


Fall Funky Junk Wreath!
I don't know about you, but whenever fall hits, I just go into wreath-making mode. And some of my favorite wreath creations start with bases that are non-conventional or what some may call junk.
Today, I'll walk you through all my favorite principles for how to create a funky junk wreath! Read on to find out how!
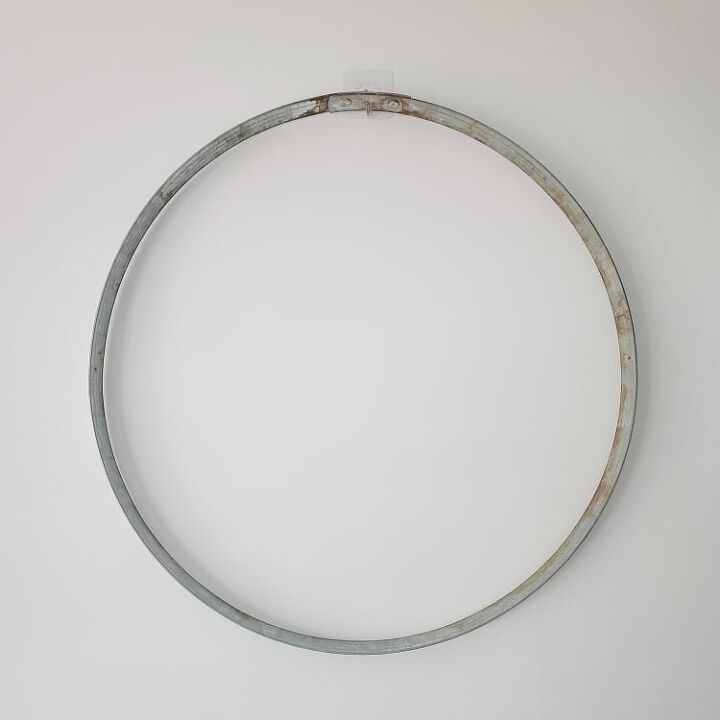
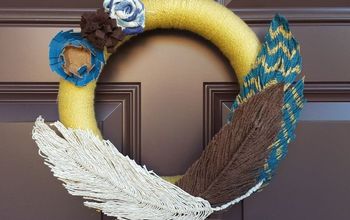
This is a ring that was pulled off of a barrel and I was lucky enough to score some of these in a local maker's Facebook group for below market value. You never know what you'll find when you search yard sales or marketplace!
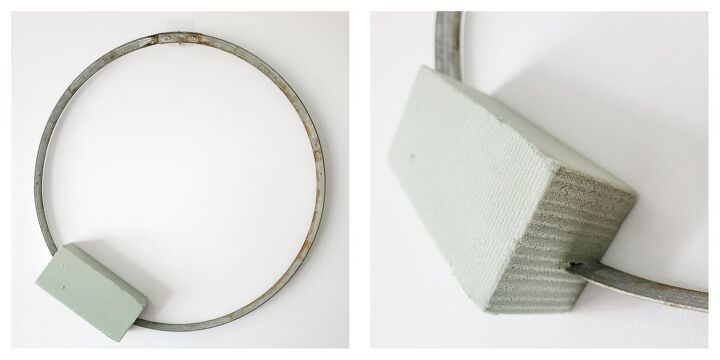
I wanted to make this wreath for my home and I really wanted it to be interchangeable between the seasons. So instead of hot gluing the foam block to the base, I pushed the foam onto the ring. This means that when fall is over, I will be able to pull the foam block off, replace with a new foam block and save the fall piece for next year!

There are no set rules to what greenery you should choose to create a great fall wreath! I immediately thought to use pampas grass and then started pulling other things that would work well with it, making sure there were different but complementary colors as well as different leaf sizes and shapes.
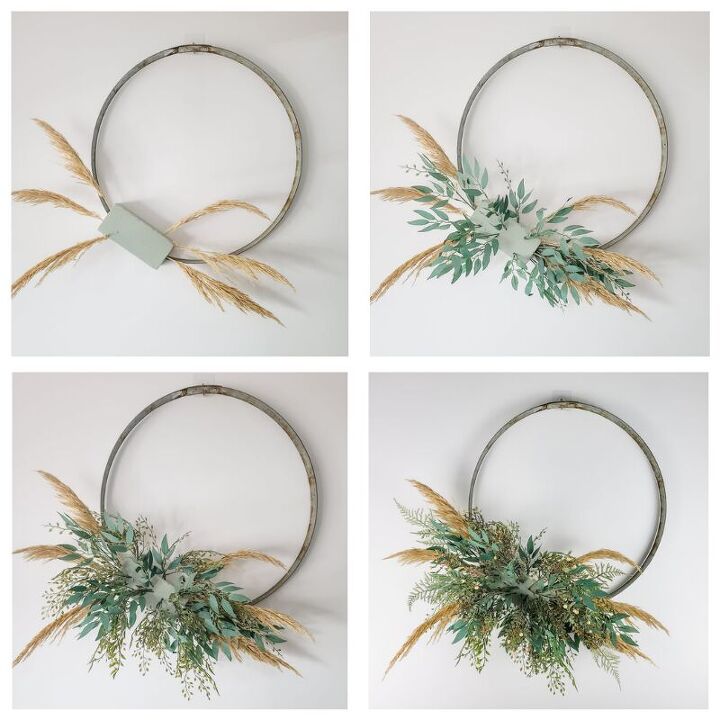
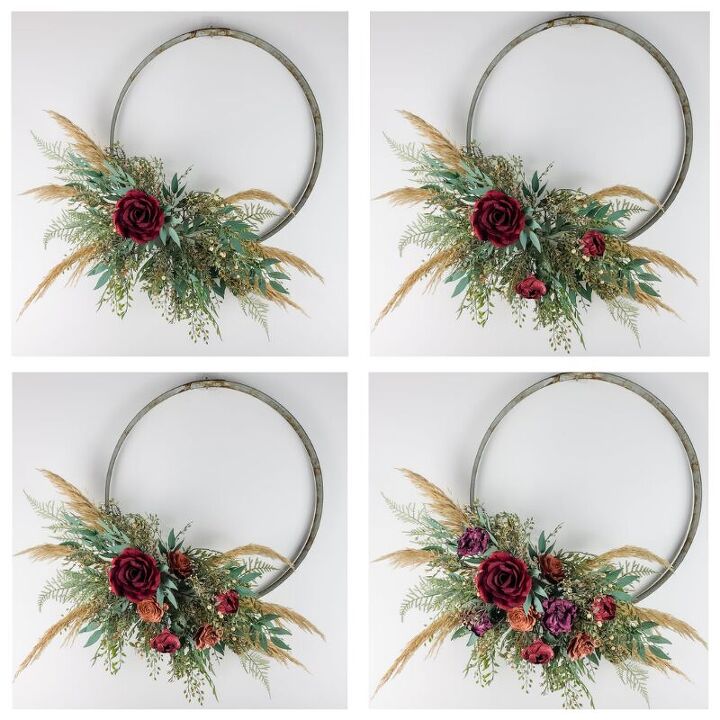
Top left pic: Start your greenery/filler base with your longest pieces to map out the boundaries of what you will be adding to the barrel ring. In this case, it was pampas grass.
Top right pic: Next, add in your leafiest greenery to start to fill in the shape. For this, I used seeded Italian ruscus (in blue green).
I love bringing texture into a piece, especially for fall, slightly boho looks. Using greenery and filler with smaller leaves and different shaped leaves can really elevate your look!
Bottom left pic: I added in smaller pieces of a hanging filler for movement. The coloring of these helped to bridge the color difference between our two starting greenery/fillers.
Bottom right pic: I used a mixed filler bundle to add to the fall vibe but also to really start filling in the gaps where you could see the foam. You don't have to worry about covering every last bit of foam in the center as we will be adding flowers next!
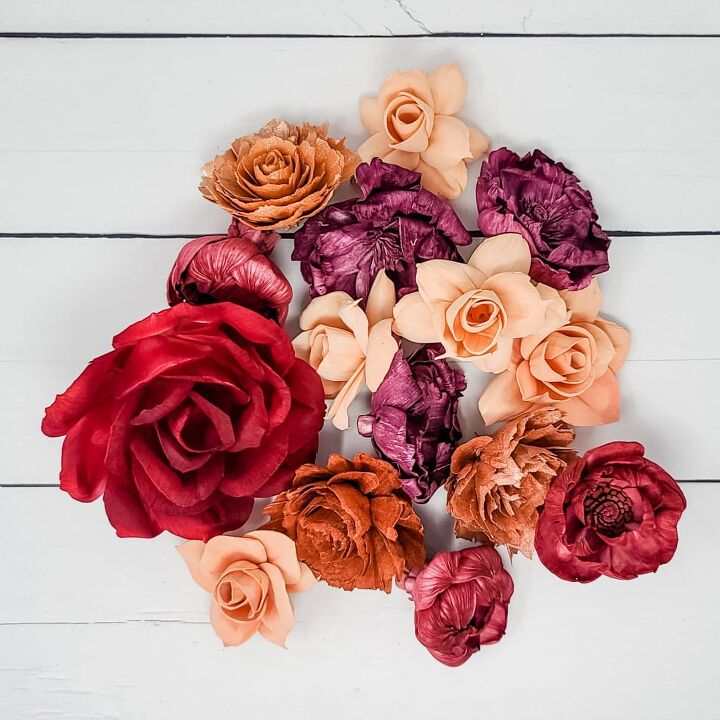
Most of these flowers were leftovers from other projects or from different dyed assortments and I just liked the way they played off one another! There are so many color combinations that work for the fall season and I was excited to play with a color story that I don't usually use.
Since these flowers are all different shapes and colors (with many being a similar size), they can be somewhat tricky to add into your greenery base. Here are a few tricks I use when placing them!
Top left: Whenever I am creating a wreath, I like to start with my focal flower first. For this arrangement, that is my reddish burgundy XL Blanche! I try to avoid placing the focal flower directly in the center of the greenery base for a slightly asymmetrical look.
Top right: In my flower mix, I had some helens that were a similar color to the blanche so I added those in next to ensure that color was distributed evenly throughout the wreath.
Bottom left: I had a few 3" sophias in different metallic colors (from our blog on Special Effects Paint) and wanted to incorporate them into this wreath. While the flowers were all different shades of color, the size and shape of the flowers themselves were the same. I created another triangle with them in the greenery base.
Bottom right: Next up to add are my purple Belle flowers. I used this to fill in gaps where a darker flower was needed.
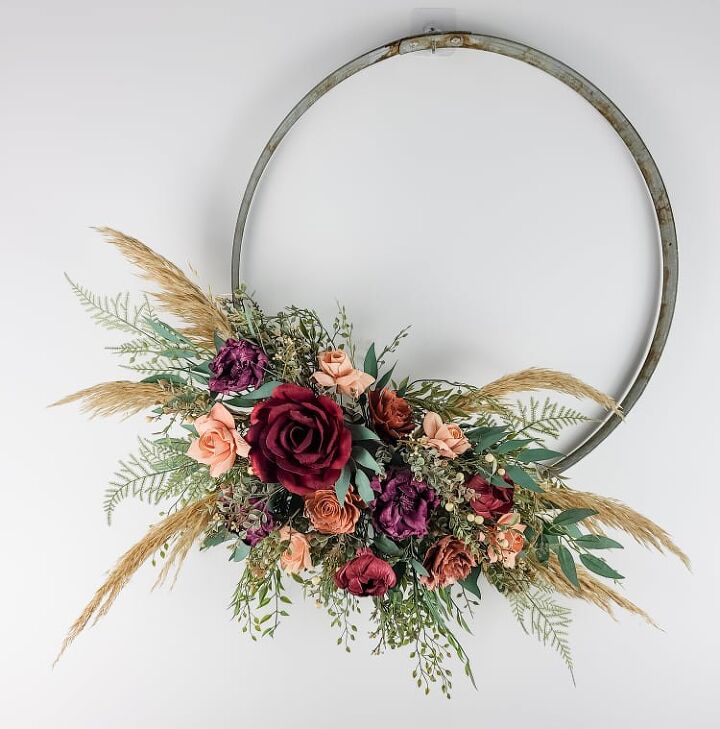
I love dark and moody vibes but I did want to add a lighter flower to help connect the pampas grass with the center of our greenery/flower arrangement. These light terra cotta La Fleurs added a much needed pop to the wreath!
That was my take on a fall funky junk wreath. Experiment on your own with your base, your colors and your greenery/flower choices and see what you come up with! Happy crafting!
Resources for this project:
See all materials


Comments
Join the conversation
-
Beautiful
-
I absolutely love barrel rings! This is an awesome idea!!


Frequently asked questions
Have a question about this project?