


Get All the Farmhouse Feels With This DIY Magnolia Wreath
Give your home a farmhouse feel with this easy DIY felt magnolia wreath.

If you want to add a touch of farmhouse style into your own design aesthetic I have a great tutorial for you – how to make your own DIY farmhouse wreath. Magnolia flowers are a staple in farmhouse decor. So follow along as I show you how to make this gorgeous felt magnolia wreath. And what’s better is it’s easy and inexpensive!
Farmhouse style decor is a favorite because it is a mix of simple, modern and timeless design. And of course it was made popular by Joanna Gaines of Fixer Upper.
My grandparents lived around Waco, Texas where Fixer Upper was filmed. The small country towns are filled with lots of old homes with the same vintage charm they had 70 years ago; cracked paint on old wood siding, all white cabinets and interiors, vintage rusted signs still hanging up. I can see a lot of those influences in today’s modern farmhouse design.
Since my site is all about felt crafts I will be incorporating felt flowers into this DIY farmhouse style wreath. The easiest way to cut out felt flowers is with a Cricut. A Cricut just makes it easier, faster, and more exact than cutting by hand. But of course if you don’t have a Cricut, these magnolia flowers are easy enough to cut out with scissors.
You can grab the magnolia flower template in our shop and follow along as I show you how to put this wreath together
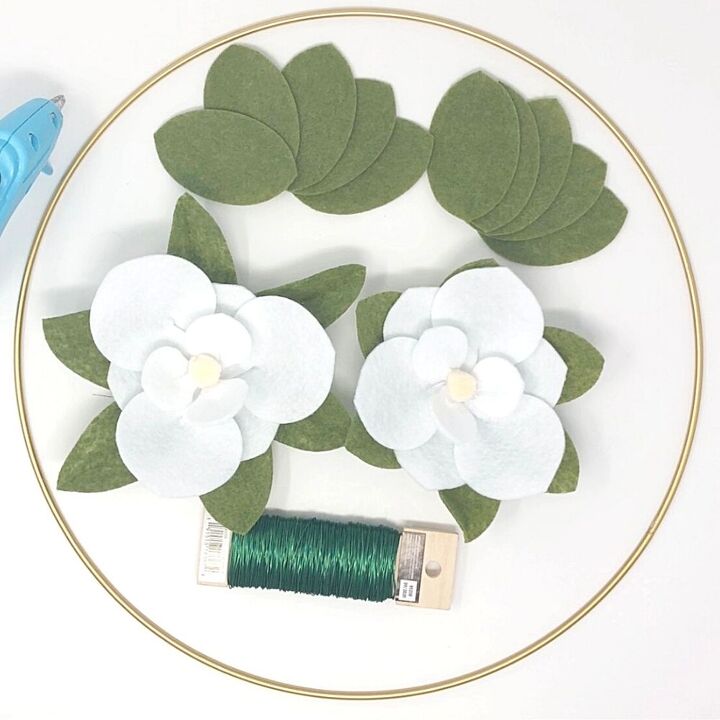
MATERIALS NEEDED FOR THIS PROJECT:
- Magnolia Flower and Leaf Pattern
- 1 sheet of white felt ( here we used Kunin Premium White felt from Hobby Lobby)
- 1 sheet of green felt (Kunin Classic Felt in Olive from Hobby Lobby)
- 1 sheet of cream or yellow felt (Kunin Classic Felt in Cream from Hobby Lobby)
- a small pom pom (you could also use a bead as a flower center instead)
- hot glue gun
- scissors or a cutting machine such as Cricut or Silhouette
- Floral hoop
- Floral wire
MAKE THE FELT MAGNOLIA FLOWERS
1. CUT OUT FLOWER PARTS
If you are using scissors to cut out the pattern use the PDF version. You can also change the size of the pattern, by adjusting the Scale on your Print screen. You can use the free version of Adobe Acrobat Reader to open up the PDF file. Click Print, then under Page, Sizing, & Handling, click Custom Scale and change the number.
If you are using a Cricut to cut out the pattern use the SVG version of the pattern. Then upload the SVG file into Design Space. You can adjust the size of the pattern by clicking and dragging the lower right corner. Use your sheet of felt with the pink fabric mat (for the Cricut Maker). Click “Make It” and insert the mat into the Cricut. Be sure to use the rotary blade (which is best for cutting felt) then press GO on your machine. (Use the DXF file for your Silhouette machine.)
For this demonstration the petal sizes for Cricut are:
- Large petals – 3.147 x 1.875
- Medium petals – 1.859 x 2.188
- Small petals – 1.258 x 1.48
- Leaves – 3.147 x 1.875
- The entire flower measures about 6 inches across
STEP 2. MAKE THE PETALS
Make short cuts up the bottom of each petal. Place a small dot of hot glue on one side of the cut and overlap the 2 sides for a 3D effect to the petals.
STEP 3. ARRANGE THE BOTTOM PETALS
Use a small felt circle as the base. Starting with the MEDIUM size petals, put a small amount of hot glue on the 3 medium petals and arrange in a triangular shape on the circle base.
STEP 4. ARRANGE THE MIDDLE PETALS
Next, use the LARGE size petals and arrange in a triangular shape again. Glue each petal down ON TOP of the bottom petals. Be sure to STAGGER the middle and bottom petals.
STEP 5. MAKE THE FLOWER CENTER
Use a pom pom and a small square piece of felt (1 in x 1 in). Glue the pom in the middle of the felt square. Fold a corner of felt over the pom and glue down. Continue folding over the square and gluing down until the pom is covered.
STEP 6. ARRANGE THE CENTER PETALS
Glue the SMALL petals to the SIDES of the center ball (not under) so they stand up around the flower center. Glue the center piece on to the middle of the flower.
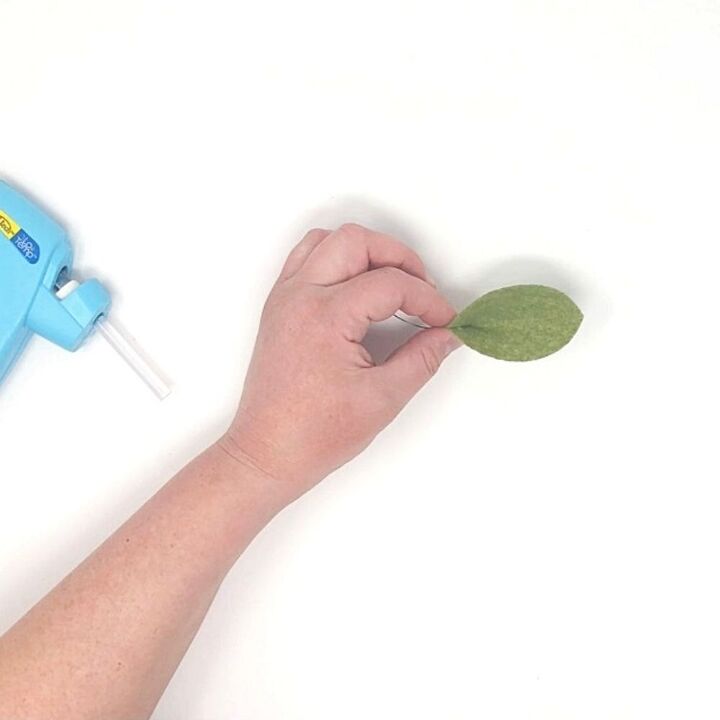
STEP 7. MAKE THE FELT LEAVES
Make a short cut up one end of a leaf. Place a small dot of glue on one side of the cut and overlap the 2 sides to make a 3D effect to the leaf. Do this for each leaf.
STEP 8 (OPTIONAL). FOLD THE LEAVES
You can use a hair straightener or iron to make a crease in each leaf. Fold each leaf lengthwise and run the iron over it a few times to make a crease.
STEP 9. ARRANGE THE LEAVES
Fan the leaves out in a circle and glue the leaves together. Glue the flower to the middle of the leaves. Or glue each leaf directly to the bottom on the flower.
PUT TOGETHER YOUR DIY FARMHOUSE WREATH
Check out this quick video on putting together your felt magnolia wreath, once you have finished making the flowers.
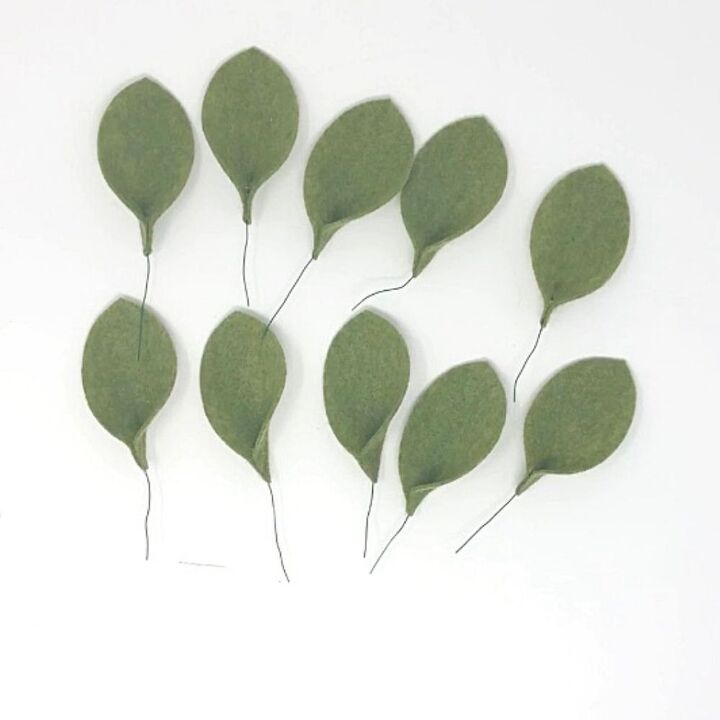
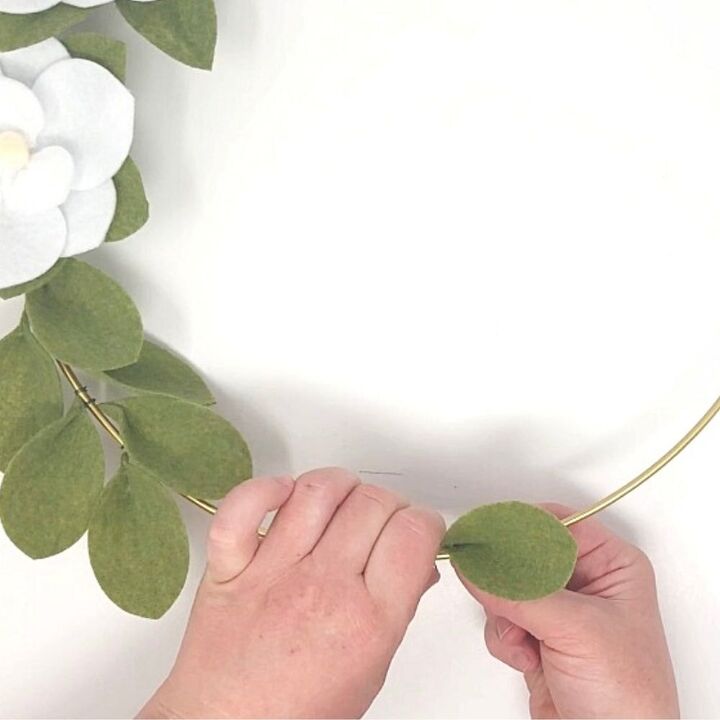
STEP 10. MAKE LEAVES FOR WREATH
Cut small pieces of floral wire about 2 inches long with wire cutters. Using the remainder of your leaves place a small strip of glue to one end of the leaf, down the middle, so you can place the floral wire onto the leaf. Add a little extra glue to the edge of the leaf so you can pinch the bottom of the leaf together, enclosing the wire.
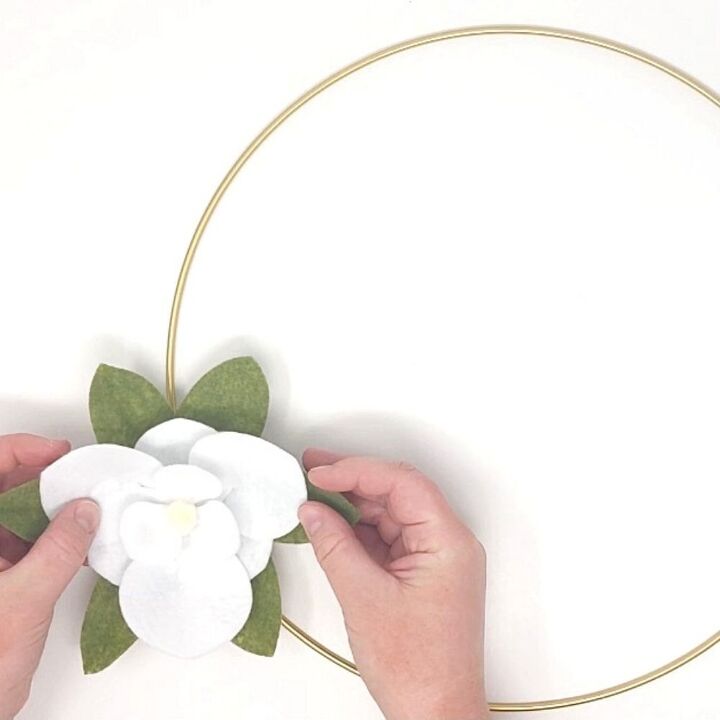
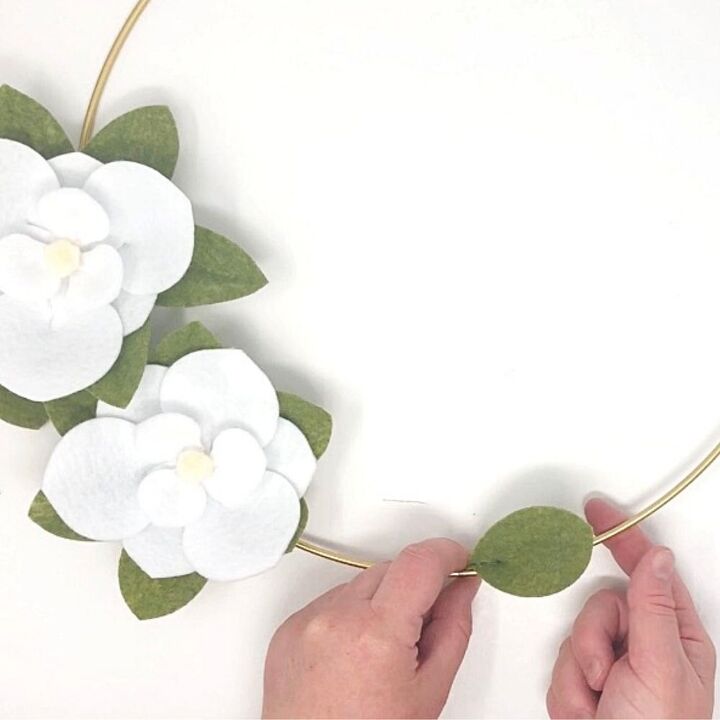
STEP 11. ATTACH MAGNOLIA FLOWERS
Next, take the felt magnolias that you made earlier, and attach them directly to the floral hoop. Place hot glue on the back of the flowers and along the hoop where you want the magnolias to be. Use a small scrap piece of felt and glue it to the back of the flowers to help hold them in place.
STEP 12. ATTACH LEAVES
Next, take the individual leaves and wrap the floral wire around the hoop. Slide the leaves down towards the flowers and arrange the leaves the way you like them. Once you have the leaves arranged how you like, glue them in place by covering the floral wire with hot glue, on the back side.
And that’s it, you’re finished! Display your new beautiful farmhouse style magnolia wreath on your wall or door to get that farmhouse feel.
I would love to see how your felt magnolia DIY farmhouse wreath turned out! Be sure to tag us on social media with


Frequently asked questions
Have a question about this project?
I looked quickly through the instructions and nowhere could I find out how large the metal hoop was??? I realize that I could use a size that I like but I would like to know the size used in this particular project. Thank you.
So what is the trick to get the flowers from slipping to the bottom and keep the metal hoop where you want it please?