


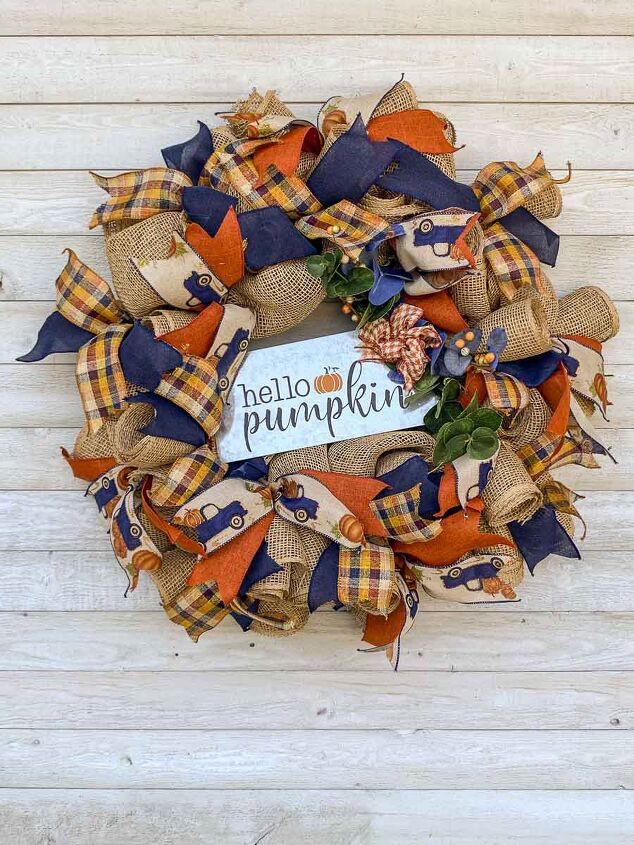
How to Make a Charming Hello Pumpkin Wreath
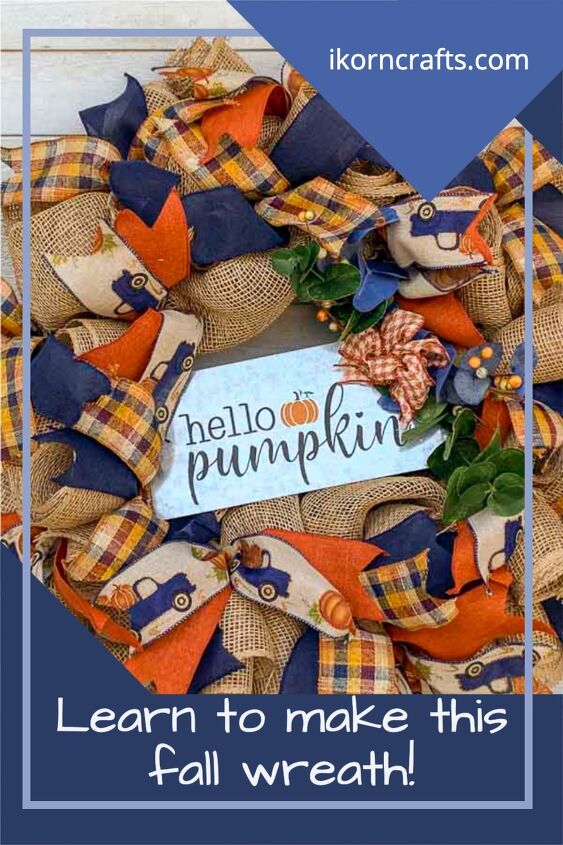
Learn how to make this charming mesh pumpkin wreath using adorable autumn ribbons and embellishments.
Autumn Colors
Do you love autumn colors as much as I do? I love the combination of oranges, reds, golden browns, and greens that mirror the fall foliage. These colors remind me of my childhood in Minnesota, where I was lucky to experience each of the four seasons. I have wonderful memories of this time of year, when the weather began to turn cooler and the leaves changed colors. The autumn color palette brings back those memories. The design for this wreath was inspired by beautiful autumn ribbons that I found at Michaels.
DIY Mesh Pumpkin Wreath Overview
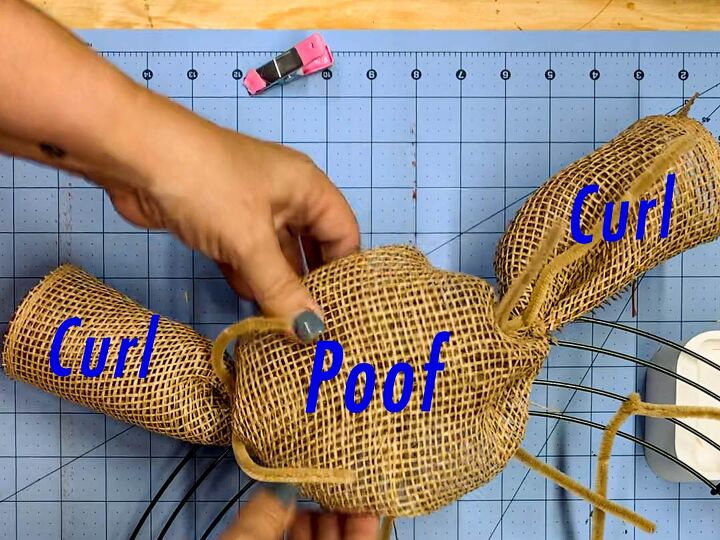
Curl and Poof Wreath Base
There are a variety of ways to make bases for deco mesh wreaths. This DIY pumpkin wreath uses the curl and poof method. The base is made from two 21″ poly burlap mesh rolls. The mesh is cut into strips and then rolled up into mesh tubes. The ends of the rolls are pinched to form curls and the middle is fluffed up to form a poof. This method creates a nice full wreath base.
Make or Purchase a Sign for your Wreath
I decided to make my own sign for this wreath. I found a blank metal sign at the Home Depot and a cute pumpkin graphic by GreatLakesDigitals on Etsy. The Hello Pumpkin message is very festive and welcoming.
I made and cut a stencil using my Cricut Maker and then painted the sign using COLORSHOT acrylic paints. In order to make the wreath sign, these instructions assume you are familiar with using Cricut Design Space software and a Cricut Maker, or other electronic cutting machine. As an alternative, you could purchase a pre-made stencil or even buy a finished sign.
Wreath Form Sections
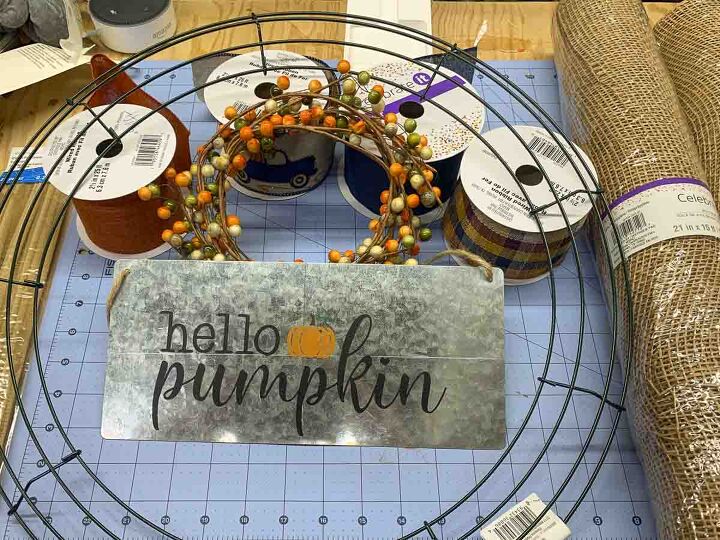
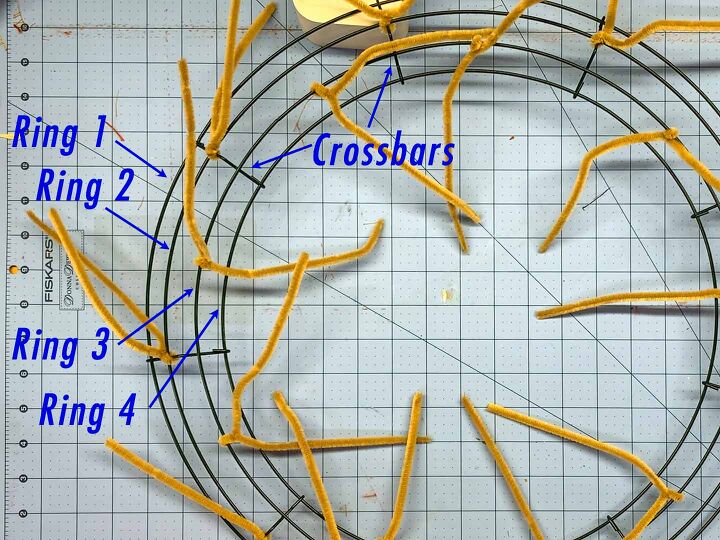
The wreath is made on an 18″ wire wreath form. I purchased mine at Michaels. You can find an 18″ wire frame at a variety of stores (like Michaels, JOANNs, Walmart, Amazon, Hobby Lobby, or a dollar store).
To make sure we’re aligned when going through the directions, I’ve numbered the rings. The out ring is Ring 1. Moving inward, the next two rings are Ring 2 and Ring 3. The inner-most ring is Ring 4.
The crossbars are the metal pieces the divide the wreath form into 9 separate sections. When making the wreath, the mesh will be attached to Ring 2 at the cross bars and attached to Ring 3 between the crossbars using chenille pipe cleaners.
Note: the Dollar Tree frame only has 3 rings and fewer sections than the Michaels ring. Therefore, you’ll simply need to adjust where to attach the 9 pipe cleaners on each ring.
Instructions for Making a Mesh Pumpkin Wreath
Here’s What I Used
Materials
Wreath
- 18″ wire wreath frame
- Pipe cleaners (aka, chenille stems)
- 21″ poly burlap mesh (2 rolls for a total of 10 yards)
- 2.5″ Wired Ribbon (Fall Truck and Pumpkin)
- 2.5″ Wired Ribbon (Yellow and Orange Checkered)
- 2.5″ Wired Ribbon (Navy Blue)
- 2.5″ Wired Ribbon (Orange)
Wreath Sign
- Blank galvanized aluminum sign
- 1.5″ Wired Ribbon
- Eucalyptus branch (green)
- Eucalyptus branch (blue)
- Berry garland
- Hot glue
- Pipe cleaners
- COLORSHOT Acrylic Paint
- Floral wire
Tools
Wreath
- Cutting mat
- Rotary cutter
- Ruler
- Clips (such as a clothes pin, chip clip, craft clip, etc.)
- Wire cuttter
- Scissors
Wreath Sign
- Cricut Maker
- Light Grip cutting mat
- Fine point cutting blade for Cricut Maker
- Hello Pumpkin SVG Cut File
- Stencil brush
- Hot glue gun and glue
- Adhesive stencil film
- EZ BowMaker
DIY Mesh Pumpkin Wreath Project Steps
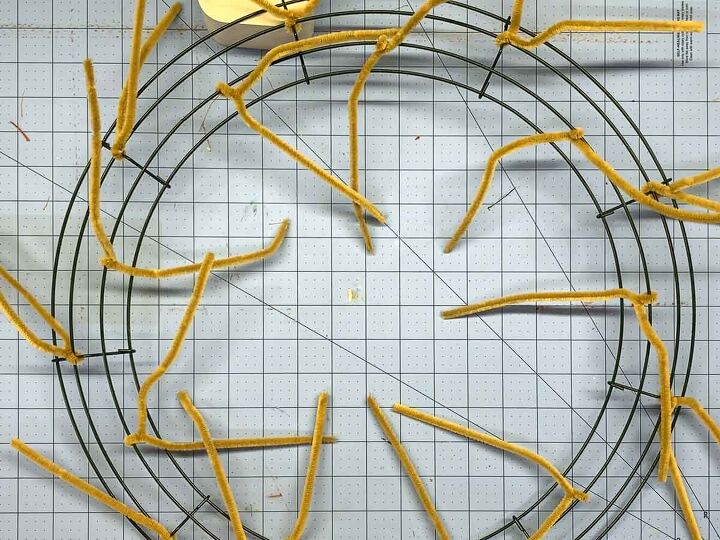
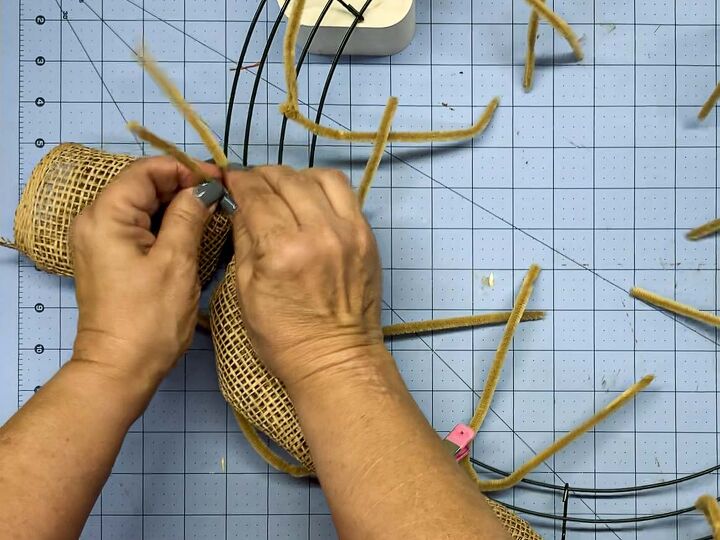
Attach pipe cleaners to an 18″ wreath frame
Attach nine pipe cleaners to Ring 2 at each of the cross bars. Then attached nine pipe cleaners to Ring 3 in the middle of each section between two crossbars.
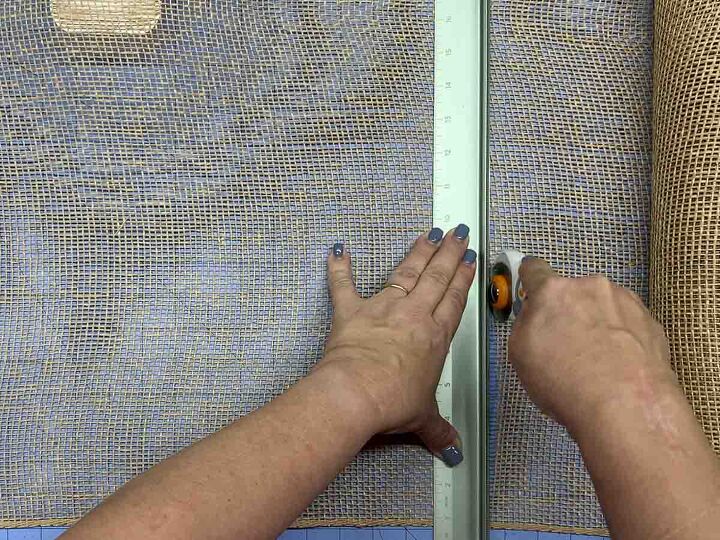
Cut 18 mesh strips
Using a rotary cutter, cut 18 strips of the 21″-wide poly burlap mesh. Each of the strips of mesh should be 20″ long.
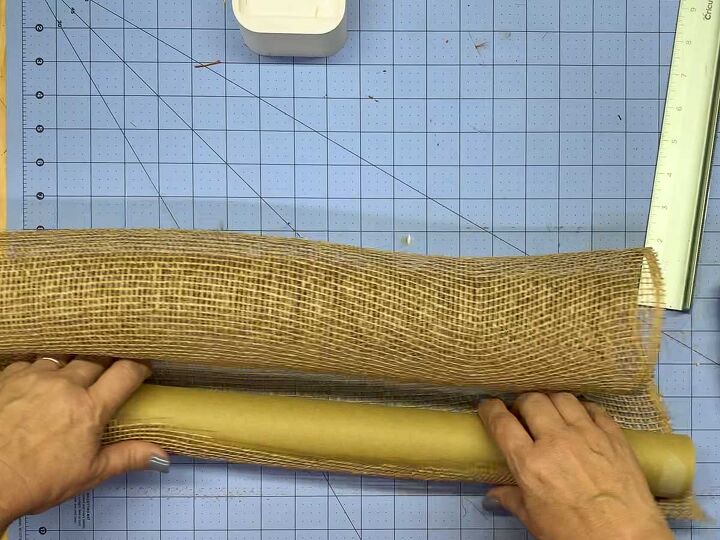
Roll mesh around tube
To facilitate rolling the pieces of mesh and making uniform curls, roll mesh around a cardboard tube (like one from an old roll of mesh or wrapping paper).
Remove tube
Slide out the cardboard tube, leaving the roll of mesh.

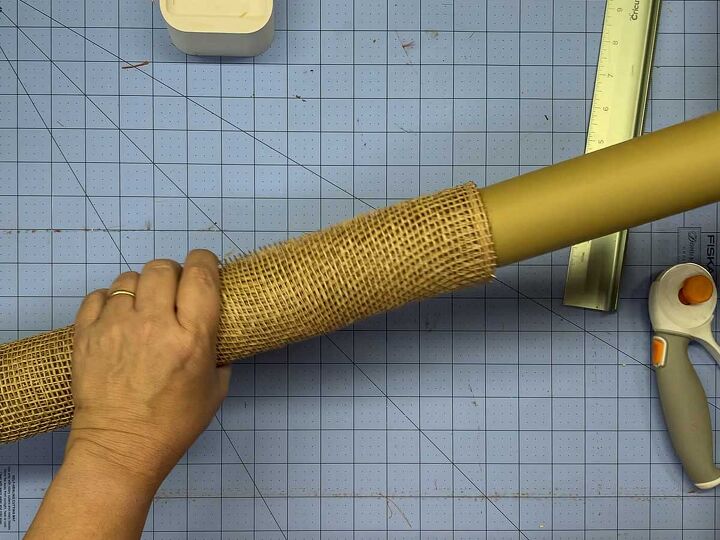
Form a curl
At one end of the roll, pinch the mesh about 4 inches from the end and secure with a clip.
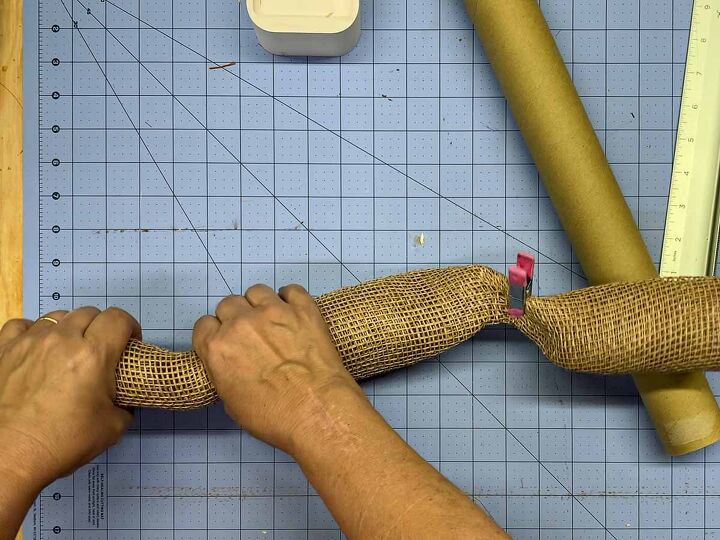
Form a second curl at other end
About 4″ from the other end, pinch the mesh to form a second curl.
Attach rolled mesh to outer ring of wreath form
The first point of attachment is a crossbar on Ring 2. Attach the rolled mesh strip to the wreath form using a pipe cleaner on Ring 2 at a cross bar.
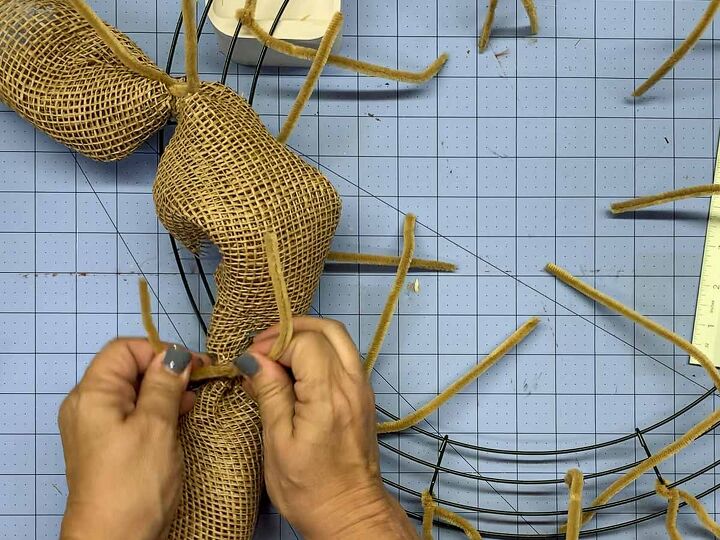
Attach the other end at the next crossbar
Remove the clip and attach the other end of the roll at the pinched point using another pipe cleaner. Keep the rolled edge of the roll hidden on the inside (facing the rings).
Puff up the poof
Partially unroll and fluff up the inner poof making sure the raw edges are facing down.
Add second curl/poof mesh roll
Form another curl/poof roll using the same process. Attach it to the wreath form using the same pipe cleaner as the prior roll. Two curls will be attached at every crossbars forming a crisscross.
Attach curl/poof rolls to all crossbars on outer ring
Continue adding a total of 9 curl/poofs mesh bundles around the outer ring (Ring 2). Crisscross the curls and fluff up the center poofs.
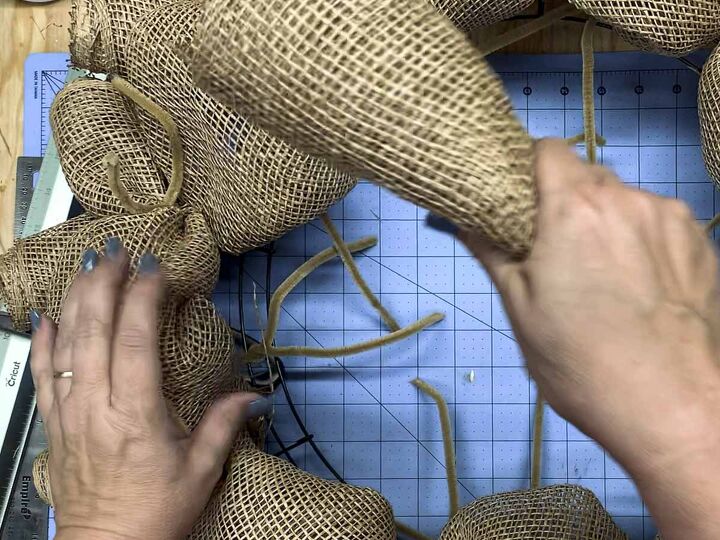
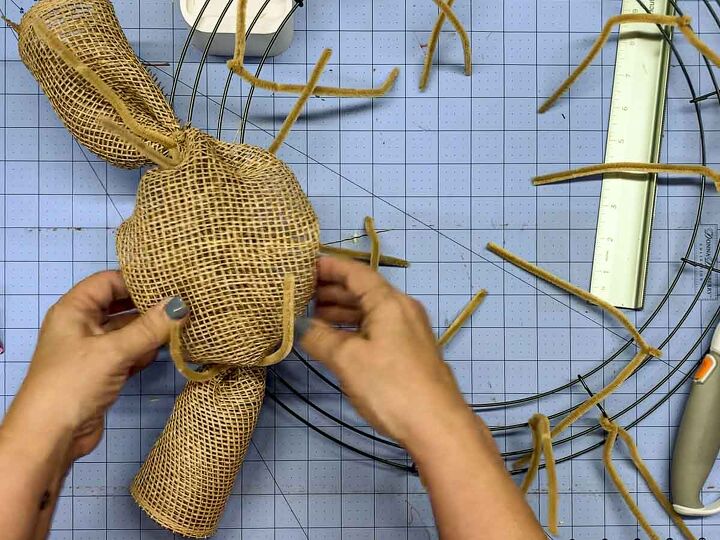
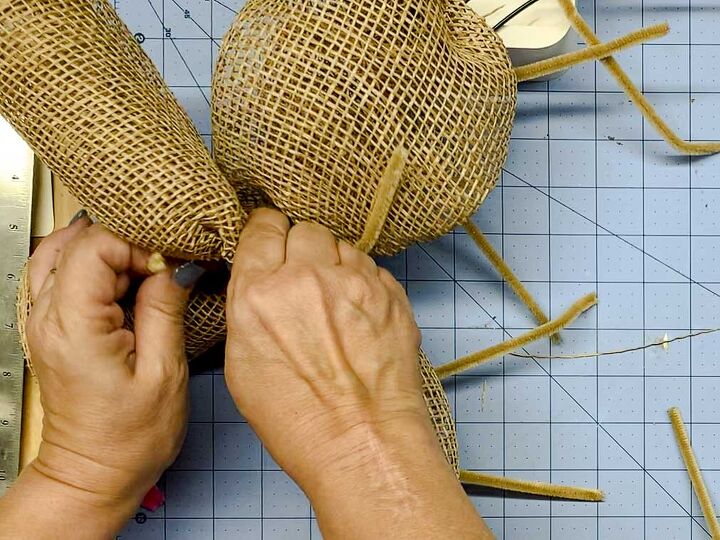
Add Curl/Poof rolls to the inner ring
Once the outer ring is complete, add curl/poofs to the inner ring (Ring 3), but attach these in the center of each section, between two crossbars.
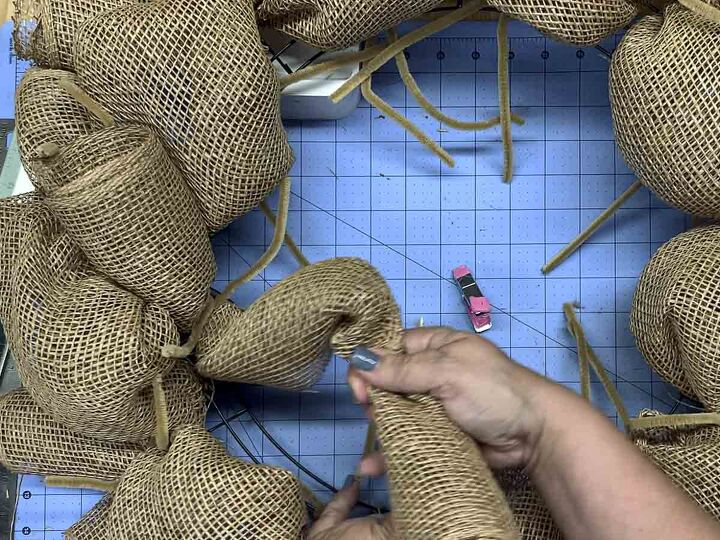
Add 9 curl/poof rolls to inner ring
Continue to add a total of 9 curl/poof rolls to Ring 3. Two curls will be attached to the center of each section using one pipe cleaner per section.
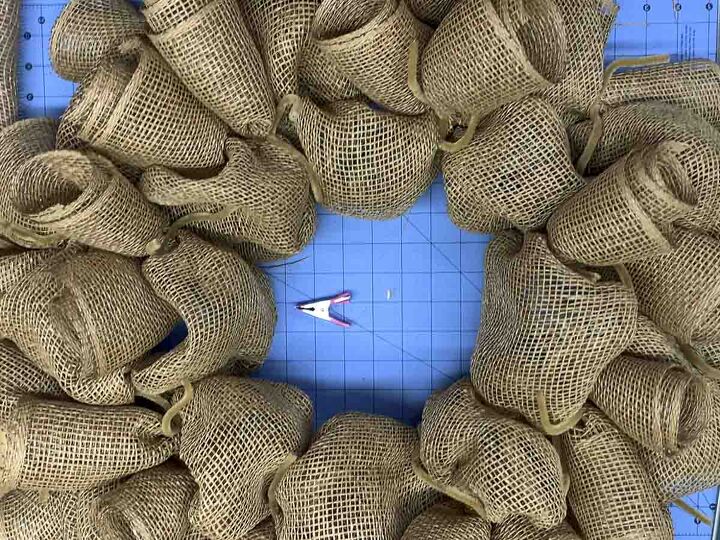
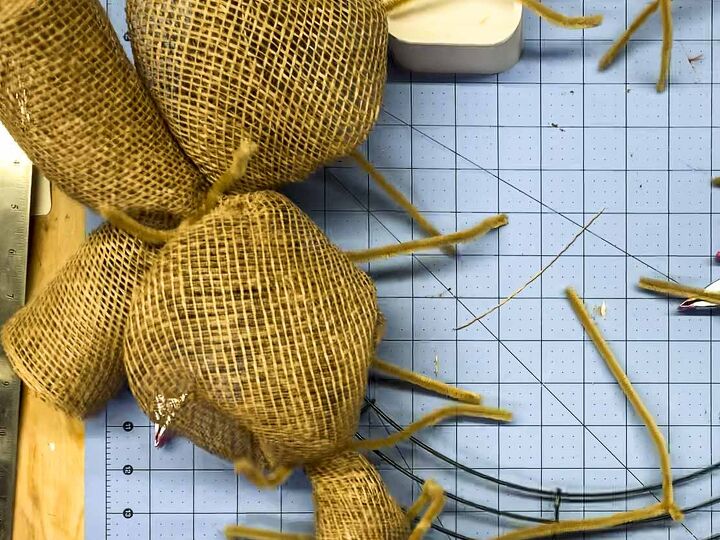
Fluff poofs
Make sure the curls are arranged nicely (nicely means pleasing to you). Form nice puffs and make sure the raw edges on the poofs are pointing down to the underside of wreath and not visible.

Cut 9 13″ strips of the first pair of ribbons
Select two complementary ribbons and cut 9 13″ strips of the pairing.
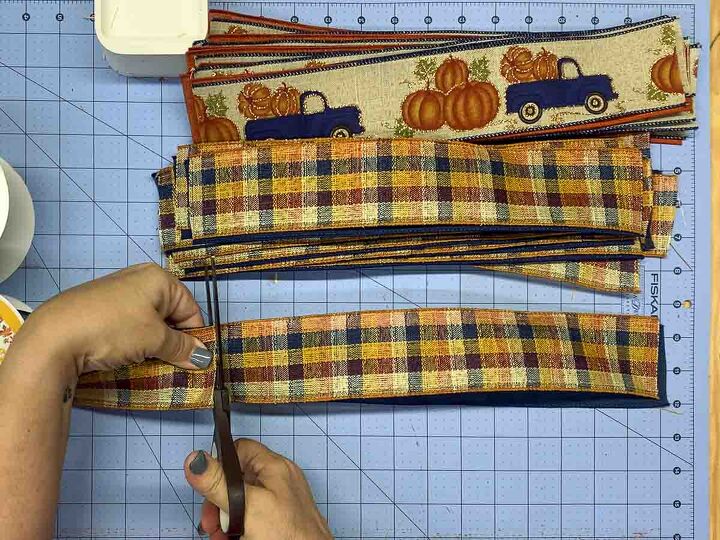
Cut 9 13″ strips of the second pair of ribbons
Select two complementary ribbons and cut 9 13″ strips of the pairing.
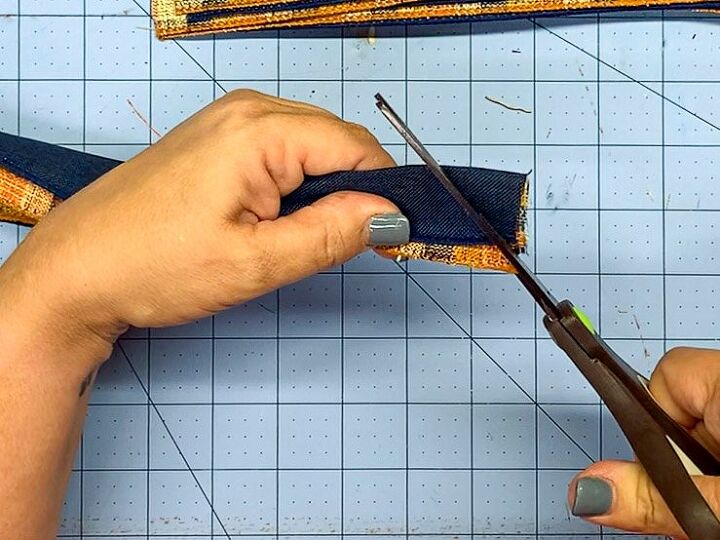
Cut dovetails at the end of the ribbons
Fold the ribbons in half length-wise and cut at an angle to form dovetail ends.
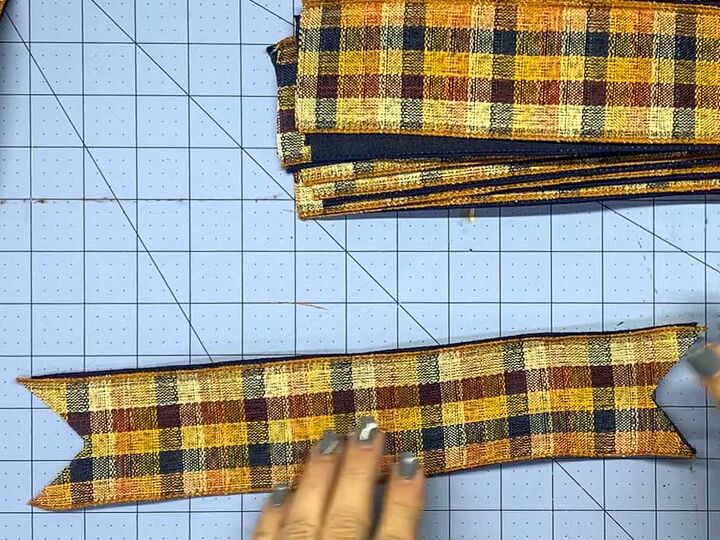
Each end of the ribbon should have dovetails
Dovetail each end of the ribbons.
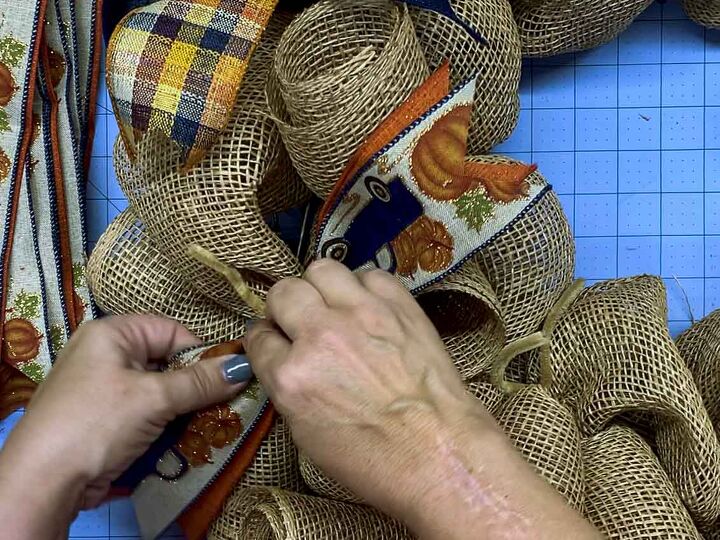
Add ribbon tail pairs to each pipe cleaner
Add the first pair of ribbons the intersection of 2 curls using the same pipe cleaner used to attach the curls to the wire wreath form.
At the next pipe cleaner add the other pair of ribbons, alternating ribbon patterns. Attach the ribbons to both the inner and outer rings. In total there will be 18 ribbon tail pairs attached to the wreath (9 on the other ring and 9 on the inner ring).
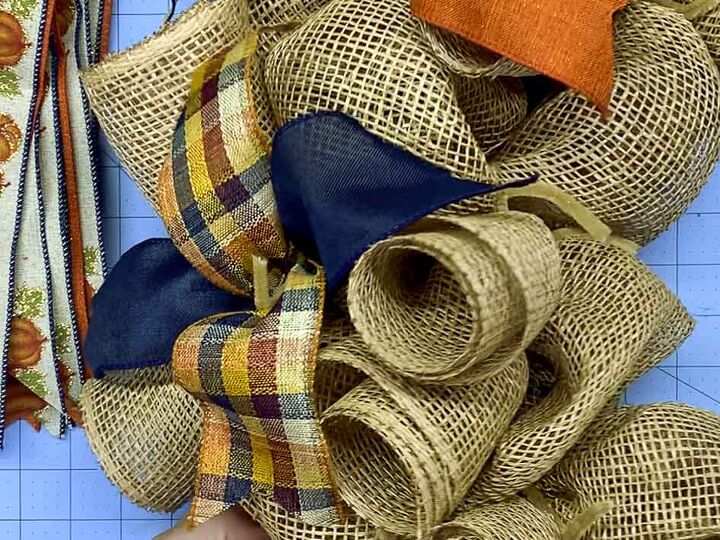
Separate the tails and curl ribbon ends
Separate the ribbon tails so that they form an “X”.
Curl the ends of the ribbon tails
Use your fingers to curl the ends of the ribbon tails.
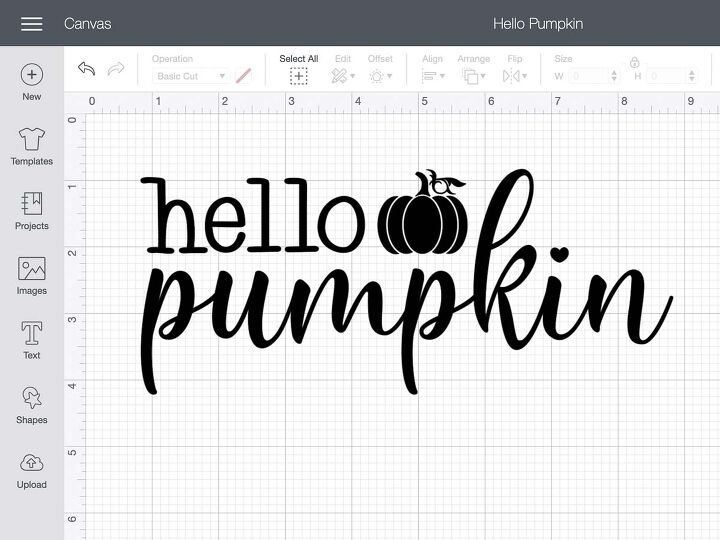
Design wreath sign in Cricut Design Space
You can purchase a wreath sign or make your own. I made one in Cricut Design Space using a Hello Pumpkin graphic I purchased on Etsy from GreatLakesDigitals.
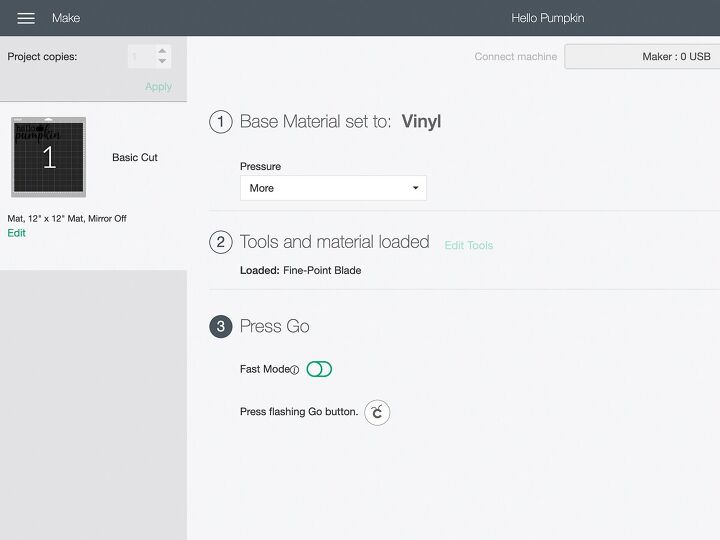
Cut out stencil
Using the Cricut Maker cut the Hello Pumpkin stencil out of stencil material. I used Oracal 813 stencil film. The best cut settings for me were to select “Vinyl” as the base material (even though there is a stencil film option) and cut with “More Pressure”.
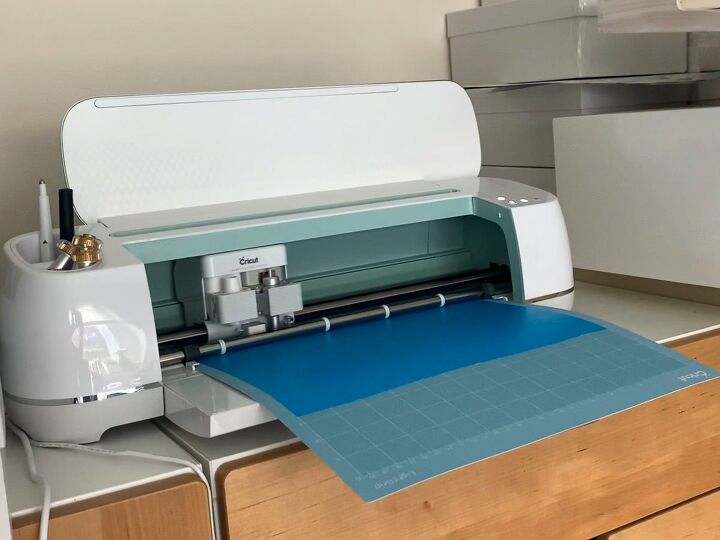
Use the Cricut light grip mat
Use the Light Grip mat when cutting this stencil.
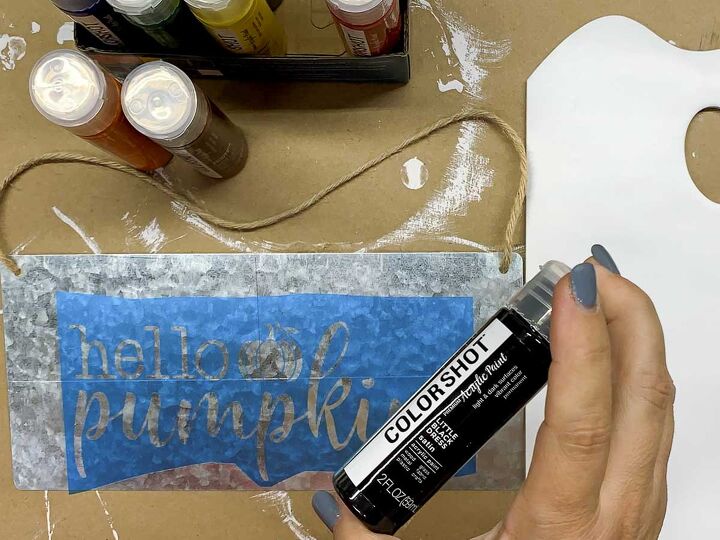
Apply stencil to aluminum sign
Clean the aluminum before applying the stencil. I used an alcohol wipe and then buffed it dry with a paper towel. Apply the stencil. Prepare your paint. I used COLORSHOT premium acrylic paint.
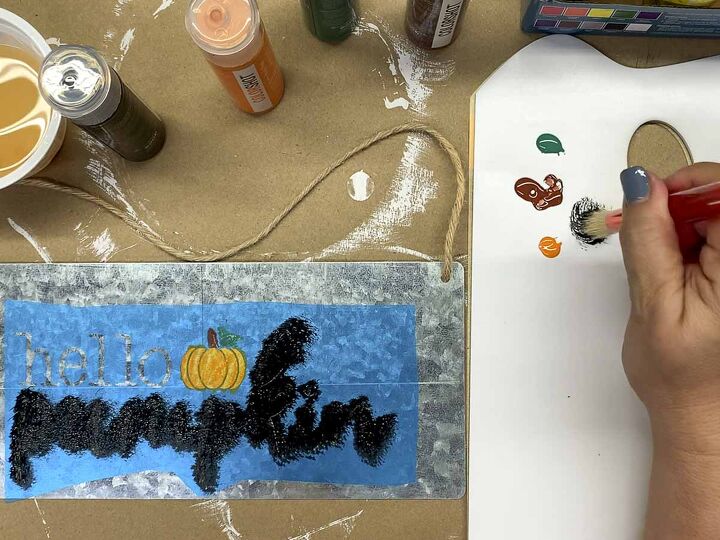
Paint stencil
I added two light coats of COLORSHOT Premium Acrylic Paint to the stencil. I used the following paint colors: Black (Little Black Dress), Orange (Orange Slice), Green (Cash) and Brown (Brownie Points).
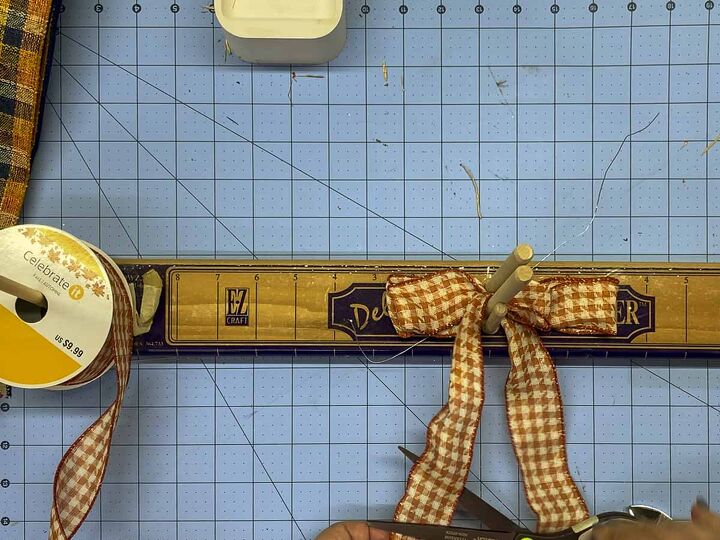
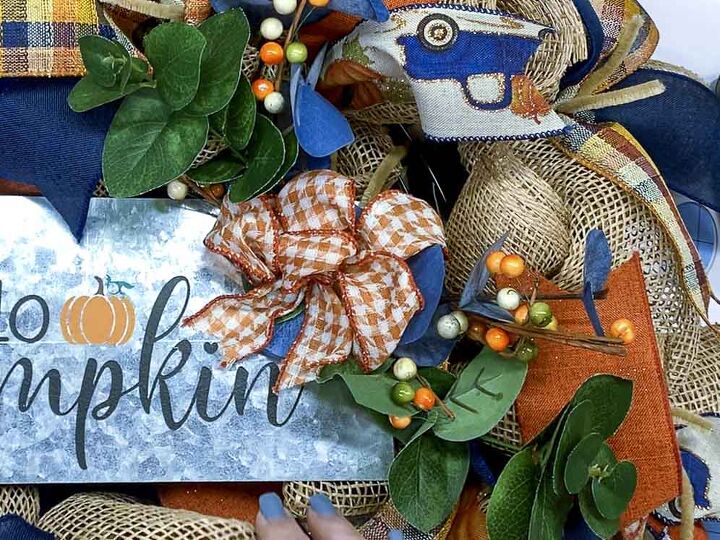
Create a small bow
Create a small bow using 1.5″ wired ribbon in another complementary style and color. I used my Deluxe EZ BowMaker. Trim a length of floral wire with wire cutters to secure to bow loops.
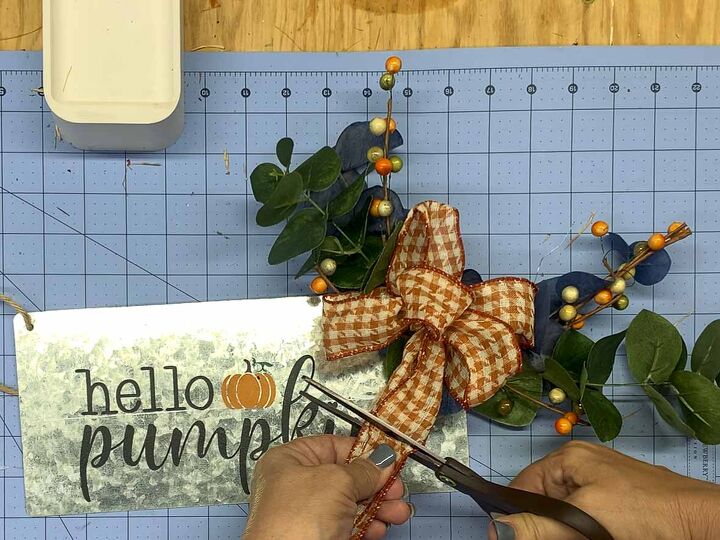
Make a swag of greenery and berries for the sign.
I used 2 small pieces of from a branch of green artificial eucalyptus and 2 from a branch of blue artificial eucalyptus. To this I added a couple small pieces from an autumn berry garland. Use the wire from the bow to wrap around the greenery and secure the mini swag.
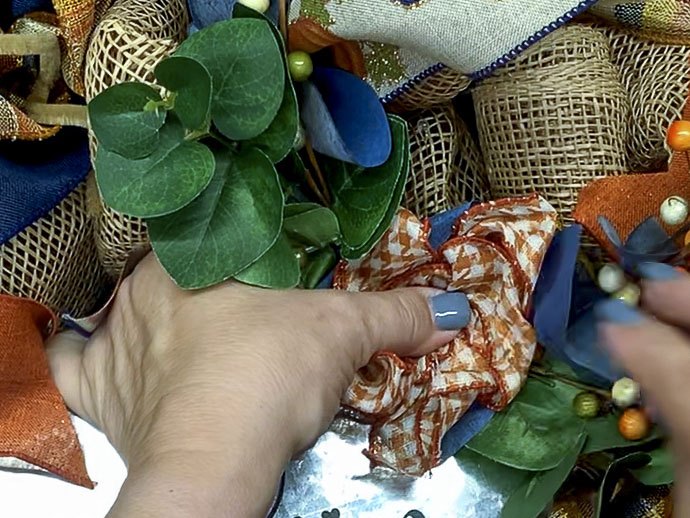
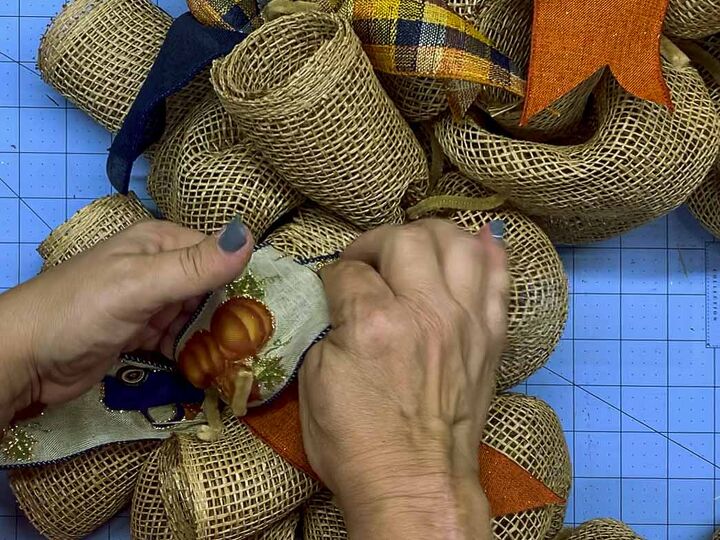
Glue swag to metal sign
Attach the swag to the metal sign using hot glue. Be careful when pressing the ribbon into the hot glue (don’t burn your fingers!). The hot glue also helps hold the pieces of the swag together.
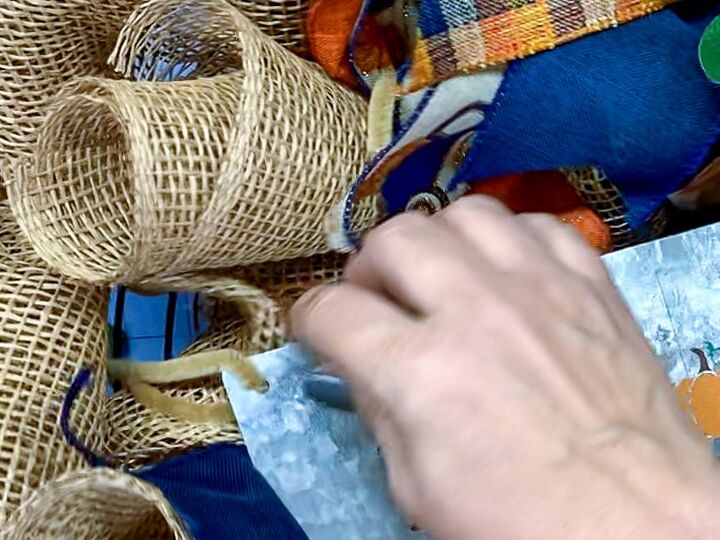
Attach sign to wreath using pipe cleaners
Use pipe cleaners to attach sign to the center of the wreath. My sign had small holes at the top. I fed the pipe cleaners through the holes, down through the mesh, and around the wire wreath form. You could also hot glue the pipe cleaners to the back of the sign and then attach it to the wreath form.
Tuck away pipe cleaners
Once you’re happy with the design, fluff and shape the mesh poofs. Separate and shape the ribbon tails as they may have been squished when you added the wreath sign. Don’t forget to fluff and separate the greenery and bow too.
Tuck the ends of the twisted pipe cleaners out of sight under the mesh. Make sure no wire ends are poking out from the back of the wreath where they can scratch you or your paint. You can add felt or other material, such as a round placemat, to the back of the wreath if you desire to protect the wall or door.
Hang your door decor and enjoy your festive pumpkin wreath!
Resources for this project:
See all materials


Comments
Join the conversation
-
EXCELLENT!!
-
Beautiful! Love the colors and materials you chose plus excellent instructions 😻😻😻


Frequently asked questions
Have a question about this project?