


How to Make a Fall Door Hanger
$15
45 Minutes
Easy
- Community Crafting
- Home Decor
- Lifestyle
- SVG Files
- September 28, 2021September 28, 2021
- by Naomi Garcia
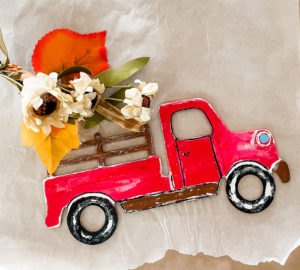
Here’s the thing: When it comes to adding detail with a pencil, pen, or paintbrush, that’s really not my jam. However, in the spirit of “trying new things” Mrs. Craft Lady decided to add some outlines and such to the truck. How did it come out? Not so great. Seriously, my kids could do a much better job than I did. But they were so sweet. “It looks amazing, Momma.” Yeah…no… My 11 year old and I walked through Michael’s looking for the perfect background for my truck door hanger. I found exactly what I wanted. It was a 10″ white-washed square wood plague. Then we found the perfect fall florals, and they happened to be 40% off. At this point, my mind was still set on making this decorated vintage truck idea work. The Door Hanger I Actually Created Well, as I started “dry fitting” the pieces together, it just wasn’t coming together as I’d hoped. The truck just wasn’t a good fit. I walked away from my project for a bit. Working on something different usually helps. I created a fall graphic with a textured look. Thanks to learning Adobe Illustrator with the help of 123-SVG by My Designs in the Chaos, this was super attainable. Once it was done and printed, I knew exactly what I was going to make!
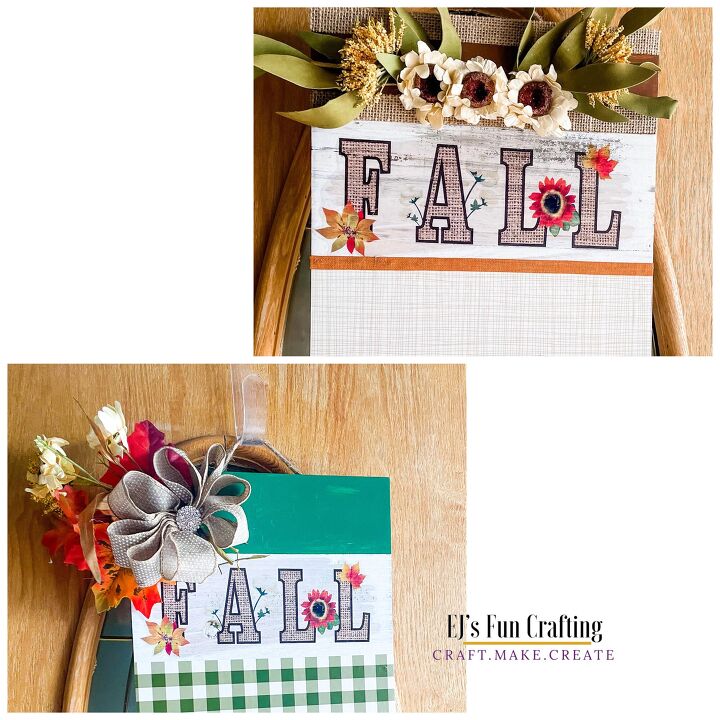
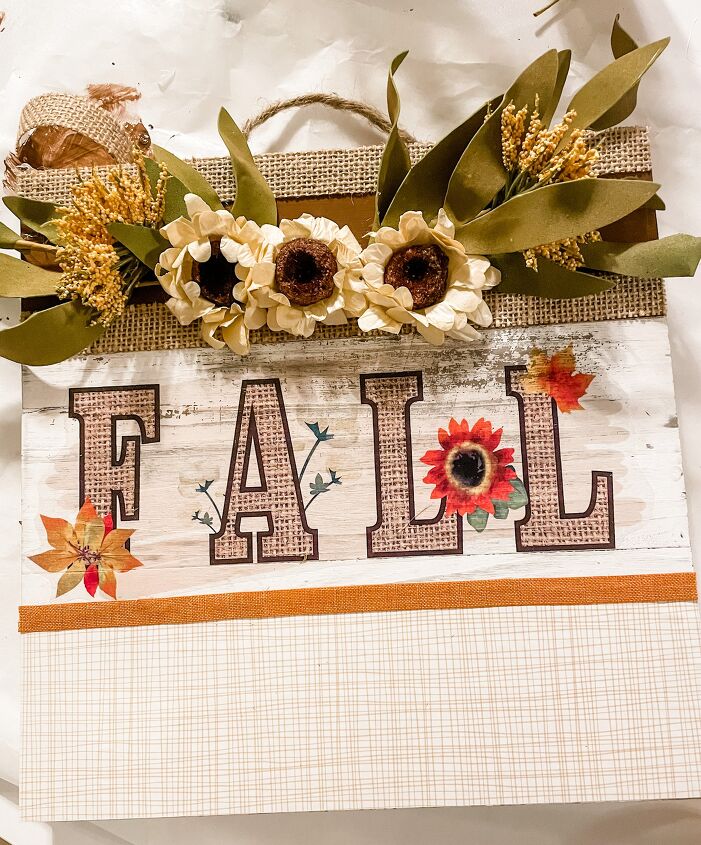
What do you think? I think they both came out great. The distressed look of the wood peeking through gives them more interest. And how about that burlap trim added to the top door hanger? For sure, they are much better than that truck was looking. Let’s leave the truck where it is for now while I show you what I used and I how I made these cute, easy, and affordable door hangers.
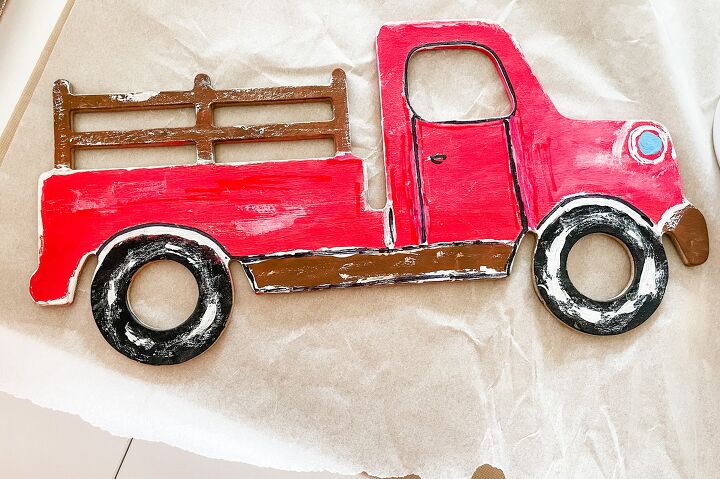
Mrs. Craft Lady is not a painter…
BONUS: Stick around until the end for more great fall DIY ideas from 13 other creators. Materials and Supplies
- white washed wood plaque (10″ x 10″)
- fall florals
- acrylic paint
- paint brush or sponge
- fall patterned adhesive vinyl
- paper trimmer
- glue gun and glue sticks
- floral wire
- floral wire cutters
- bling embellishments
- zip tie
- ribbon
- fall burlap png file
- clear sticker paper
- scissors
- ruler pencil
- masking tape
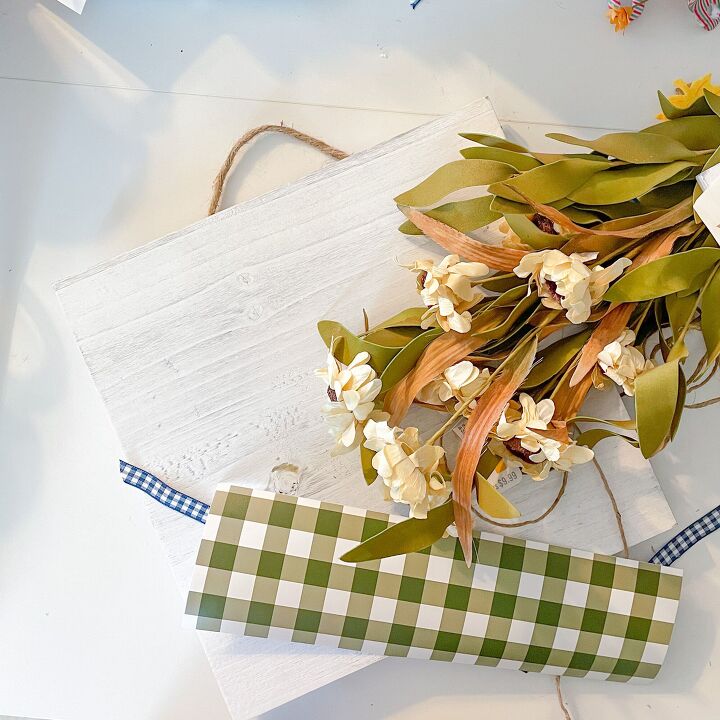
Gather all of your supplies
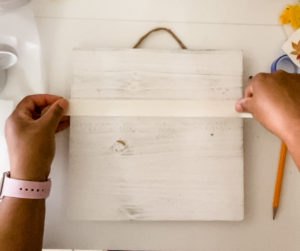
Prepping your wood board
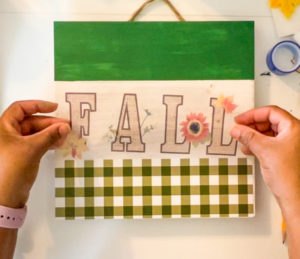
- Divide your wood board into three sections using a ruler and a pencil.
- My board was 10″ so I divided it so that the top and bottom sections were 3″ each and the middle section was 4″
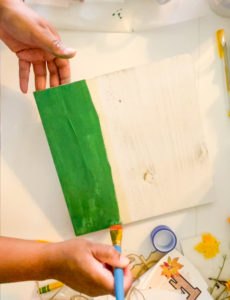
- Use masking tape to tape off the top line
- Paint the top using whatever color you choose
- Let dry and add a second and third coat if desired

Adding adhesive vinyl
- Use scissors or a paper trimmer to cut a strip of the patterned adhesive vinyl 3″ x 10.5″
- Start peeling the backing from the adhesive; only peel away about 3″-4″
- Line up the adhesive vinyl along the bottom edge of the wood and slowly peel away the liner as you smooth it onto the board
- Use your hand, a scraper, or an old gift card to smooth away any bubbles

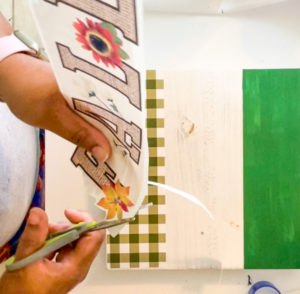
Creating the Fall Burlap Decal
- Purchase and download the fall burlap decal
- Open a program like Word, Google Docs, or any other app capable of opening graphics
- Size the decal to about 8.5″ wide
- Print onto clear sticker paper (do not mirror)
- Use scissors to cut around the outline of the sticker
- Remove the back liner from the sticker and place your sticker on the board, in between the painted section and the vinyl section
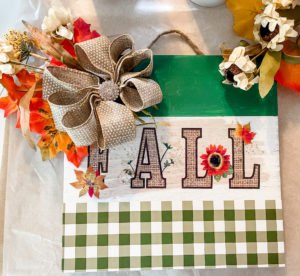
Wrap it up with a bow DISCLAIMER: I am NOT a bow creator. But my good friend, Melanie Ferguson is. You can check out her blog post, 7 Easy DIY Bows Anyone Can Make over on her blog, Southern Crush at Home.
- Use your fall florals and ribbon to create a bow or arrangement you like
- You can use the zip tie to hold together the bow.
- Glue the flowers and bow to your board using the glue gun.
- Give a touch of sparkle to your door hanger (because you know how I love my sparkle) by using the glue gun to add the bling embellishment to the center of the bow.
Craft Buddies… we did it! You created a beautiful fall door hanger, and I bet you did it in under an hour. If you make this or something similar, I’d love to see it. Please tag me. I am EJsFunCrafting on all platforms. More Fall Decor Ideas As you may know, I’m really about community. There is so much amazing talent and so many fun ideas out there. So, I’ve rounded up some of my favorite fall DIY decor ideas from around the internet. Check them out! Let me know if you have a favorite fall DIY as well.
- Tried and True Blog: 15 Minute Burlap Pumpkin Wreath
- A.V. Does What: Tie Dye Fall Coffee Mug
- Thistlewood Farm: 7 Simple Ideas to Decorate Your Fall Porch
- Sweet Valley Acres: 4 Easy Steps to the Mos t Beautiful Fall Garden Hat
- The Happy Door: Fall Home Tour
- Weekend Craft: 12 DIY Fall Wreaths
- This Is Tisa Blog: Porch Welcome Sign
- Gathered In The Kitchen: 11 Easy Home Decor Crafts for Fall
- My Homier Home: 7 Cozy Fall Living Room Decor Ideas to Steal
- Our Tiny Nest: Hot Glue Painted Pumpkins
- B4 and Afters: DIY Fall Tiered Tray for $3
- Amy Sadler Designs: Leather and Wood Pumpkin DIY for Fall
- Log in
- Entries feed
- Comments feed
- WordPress.org

Want more details about this and other DIY projects? Check out my blog post!


Frequently asked questions
Have a question about this project?