


How to Update Old Decor to Make a Fall Wreath
I love to make old things look new again! Let me show you how easy it is to update old decor items to make a Fall wreath for your home!
Fall is right around the corner my friends! Have you started decorating yet? Do you have old holiday decor that is out of date or you're just tired of using it? Well, if you don't want to spend money on something new, you can always pull out your craft supplies and give those old decorations a whole new look! Let me show you how I'm going to update two pieces of my old decor to make a Fall wreath for my front door!
My Old Decor
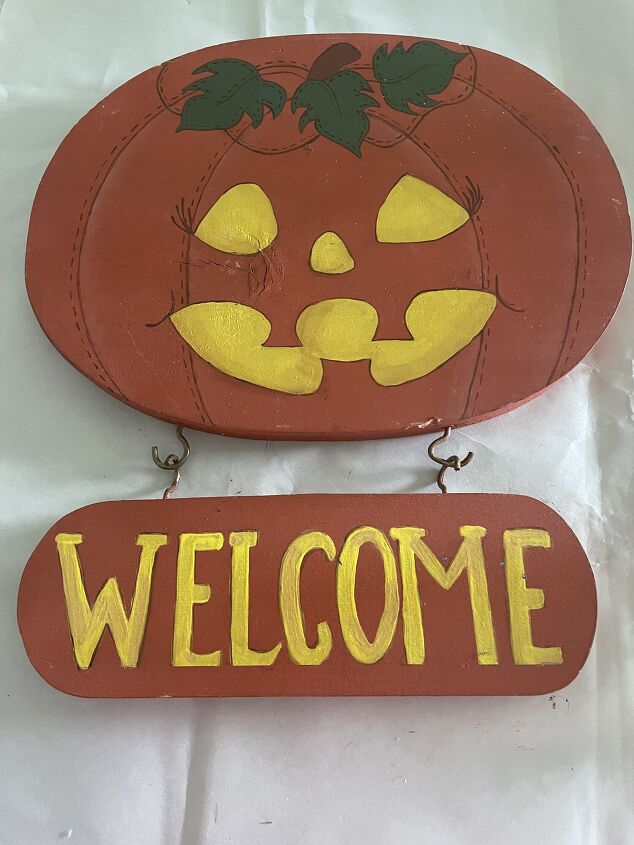
The first piece of old decor I'm going to show you how to update is a pumpkin-shaped welcome sign, it will serve as the center of my new Fall wreath.

The second piece of old decor I'll be using is this large grapevine wreath decorated with red and white flowers.
My Inspiration
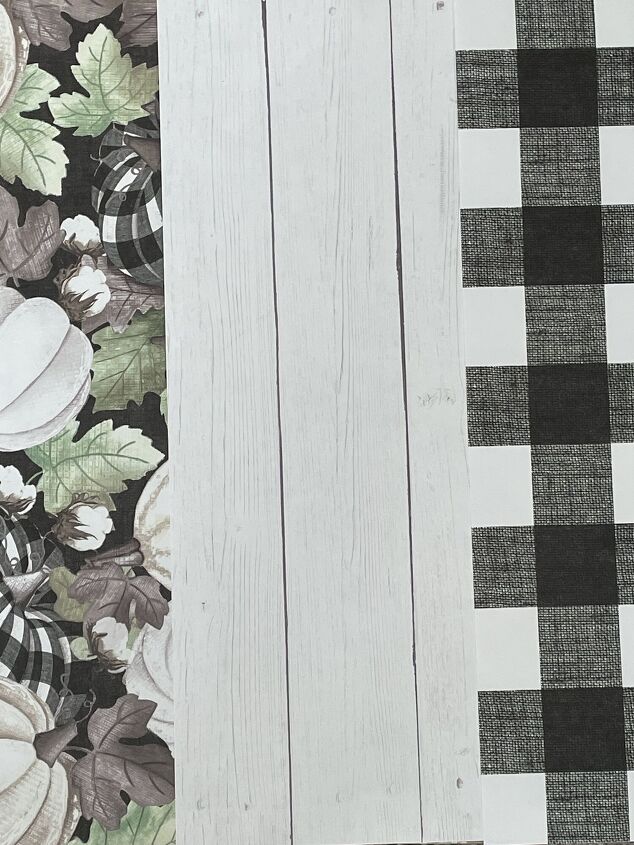
I was shopping at Hobby Lobby and saw this cute garland made from burlap and buffalo check ribbon! I knew I already had both of those items at home and could create something similar! Then, I noticed the buffalo check pumpkin below it and thought about my old pumpkin welcome sign. My mind started racing, and I wondered if I could cover it with buffalo check paper? I went straight to the scrapbook paper section to see what I could find! I bought the three designs you see above! My favorite is the pumpkin print, so I decided to use it on top of the sign instead of the buffalo check!
How to Update an Old Welcome Sign
Gather
Below are all of the items I used on this project. I purchased the scrapbook paper, Mod Podge, and the E6000 adhesive. I already had the other items at my house, so this was a very inexpensive DIY!
- an old pumpkin welcome sign
- 12 X 12 Scrapbook paper – 2 different designs
- pencil
- scissors
- Mod Podge
- foam brush
- paintbrush
- black chalk paint - Waverly Ink
- white chalk paint - Waverly White
- faux leaf
- burlap leaf
- a piece of mulch
- glue gun
- Cricut cutting machine (to cut letters) or black sticker letters
- Cricut vinyl-black
- transfer tape - Cricut
- wood beads
- E6000 adhesive
- floral wire
- 3 bed risers-to hold beads when painting
- staple gun
Prep
Protect your work surface - I put down craft paper.
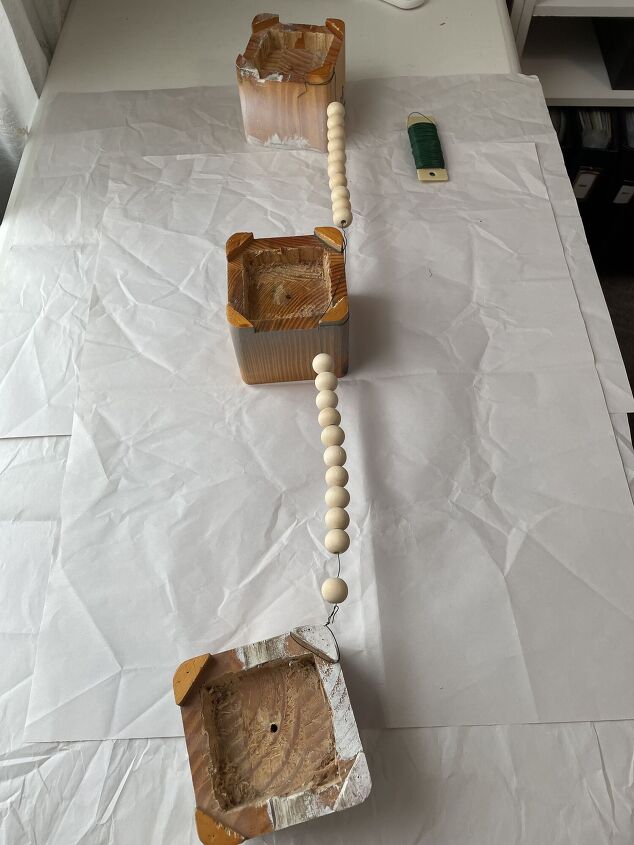
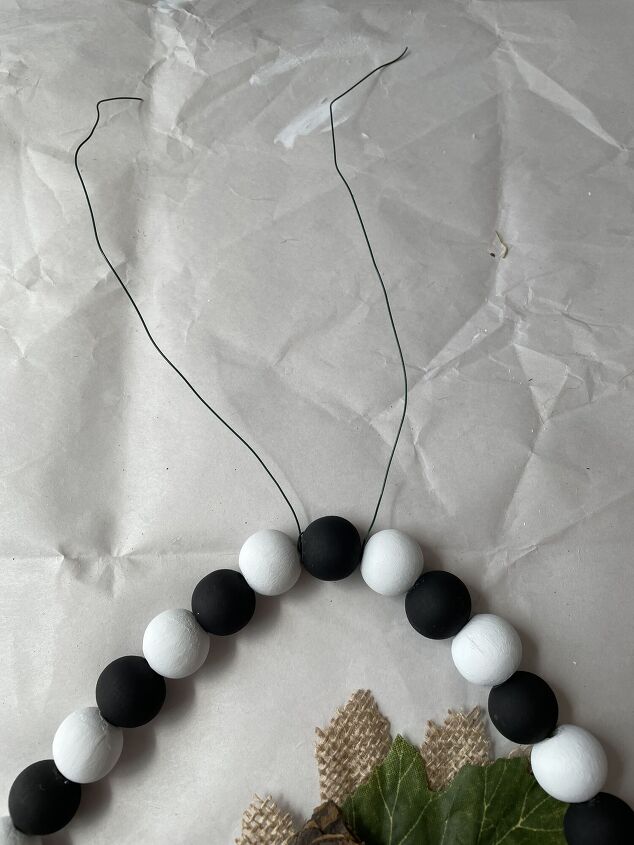
I prepared the sign by removing the old hooks and dusting both wooden pieces. Next, I prepared the beads to be painted. First, I strung the beads on a long piece of floral wire. Then, I wrapped the ends of the wire around the bed risers. I used three risers, so I could separate the beads in half.
PAINT
Shake the paint well.
First, I used black paint to cover the edges of the sign, and then I painted eleven of the beads.
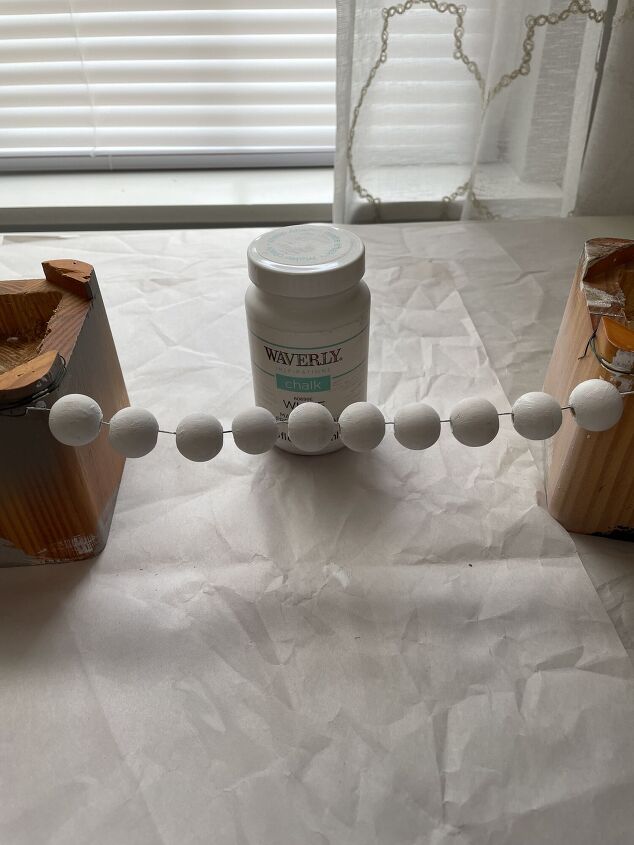
Next, I used white paint on the remaining ten beads.
Let paint dry.
Add a second coat if needed.
Decoupage
Guess what friends...I have never decoupaged anything before!! That's why I had to purchase the Mod Podge because I've never used this product before. So, here goes nothing!!
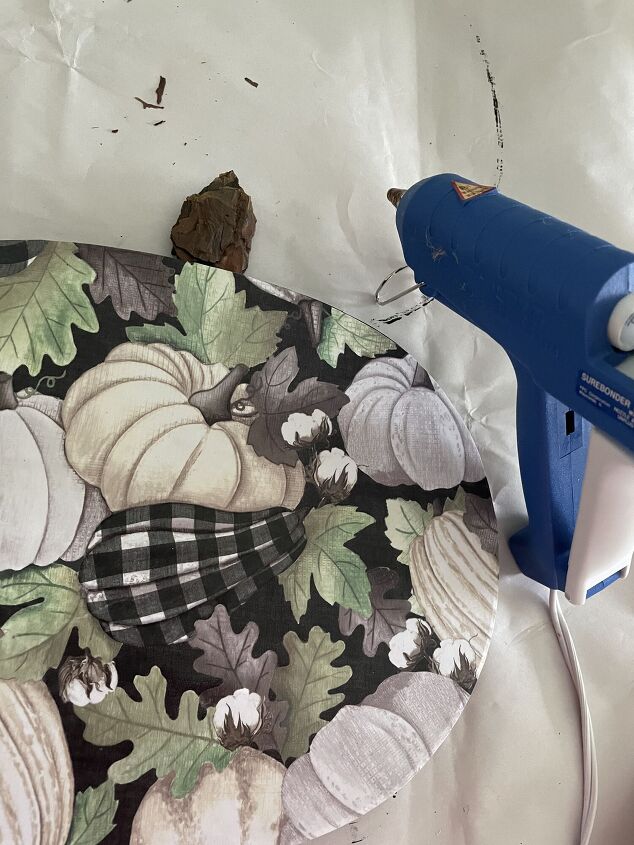
Turn scrapbook paper to the backside and lay the sign on it. Trace around the sign with a pencil.
Use scissors to cut out the shape.
Apply Mod Podge to the sign.
Paint every bit of the sign, then carefully place the scrapbook paper on top of it.
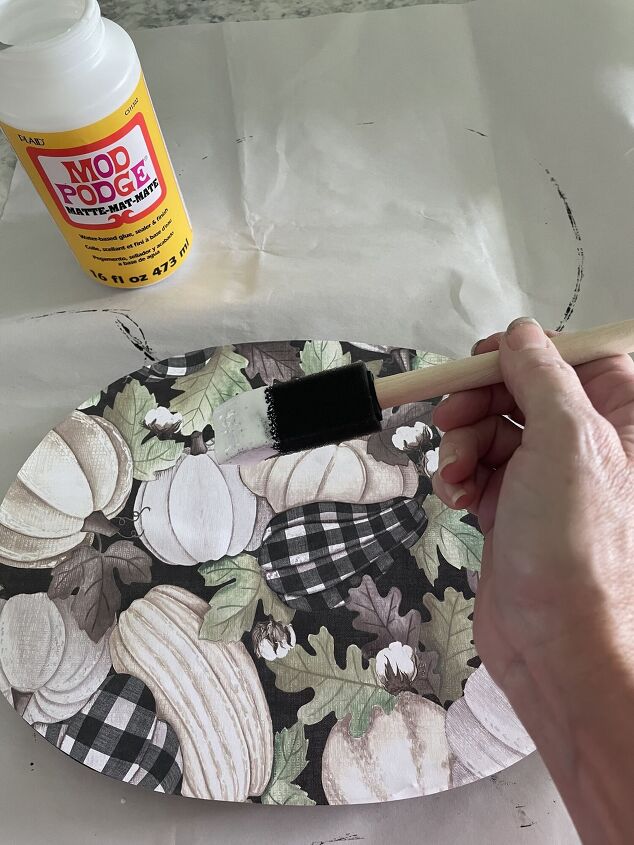
Apply Mod Podge over the entire surface of the paper. Next, I repeated each step with the small part of the sign that said welcome.
I was worried because the paper had bubbles under it and I couldn't smooth them out. At this point, I thought I had ruined it. When I came back later, after it had dried, you could hardly see the bubbles. I have no idea if this is typical since this is the first time I've used the product.
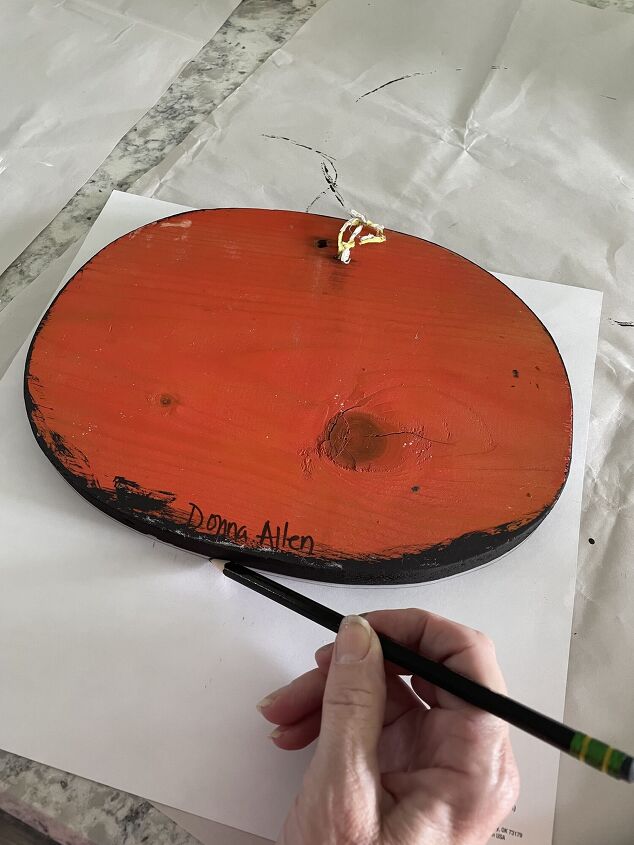
Make a Pumpkin Stem
After I covered the painted pumpkin with the paper, I realized that the stem had been painted on it. It didn't actually stand up from the top of the pumpkin. It looked so plain, I decided to add a stem. I went outside and grabbed a piece of mulch!
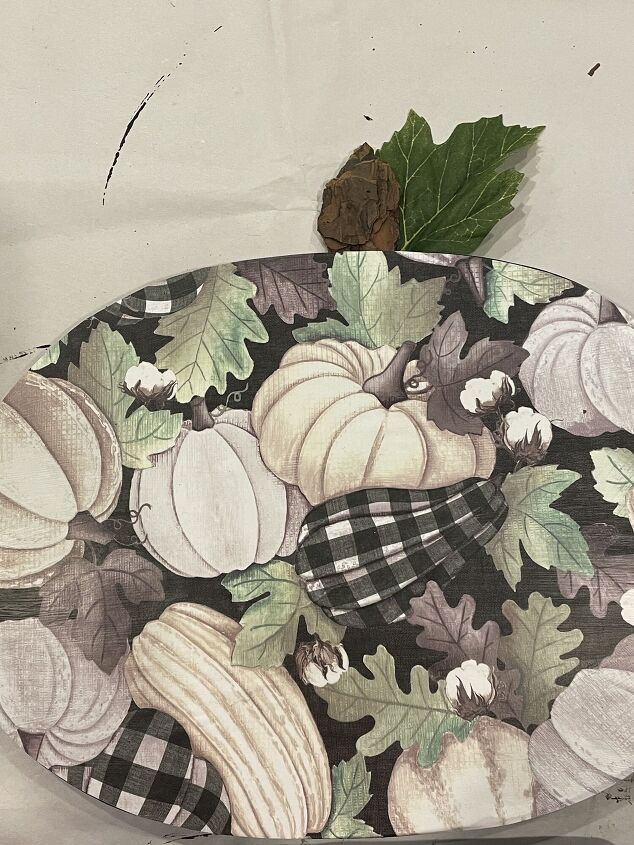
I hot glued the mulch to the back of the sign. Ta-Da!!! Now we have a stem!
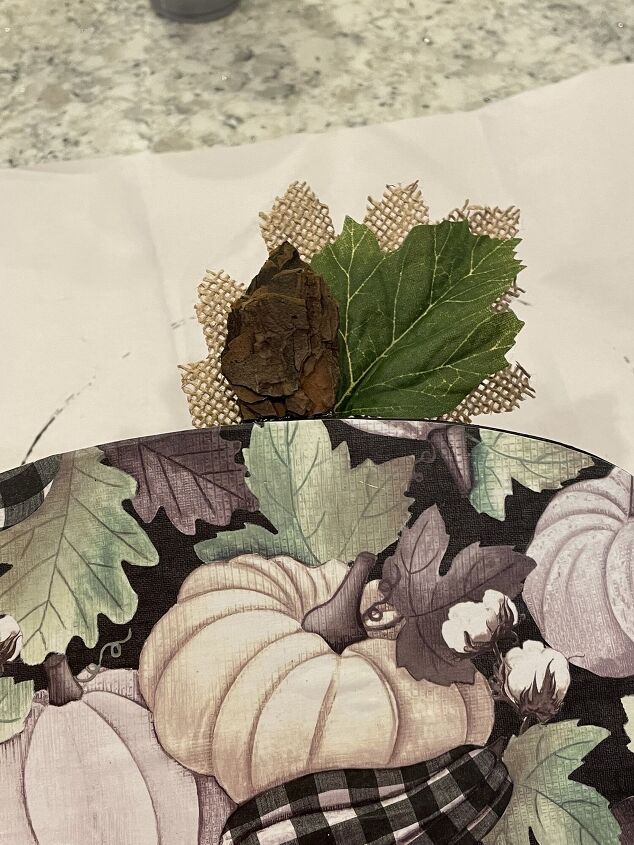
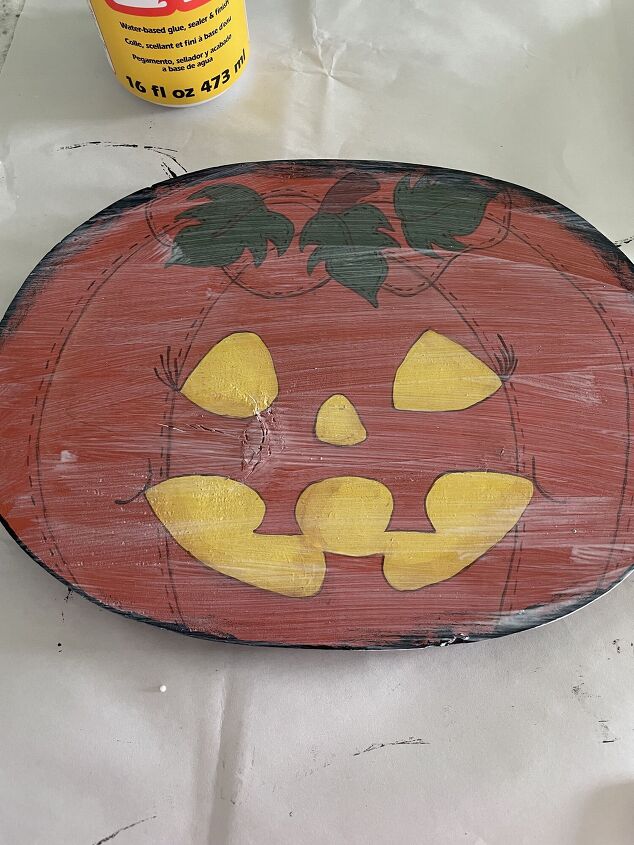
Next, attach the faux leaf to the back of the sign with hot glue. At this stage, I remembered I had some burlap leaves. I found them and decided to add one behind the faux leaf, to tie in with the burlap that's going to be on the grapevine wreath!!
Hot glue the burlap leaf to the back of the sign.
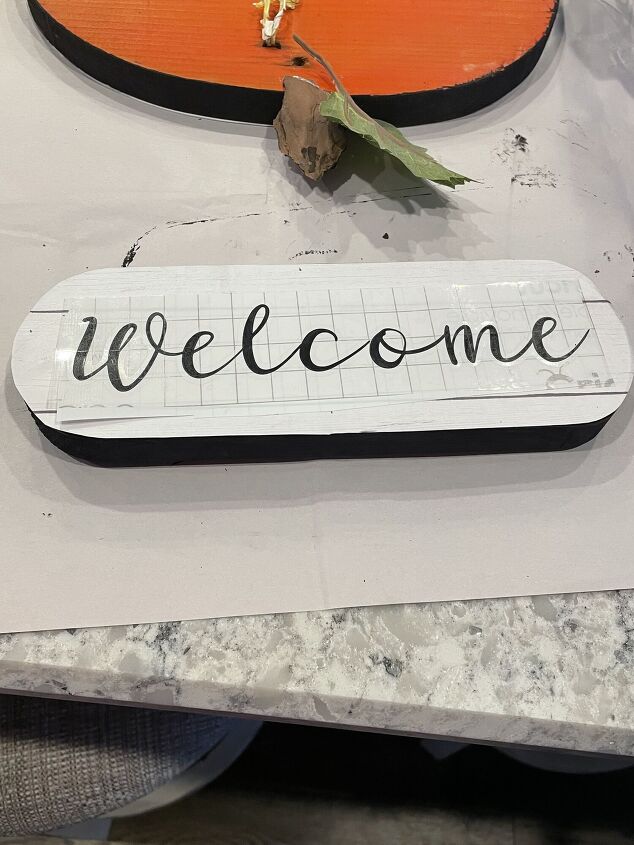
Add “Welcome” to Sign
I used my Cricut cutting machine to cut out the word welcome in black vinyl.
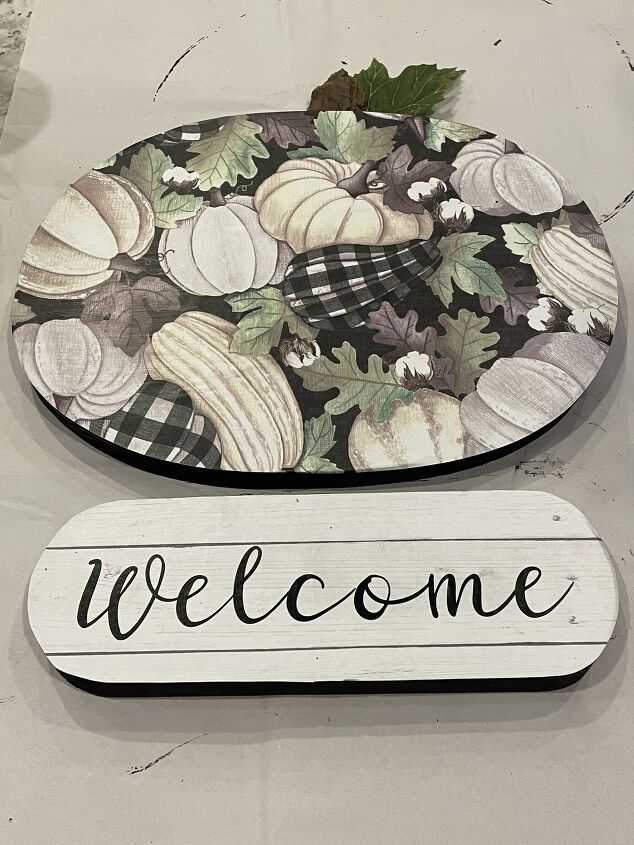
Next, I used transfer tape to apply the word to the sign.
Tip - if you don't own a Cricut cutting machine you could use black sticker letters.
Connect signs
I did not want to use the old hooks to connect the signs. Instead, I used two beads and glued them to each part of the sign with E6000 adhesive.
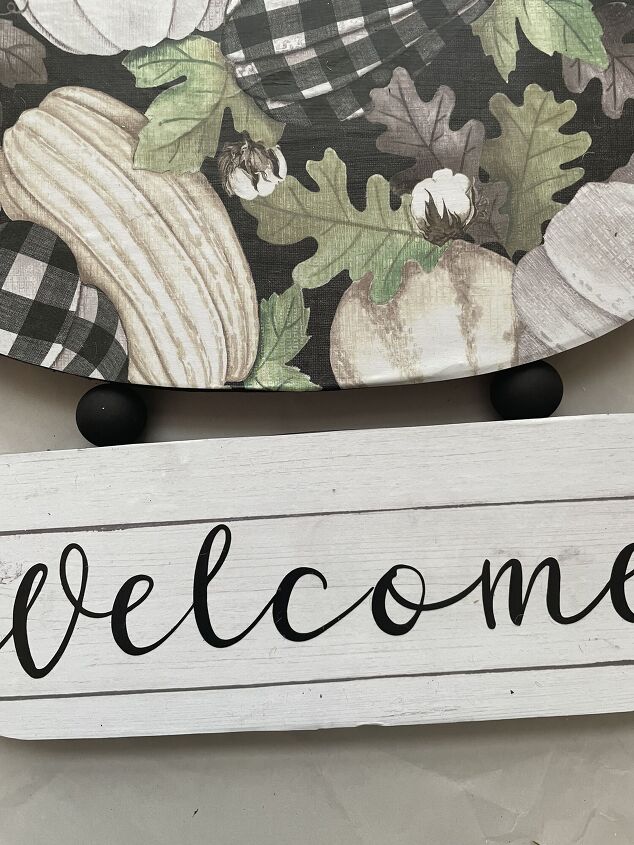
Signs are now connected together.
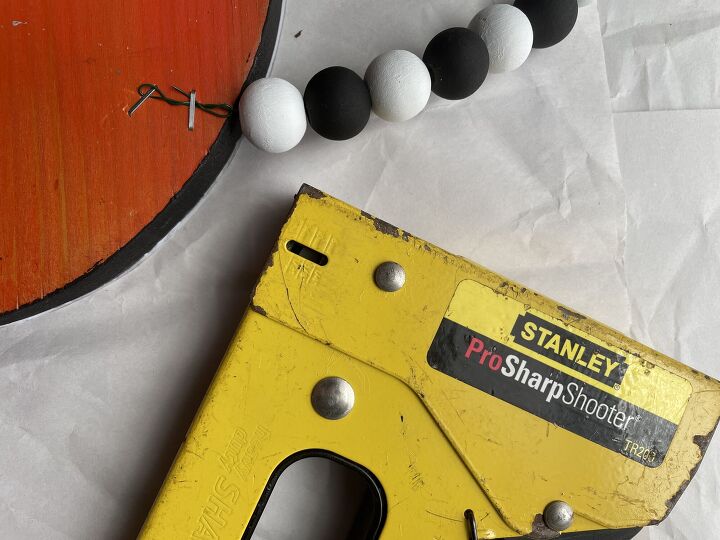
Make a Bead Hanger
I decided to hang the sign with a string of wood beads.
I strung the beads on a piece of floral wire, alternating the black and white beads. Then I used a staple gun to attach the wire to the back of the sign.
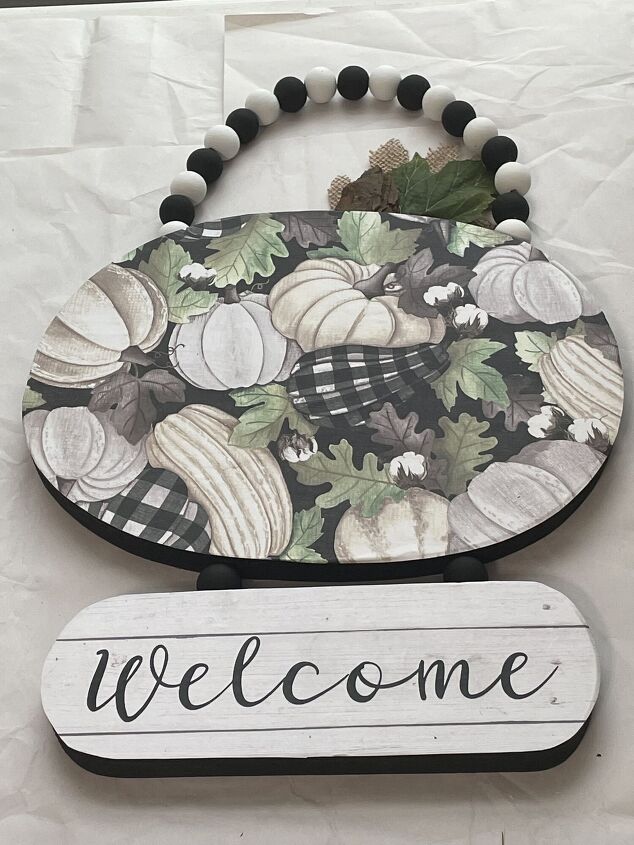
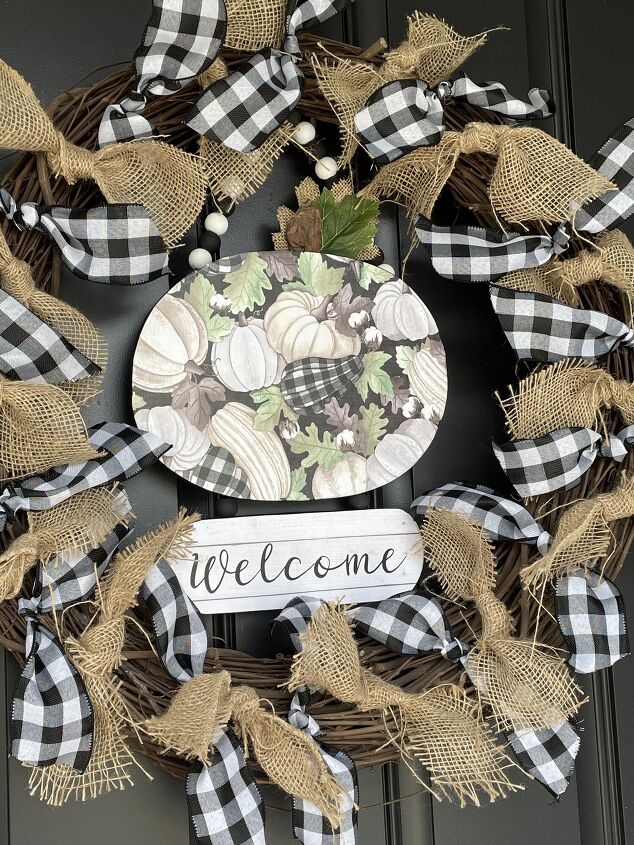
The new welcome sign is finished!! Doesn't it look fabulous! I could use it by itself but I'm not done yet! I'm going to add a bit more pizazz to the sign!
How to Update an Old Wreath
The welcome sign is done and now I'm going to move on to the actual wreath form. I'm so excited to update this old wreath and turn it into something great to add to my Fall decor!
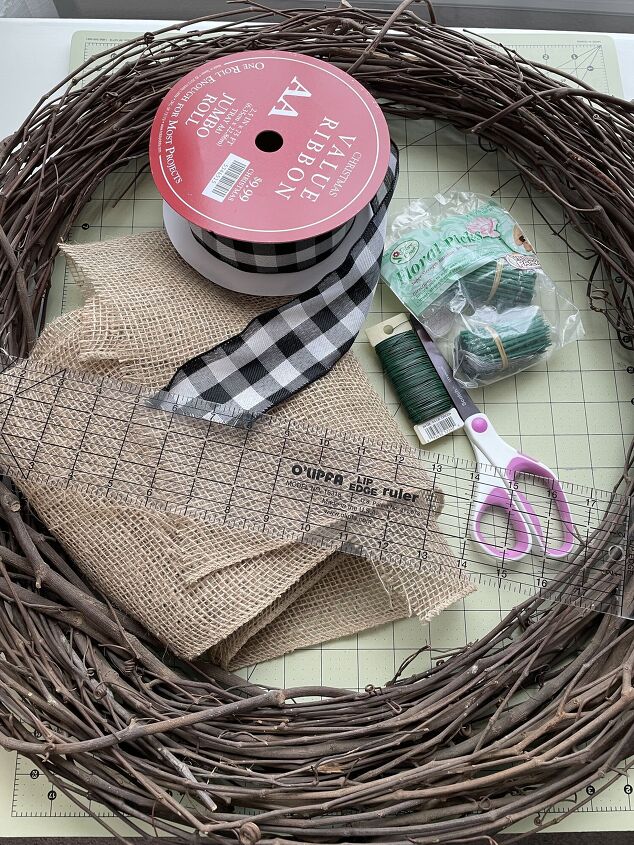
Gather
I used the items below to update my wreath for Fall!
- a grapevine wreath
- burlap
- wide ribbon
- ruler
- scissors
- floral wire
- floral picks
Prep
I like to cut all of the material I need before I get started.
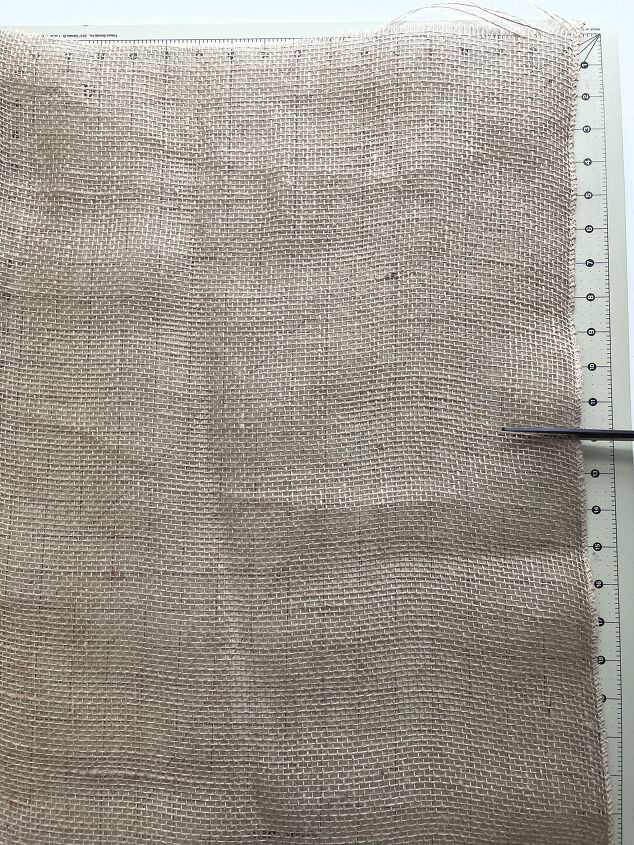
Lay your material on a large cutting mat. Measure 12 inches in length and cut the burlap. Cut the 12-inch strip into 3-inch wide strips.
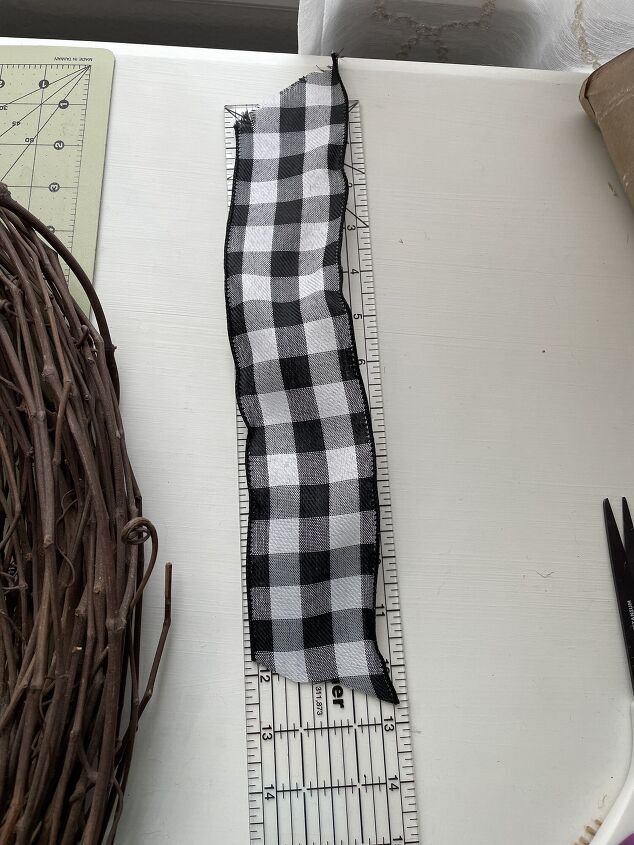
Cut ribbon in 13-inch strips, then angle each end.
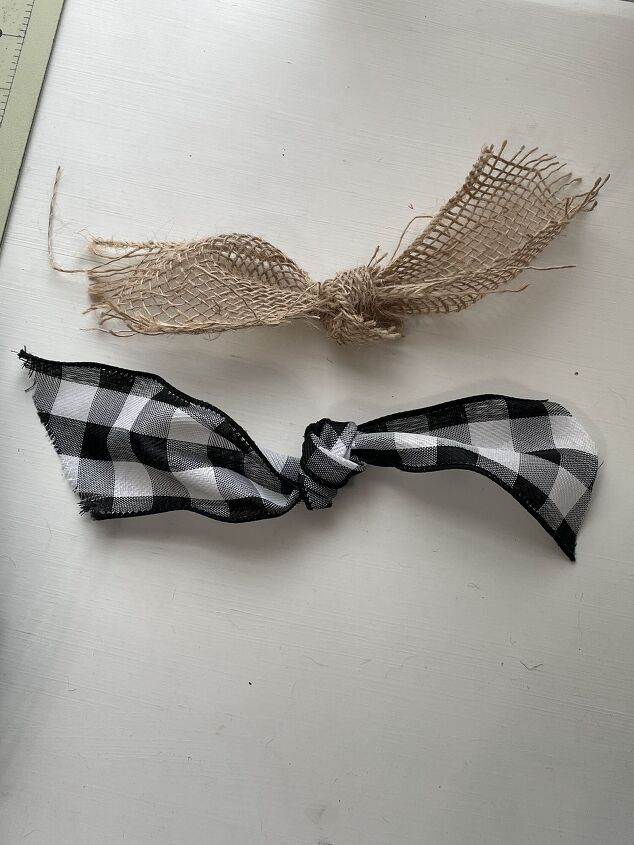
Make Picks
You are going to tie the ribbon and the burlap strips in bows.
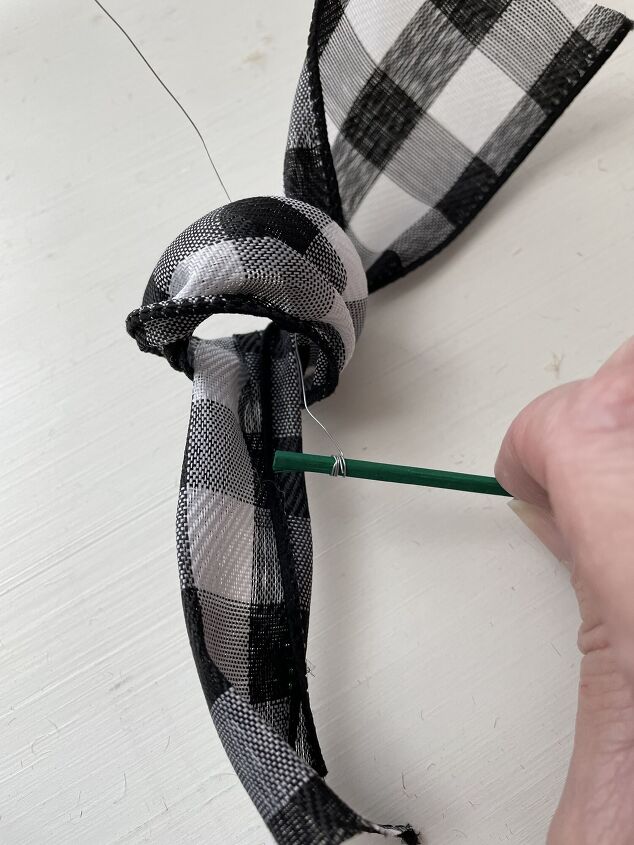
It works best if you leave the knot loose and then put the wire pick through the knot.
Tighten the knot.
Repeat the steps with the burlap.
You don't have to keep the knot loose because the wire will go through the holes in the burlap.
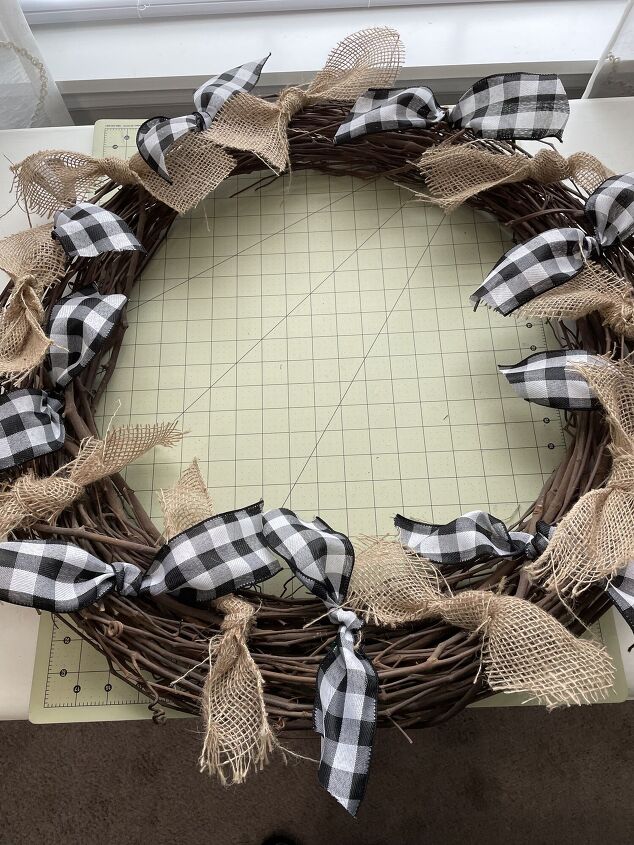
Attach Picks to Wreath
I do not want to hot glue the bows to the grapevine wreath because I like to reuse my wreaths each season. So I decided to use wire picks that can be removed next time I want to use this wreath!
Slide the picks into the wreath, alternating the ribbon and the burlap bows.
Put Sign and Wreath Together
Use floral wire to attach the sign to the wreath
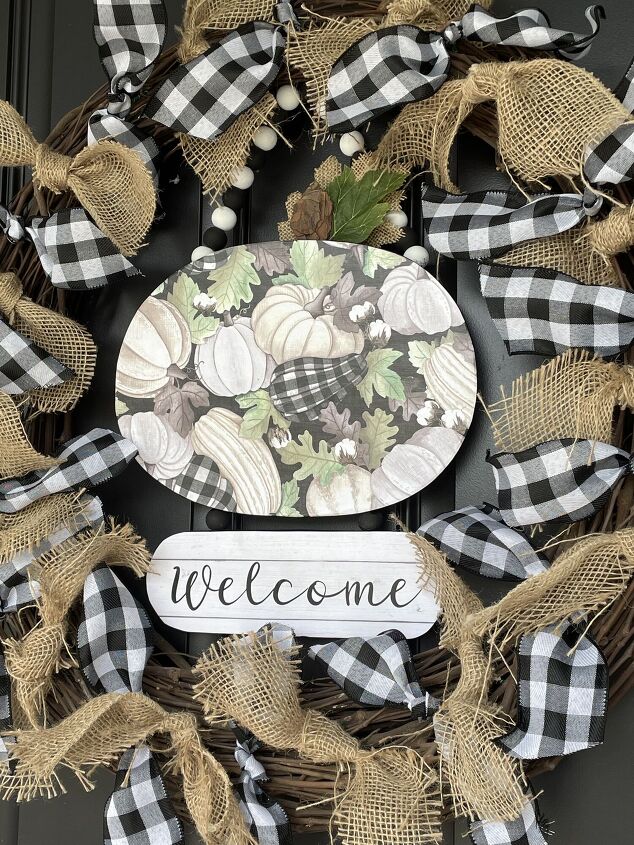
The Finished Project
Can you believe I turned these old, outdated decor items into a fabulous wreath for Fall??

Now that you've seen how easy it is to update old decor to make a Fall wreath, do you have a project in mind??


Frequently asked questions
Have a question about this project?