


Modern And Simple Floral Wreath
A wreath DIY is a great way to change up color in your home and add a fresh, inexpensive touch to your decor. You are going to love my modern and simple wreath tutorial!
SIGN UP FOR MY WEEKLY NEWSLETTER!
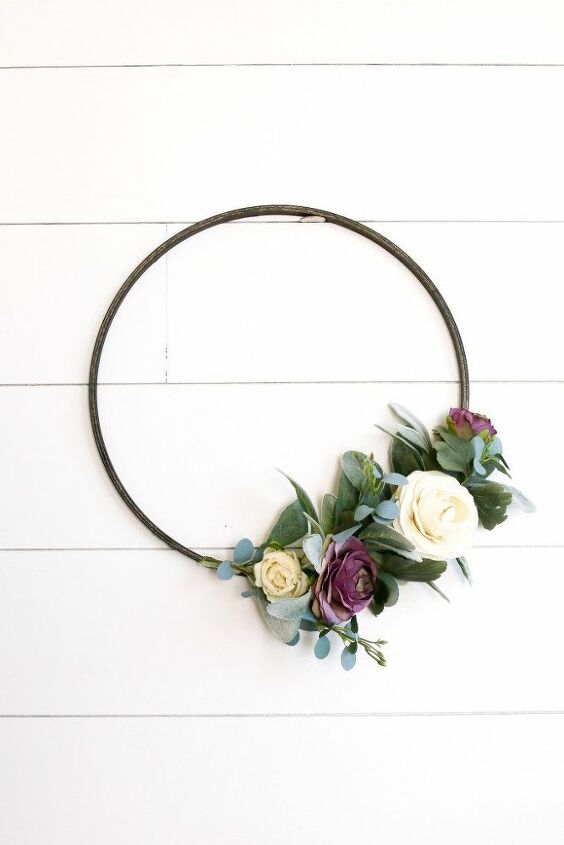
The funny thing about this wreath is the colors…for me anyway. I DO NOT do purple. Ever.
But I held a craft class a couple of weeks ago and a friend of mine made her wreath with a black hoop and the purple flowers and I LOVED it!
So, I guess I do purple now.

To be honest this is how I came to love pink a couple of years ago. I never used it, never liked it, until I bought some pink faux flowers and I loved the pop of color. Now it is all over my house!
Let’s get to makin’!
Gather Your Supplies
- 14″ Embroidery Hoop
- Wood Stain (optional, I used MinWax in Ebony)
- Faux Flowers and Greenery
- Hot Glue Gun And Glue Sticks

Step One: Cover your workspace. Black plastic trash bags or newspaper work well.
Step Two: Stain the embroidery hoop if you want to. Use a small piece of t-shirt fabric to wipe the stain onto the hoop. Go back over the hoop with another t-shirt piece to remove excess stain. Let dry for at least one hour.

Step Three: Cut your flowers and greenery off their branches. I generally like to cut the pieces a little longer than I think I will need them to be. It is better to leave space for trimming than to cut too short.
Step Four: Plug in your glue gun to heat it up. I also suggest that you get a glass of ice water to set by your workspace just in case you get glue on your fingers. It is quite hot and does not cool off quickly. Sticking your fingers in the water cools the burn quickly!
Step Five: Design your wreath first without gluing the flowers and greenery on. This will help you to decide on your look before committing to it.
Step Six: Glue the flowers and greenery onto your hoop. I like to use a good amount of glue to keep things attached for the long haul.
Step Seven: Let dry completely and hang your wreath as desired. An over-the-door wreath hanger would work, as would a Command Hook.
Wasn’t that simple?
I hope you enjoyed this wreath tutorial!
Resources for this project:
See all materials


Frequently asked questions
Have a question about this project?