


Nutcracker and Peppermint Candy Wreath Inspired by Pinterest.

A few years ago I spotted a beautiful and festive Nutcracker wreath that I fell in love with on Pinterest and decided that I wanted to make my own version. After that, I started collecting peppermint candy themed decorations from mostly Hobby Lobby in the after holiday sales. This really helped to keep the costs down.
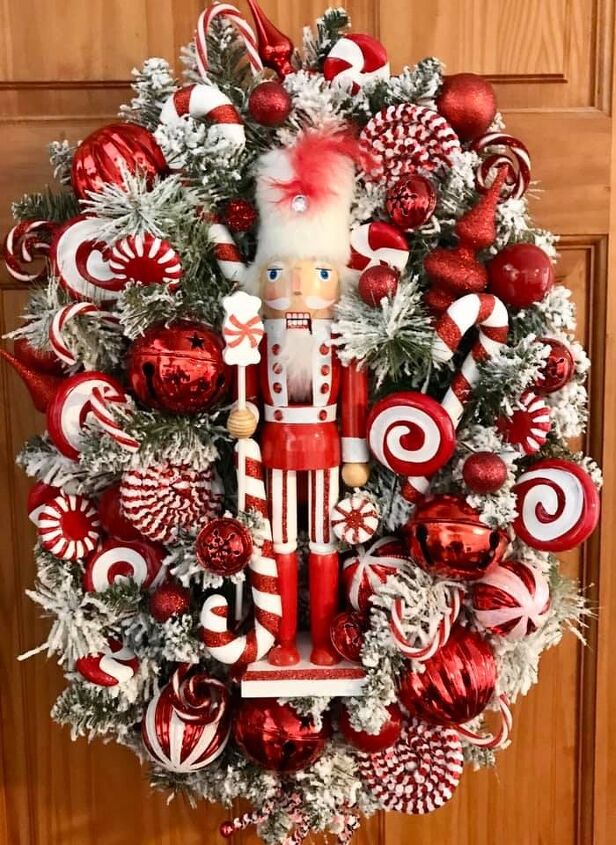
All that remained to be purchase was the wreath, some bells, ribbon, a peppermint themed Nutcracker and pine boughs. I wanted a lush full look to the wreath and decided the pine boughs would help add a little dimension and make it look thicker. All these I bought half price at Hobby Lobby back in early October 2021. Most wreaths are the faux fir and even fluffed up lack in lushness.
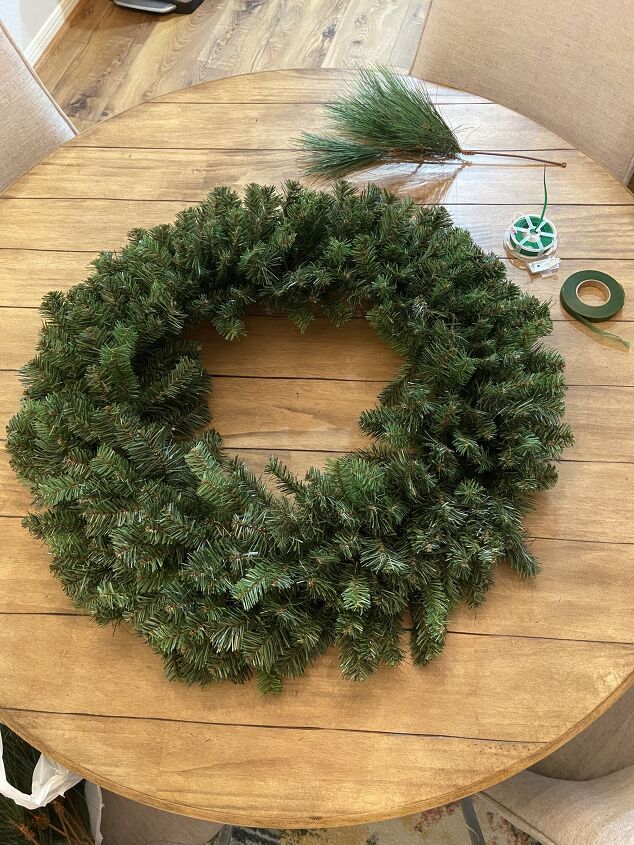
Spent some time really fluffing up the fir wreath.
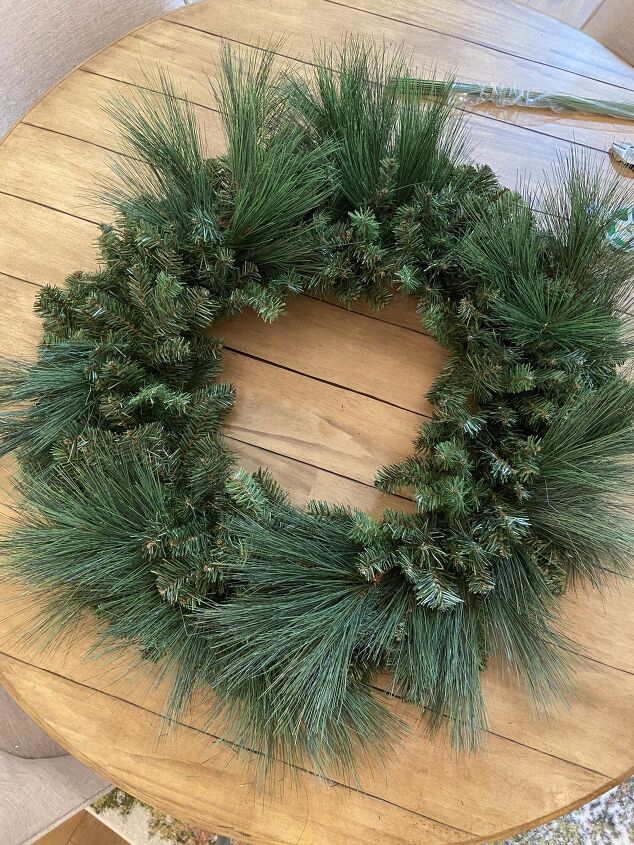
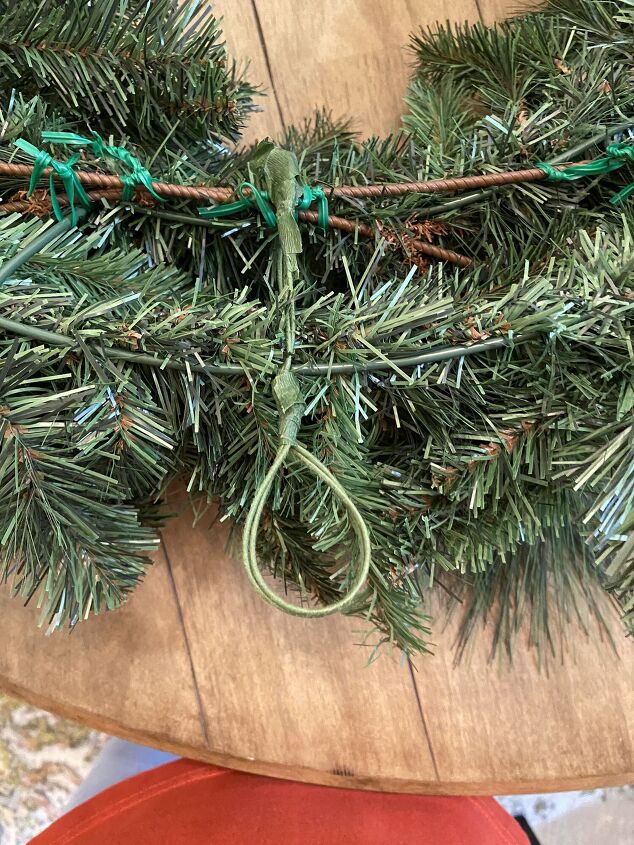
I placed the pine boughs randomly around the wreath. The boughs had really thick wire branches so I wired them as tight as I could from the back. Once this was done I added some light flocking.
I have a storm door and needed the wired hanger to hang on the device I bought on Amazon. It’s a special hanger designed for storm doors.
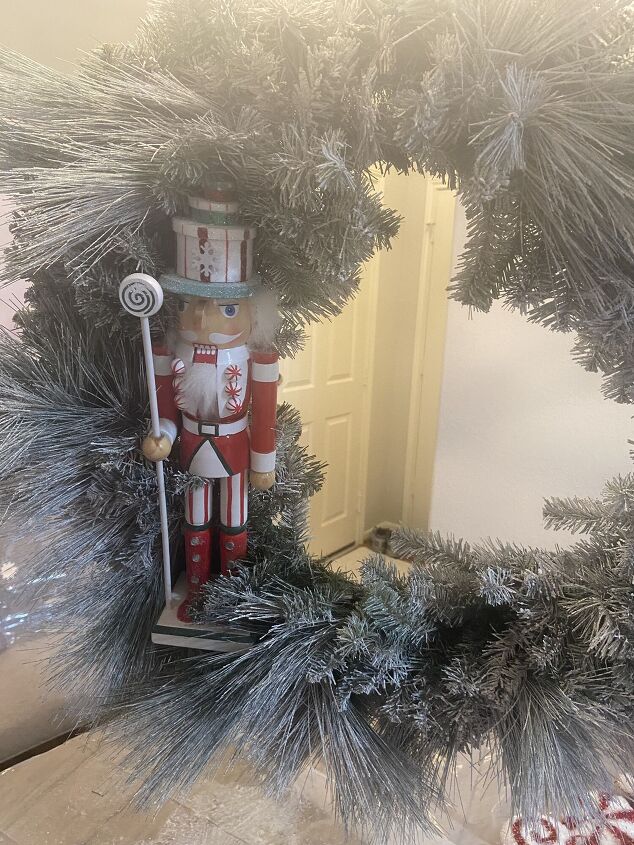
After going on and on about where to place the Nutcracker, I decided on attaching off center to the left. He is held in place with floral wire around the waist, above and below his belt. And he is snuggled in tightly.

Here I’m just playing around the placement of all the ornaments and adjusting for balance. Some had wires and some had hanging holes.

This is the final placement of the ornaments and peppermint candies before I added the ribbon. The ones with wires were attached to the frame first. I just pulled them through the back of the frame and wired them to the back very firmly. The rest of the candies and ornaments were attached with hot glue. And I may have left some skin behind in the process. You have to be heavy handed with the hot glue.
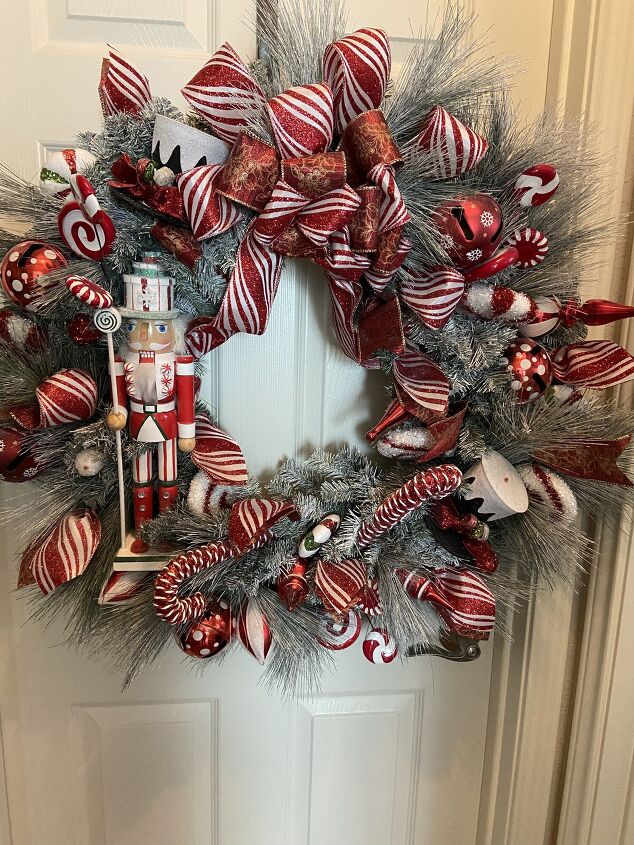
The last thing to go on the wreath was the bow centered at the top. A mostly solid ribbon was used behind/under the peppermint stripped ribbon. Then I just cut short pieces and randomly hot glued them in. With the addition of the pine boughs, this wreath ended up being about 35” wide. Now you can really see it from the street.
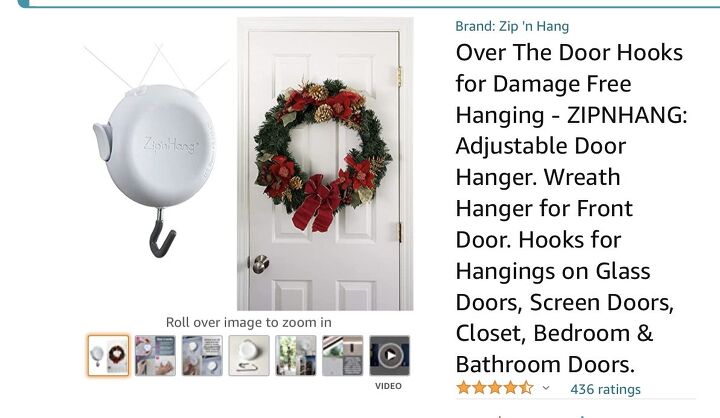
I have a feeling that some folks with a storm door might want to know about this hanger. I found it on Amazon and I’m currently hanging my Autumn wreath on it.
Resources for this project:
See all materials


Comments
Join the conversation
-
That is beautiful!!! I love the red and white candy theme with the cute nutcracker. I’m going to do exactly what you did and grab the supplies from sales after Christmas this year so I can make a wreath for next year!!!
Thanks for the inspiration and great tips!!
-
Thank you, Good luck and be sure to submit.


Frequently asked questions
Have a question about this project?
Can you explain how you made the bow please & how you decided where you placed each piece? I love to make wreaths but I'm not too good at it. I'd love to replicate yours. It's beautiful . Thank you!!
Where do you get the fairy lights solar jar lids?