


Repurposed Garden Glove Wreath
This garden glove wreath is a fun way to create a colorful wreath that will take your front door from spring until the fall season arrives.
You can find more home decor, craft, and garden projects on my blog, Color Me Thrifty, here.
When each new gardening season arrives I love to create a new colorful wreath for my front door. The door we always use leads into our kitchen, and my kitchen colors are red and aqua with accents of sunny yellow.
But this wreath can be made using whatever garden gloves you can find to match your own colors.
Here's how I made it.
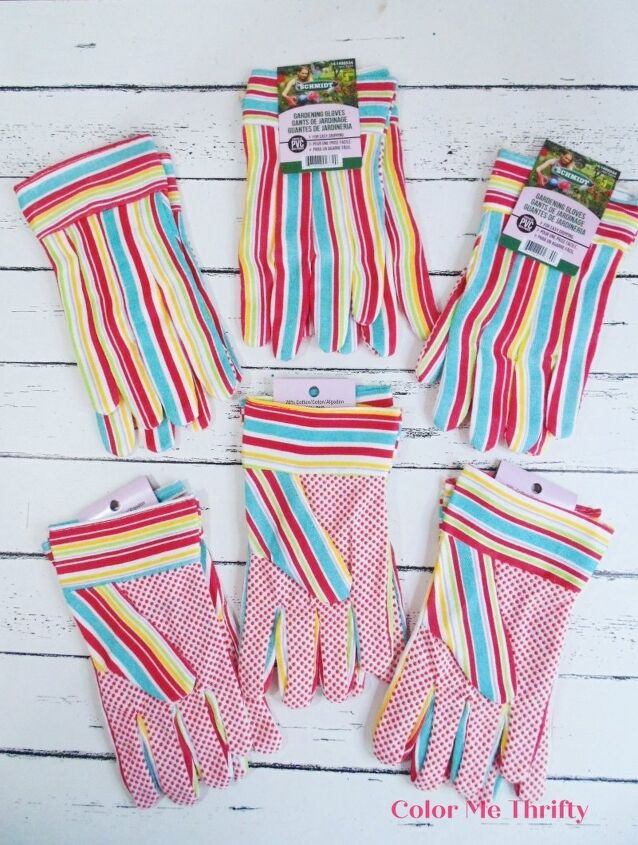
I found these fabulously colorful garden gloves at a dollar store for $1.50. Practically nothing at our local dollar stores is actually a dollar anymore, but for $1.50 they’re still a great deal.
As soon as I saw them this project idea popped into my head, and that doesn’t always happen so when it does I tend to pay attention.
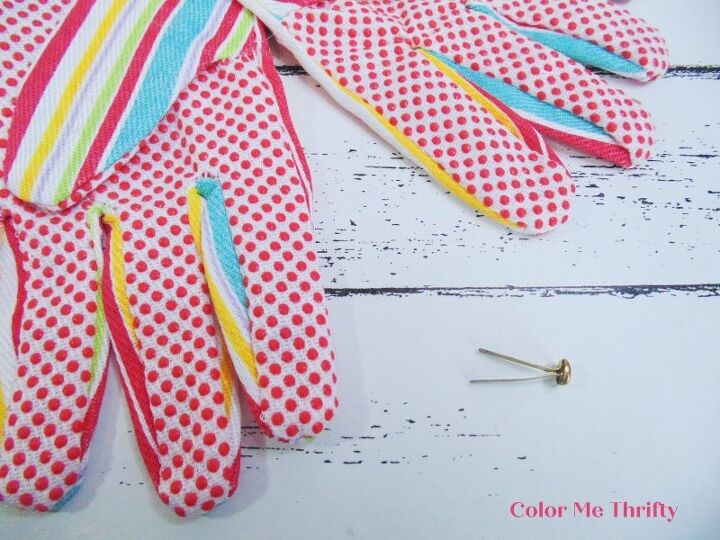
These garden gloves immediately caught my eye because of the fun bright colors, but also because the front and backs have two different patterns. And I’ve always loved the combo of stripes and polka dots.
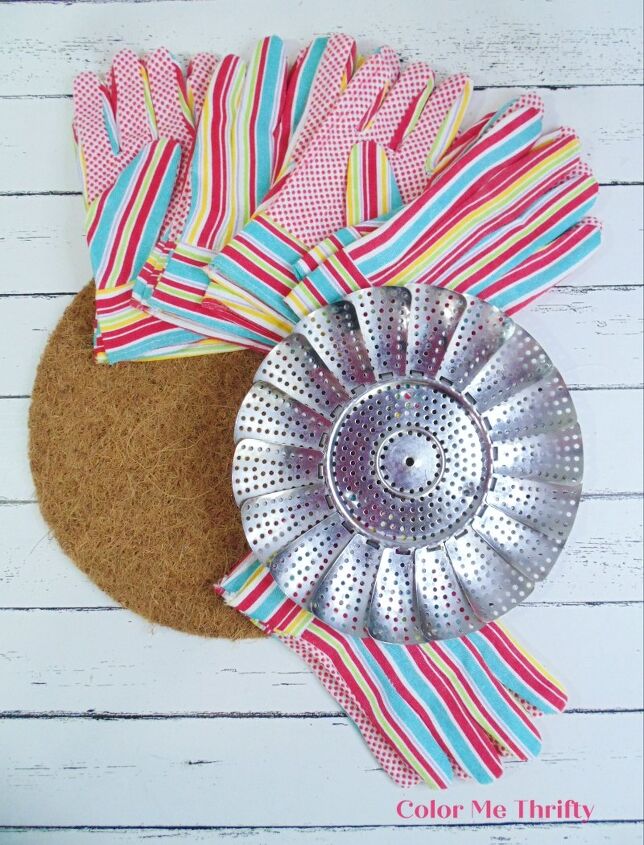
In the gardening section I also found a set of 2 coconut fiber flower pot fillers for $2.
Here are all the supplies needed for this garden glove wreath
- 5 Sets of garden gloves
- 1 12″ coconut fiber flower pot liner
- 1 metal folding steamer
- glue gun and glue sticks
- ruler
- black marker
- wooden skewers
- jute twine
- 1 folding tack
- 1 small tart tin
- spray paint
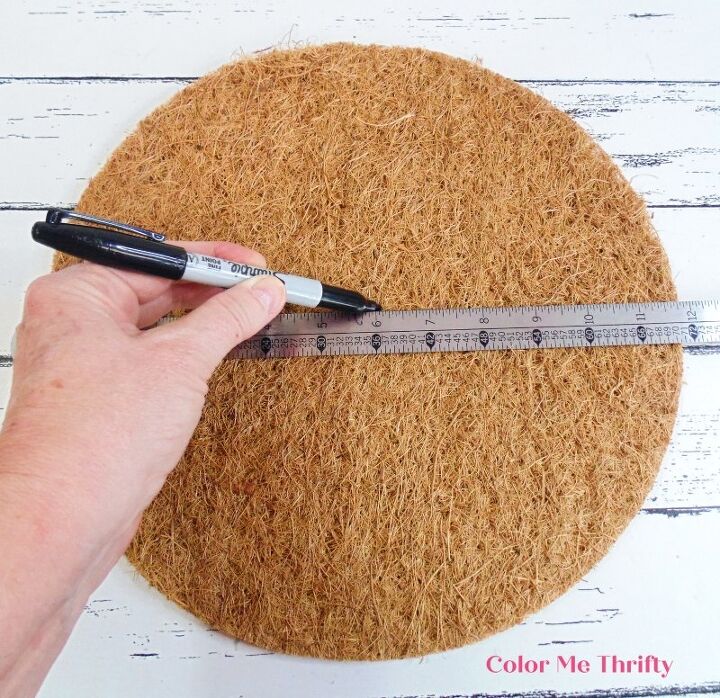
STEP ONE: Measure and mark the middle of the flower pot filler. This is to make it easier to place the garden gloves.
If you don’t have a flower pot filler like this, you could also use a cardboard circle.
STEP TWO: Put your garden gloves in place around the middle mark.
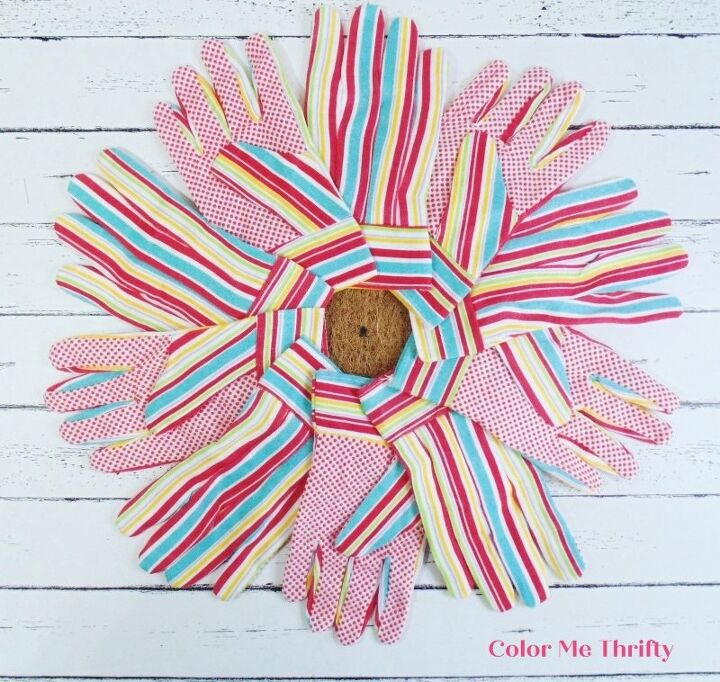
There are basically three different ways you can arrange these garden gloves. It really just depends on which look you like best.
First, is to really mix up those stripes and polka dots by alternating the fronts and backs.
The second is to use just the backs for a very striking stripy look.
And the third is what I chose to do, which is to use just the fronts. You’ll see why I chose that option when the garden glove wreath is done.
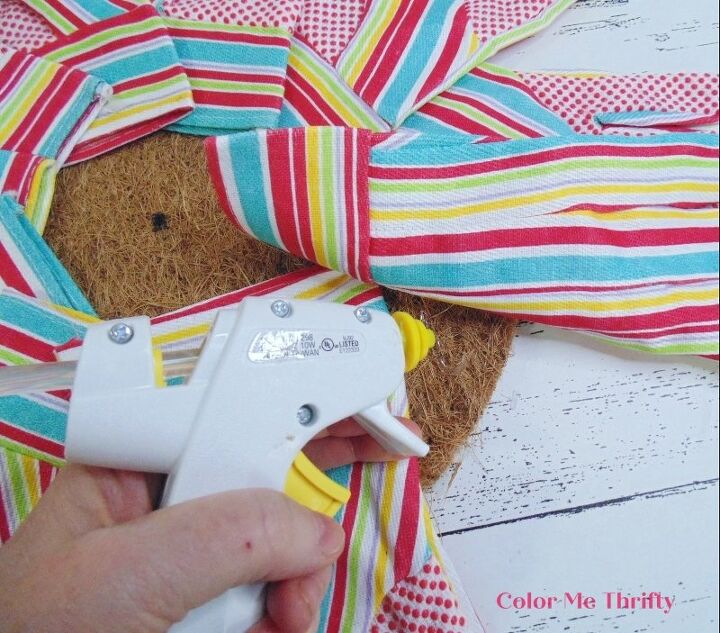
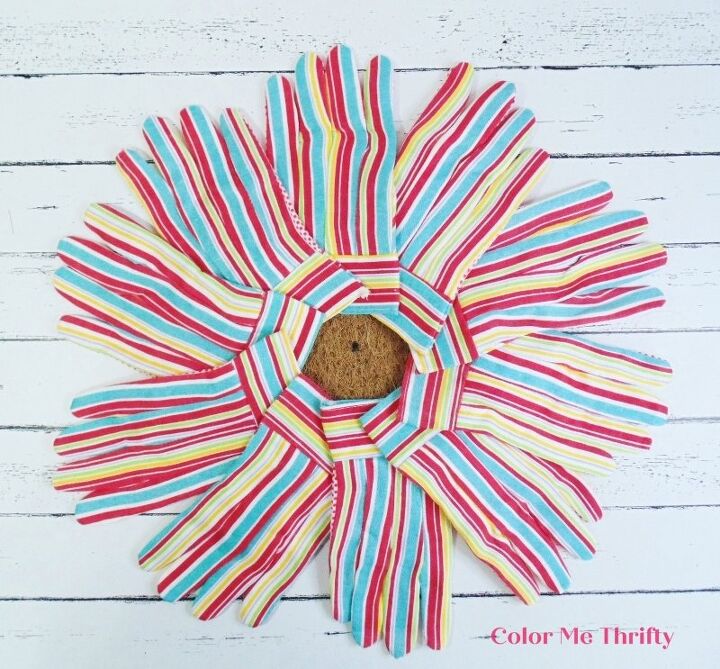
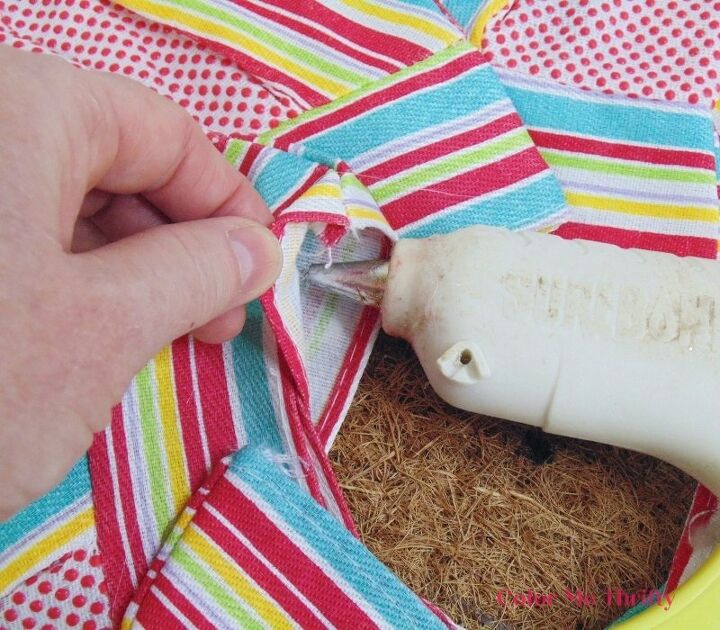
STEP THREE: While your gloves are in place, pick up each one and glue underneath it on the outside edge of the flower pot filler. I started with my mini glue gun, but switched to my regular sized glue gun. The mini just didn’t put out enough glue to move quickly.
TIP: I don’t recommend trying to place and glue each glove one at a time. I think it would be pretty much impossible to get equal spacing. It’s best to glue each glove one at a time while all the gloves are in place.
STEP FOUR: Lift each glove at their bottoms, one at a time, and glue them onto the flower pot filler.
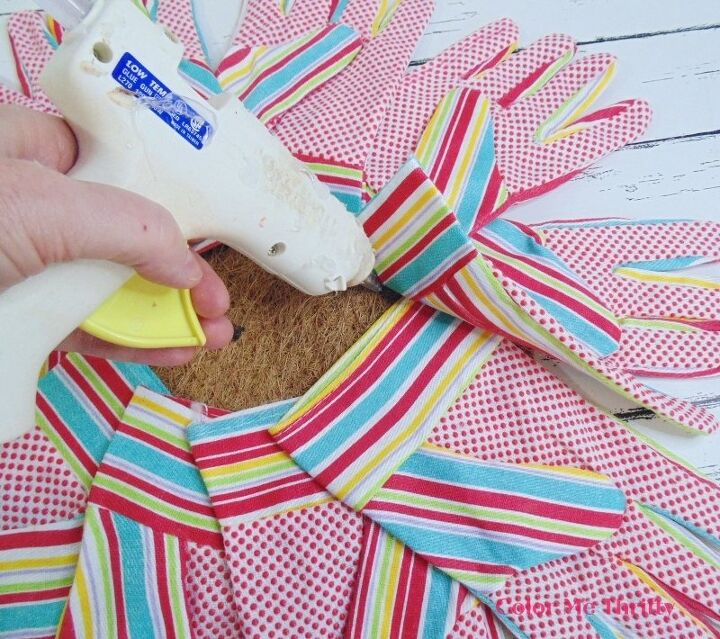
STEP FIVE: Glue the gloves to each other. Make sure to add the glue to the top glove, not the bottom glove.
This avoids any glue messes from any miscalculation.
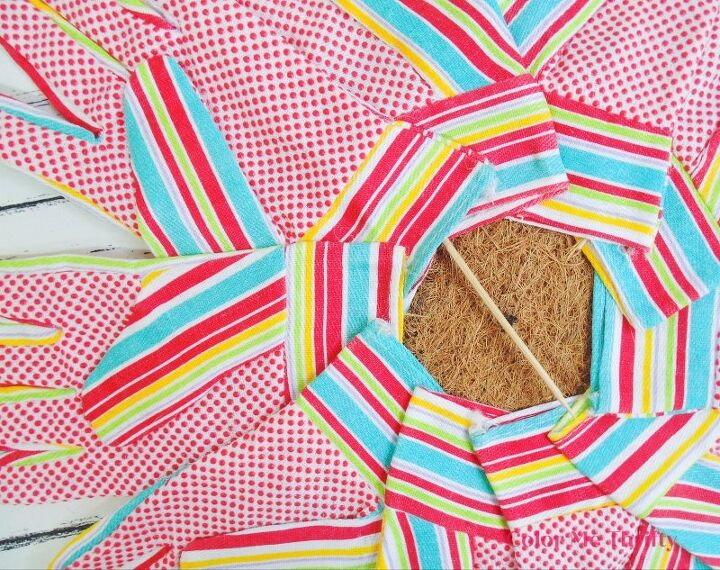
STEP SIX: Decide where your top of the wreath will be, and insert wooden skewers into the top finger of each glove to keep the gloves from sagging once your wreath is hanging.
Then break the wooden skewers off at the end of each glove at the middle of the wreath.
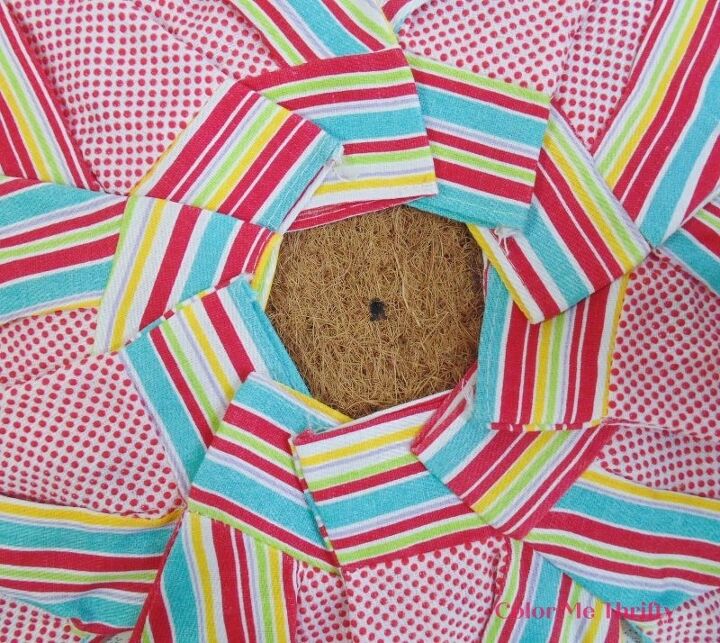
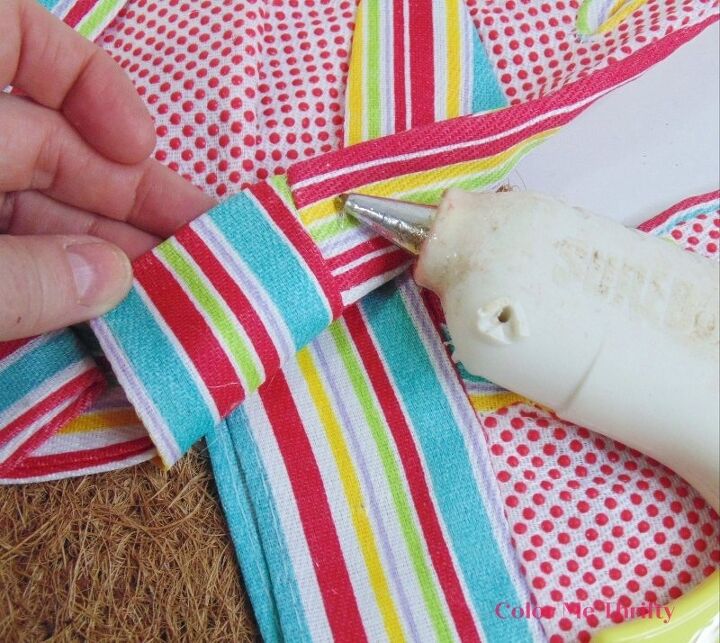
STEP SEVEN: Strengthen the wreath by gluing each glove together at the bottom insert. And then glue the thumbs down as well.
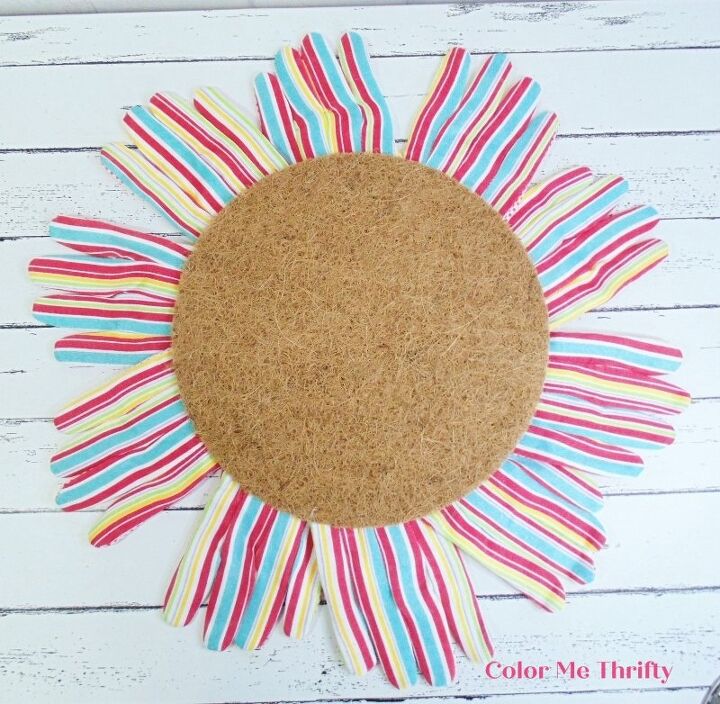
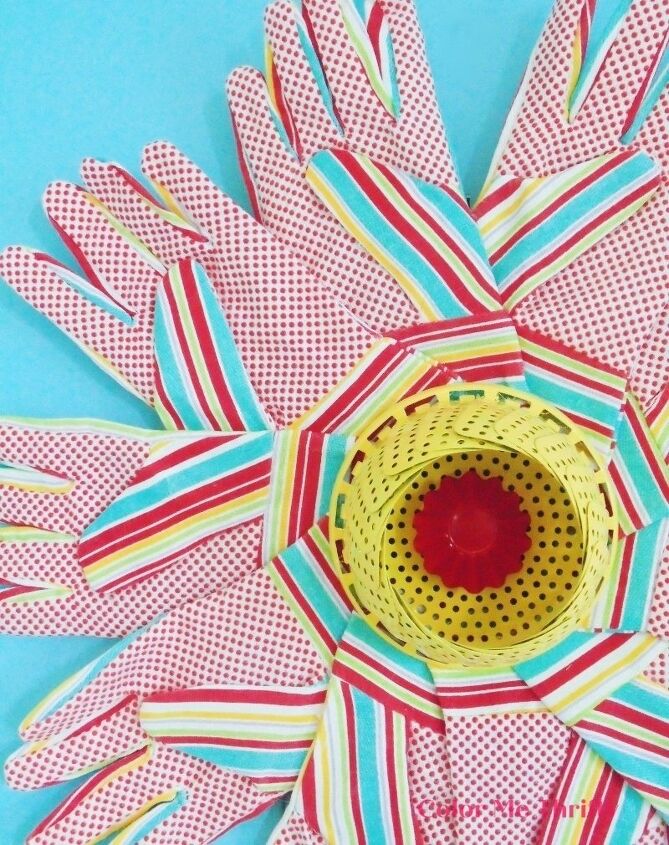
STEP EIGHT: Turn your garden glove wreath over and check for any glue gaps around the outside.

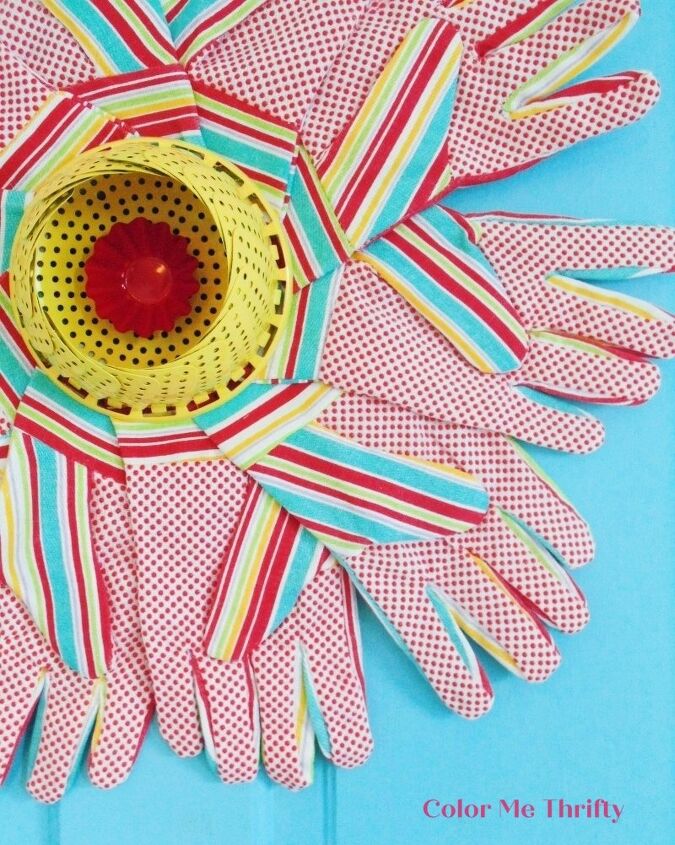
And here’s why I chose to use just the fronts of the garden gloves. I love how the stripes create those geometric patterns against the red polka dots.
To me this looks like one big fun and funky flower.
But it’s not finished yet. This flower needs its sunny centerpiece.
STEP NINE: Add your centerpiece.
To add my metal folding strainer to the middle of my garden glove wreath I used a folding metal tack. I just put it through the hole in the steamer, poked it through the coconut fiber, and opened it up on the back.
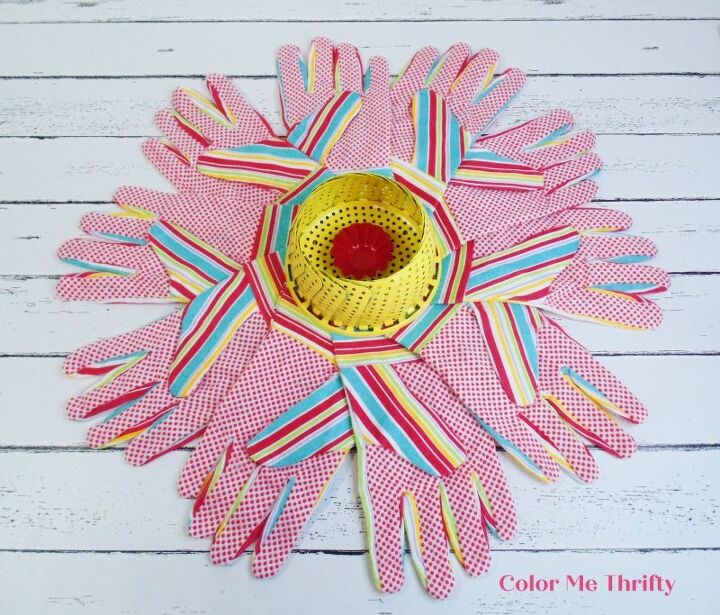
I sprayed paint the metal steamer, inside and out, with a lovely sunny yellow to really make it pop. Then I glued in a small metal tart tin that I spray painted a glorious bright red.
If you don’t have a metal steamer and tart tin, you can use whatever you have that you think will work.
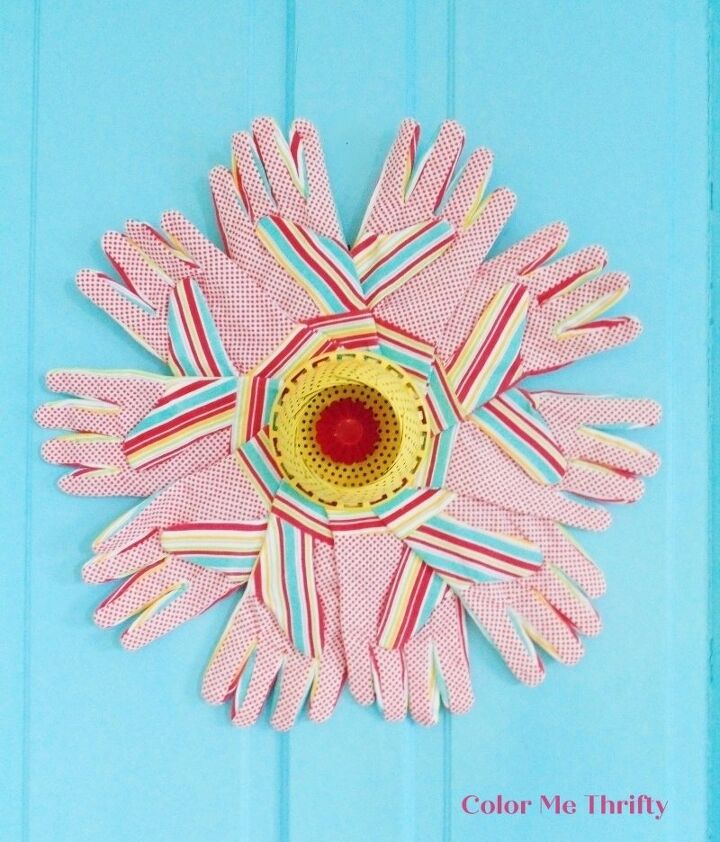
And here’s my easy and inexpensive garden glove wreath hanging on my kitchen door. I’m super happy with the way it turned out, and only cost me somewhere between $9 and $10.
To hang my fun and funky flower wreath I simply hot glued a loop of jute twine to the back.
This wreath project was so much fun, and the creative possibilities are really endless depending on the colors and patterns of the gloves you use.
I hope this project has inspired you to create a garden glove wreath of your own. Gloves are not just for gardening anymore, they’re for door decor too.
You can find more wreath projects on my blog here.
Resources for this project:
See all materials


Comments
Join the conversation
-
Love it! Especially the way you arranged the gloves💕
-
A gardeners delight!


Frequently asked questions
Have a question about this project?
How did you keep your strainer/steamer from opening up all the way?