


Deck Update - New Railings and Balusters

After the stairs and handrails, it was time to get rid of the ugly old 2x2 balusters and dated rails. NONE of the deck was standard measurement, so here's the steps to bring a new look.
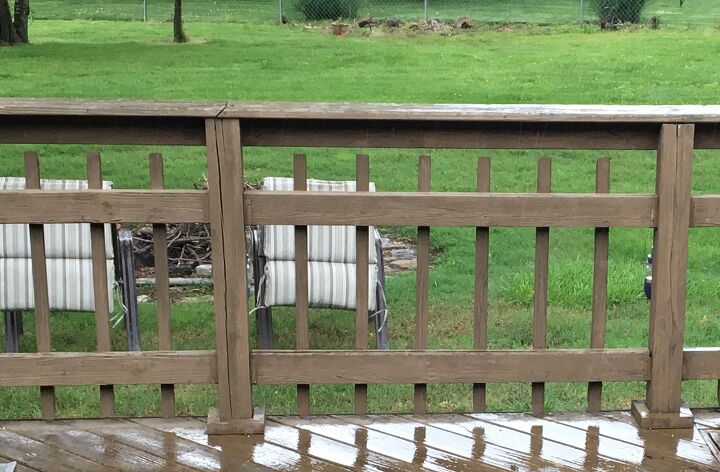
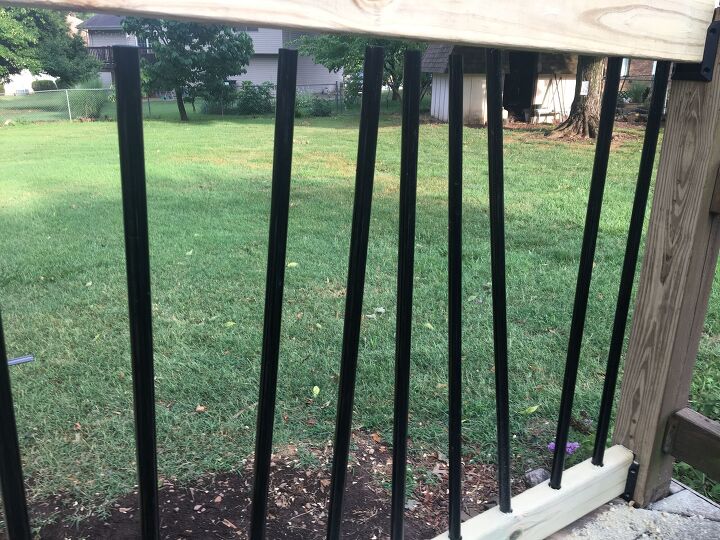
This was the railing around my deck. Top and bottom rail, plus 2x2 balusters (too far apart for code), with a drink rail and rail support. This particular view (especially while working from home) was why I put in the stairs last summer, but the whole thing obviously needs an update. I don't like the color or the look.
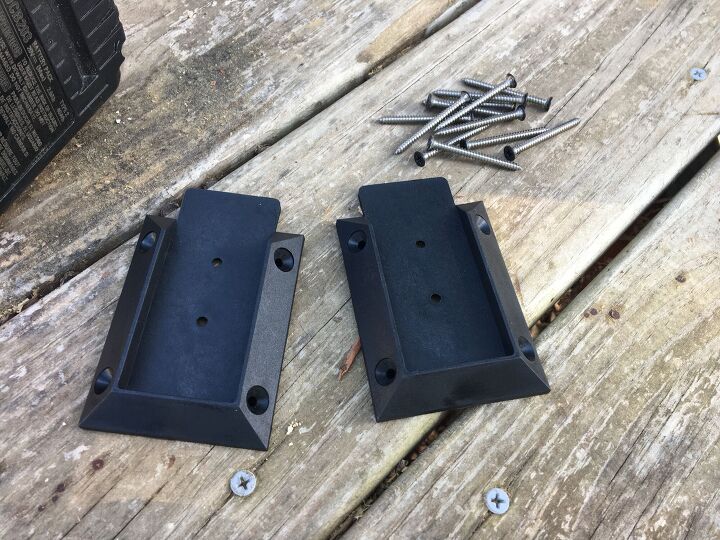
I got a handful of these brackets for hanging 2x4s from Amazon, they came with screws which turned out to be absolute junk. I went to Menard's and got some No. 8x2" stainless screws with square drive heads, thinking they would look nice, and the stainless would hold up. These brackets run about $2.50 each. There are cheaper brackets that won't hold up as well when you assemble them.
I prefer Myard to Kastforce which you see a lot of here, and avoid the Eapele brand. The Kingshanhai brackets are even better but much more $$. I may use them on my front deck where I'll only need 12 or so. The advantage to the plastic (vs metal) is being able to notch them easily for wires used on a custom lighting project I also added during this build.
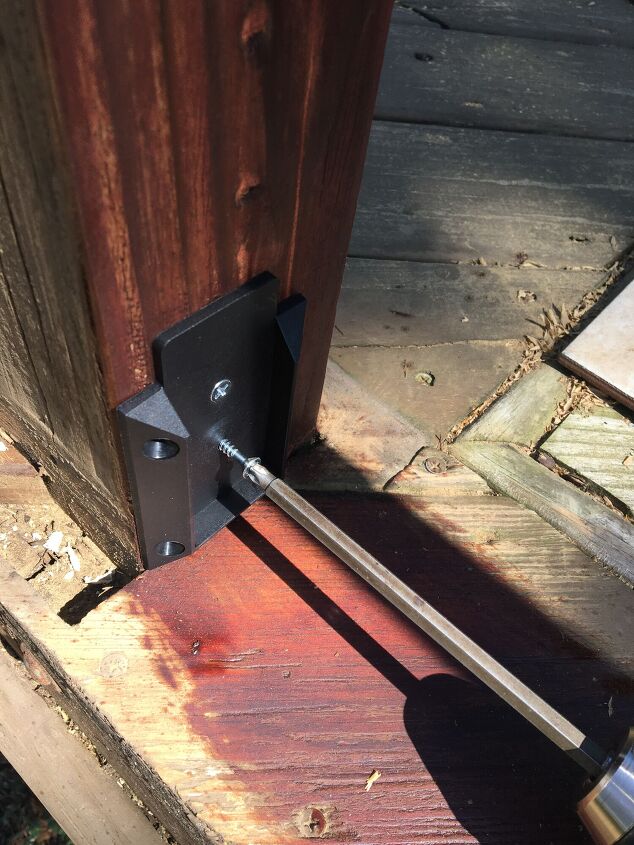
I stripped the old stain from the posts with a planer (faster than a sander) and attached the plastic 2x4 brackets TO THE POSTS - but just temporarily. Not what they're designed for, but this is what I needed for now. My posts are not square, nor plumb. This method made measuring for the new railings (rails? whatever) much easier. You can see I was trying different ideas with colors of stain as well. I used galvanized wood screws for this quick attachment (back in 2020) and they didn't hold up a single year, so I switched out to stainless as I finished up the project.
The lower railing is lower than some prefer, and it makes blowing leaves off the deck a bit more work - but when you see the custom lighting project I added to it, the results are worth the trade-off😎
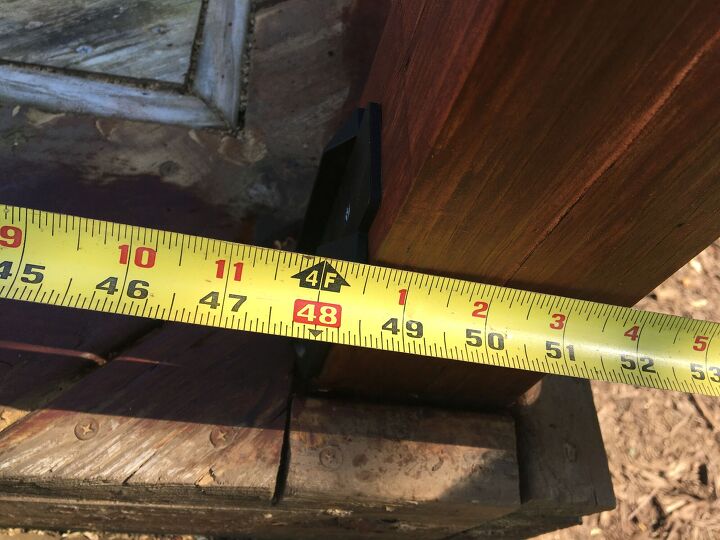
I measured for both inside and outside dimensions, and cut the longest of the two out of treated lumber. Because the posts had twisted and warped over the years (My neighbor said the deck was built around 1988) I had to sand or cut an angle at one or both ends of the 2x4s to make things fit
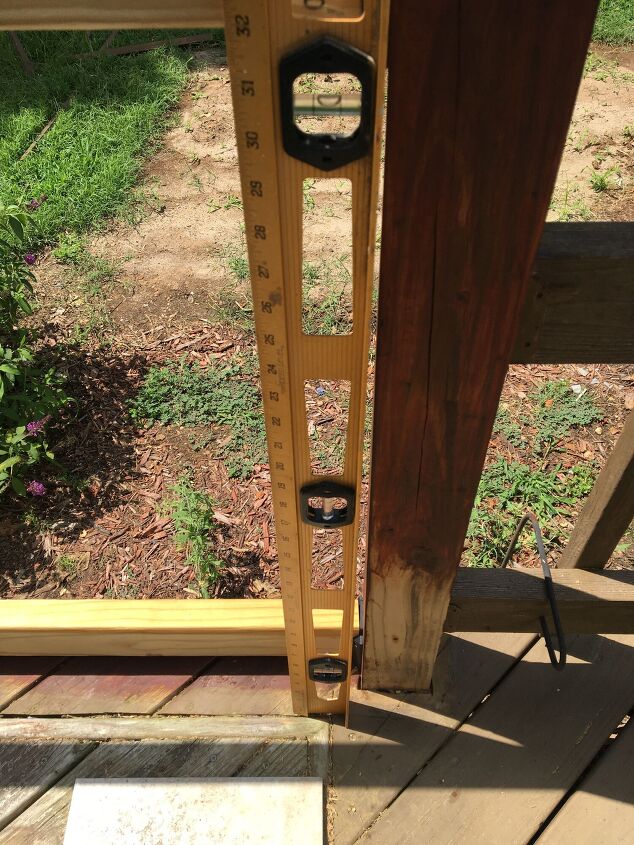
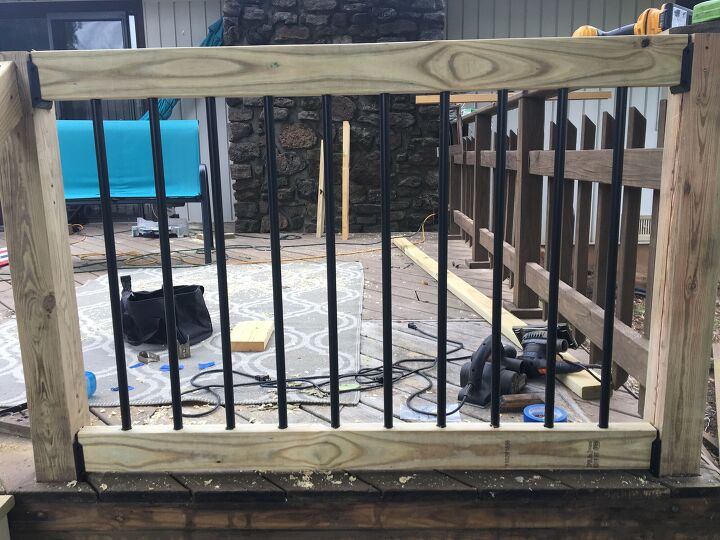
Here's an example of working with what you've got, and why we measure twice/cut once (or more as we made mistakes). This post was not plumb. The top rail was going to be shorter than the bottom. Note that the old railing was still in place on the right. I had to make the bottom railing 3/8" longer, and had to add 3/8" spacing at that end before I drilled the hole for the first baluster so it would be plumb/vertical.
I did this one section at a time for both cashflow and safety. BTW each section was easier than the previous as I gained experience! 😊
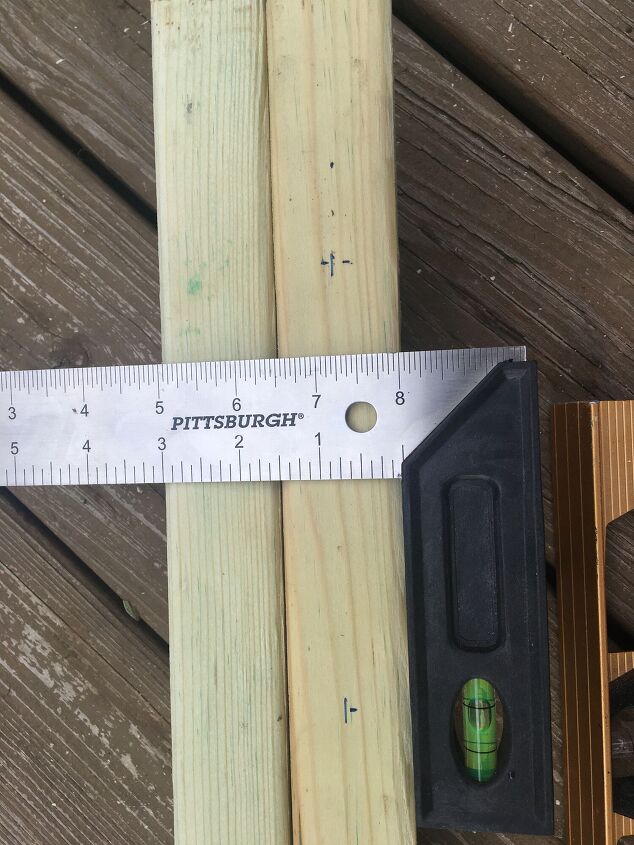
When it came time for spacing the balusters, varying sections were different, although most of them ended up on 4.5" centers. Typical building codes call for 4" maximum gap between balusters. With 4½" centers I used 3/4" balusters which took 3/8" off each side, and left 3 3/4" gap. Take time to do the math. I often visit a TV or appliance store and get a large box to draw things on before I cut. (Or I cheat and draw them in Autocad at work on my lunch break)
Here you can see me marking center lines on the 1.5" thick 2x4. If you have different lengths like mentioned in steps above, take your time to make sure you know which railing will be the longer of the two. (I scrapped a board or two) I'm labeling this project 'MEDIUM' only for the math - and patience 
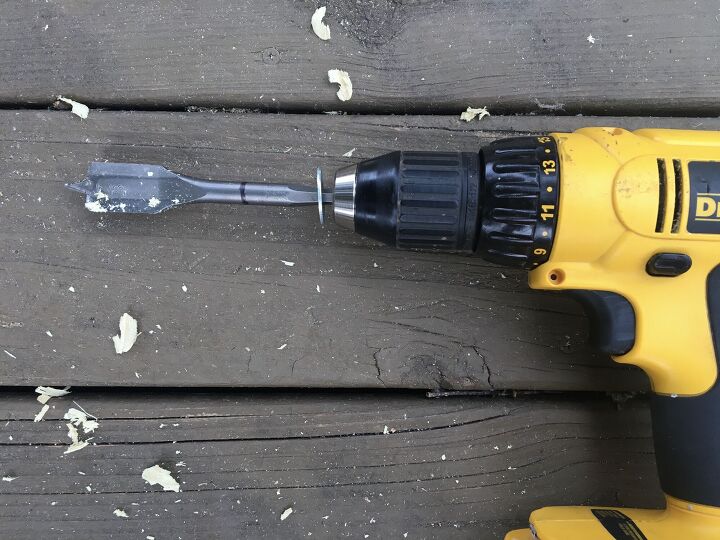
Same thing I did for my stairs, I used a 7/8" bit with a washer and a sharpie for a depth guide. I drilled 3" deep in each 2x4 which gave me some wiggle room for my balusters.
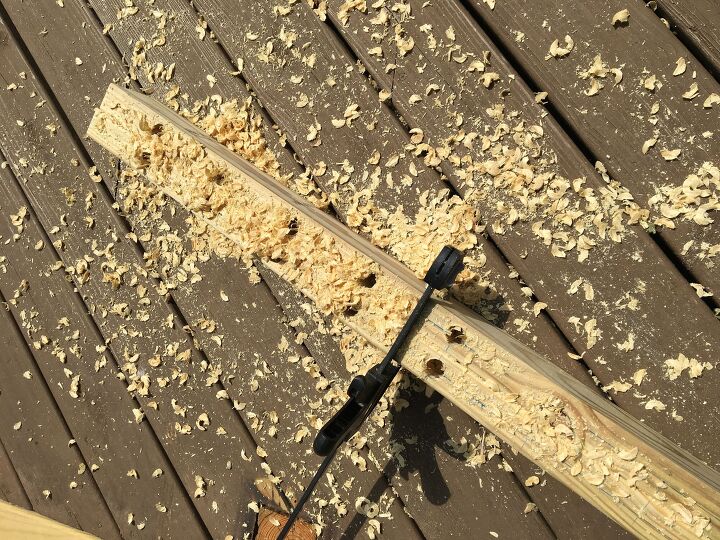
I kept my 2x4's clamped together as I drilled, and made lots and lots of sawdust. (Don't do this anywhere you have to sweep later if you can help it!) It also helps to mark top and bottom, North and South etc. on a piece of masking tape. Take time to keep your drill vertical/plumb!
I know there are several connector kits out there, but I didn't want to use more plastic pieces that I had already committed to. I had recently helped a friend update his deck, and after seeing the quality, and knowing what he had spent on plastic / injected wood composites, I just couldn't see it. This is my personal preference, nothing more. This way I get a few knotholes and woodgrain too. I really enjoy a more natural look when I can get it, probably comes from my guitar making days.

I sanded off rough spots, and mill labels etc.
Drop in your bottom 2x4 and insert your balusters. I got some from Home Depot which had a matte finish, and some from Menards which were glossy. I prefer the HD. (5-pack was $18)
Starting at one end (here I started on the right), lower the top 2x4 into a bracket and slowly guide your balusters into the holes one at a time until you have them all in place.
Now is the time to look for mistakes, check for spacing, plumb etc. On a couple of rails I went to a slightly (1/4" smaller spacing) so there would be more room on the ends, so the last baluster wasn't so close to a post. If you buy a kit at the big box stores with the pre-marked rails this won't be such an easy option. Because I had different widths between my posts (43", 44", 48"), simple adjustments or adding a baluster made customizing a must. Here you can see I missed a couple of mill markings on the lower railing. If it all looks good - take it apart and stain it. Keep them separate so you know where to replace them.
While it was apart I stained under the lower railings. The whole deck will get stained this fall. I know some of you naysayers were ready to comment
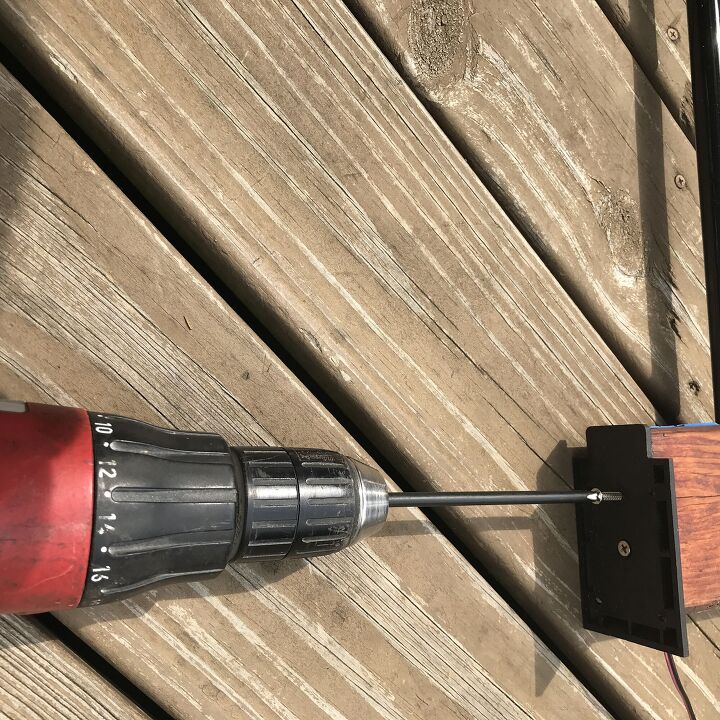
While your stain is drying, take the brackets off the posts. When it's time, move them to the railings (as they were originally designed for). Attach with two No 8x1 stainless wood screws. Here you can barely see a blue tag telling me where this railing was before I removed it. I had stained it previously while working on another project and had some free dime. Comes in handy so you don't have to figure out where it fits a 2nd time
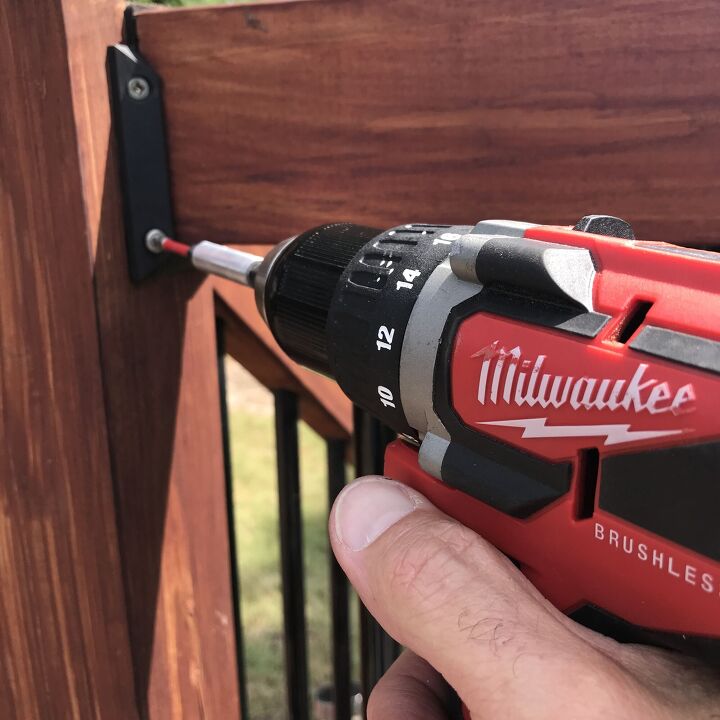
Assemble the railings bottom to top just like I did in the last few steps, and this time secure the plastic brackets to the posts. Note that I moved them all the way to the outer edge of the posts. Just getting that extra inch of room on my deck.
Here you can see I'm using a SQ2 drive on the No. 8x2 stainless screws. These screws were a disappointment. I ended up using a No 8x1 stainless flathead Philips from Westlake hardware. The square drive did not hold up like I thought it would when I would make a mistake and have to remove and adjust. The screws got so beat up taking them out and getting put back in I had to pitch them. Oh well.

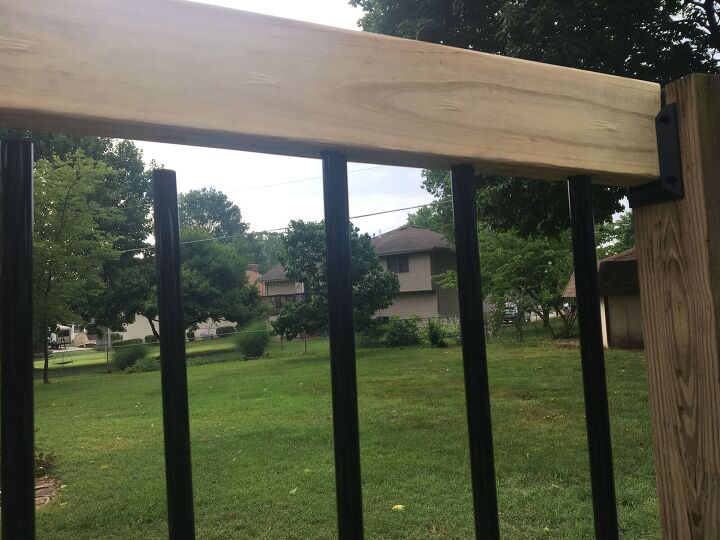
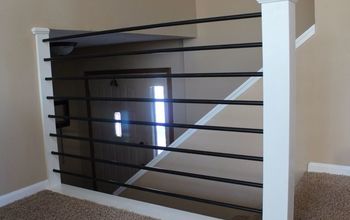
Here are the finished railings. I need to fill the posts before I cap them. At the time of this posting, I was unsure about a drink rail. There was another project in the works the whole time I did this one, actually a 'prequel' if you will, and some of you might enjoy the look. Click on the link above.
(Again, don't worry about the floor getting stained, I'll get there!)
Actual cost was about $60 rounding up a bit per 4' section, and I did nine sections total. That includes screws, stain, and maybe a mistake or two in the lumber dept. The 45 min time estimate is for each 4' section as well. It would be unreasonable to try and break down cost for a 330 sq ft deck considering I took out 12' last summer for the wide stair and another 4' for the future hot tub stairs, and each deck is different.
If you have ideas to make it easier/better for the next person please comment below.
Stay tuned for the next update, and happy Hometalking!
Resources for this project:
See all materials


Comments
Join the conversation
-
Great job. The railings look amazing. Lots of great tips and recommendations. great share.


Frequently asked questions
Have a question about this project?