


A Little Treasure Box

by
RDO
1 Material
2 Hours
Easy
How to Give a Piece of Firewood A New Life As Something Useful
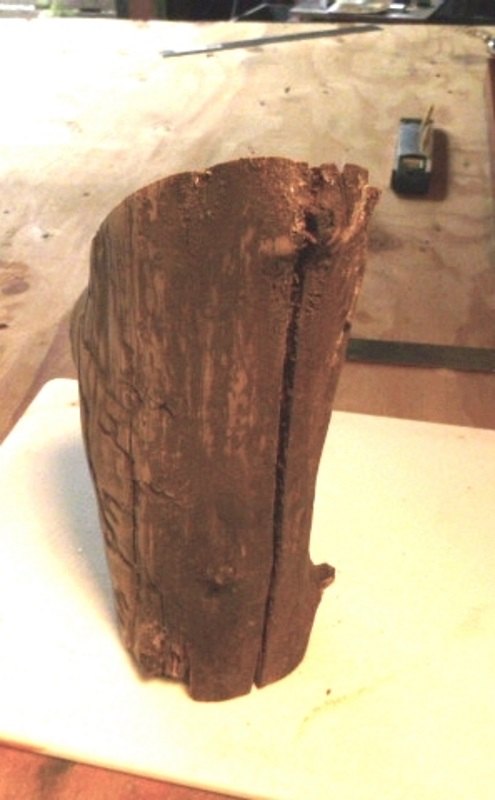
It seems I save more firewood for carving than I do for heating my shop. In this case it's a piece of gnarly, cracked and split incense cedar.
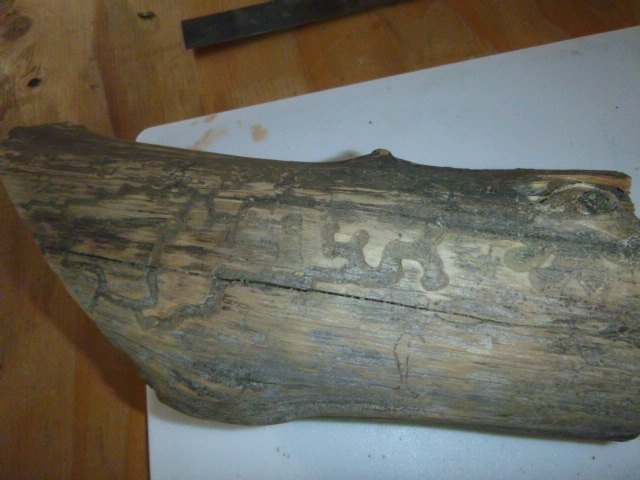
Upon examination of this sorry looking chunk of wood I noticed Mother Nature put some insidious Bark Beetles to work carving a few tracks into the piece. OK, lets put the tracks to use giving this tree branch some character.
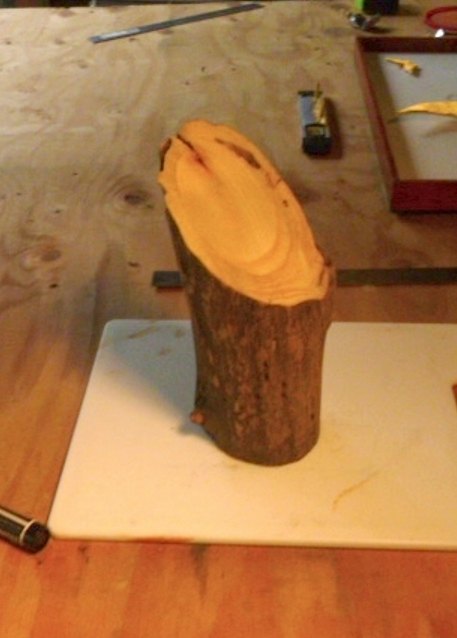
The first thing I did was to cut what was to be the top of this piece at a 45 degree angle to expose some very pretty grain. At this point I still had no idea what I was going to do with said gnarly chunk of wood.
Since it was leaning like the Tower of Pisa, I cut off about 3/8th inch of the bottom to level it up. While cutting I noticed the band saw hit a hard spot. After completing the cut, I discovered the problem. Seems I cut through a bullet embedded in the branch. Now I really started to feel sorry for this poor beat up piece of wood. Not only was it cracked, split and beat up, but someone SHOT IT! That's gotta hurt!
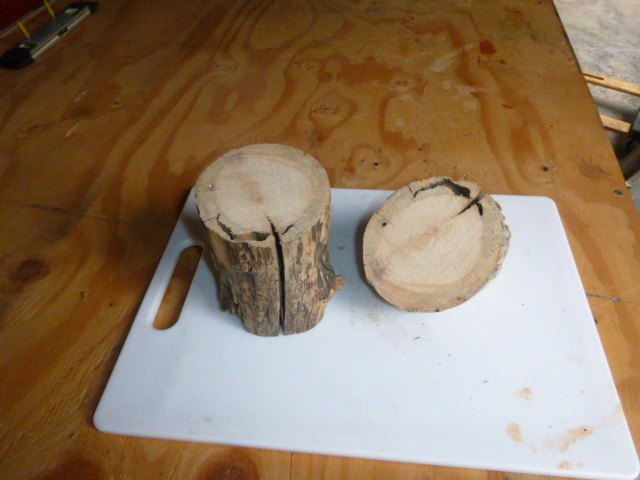
At this point I finally figured out what to do with my wounded little friend. Let's transform our ugly buddy into a Little Treasure Box. That being decided, I then eyeballed another cut about 5” down from the peak of the 45 degree cut. This was to be the top of the box.
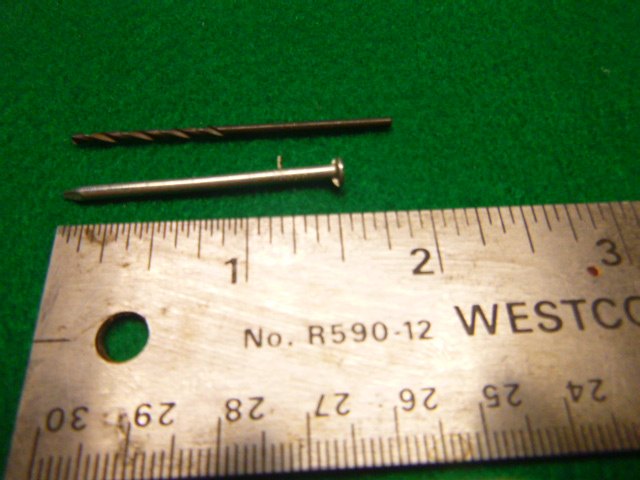
Now I needed to come up with a way to hinge the top to the body of the box. The only thing I could come up with was to make a “Swing Hinge”. I scrounged through my collection of nails and found a couple 1 ½” finish nails that were 2mm wide. I took one nail and cut about 3/8th inch off the tip. This was to be used as a marker point for the top and bottom of the box. For the actual hinge, I cut off the head of the second nail and set it aside.
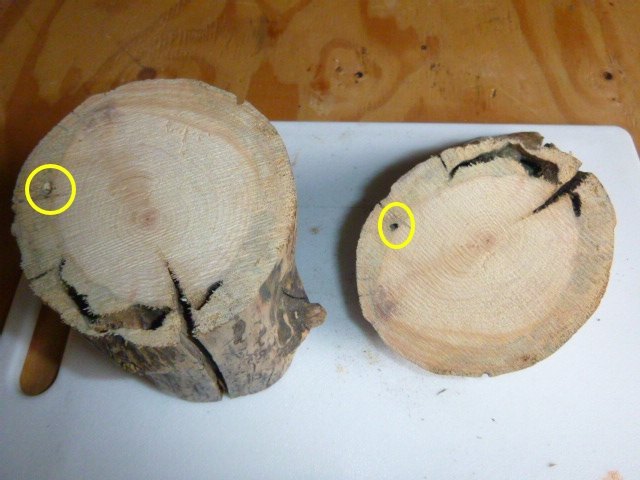
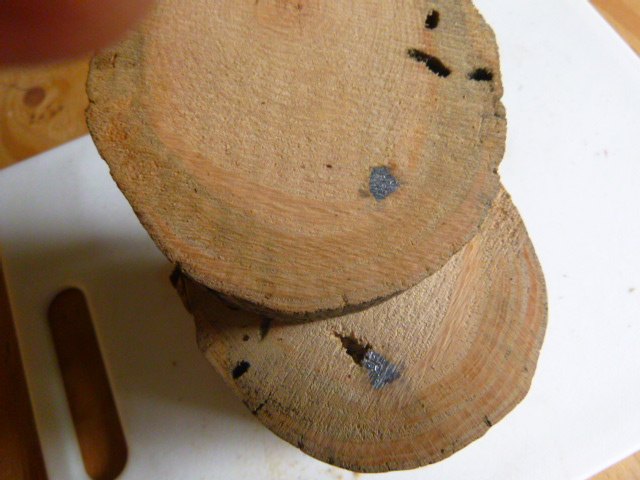
Taking the marker nail and with a tack hammer, I tapped the marker nail into the base of the box near its outer edge leaving about 1/8 inch sticking up. Taking the top piece of the box, I aligned the top with the bottom being very careful to match the top grain with the bottom grain. Then I forcefully pressed the top down on the exposed nail to create the mark to be drilled. After making the drill marks, I removed the cut nail from the bottom of the piece. Next using my smallest drill bit, which is about 1.2mm in diameter, I drilled down about ¾” into each of the 2 marker points. It's important the drill is smaller in diameter than the nail!
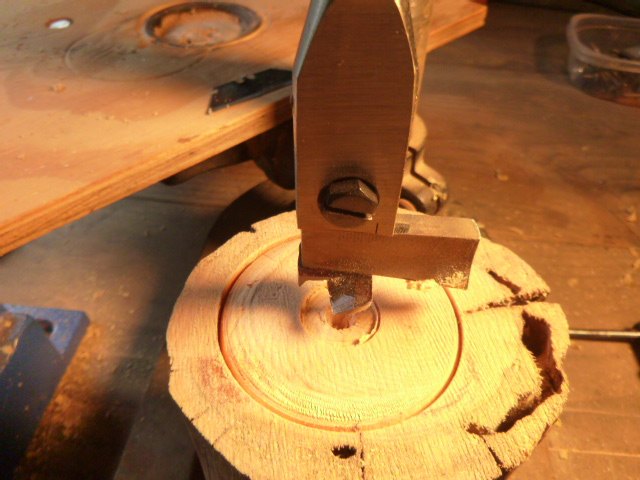
With that done, I used an “adjustable boring bit” set for a width of 2 1/2”, I drilled down 3” to make the “box”. Do not use a drill press! Even at its slowest speed, you run the risk of “burning” the bit. Bore the hole with either a carpenter's brace or a variable electric drill. Take your time... going slowly is a good thing here. ( Adjustable bits are available on Ebay for about $12.00 )
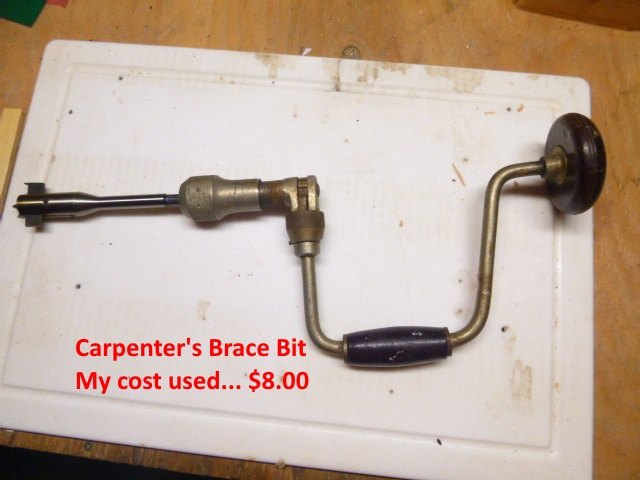
Carpenter's Brace Bit...
After a very light sanding, I used some old deck stain and MinWax Polycrilic to dress up my little friend. After the stain and poly dried, I lined the inside of the box and its bottom with green felt.
Now all that was left was to attach the top with the bottom. Taking the headless second finish nail, I very lightly coated it with JB Weld epoxy and using the tack hammer, tapped the nail about 3/4” into the hole previously drilled into the bottom piece of the box. Then taking the top, I lined up the drilled hole in the top with the protruding nail, and very slowly pushed it down by hand to mate with the bottom. This step can take a bit force.
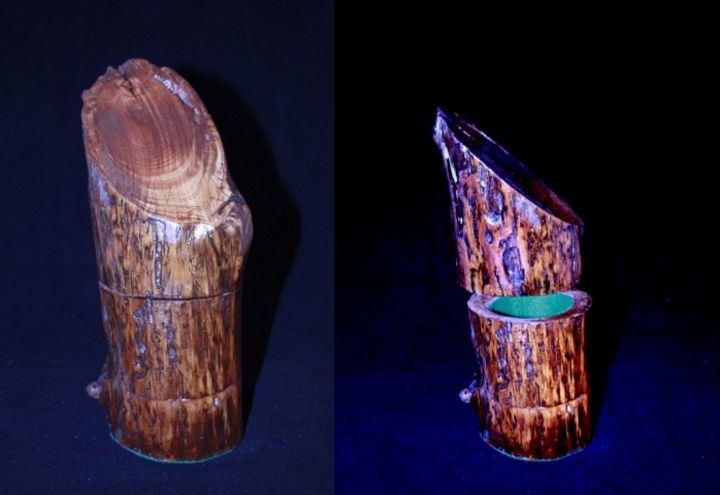
After showing the nail who's boss, the Little Treasure Box is finished!
To open the box, simply twist the top either to the right or left.
Instead of being used to create a few BTUs and turned into ash, my little buddy was given away as a Christmas gift, and is enjoying life and a new found purpose holding in safe keeping the little treasures of one of my neighbors.
All told, my total cost was $0.00 and only about 1 1/2 hours of my time, not including drying time for the stain & poly. Small price to pay to put a smile on someone's face. 
Comments
Join the conversation
3 of 8 comments
-
Good Morning Kay... Mucho Thanx !
-
Love this!!! Wayyy cool!


Frequently asked questions
Have a question about this project?