


An Update for Dasher and Christmas Centerpiece
Create an evergreen centerpiece for Christmas and provide a quick update with paint!

I’ve had this reindeer sleigh, Dasher, for several years. He was a gift that I *deerly* love using at Christmas as a centerpiece filled with greenery and / or ornaments. You can see him at a Merry and Bright Plaid Table, HERE.
I decided he could use a makeover to warm him up and blend with the wood tones of the room and marry the rusty sleigh bells on the garland and wreath I’m using this year.
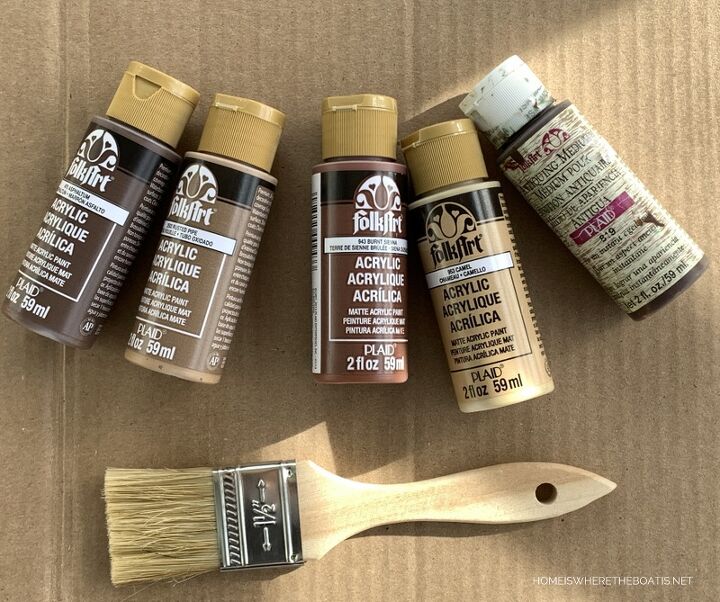
I picked some acrylic paint from the craft store in assorted shades of brown. I used 4 shades of FolkArt Matte Acrylic Paint and some antiquing medium I already had. The 2 oz. bottles of paint run around $1.69 each, but the day I stopped in Michaels to buy the paint, the bottles were on sale for 57 cents each! Tip: Download Michaels mobile app to your smartphone to access their weekly coupons when you shop.
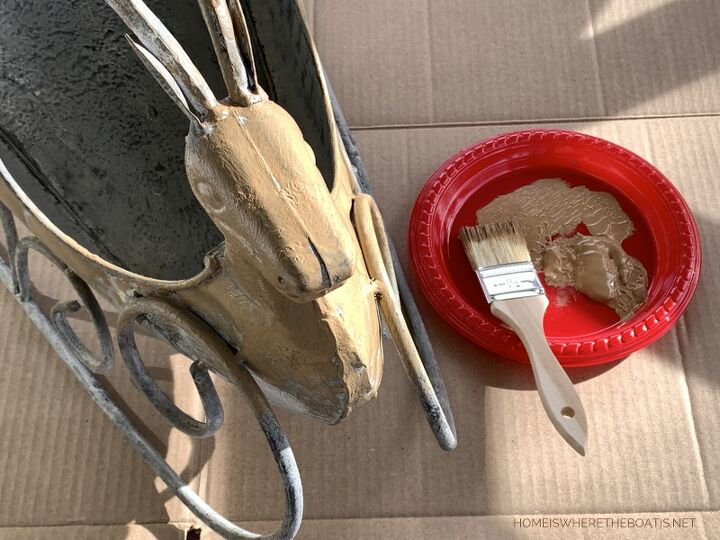
Dasher had a matte finish so I didn’t have to do any surface prep before painting, but if your item has a glossy or shiny finish, you would want to sand it first so the paint will adhere.
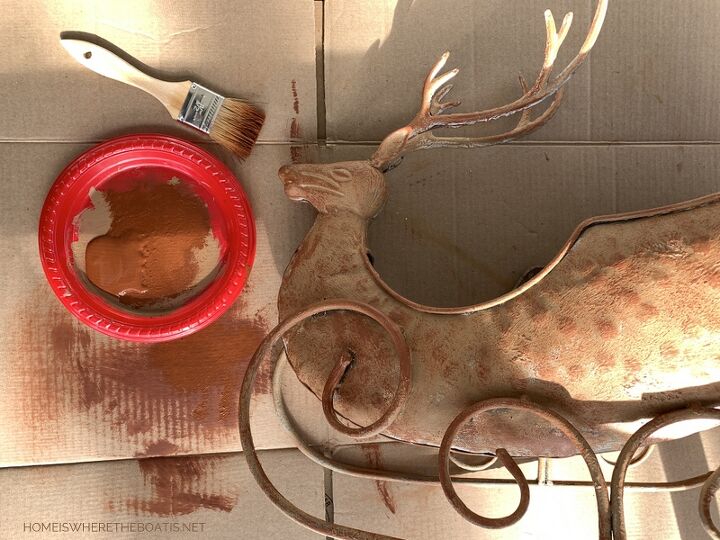
The matte paint dries quickly, ready to recoat in an hour. After an initial first coat of paint, I used a dry brush technique to layer the other brown shades and cover the original gray tones and finish.

If you’re not familiar with ‘dry brushing’, it’s a paint technique using an almost dry brush to apply paint:
Dip the ends of your brush in the paint, then blot your brush on a some paper towels or newspaper (I used a piece of cardboard), wiping most of the paint off, before lightly dragging your brush over the surface. Experiment your dry brushing technique on a scrap piece of wood or on an inconspicuous spot before beginning.
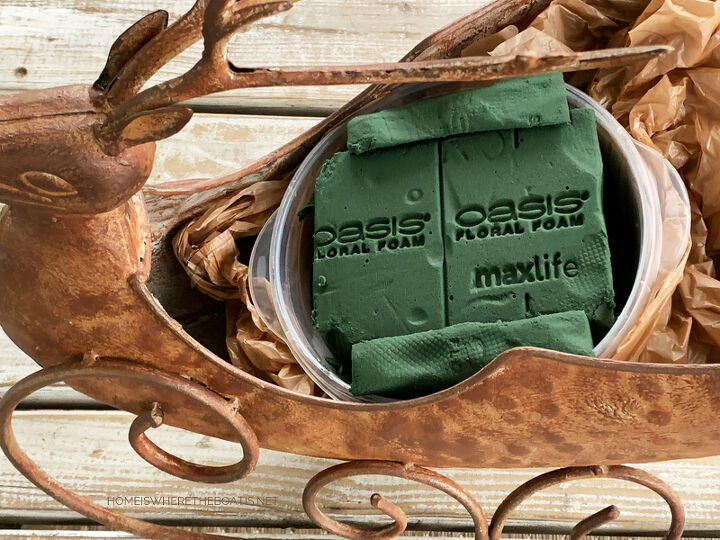
After Dasher was dry, I filled a plastic container I had with wet floral foam to place inside the body of the sleigh. Plastic bags from the grocery store help keep the container in place and provide some protection from any water spilling.

Wet floral foam is available at the craft store with the floral supplies. It can be trimmed easily with a knife to the size you need.
Tip: When using wet floral foam, use the “float soak” method and place the floral foam brick on top of the water. Let the floral foam gradually absorb the water until it’s fully saturated. Plunging the floral foam in the water traps air bubbles and will prohibit the transfer of water from the foam to the flower stems.

Dasher is filled with a mixture of evergreens clipped from the shrubs and trees. . . cypress, juniper, boxwood, magnolia leaves. . . along with a bit of red plaid ribbon, red ornaments and pine cones. Nandina berries cut from the shrubs provide an additional pop of seasonal red.

Here is Dasher his makeover and greenery for Christmas. More photos of the wreath and garland at the blog link below.
Merry Christmas and Happy Holidays!
Resources for this project:
See all materials


Comments
Join the conversation
-
I love how you explained your technique for the paint and foam so clearly. It made The Who project less intimidating! It looks great.
-
Lovely and truly worth the effort.
Annie


Frequently asked questions
Have a question about this project?
Just wondering where you got your bichon frise dogs from.
they are adorable .
could you tell me the breeder ?
thanks