


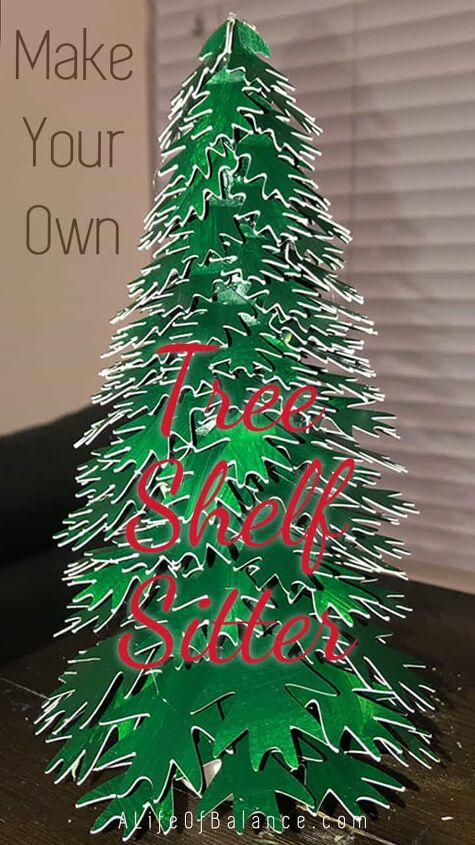
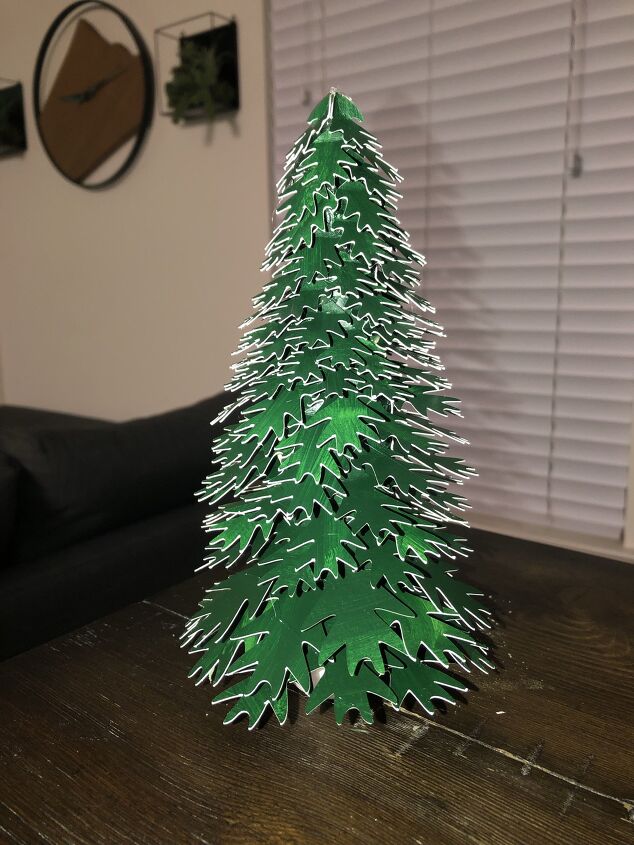
Christmas Tree Shelf Sitter From Old Furniture Leg
Welcome to an interesting challenge hosted by Kippi from Kippi at Home. While I love crafting for the fall season and holidays, I’m in the mode to start thinking about and crafting for Christmas. If you’re like me, this is your lucky day! I’m sharing my Christmas tree shelf sitter today, you can also see my gnome ornament here and get the links to several other talented bloggers’ Christmas crafts for this challenge.
Here’s how this challenge worked. Kippi sent each of the bloggers participating a few of the leftover chair legs she had laying around from her upholstery days. She challenged us with coming up with a way to use these as a part of our Christmas décor! Here’s what the legs looked like when I received them.

I’m always up for a good crafting challenge so I jumped on this quickly. I decided to make 3 shelf sitters to use in my décor: a Christmas tree, a gnome, and a nutcracker. As you’ll soon learn, I only got 2 of them done. The nutcracker turned out to be a little more challenging than I expected. When I get it completed, I’ll write another post about it. The gnome ornament can be found here.
Wooden Furniture Leg
Green Scrapbook Paper
Glue Gun
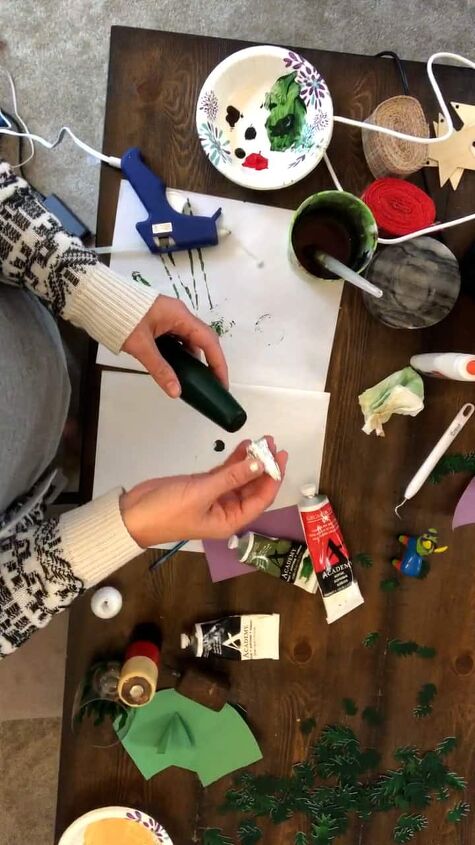
Paint the furniture leg green. I didn’t think that the furniture leg came to enough of a point at the top so I, formed a “top” for the tree out of tin foil. Attach with your glue gun and paint it green also. This step is optional and you could use a lot of different materials to create the topper.
Step 2 – Cut out tree leaves
Cut out tree leaves in a variety of sizes (get the file here) from green scrapbook paper. I used a Cricut Explore Air 2 to cut my leaves out but you could easily cut them out by hand. As you can see from the video, mine wasn’t quite so straight forward. I didn’t have enough green paper so I had to paint some art paper to use for my leaves. This meant that my leaves got an awesome variegated look but it also meant that they had white edges. I started to paint to edges of each leaf (a lot of work) but my husband pointed out that it just looked like snow on them so I decided to keep them as they were.
Glue the leaves on the tree. Start with the largest leaves on the bottom. Then put the medium sized leaves in the middle and the smallest leaves on the top. Connect 3 small leaves together to create a top for your tree.
Step 4 – Create a Base
Cut one side of a Styrofoam ball so it will stand straight to use it for the base for the tree. Paint the Styrofoam ball – I used a dark brown. Put the screw from the furniture leg into the Styrofoam ball and sit on your shelf.
Now you have a cute Christmas tree shelf sitter to use in your holiday decorating.


Frequently asked questions
Have a question about this project?