


Cricut Crafts for Christmas: Custom Wood Trees
Looking for easy Cricut crafts just in time for Christmas? With one piece of wood and your Cricut machine you can create an inexpensive custom home decor piece that anyone would treasure!
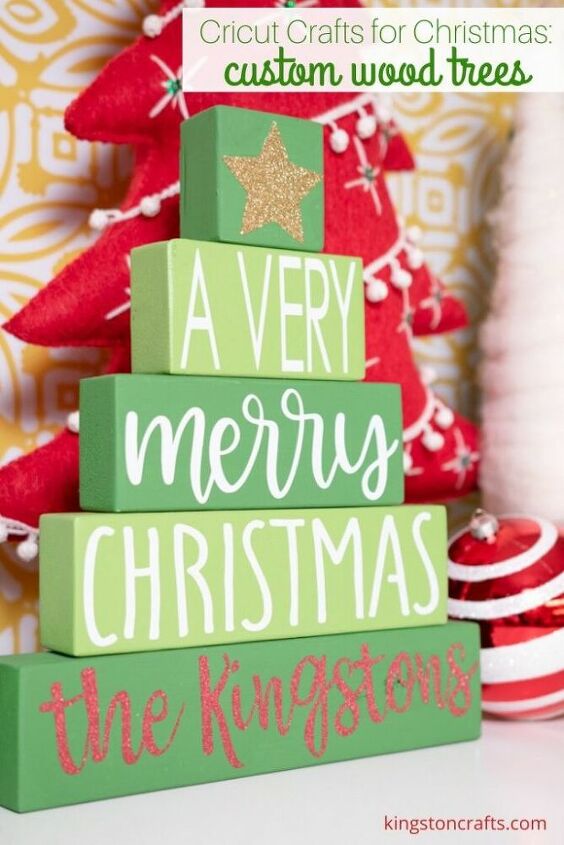
I love to make personalized hostess gifts during the holidays – but you and I both know time becomes an issue and by the time Christmas rolls around I’ve resorted to store bought candles and tins of popcorn. Not this year! These personalized wood Christmas trees can be done in batches, then you can add a name in just a few minutes and be the most thoughtful guest at any party this year!
Here are the supplies you will need:
- 2×3 board
- handsaw or miter saw
- Cricut machine – I used a Maker but this could also be done with an Explore Air
- Cricut Strong Grip Mat
- Cricut Glitter Iron-On in gold and red
- Cricut Everyday Iron-On in white
- Cricut EasyPress Mini
- Cricut EasyPress Mat
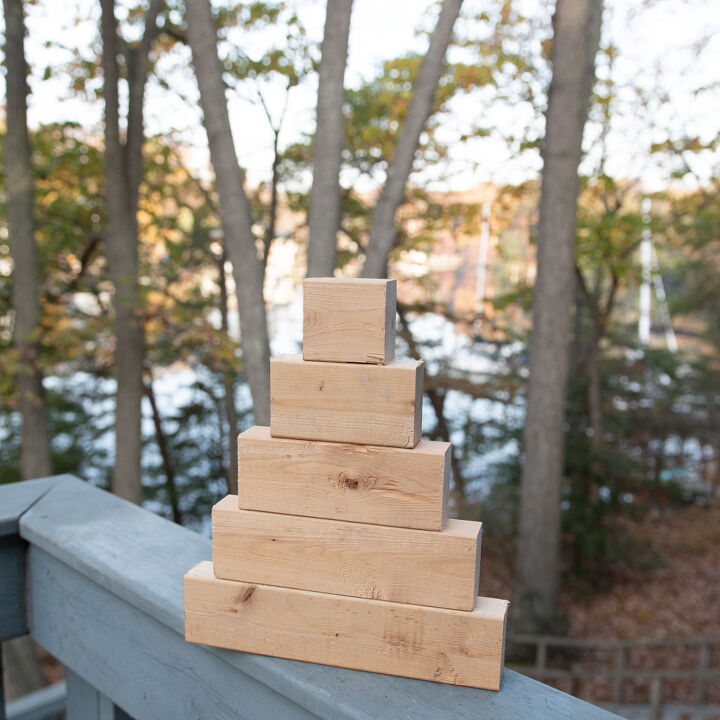
Step 1: Cut board In to five pieces – 2.5”, 4.5”, 6.5”, 8.5” and 10.5”. Sand the edges if needed and use spray paint to cover.
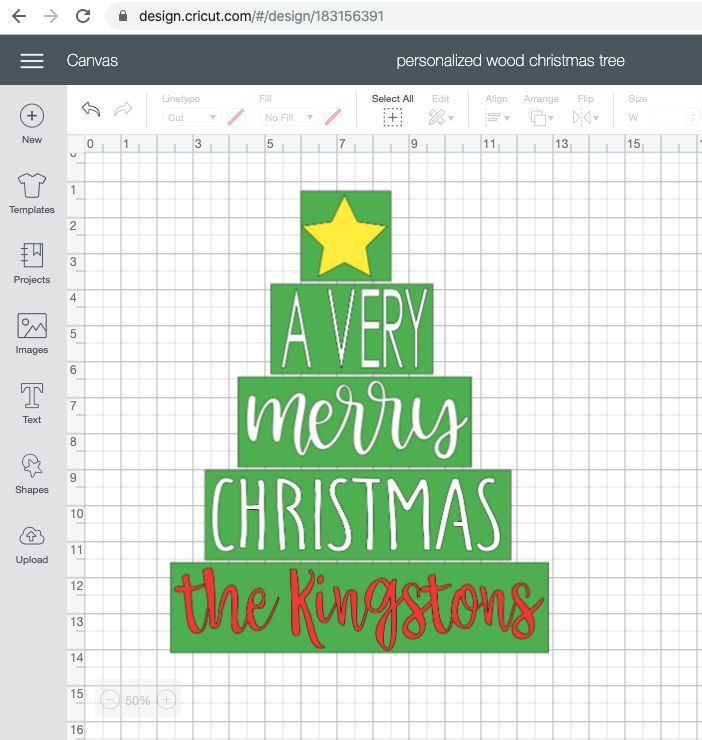
Step 2: I’ve saved this file in Cricut Design Space so you just need to change the name to create your own! I created the green rectangles as a canvas so be sure to hide them before cutting.
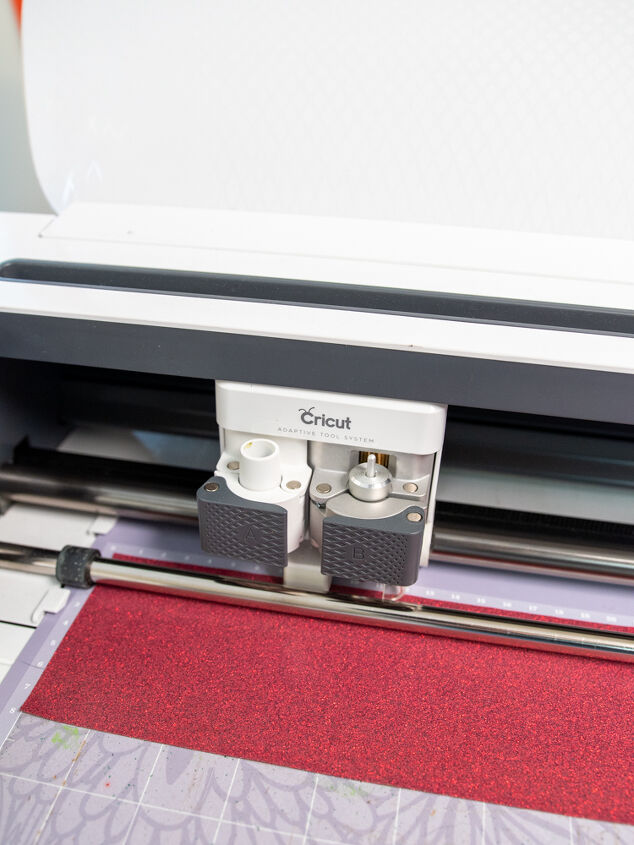
Step 3. Cut each image/phrase on Cricut machine – don’t forget to mirror your mat and put your material shiny side down!
Star – gold glitter iron-on
A Very Merry Christmas – white everyday iron-on
Family name – red glitter iron-on
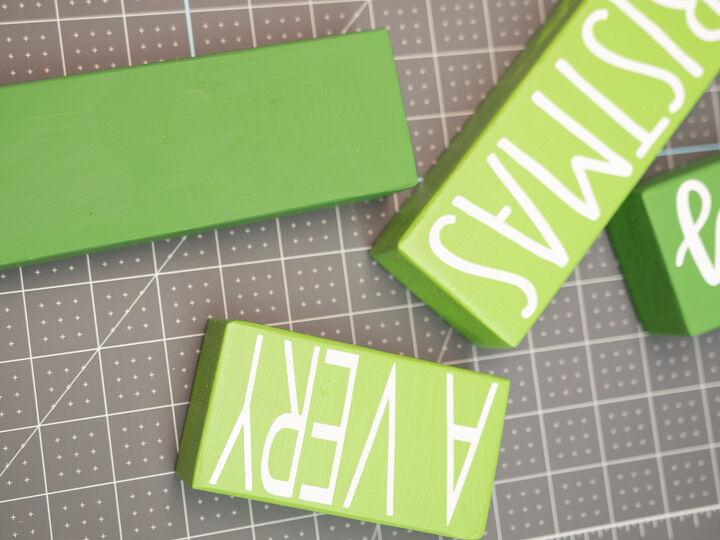
Step 4. Cut the white iron-on phrases in to strips before applying to wood blocks.
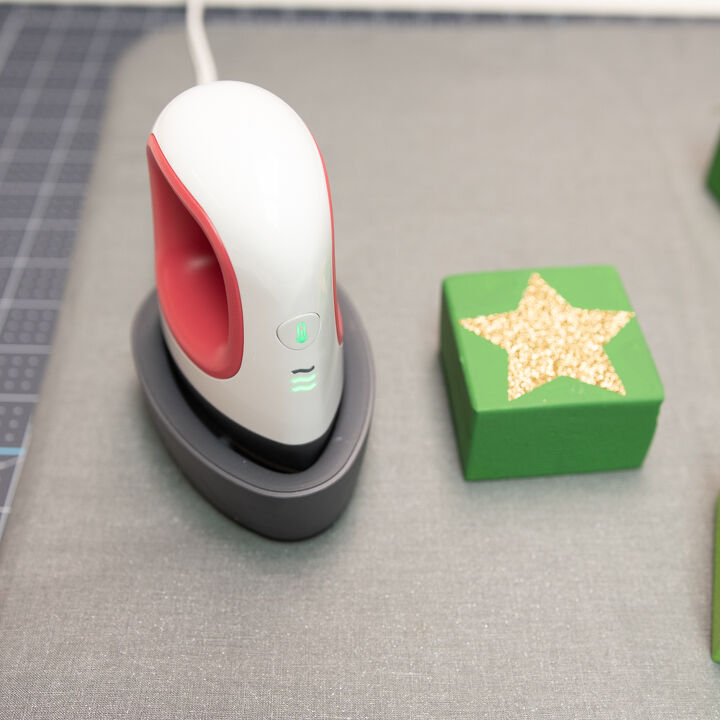
Step 5. Use the Cricut Heat Guide to determine the correct heat/time (in this case it was the medium setting) and apply images/phrases to blocks. You can use any size EasyPress but I love using the EasyPress Mini for intricate projects like this because I can use the pointed edge to make sure every little piece gets heated. It is also super helpful when working with wood because the surface isn’t uniformly flat so if I used a larger EasyPress the heat might not be distributed evenly.
Finally, once you are done adding your images, stack your blocks and enjoy!
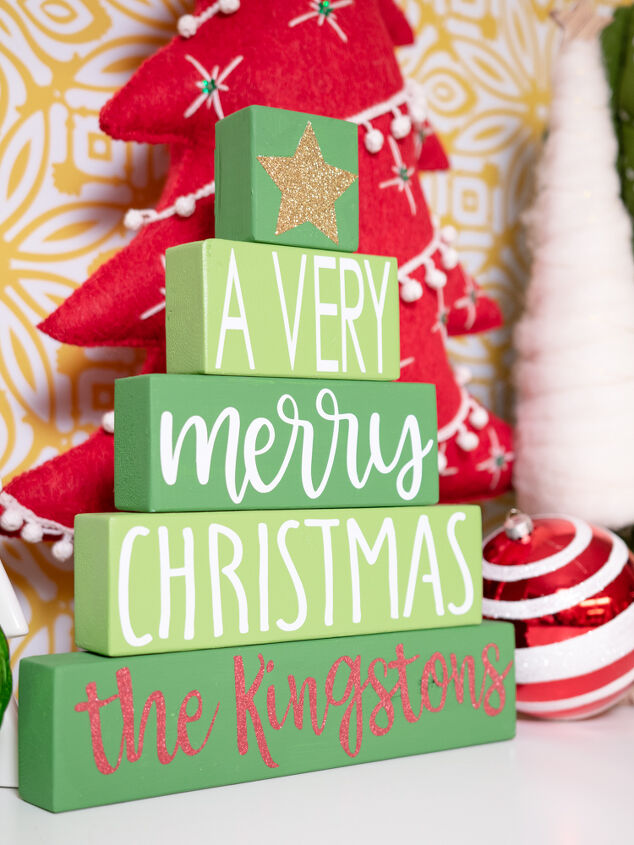
And voila! With just some paint and vinyl, you can easily transform any wood block into a personalized gift!
To get more project inspiration for your home and to learn more about the products used in this project, stop by my blog!
Resources for this project:
See all materials


Frequently asked questions
Have a question about this project?