


DIY Dried Orange Slice Garland
Have you seen the dried oranges popping up on all your social media feeds this year? Do you wonder how they did that? I decided to try it out this year as I am a fan of the way they look. I will show you a simple version and then give you a few ideas of how to spruce yours up and different ways I plan to use them.
This project is not very difficult it just takes a little bit of time and is really two separate projects. I’ll be breaking it down into two parts.
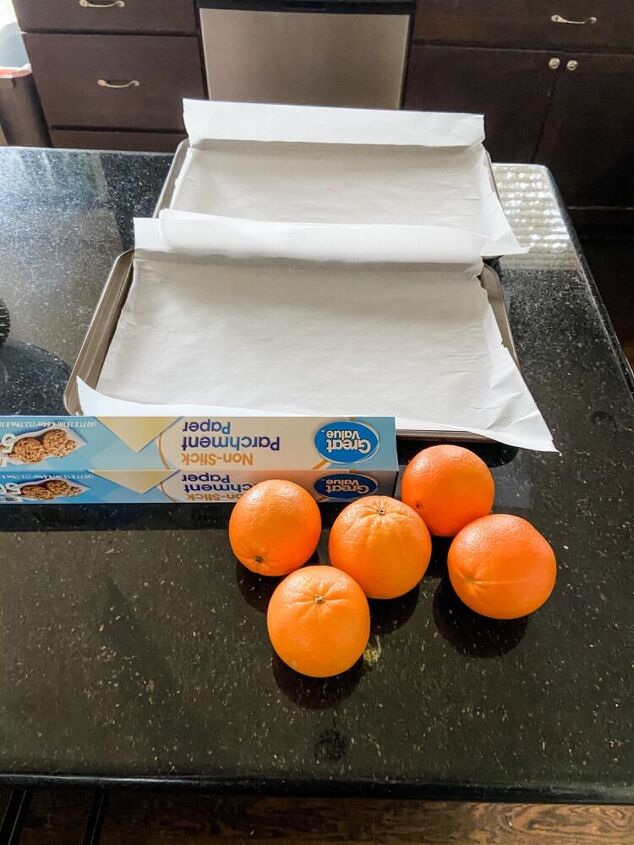
Materials for part 1 drying the oranges:
*parchment paper
*cookie trays
*5-6 oranges
*roll of paper towels
Preheat your oven to 200°F and line each cookie sheet with parchment paper. I used 2 cookie sheets.
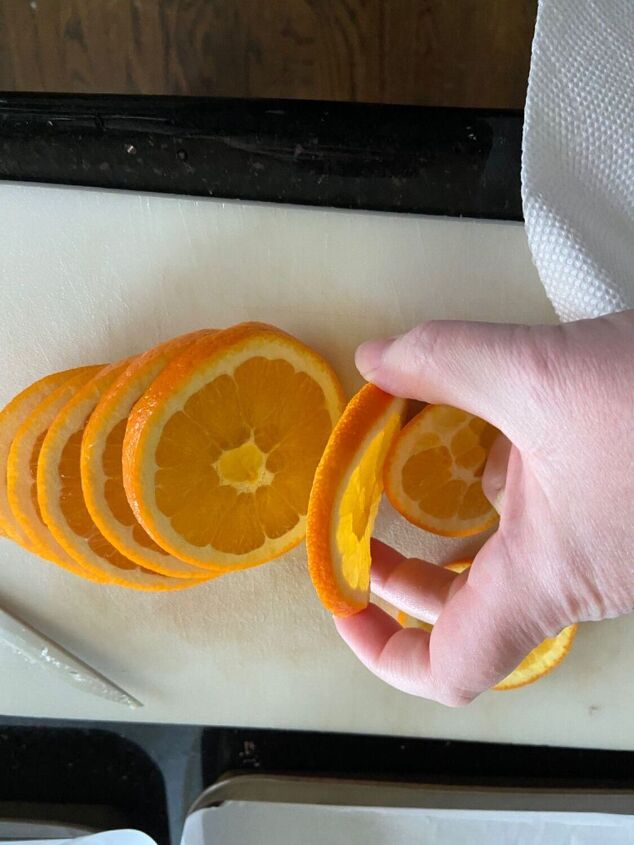
Next slice your oranges about 1/4 inch thick. Depending on how thick or thin you slice the orange will determine how many round slices you will get from each orange.
Then place each slice on a paper towel (I doubled my paper towels), fold the towel over the top of the orange slice and press to remove some of the juices. This will help speed up the drying process.
**If you have a dehydrator follow the direction for your machine.
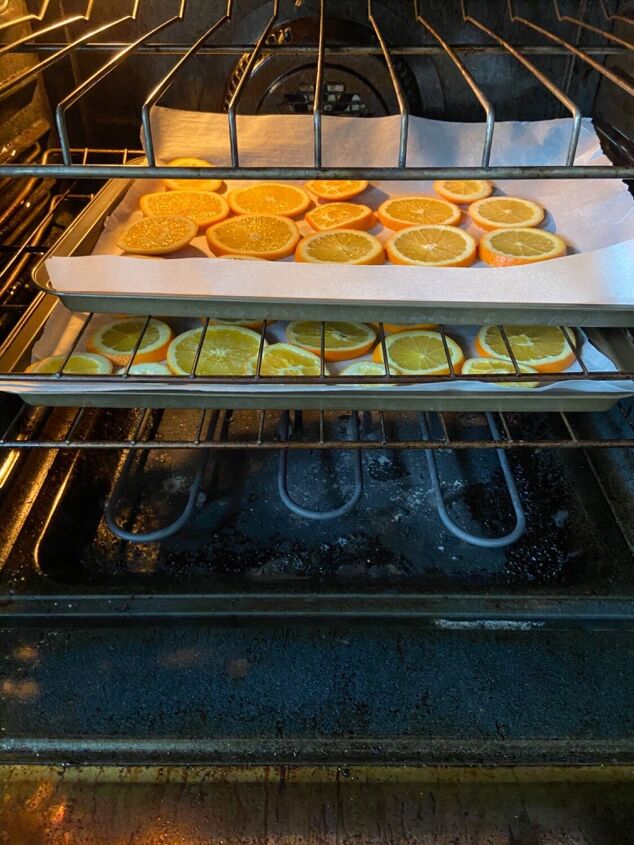
If you do not have a dehydrator, place the orange rounds on the parchment paper, then place them in the oven and set a timer for 2- 2 1/2 hours.
When the timer rings, flip the oranges over and then trade the trays so the one that was in the bottom is now on the top and vice versa.
Time them again for 2- 2 1/2 hours. Keep an eye on them as they can burn.
**Remember- each over is slightly different and baking times may vary. However, if you turn up the heat over 250°F your oranges will burn more quickly.
Let the oranges cool for several hours before moving on to the second part.
Part 2, making the garland.
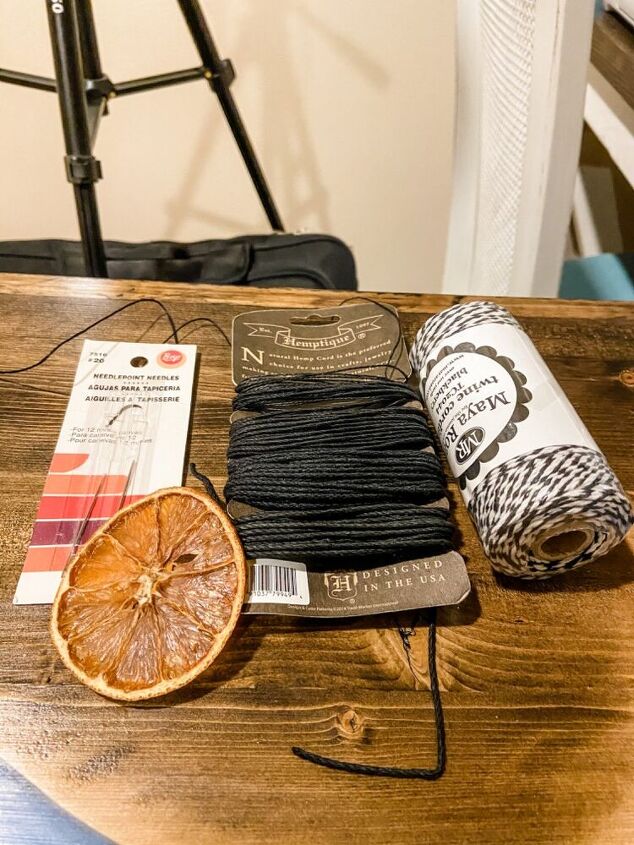
Materials you’ll need:
* #20 needle point needle (or some other object to poke a hole in the dried oranges)
* jute, twine, cording, ribbon (what’s ever cording you’d like to string your oranges onto)
* dried oranges
This part goes very quickly compared to the drying time.
First, you’ll want to unwind the amount of twine you will be using in your space. If it’s your mantle, go measure out your mantle and allow for a 5” tail on each end.
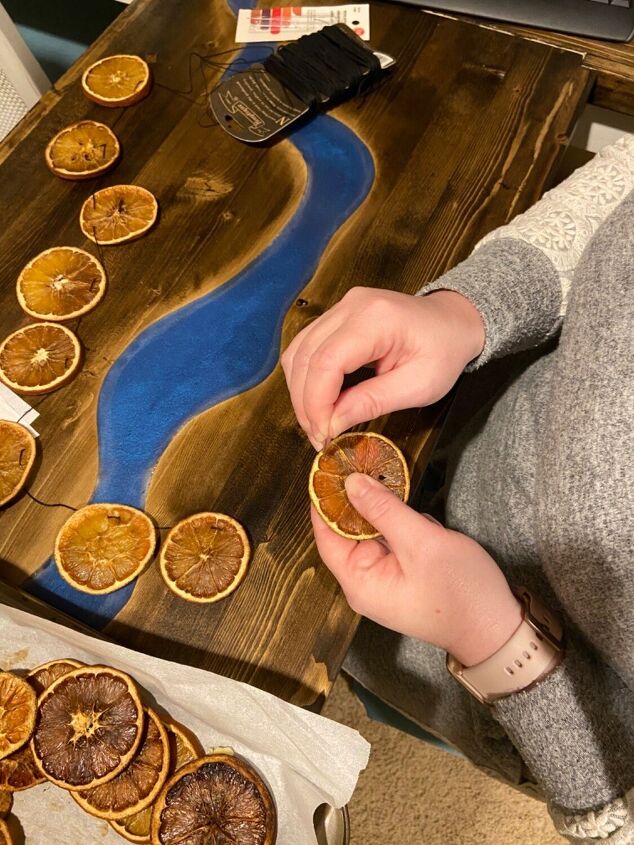
Next, taking the needlepoint needle, poke a hole through the dried flesh of one segment and another hole on the segment next to it. This will keep your string, twine or cording from cutting through the orange flesh and the orange falling off.
** you can also poke a single hole and thread the oranges through. They will be more side facing than front facing. It all depends on what look you are going for. **
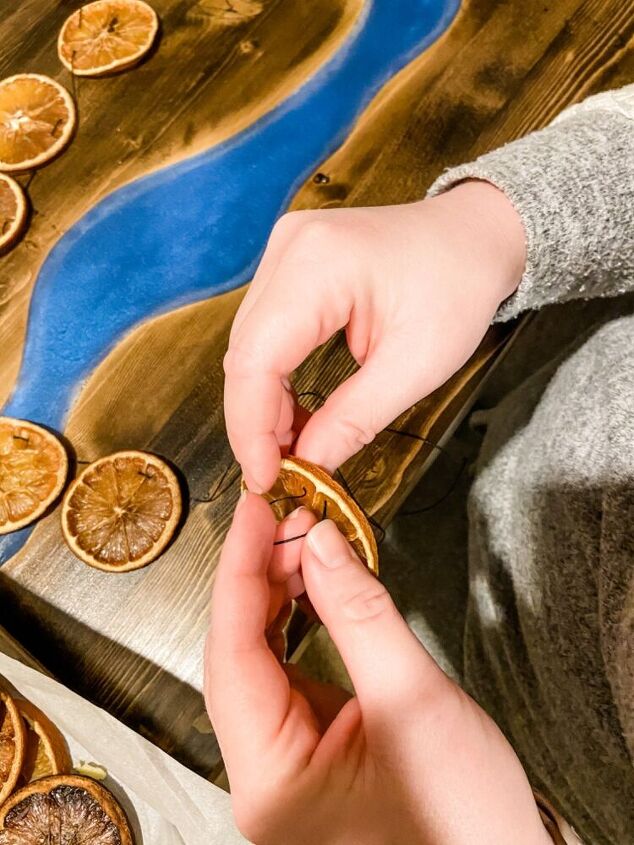
Here’s a close up showing what I mean with one hole in two different segments of the orange.
You’ll thread the cording then slide it into place on the cording.
Repeat this process until the desired amount of oranges are in place or your cording is full of oranges. When making a garland that will hang on a mantle or across the top of a book case or shelf, I prefer and odd number of items on my garland. It’s more pleasing to the eye. But this is your project so make sure you do it how you like it.
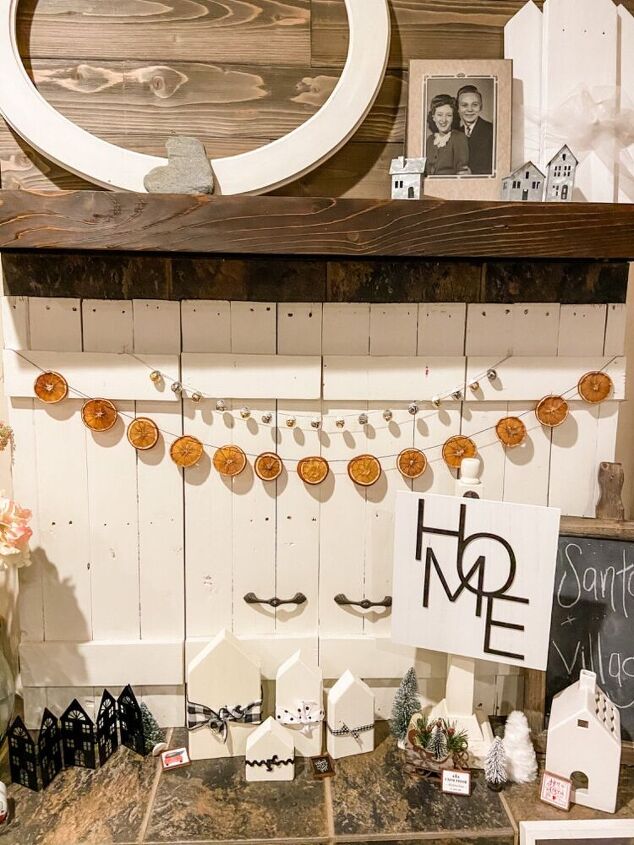
Last, you’ll hang your Garland and enjoy the fruits of your labor!
I had most of these items on hand from other craft and cooking projects. I did have to buy the oranges and some more parchment paper.
Here’s a few ways to use a dried orange garland:
* to decorate a Christmas tree
* to hang on a mantle
* to hang on a piano, bookcase or shelf.
* to hang across the top or bottom of a chalkboard or decorative window.
Here’s a few ideas of how to spruce it up and make it a little more fancy:
*add 3, 5, or 7 cranberries between each slice. You will have to thread a needle and pull the cording or string through each cranberry.
* add a small stick of cinnamon and a sprig of rosemary to each slice by tying them or hot gluing them in place. I like to tone them with jute your keto the natural look.
* string popcorn between each slice of orange. Or popcorn and cranberries between each slice.
* tie ribbon or strips of fabric between each slice of orange.
This year I have been trying to keeps things more simple, but we would love to see what you do too. You can find more of my project on my Instagram page @therefininghome . Stop by and say hi. We’d love to see you.
Resources for this project:
See all materials


Frequently asked questions
Have a question about this project?