


Dollar Tree Mesh Tube Christmas Trees
$6.00
1 Hour
Easy
OMG! Imagine my surprise when I saw packages of mesh tubing, silver bells and chenille stems at Dollar Tree. I always had in mind to see how mesh tubing would work on cone shaped trees but didn't want to pay regular prices for something that may not work. You can't make very many things with mesh tubing. But for a dollar, how could I go wrong. And then I saw silver bells - in packages of 50 and 25, depending on the size. Wow! They can be expensive. And hanging next to them - glitter chenille stems! Say what you want about the Dollar Tree but it's becoming my go to store for lots of craft items!
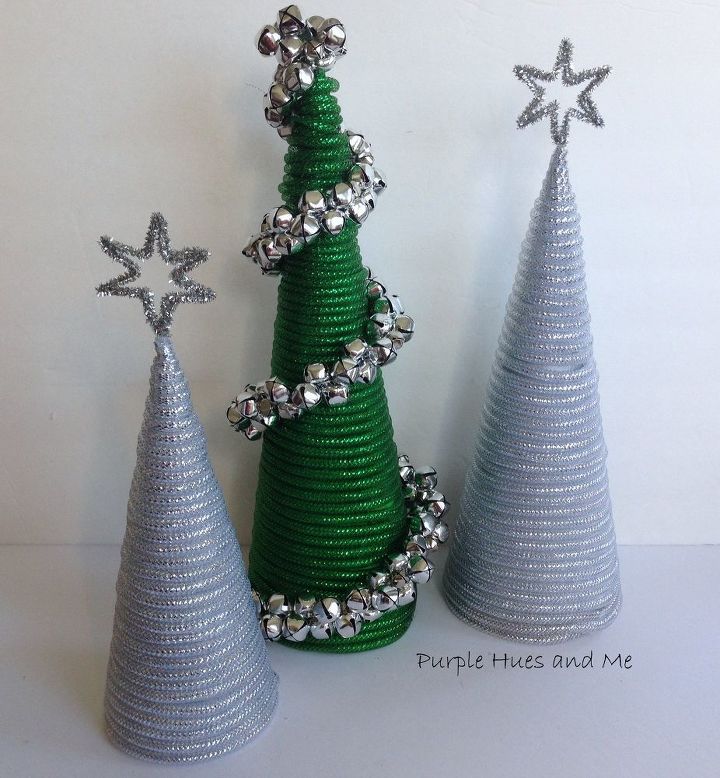
And I don't think you can make an easier holiday project using these items.

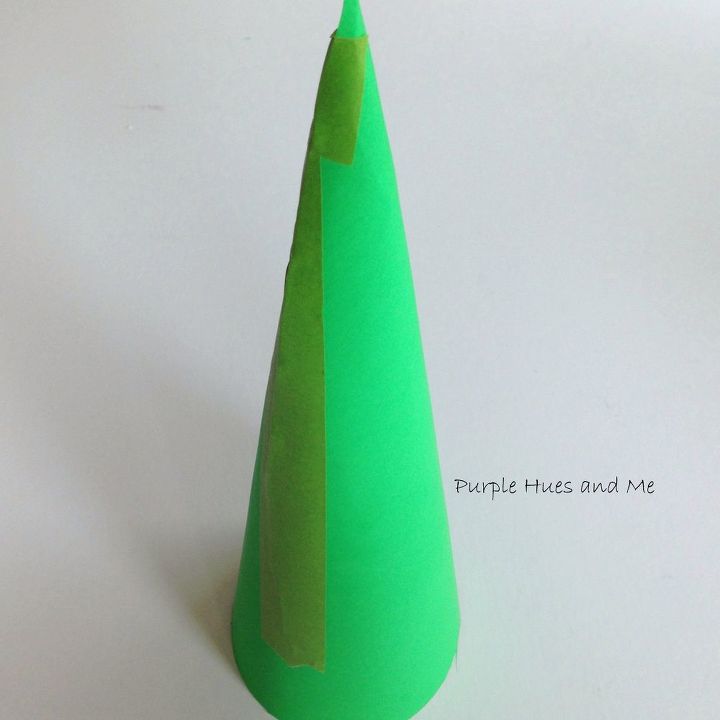
cutting off excess (side and bottom) to even out and taping side edges.
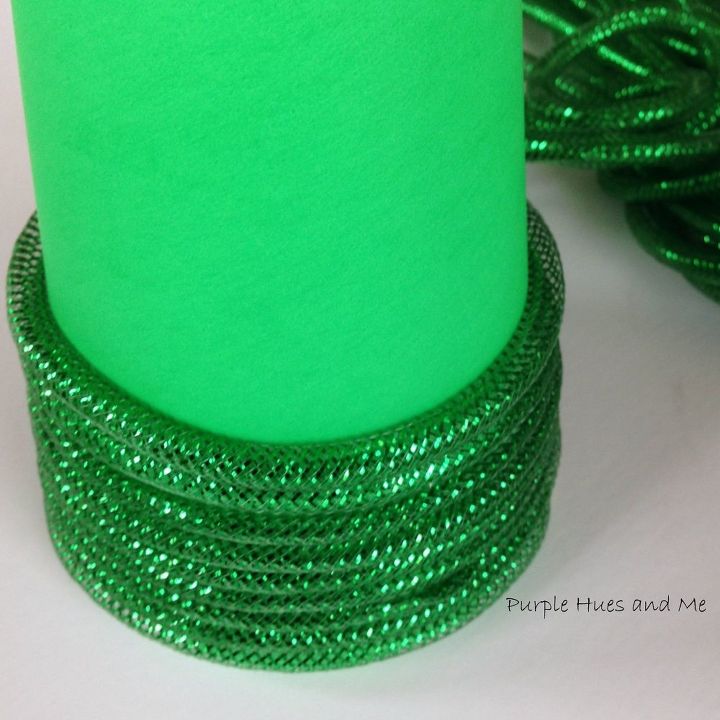
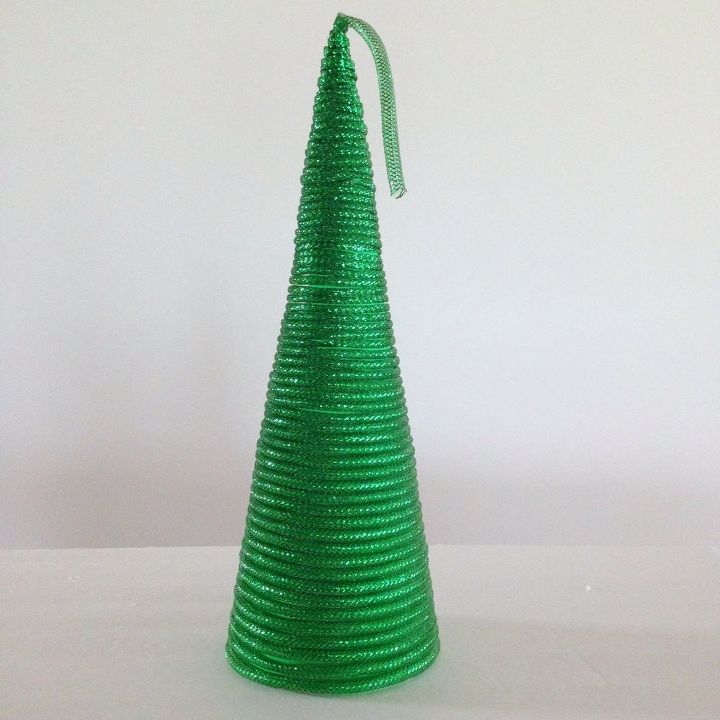
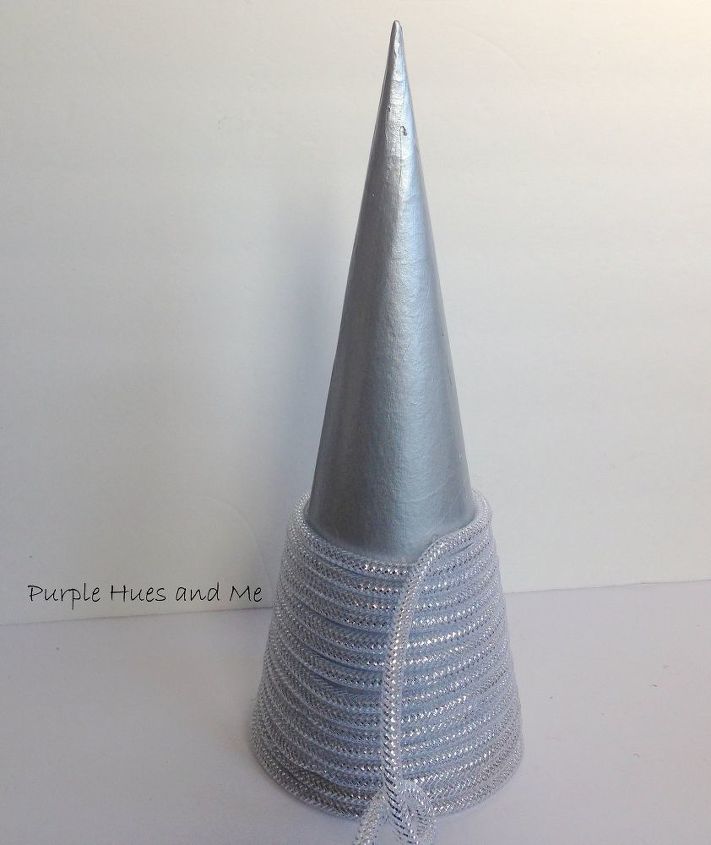
Secure end of mesh tube on bottom edge with hot glue, and begin twirling tube around cone, pushing the mesh tube down as you wrap. Hot glue tube in place every few wraps. *Mesh tubing has a pattern of its' own so be sure to let the tube "relax" to its original shape as you are wrapping the cone, without stretching it.
You can tighten the top area when reaching it and glue in place to finish.
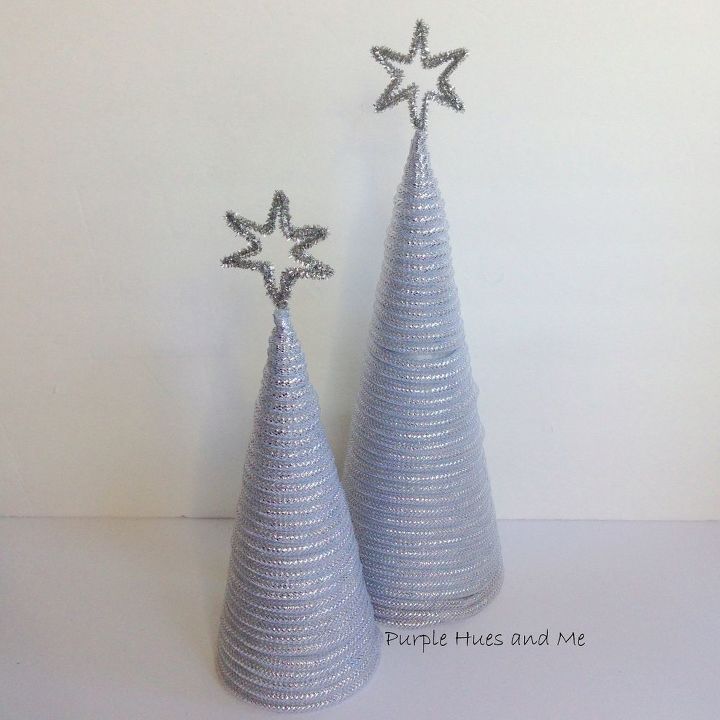
I painted the next cone, silver, since you might be able to see the cardboard between the tubing and then wrapped it the same way.
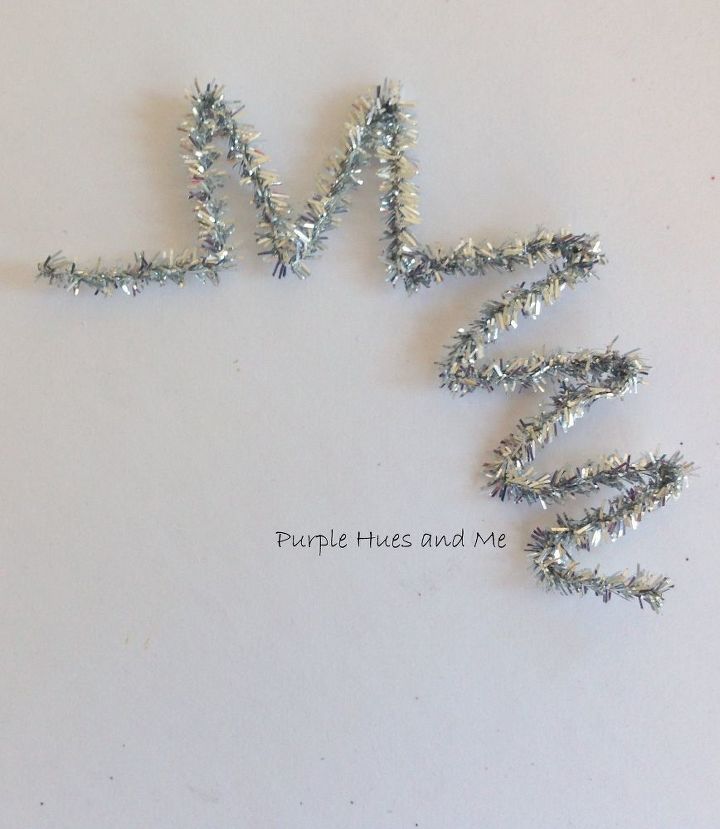
Once the cone is wrapped with the mesh tubing, take a chenille stem and fold it into six points to make a star. I know, a star has five points but you need an extra one to glue onto the top of the cone.
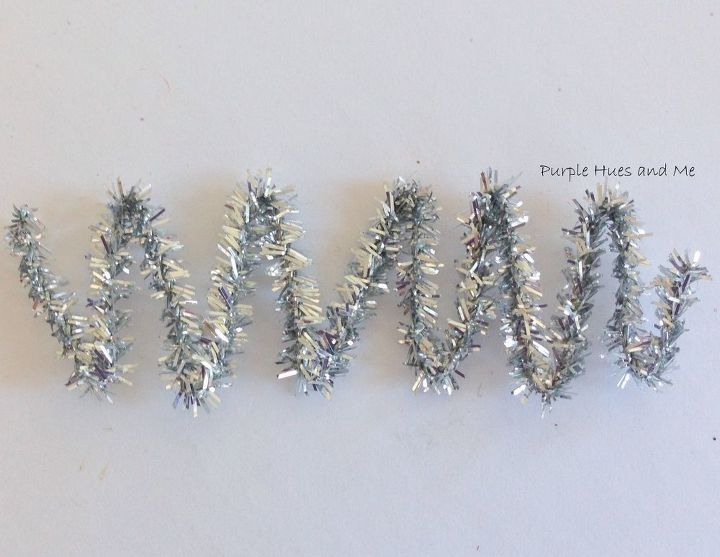
Pinch together each point tip and begin shaping chenille around to form a star.
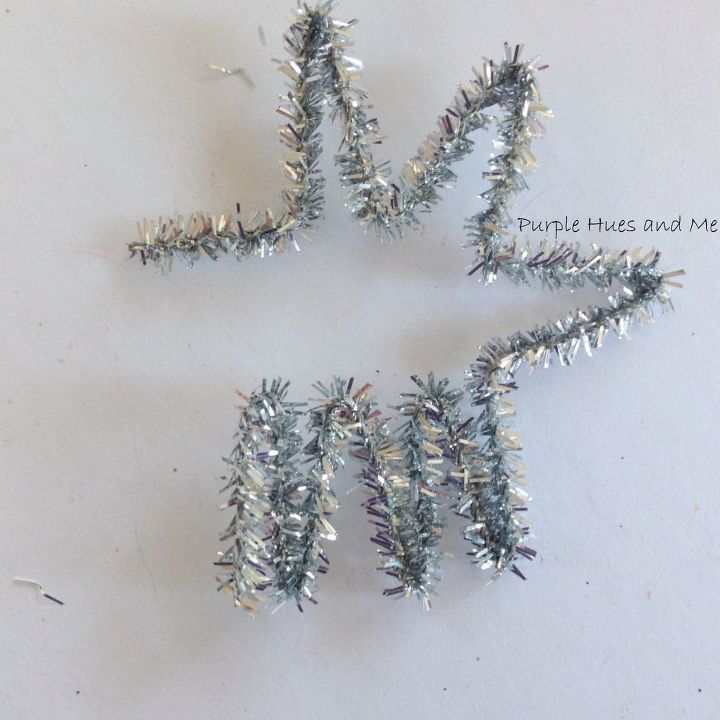
Once you have the star shape, wrap the last two chenille pieces together to form a straight side. Make another star and glue the two together at the points for a fuller look.

Hot glue stars on top of the cones.
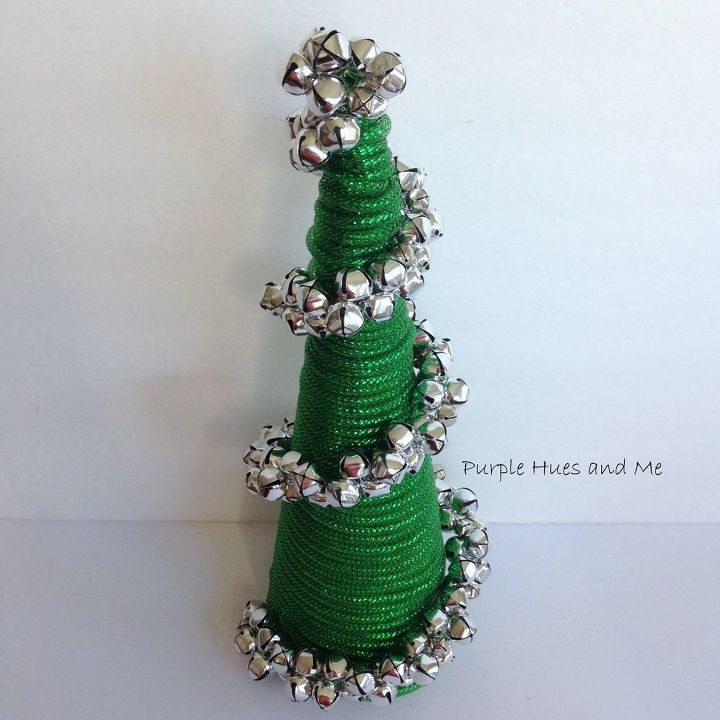
For the green tube tree, string bells on a cord or string, tie in knots at both ends . . .

and wrap them around the cone by tacking the ends on using a needle and thread.
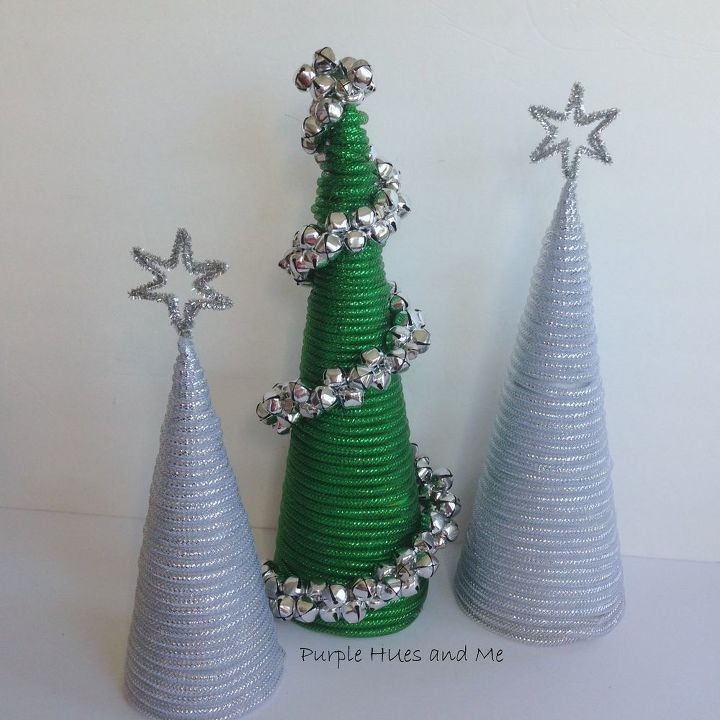
Not bad for a few dollars!

Want more details about this and other DIY projects? Check out my blog post!
Comments
Join the conversation
3 comments
-
These are great!
-


Frequently asked questions
Have a question about this project?