


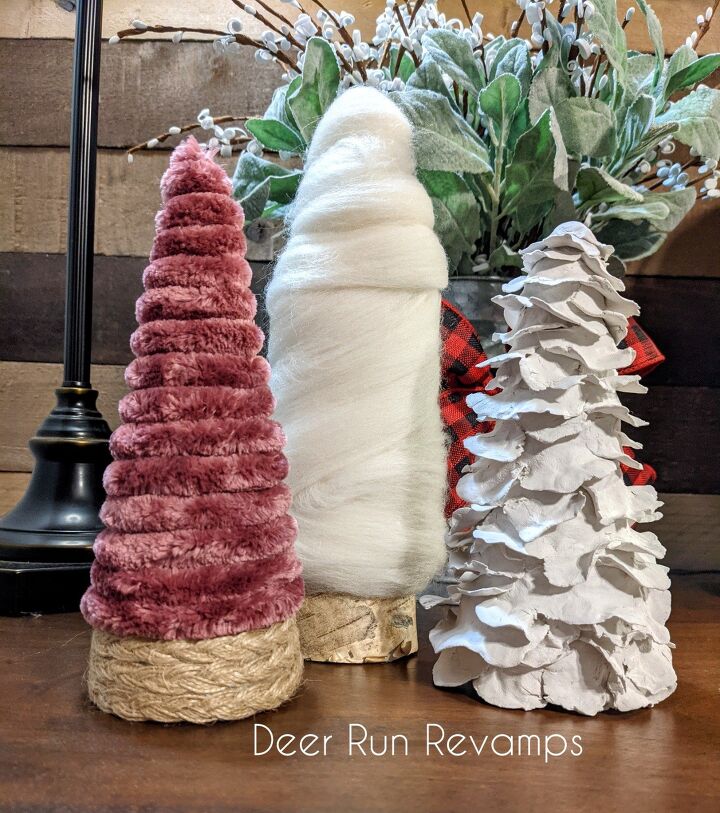
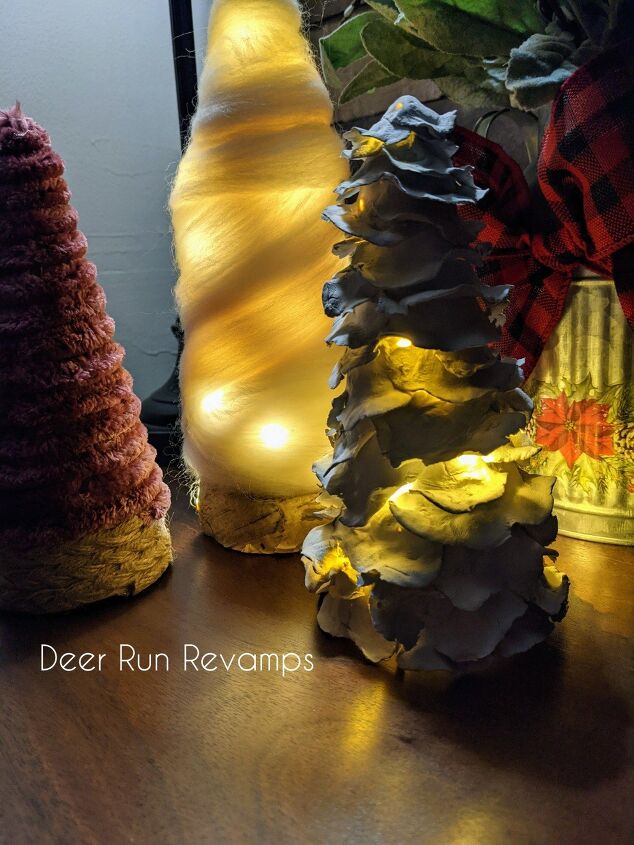
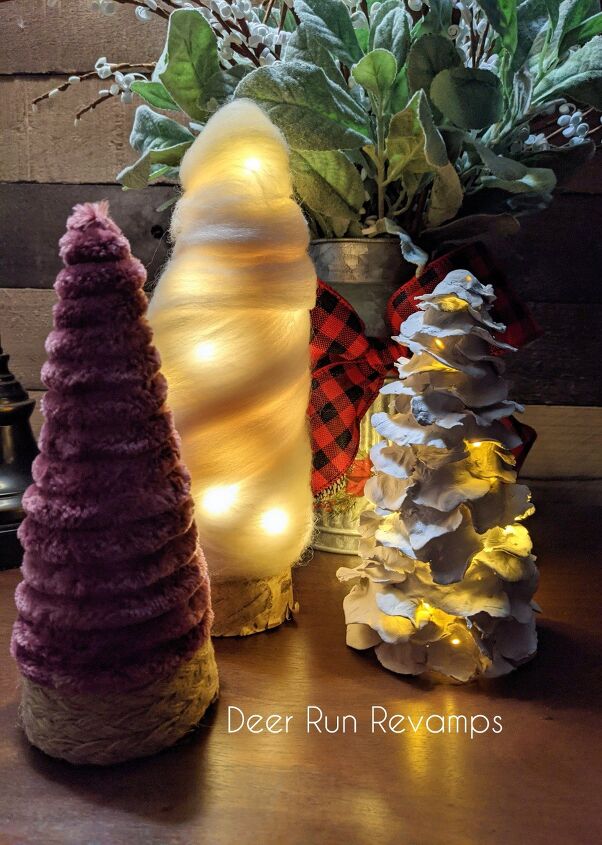
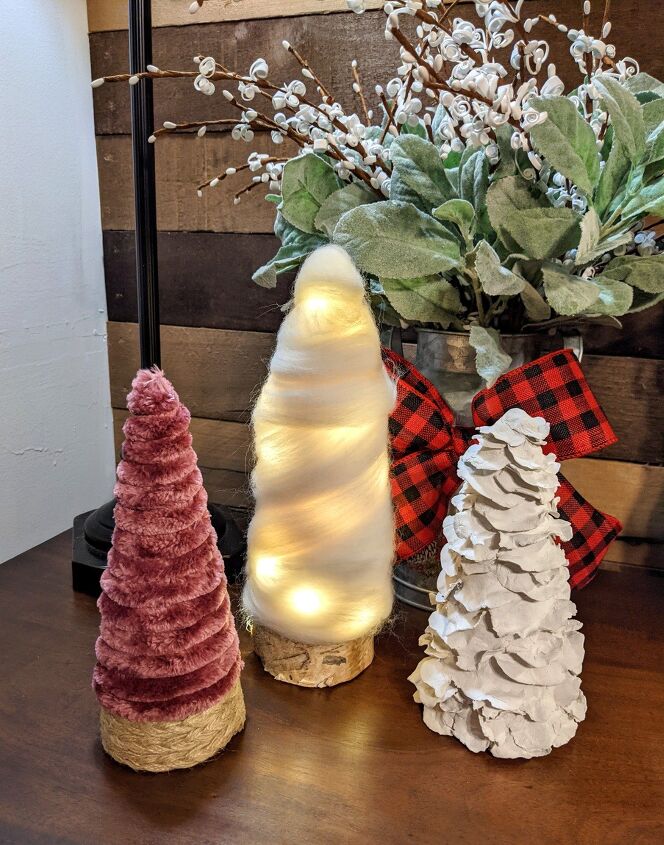
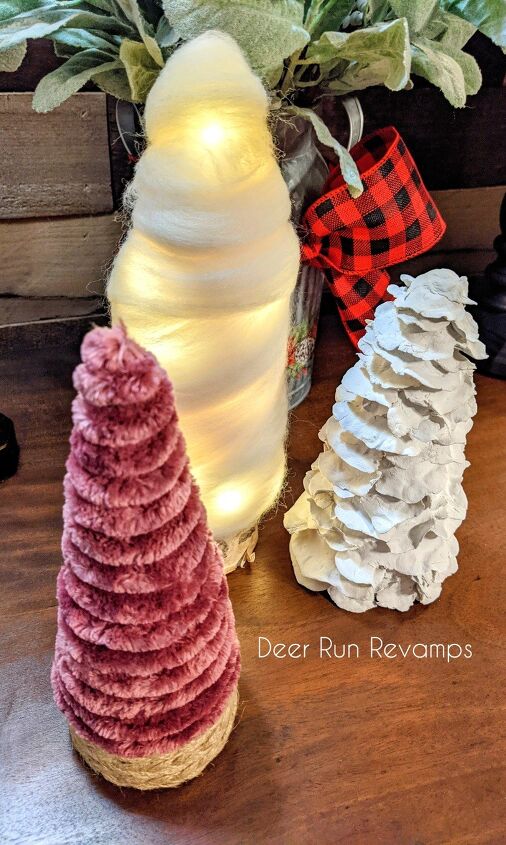
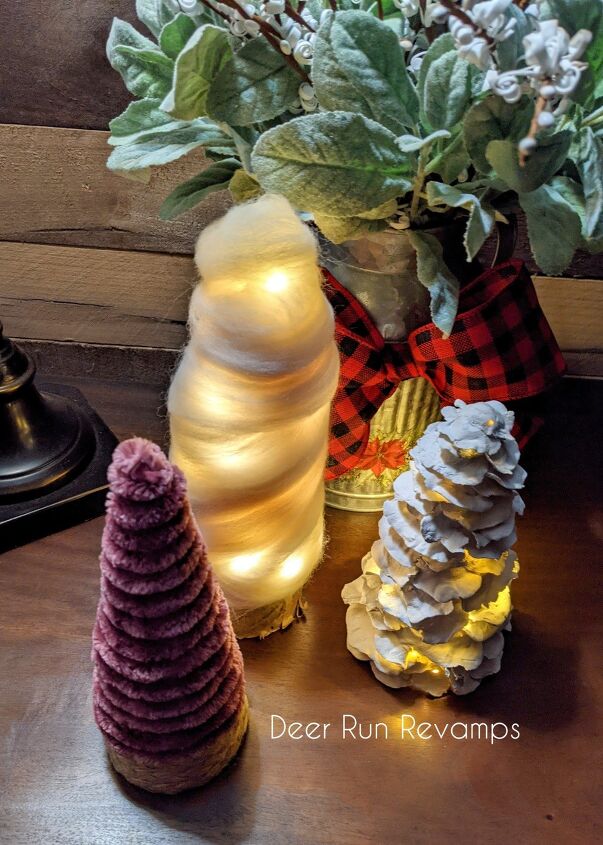
Foam Christmas Trees 3 Different Ways

I love Christmas! 🎄🎅🎄
This is my favorite time of year and I start making home decor and ornaments in September! Although sadly, my family has a rule for me, no Christmas decorations can go out until the day after Thanksgiving 😆 But I love em anyway ♥️
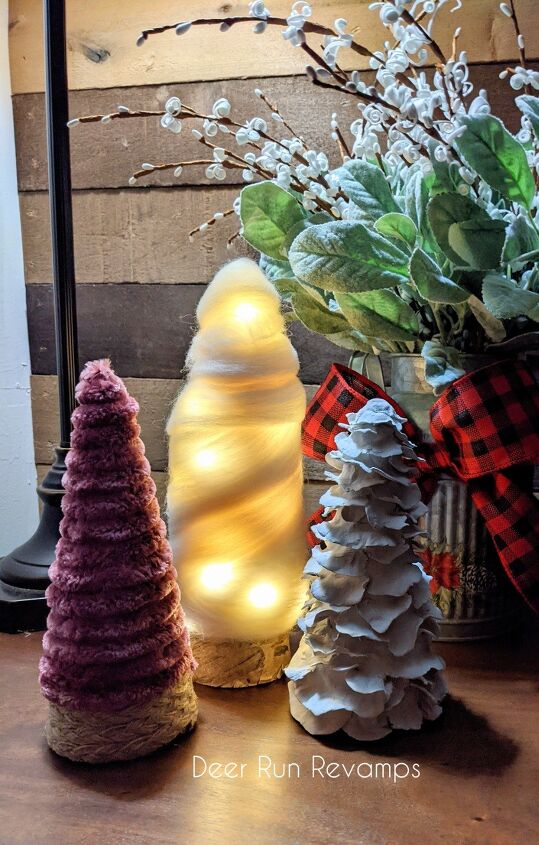
Here are my versions of foam Christmas trees 🎄
*Price listed is for the amount of products l used, not the initial cost of the products
*Time listed is for work time only, does not include dry times

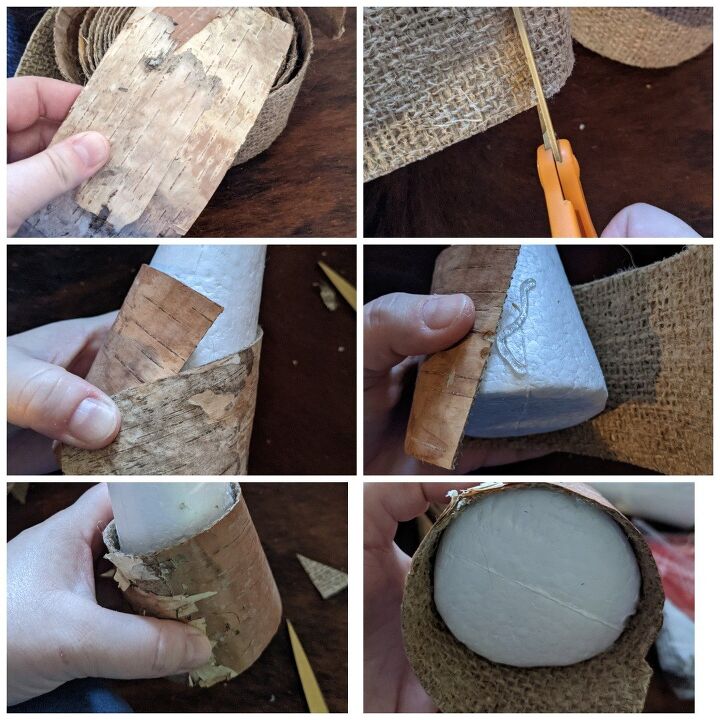
I've had this roll of Birch bark from Michael's in my stash for over a year now but have never used it and I'm not sure how 🤔 this stuff is awesome, and I'm positive I'll be using it again very soon!
I cut a piece of bark long enough to fit around the base of the foam cone.
Since the tree tapers, I hot glued the bark to the tree on an angle leaving some extra below to give the tree more height. Then I cut the bark on the bottom so that it was even and stood straight.
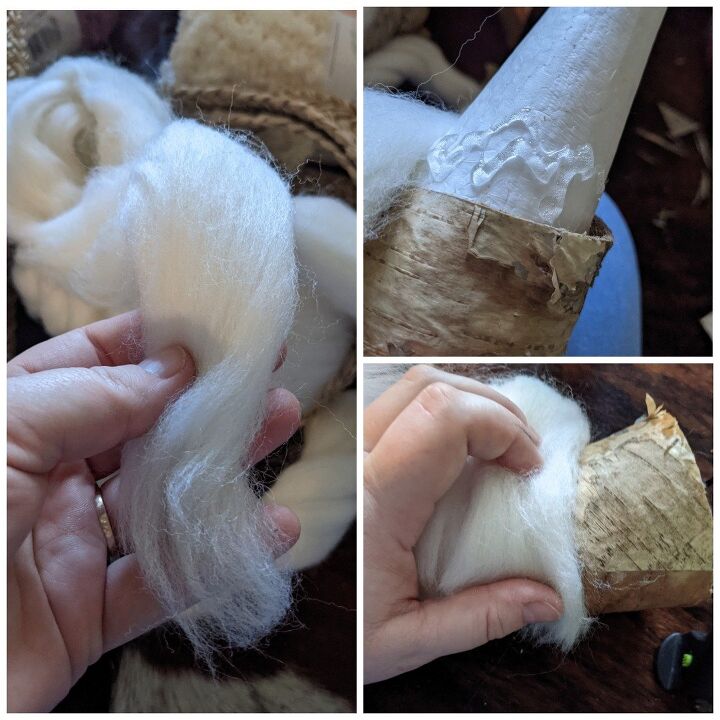
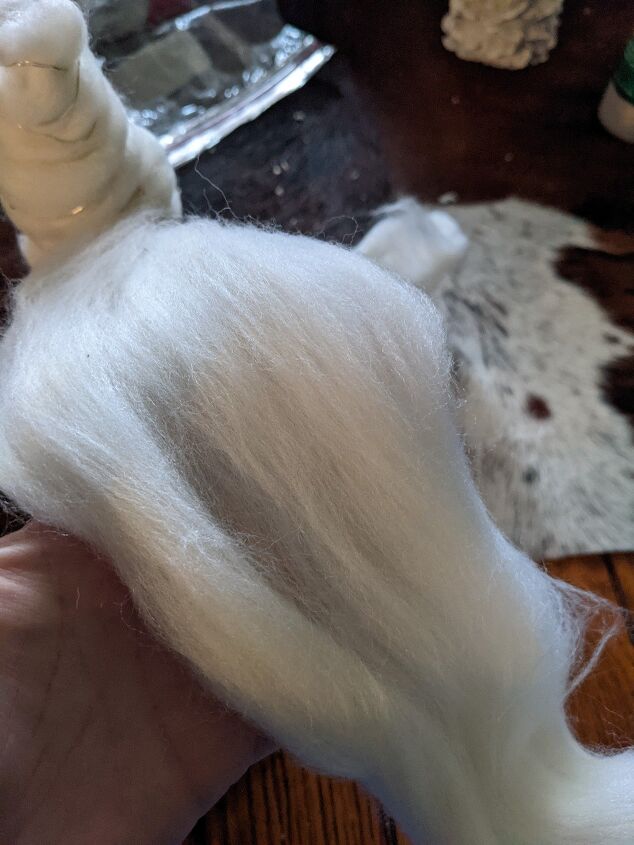
I had some leftover chunky wool yarn from becozi. This stuff is expensive so I save every last bit of it.
It makes the most perfect fluffy snow!
Using hot glue and starting about 2/3 of the way up the bark from the bottom, I glued the end of the wool on top of the seam of the bark. This will be the backside of the tree.
Then continued wrapping the wool all the way around the tree, gluing it down every inch or 2.
Wool breaks easily, so instead of cutting it, I like to tear it, it looks more natiral. One or two swift pulls will get it to break.
For the very top end, I concealed it as much as possible and glued it in place.
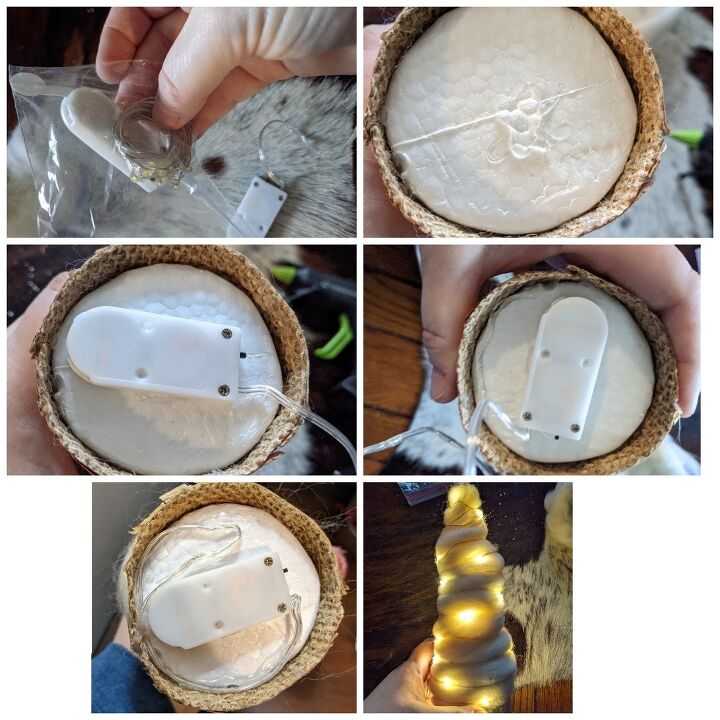
Grab a strand of fairy lights. Add some hot glue to the bottom of the tree and glue the batter pack down, screw side up and be sure to give enough room to easily be able to turn it on.
Then wrap the beginning part of the strand that had no lights around the edge and glue it down making sure the start of the strand with lights begins at the back where the seam is.
Then glue the strand down right next to the seam in the bark and start your way up the tree wrapping it around somewhat tightly.
For the very top, if you have extra strand, cut it off in between two lights and add a bead of hot glue on the cut end. Then hot glue it to the back of the tree.
Again, take your wool and spread it apart so that it's really thin. Then wrap it around the tree, covering the strand of lights.
Turn on, and enjoy 😊
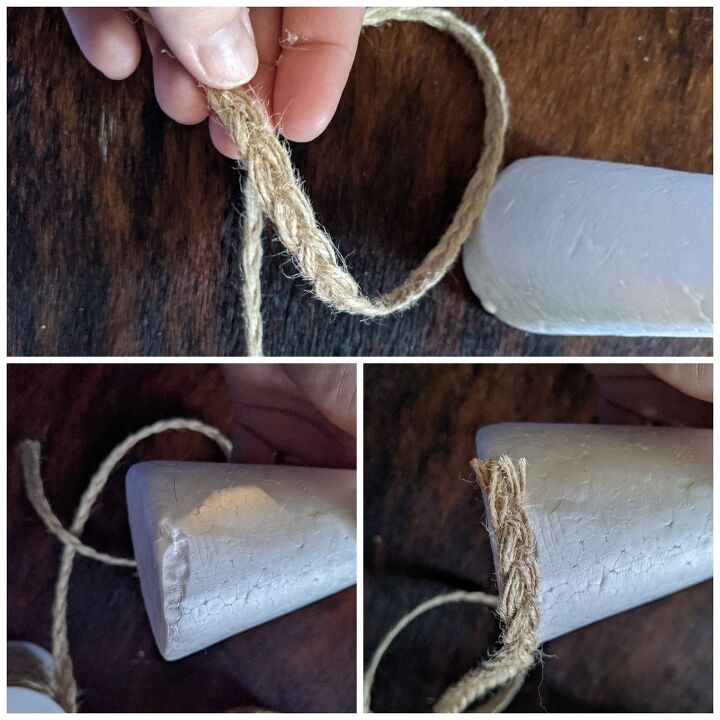
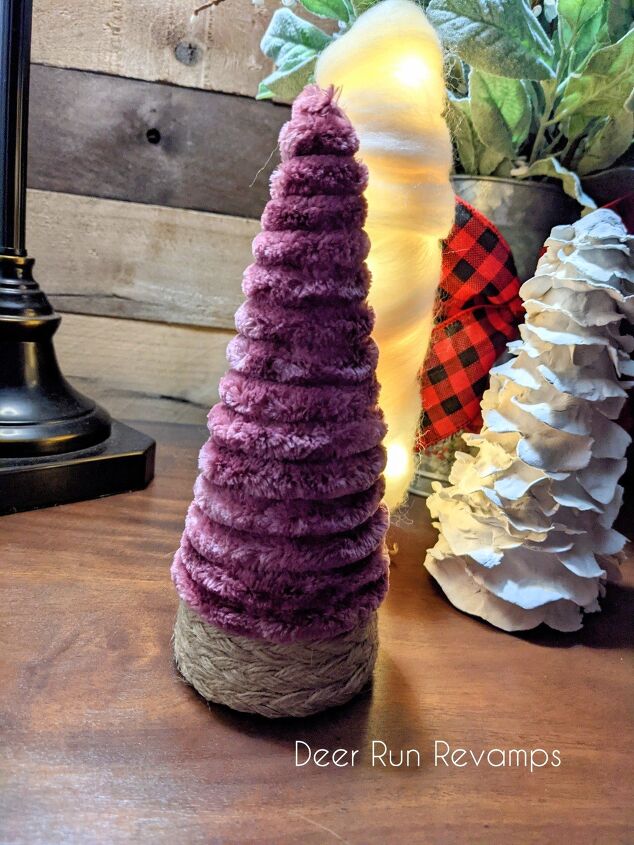
Amazon has some great trims! This one is called braided jute twine.
Hot glue your trim to the bottom of the tree. I did 4 rows, but do as many as you'd like.
Start and stop on the same side, this will be the back of the tree
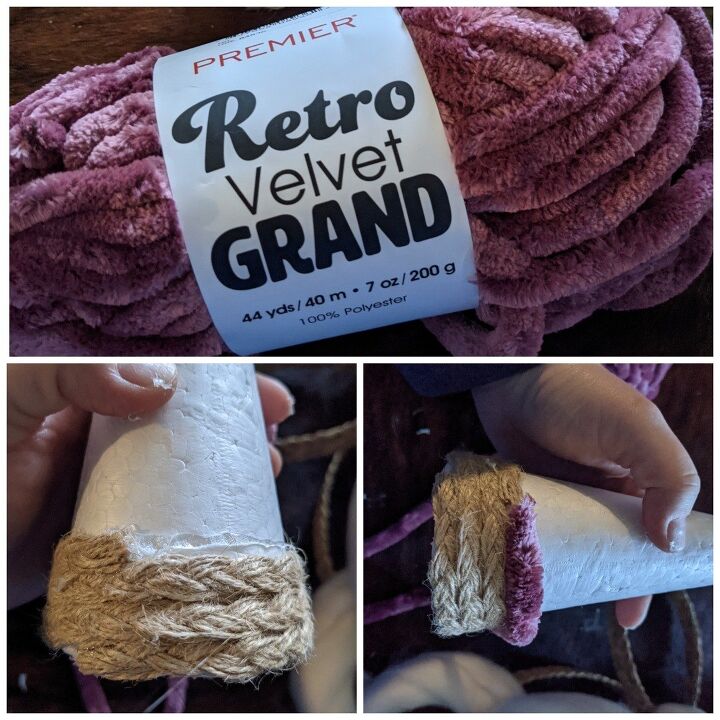
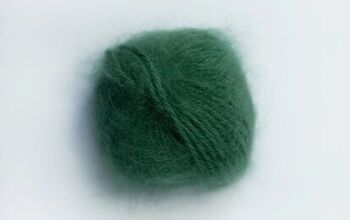
Hobby lobby is great for yarn choices, especially when it's all 30% off! Which is quite often
I grabbed this velvet yarn a few months ago and boy is it soft!
Starting at the back of the tree, glue down the end of the yarn, and then wrap it around the tree, hot gluing often to keep it in place.
And that's it! Easy peasy!
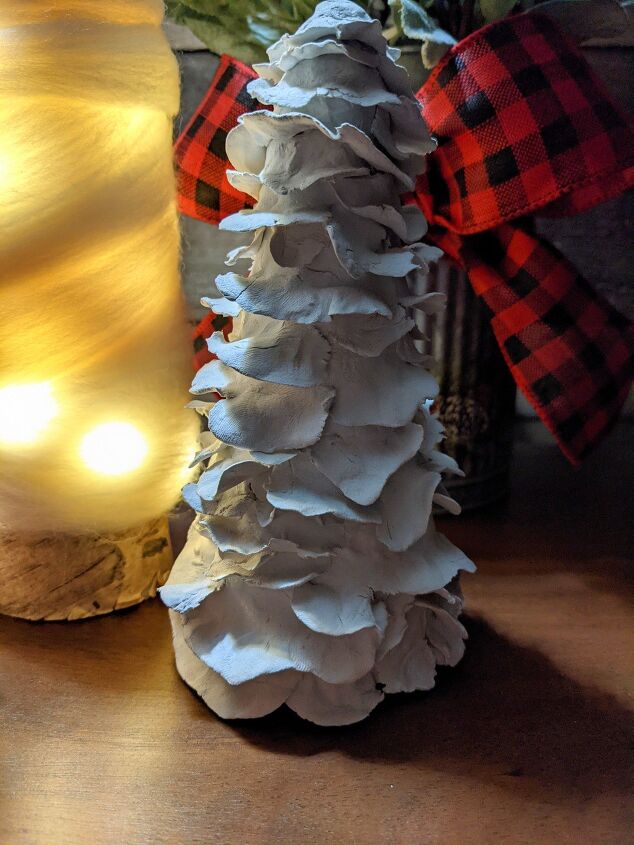
This one is my favorite! But takes a bit of time to make.
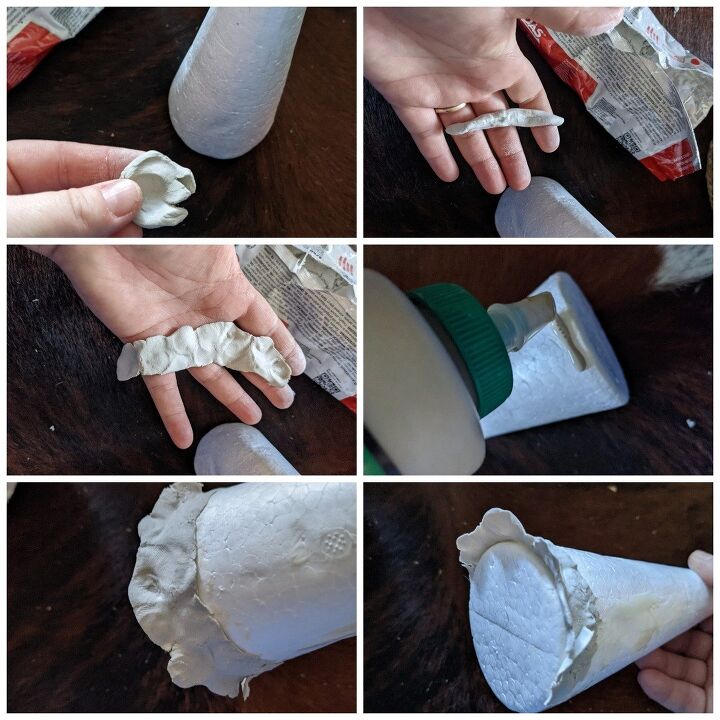
You'll need the foam tree, wood glue and clay. Either creative paper clay or DAS air hardening clay work best.
Strand of fairy lights is optional..
(**I didn't do the tutorial with the lights because it only half way worked, but still looks pretty (photos below). In some parts, I didn't make the clay thin enough to still allow the light to shine through.
If you want the fairy light look, hot glue the battery pack to the bottom, then wrap the strand around the tree, gluing it into place every so often. Then proceed to the next step.......)
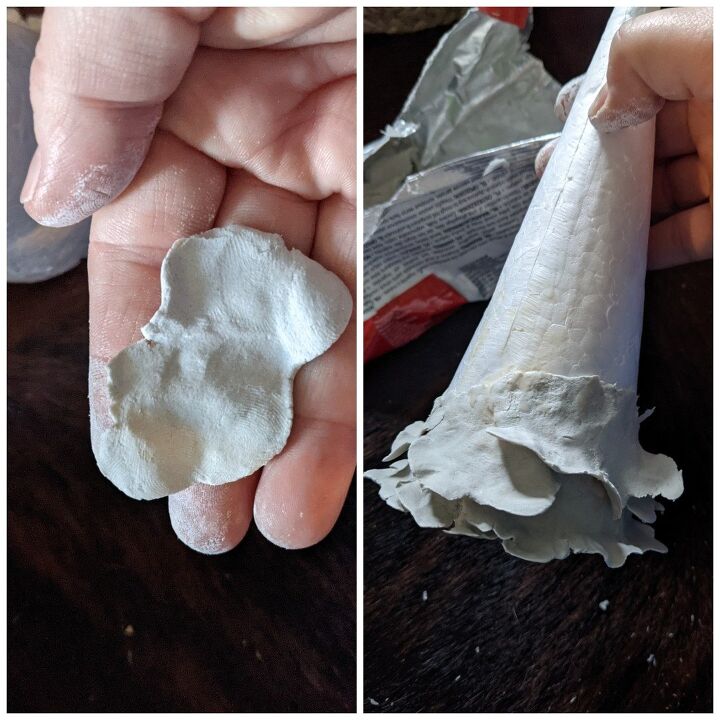
Take a small piece of clay and roll it in your hands to create a 1 inch "worm". Then flatten it out with your fingers so that it's thin.
Apply a thin line of glue at the base of the tree, then press the clay onto the glue. Flare up the bottom, make some areas go up, others down.
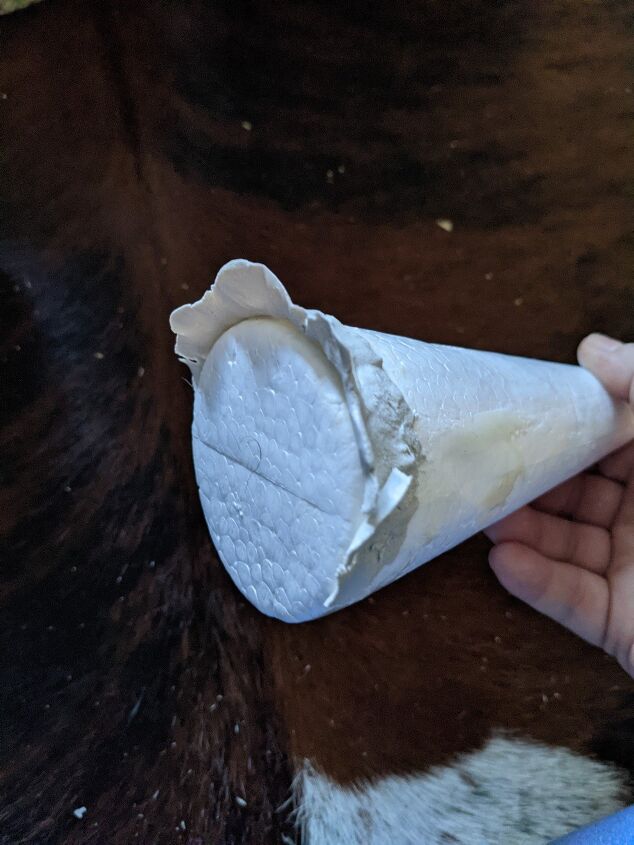
Continue on all the way around the bottom
Once the bottom row is done, move up.
You can make some pieces larger and others smaller. Overlap some pieces. No two pieces of clay should be the same.
Continue untill the tree is covered in clay and let dry overnight.
Be careful when handling, the thinner the clay, the more fragile the edges are
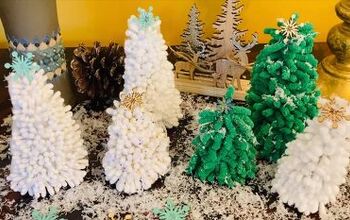
Then display your beautiful trees 😍
You could also spray paint the clay tree if you'd like.
Silver glitter spray paint
Green spray paint
Or first green, then a little spritz of silver glitter
Options are endless!
Make the trees your own, get creative ♥️
You could also put fairy lights on the purple one! Put the strand of lights in between the stands of yarn. This will conceal it pretty well
These were so much fun to make, and you could even get the kids in on this project!
Visit our Etsy shop for unique home decor, one of a kind furniture, and over 500 different crafting products such as silicone moulds, clay, epoxy, image transfers, waxes, paint and so much more!
https://www.etsy.com/shop/DeerRunRevamps
I hope this tutorial has inspired you to create something beautiful ♥️
If you'd like to see more of our home decor and refinished furniture, follow us on Facebook
Resources for this project:
See all materials


Comments
Join the conversation
-
I especially like the soft velour yarn tree, as it just begs to be touched with fingers. Thrift stores can be a good source for small amounts of yarn, at less-than-retail-price.


Frequently asked questions
Have a question about this project?