


Grow Your Own Christmas Decorations
2 Materials
$5
30 Minutes
Easy
Growing Crystals is such a fun project to do at home. Here we show you how we made our own Christmas snowflakes to hang on our Christmas tree - the crystals form so quickly you only have to leave them overnight!
I believe you can grow crystals from pretty much any salt (Table, Epson and Borax are the most commonly available), as well as sugar. The science behind it, put very simply, is that the water can only hold a certain amount of your crystalline substance in solution, in other words, you can only dissolve so much in it until it becomes saturated. By heating the water, it can hold more, as essentially the molecules have moved further apart. As your solution cools, the molecules move closer together again, causing your solid to crystallise out of the solution once more. The crystals are attracted to solid surfaces to reform, so you can encourage them to grow where you want them to by providing a foreign object within the solution. For our crystals, we chose to use Borax, as the crystals are reputed to be fairly sturdy once they have formed, and we plan to use ours as decorations.
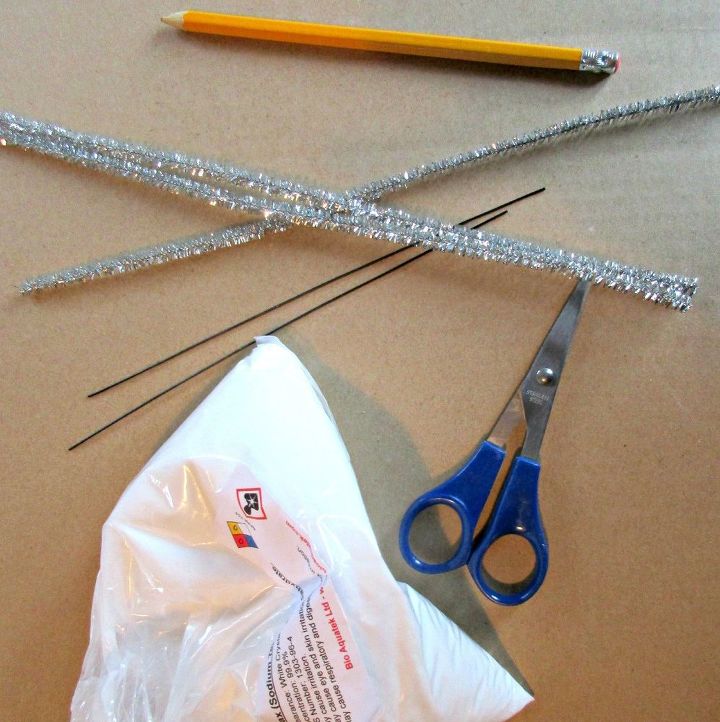
We used a pipe cleaner, an extra piece of wire, borax (which we sourced through eBay), a glass jar and a pencil to suspend our creation from.
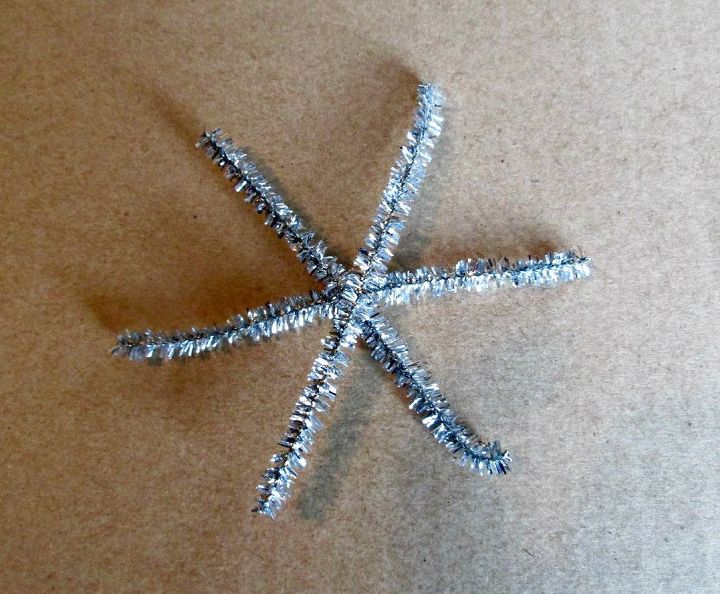
We started by cutting our pipe cleaner into three equal lengths and twisted it in the middle so it would hold its shape. You could use any shape or object, although I think having a rough surface for the crystal to attach to works best.
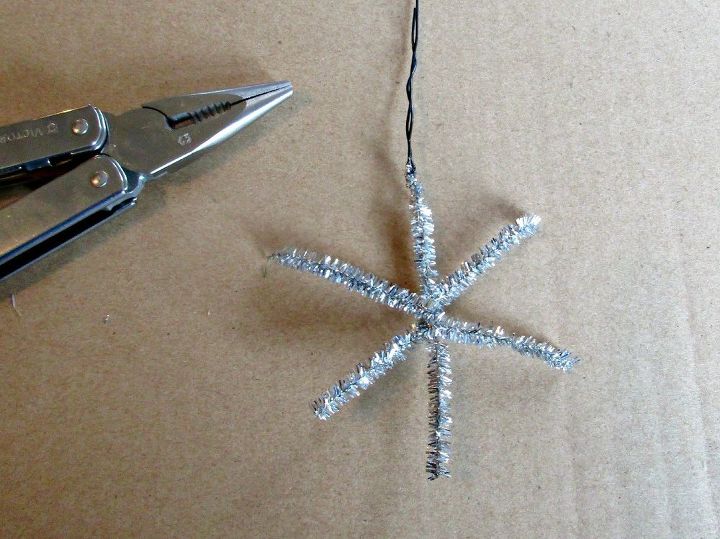
We bent a little loop on one of our arms and twisted our extra piece of wire onto it so it held firm (remembering once you suspend your object in the solution it may try to float up if not held securely)

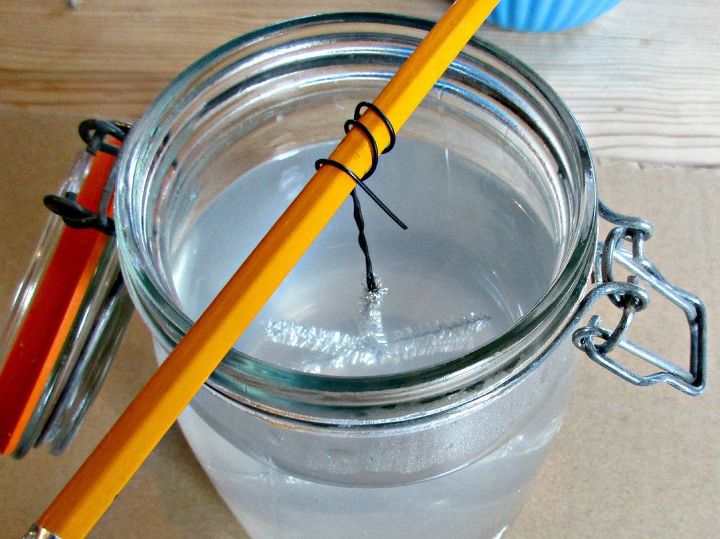
Using our jar as a guide, we then worked out how long to leave the suspension wire so it would hold our snowflake in the centre of the jar (you don't want it touching the sides or bottom)
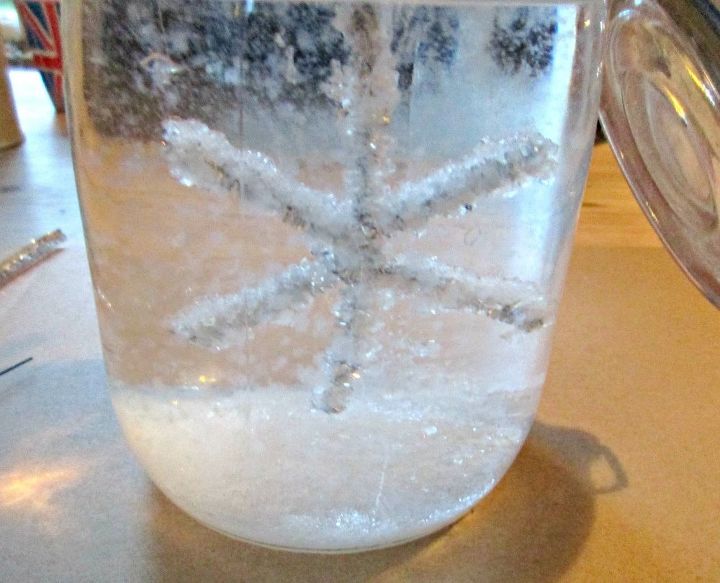
We heated up 1 litre of water until it was very hot but not boiling and stirred in the borax a tablespoon at a time until no more would dissolve (in our case it was ten spoons). We then simply poured into our jar and popped in our snowfake. This photo shows our crystals after about 2 hours.
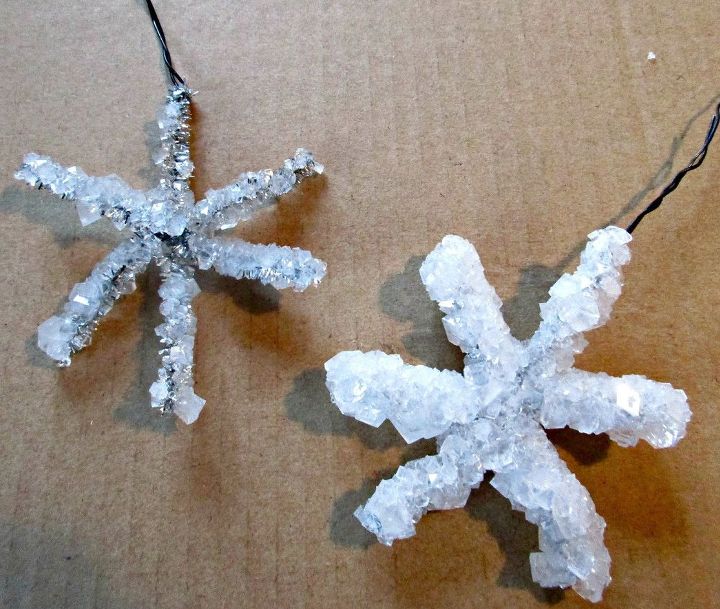
The snowflake on the right was left overnight, whereas the one on the left was only in the solution for 3 or 4 hours. The crystals are reasonably robust, over time they can become less sparkly, and you can paint them with a clear nail polish to prevent this happening. We have some that we made a couple of years ago that are still in great condition, so they really do last well with a little care. The kids absolutely loved growing crystals, and can't wait to take them in for show and tell at school!


Any price and availability information displayed on [relevant Amazon Site(s), as applicable] at the time of purchase will apply to the purchase of this product.
Hometalk may collect a small share of sales from the links on this page.More info

Want more details about this and other DIY projects? Check out my blog post!


Frequently asked questions
Have a question about this project?