


Holiday Stencils Challenge

6 Materials
$40.00
Easy
Somethings old + somethings new = Holiday Christmas Decor Idea
When Hillela asked if I'd be interested in participating in a holiday stencil challenge I thought "Why not? I've never stenciled before so this could be fun!"
When Hillela asked if I'd be interested in participating in a holiday stencil challenge I thought "Why not? I've never stenciled before so this could be fun!"
Me receiving the first e-mail and very curious to see what would be coming soon.
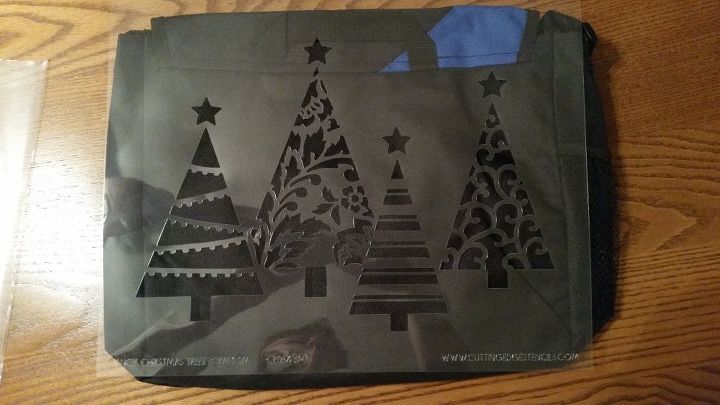
When I saw the stencil that I received from Cutting Edge Stencils (http://www.cuttingedgestencils.com), I was ecstatic to get to work on this. I knew that I had finally found a partner for an old remnant of fabric that I had purchased at least 10 years ago! (It's not my thing to hold on to something for this long but I am seriously in love with this fabric and whatever I decided to do with it had to be special. I just didn't know what; until now...) A plan was finally hatched.
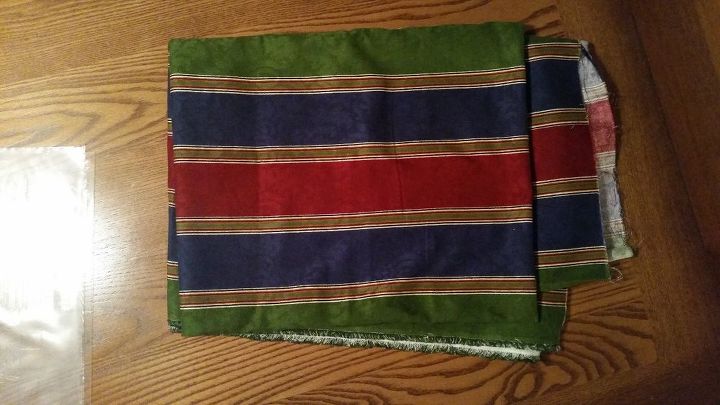
The fabric remnant I am in love with!
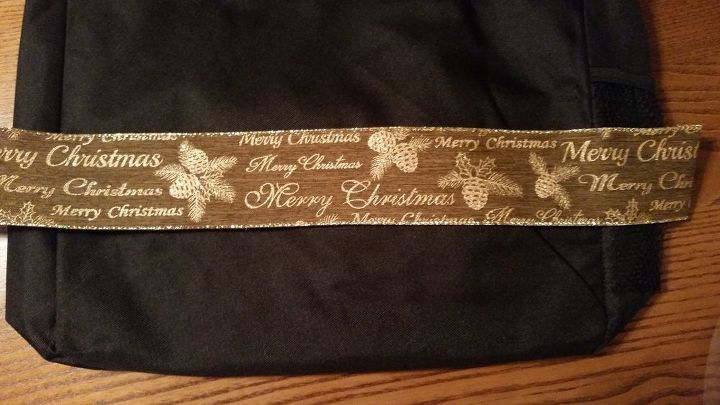
Found some beautiful Christmas ribbon to use for trim.
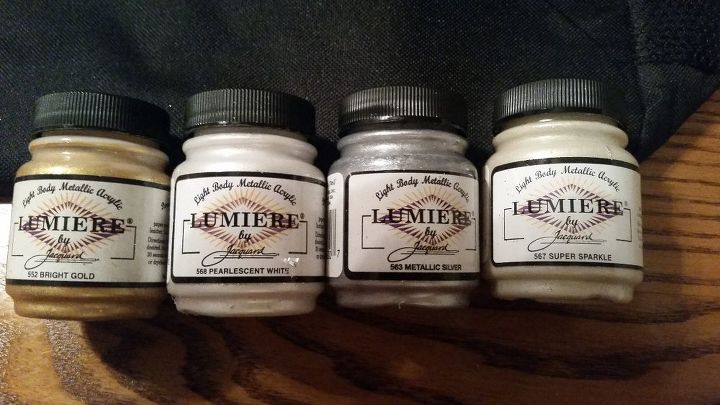
Fabric as beautiful as this definitely needed to be highlighted with some subtle metallics... (is "subtle metallic" an oxymoron?)
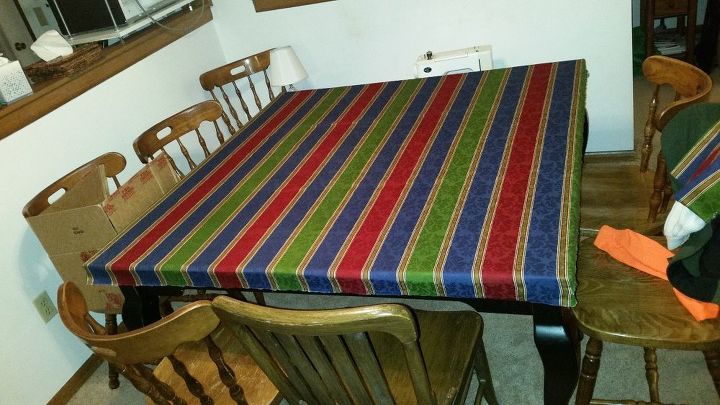
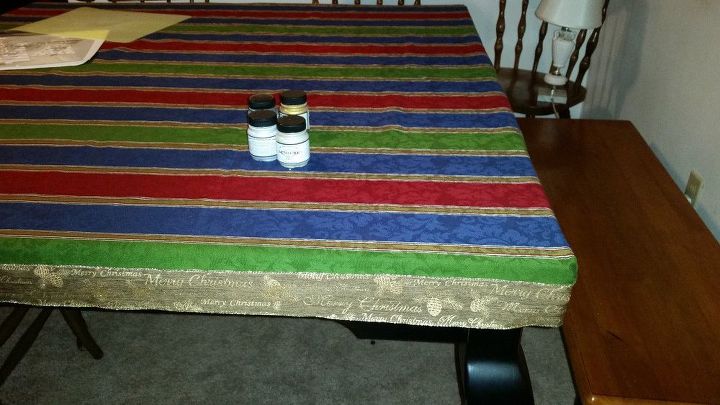
I started by laying out the fabric, can you see that beatiful damask print that is playing so nicely with the stripes of the fabric? Then I trimmed the remnant to the size of my table, pinned and sewed the corners. Having very curious cats AND a curious dog, I am not a big fan of flowing, drapey tablecloths. In my home, that is just a setup for a really bad magic trick gone awry at the paws of my furry friends. I decided to make a "form-fitting" tablecloth. At this point, it still is in need of a little something.
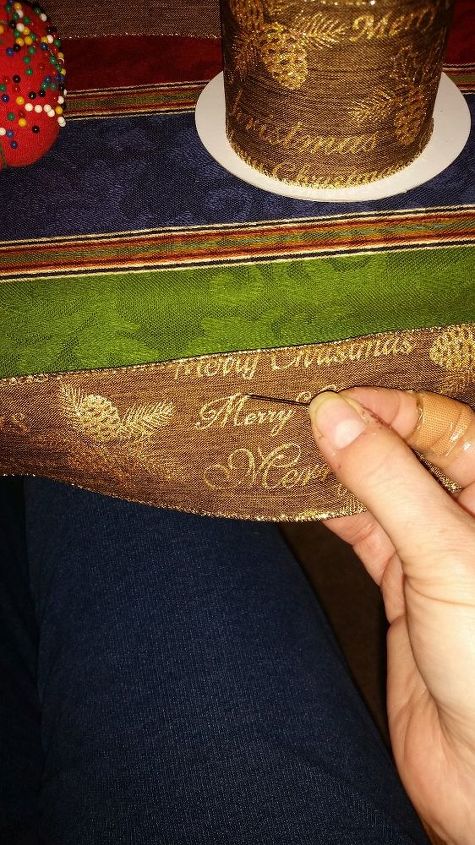
I pinned the ribbon around the edge of the form-fitted tablecloth and when that was attached to my liking, I sewed the ribbon to the tablecloth with my trusty sewing machine. I didn't measure anything, I just kind of eyeballed it as you will soon see.
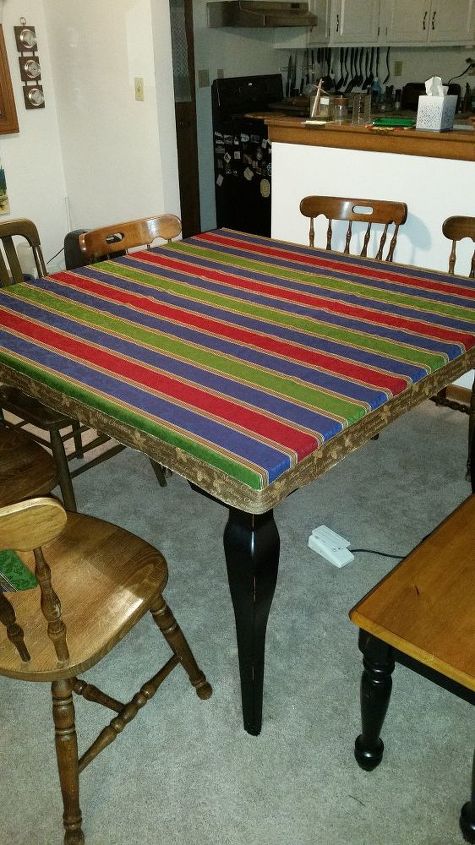
With the ribbon sewn into place, this is looking pretty sharp. But - - - it still needs a little something more to dress it up properly for the holiday. Cue Cutting Edge Stencils stage right...
I didn't want to add the stenciling just yet without trying it on a scrap piece of fabric like the folks at Cutting Edge Stencils recommend. I am so glad that I did the recommended "scrap test" because I eventually ended up moving away from the spongy type brush to an actual bristle brush designed for stenciling. (Have I mentioned that I'm in LOVE with this fabric?) I'm starting to get excited; time to peel it up and see what it looks like...
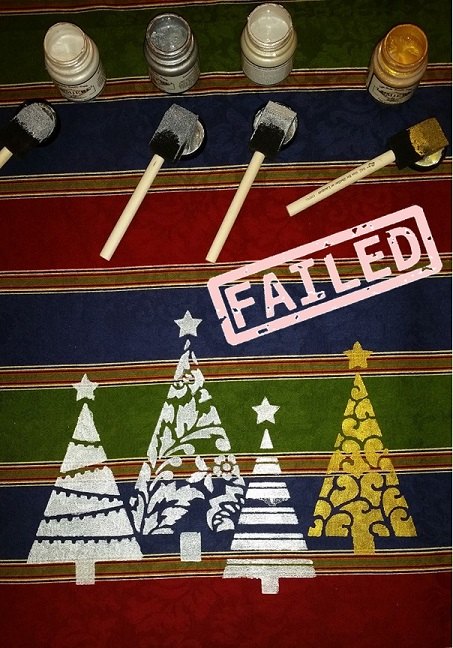
FAILURE!!! I'm not sure if the rest of the picture will show up here but this just looks blah beyond measure and I had some unexpected seepage under the stencil (ie - too much paint on my sponge). I need to come up with something just a little more elegant for this fabric...
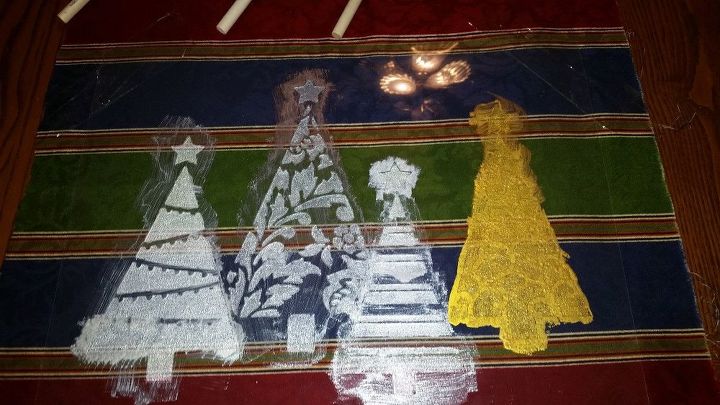
Time for Plan B. I put the different colors throughout and also mixed some of the colors to get different tones. I apologize for the bad color but the flash wasn't turned on and when you're "in the zone", the last thing that you think about is taking pictures!
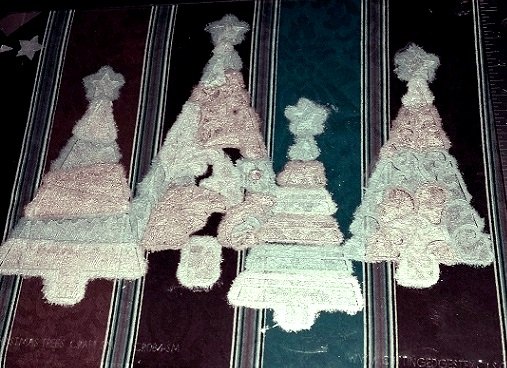
Holding my breath and bringing out the good stuff...
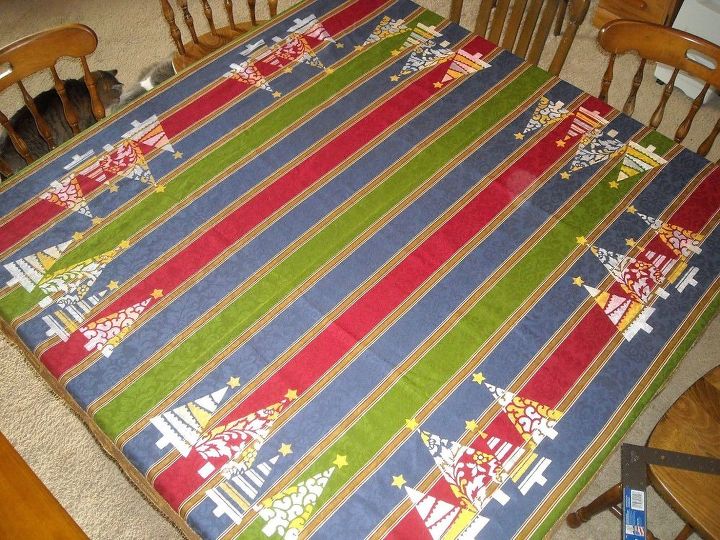
The finished product! I wish that all of the colors would come through better so I'll have to do some learnin' on that. I just love this and cannot wait to set this table for the holidays!
Comments
Join the conversation
4 of 5 comments
-
Wow, very cute, I love how it turned out.
-
I like it very much, can't wait to do similar on my pillows :) mixing colors was great idea:)


Frequently asked questions
Have a question about this project?