


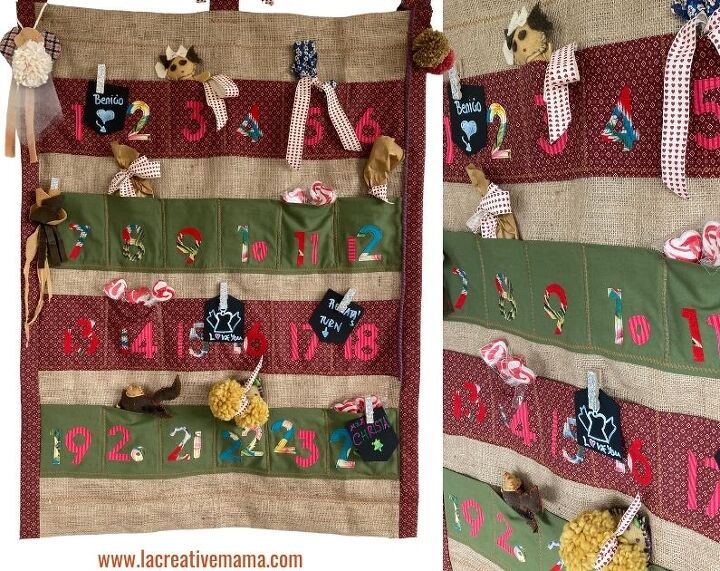
How to Make a DIY Fabric Advent Calendar That Your Kids Will Love
How to make a DIY fabric advent calendar Hi Creative Mamas! I am so excited to share with you a wonderful way to turn fabric scraps into an amazing DIY fabric advent calendar for this Christmas! If you have fabric scraps piling up from previous projects this is the perfect way to re purpose and up cycle all of those fabric left overs.
If you have kids, grand kids, nieces or nephews you will certainly be super popular, the kids will love this advent calendar with pockets! To create a home full of Christmas cheer you can check out many other Christmas projects here.

I will show you a step by step tutorial on how to make an easy advent calendar made out of fabric scraps and applique patterns. You can download your Free Printable Numbers Template from the from the Free Resource Library by completing the form under the Materials List.
How do you make an advent calendar that your kids will love?
In my experience kids will love anything that we present to them in an exciting way! An advent calendar is the perfect way to get them all enthusiastic about the beautiful spirit of Christmas and they will be expecting their little surprises that are hidden inside the pockets!
Also I have noticed that if the advent calendar is a bit bigger the kids tend to get more excited about it because there is more room for presents and treats inside the fabric pockets 🙂 Making a fabric Christmas Angel is a great way to further decorate the calendar as well.
Attention Grandmas: A fabric advent calendar is a great gift to make for your grand kids and give it to them by the end of November. You can fill it with little surprises inside the pockets and include little love notes to every grandchild. It’s the perfect way to be present with the grand kids even if you are not in the same household or city, or country!
The Christmas DIY Fabric advent calendar tutorial will show you how to make:
- A fabric advent calendar with pockets
- A fabric advent calendar using upcycled fabric scraps and a coffee sack
- A fabric advent calendar with pockets
- A reusable fabric advent calendar
- A fabric advent calendar wall hanging
This tutorial uses applique as the main technique but you can explore mixing applique with other sewing craft techniques such as quilting and embroidery. Check out this great Beginners Guide to sewing crafts for inspiration.
How do you make an advent calendar pocket
This tutorial will show you how to make fabric pockets for the days preceding Christmas. In this case the pockets are all made from fabric scraps and they are sewn as one piece to the base fabric.
Which number do you start with in an advent calendar?
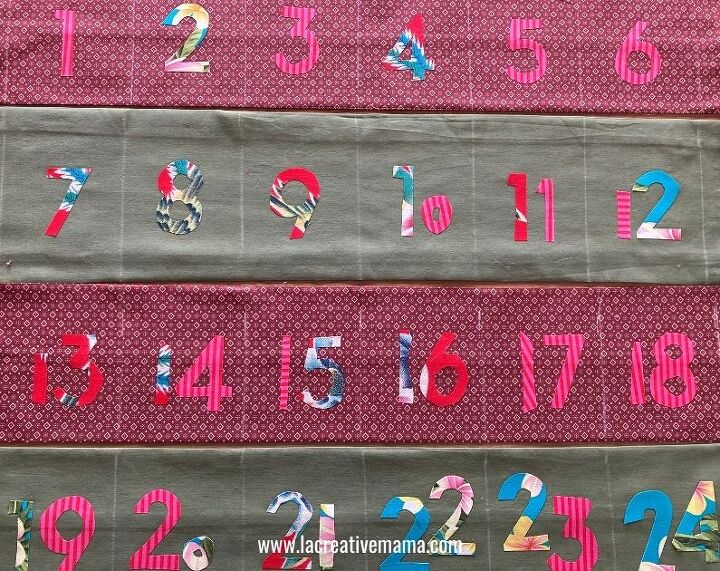
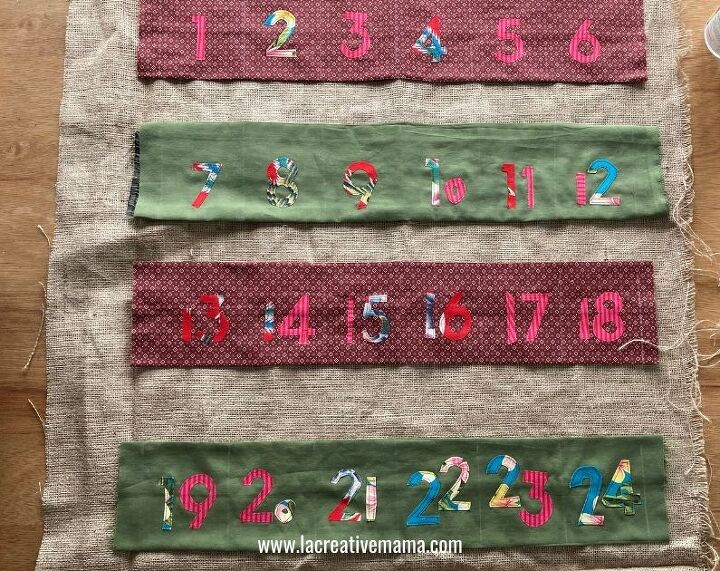
The Christmas advent calendar starts with the number 1 and it goes all the way to number 24 to celebrate the days before Christmas. Advent derives from the word coming in Latin. I like to remember this because when I was little I used to find those weeks before Christmas super exciting.
I feel that by making a fabric advent calendar with big pockets for my kids I can sparkle a little bit of that anticipation and excitement among them and it makes me happy!
How many pockets does an advent calendar have?
The calendar has 24 pockets, one for each day of December that precedes Christmas. You can fill them with treats for each child in the family or take a more random approach. I like to have assigned pockets for each child to make sure they all get a fair share 🙂
DIY fabric advent calendar Tutorial
Please note that I made this calendar during a period of 2 afternoons and the weather kept changing which means the photos have very different tones depending on what Auckland weather was doing at the time. Excuse the difference in tones, the fabrics are always the same but they look so different from picture to picture 🙂
Be sure to check out the Adhesive felt Christmas templates for kids {FREE} so that you can get the kids involved in gift wrapping and making their own little Christmas gift tags and decorations using these simple self adhesive felt templates.
Materials and equipment
- Sewing Machine
- Iron
- Fabric scraps (Make sure that they are 100% cotton and that they are pre- washed)
- Coffee sack if you can get hold of one otherwise Hessian fabric used as a base fabric
- Christmas Advent Calendar Numbers Applique Template (available in my FREE RESOURCE LIBRARY— get the password for free by filling out the form below)
- Adhesible fusing and I am using HEAT & BOND lite
- Fabric marking chalk
- Cutting mat
- Rotary cutter
- Fabric scissors
- Paper scissors
- Quilting Ruler
- Regular sewing thread
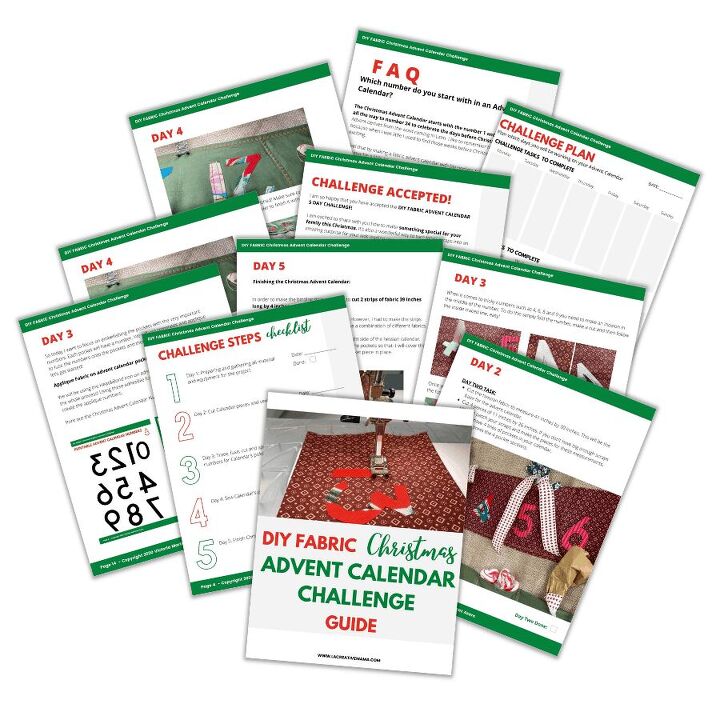
This tutorial is long and detailed so that you can get the most out of the process! If you would rather have a day by day action challenge on how to make your DIY Fabric Advent Calendar register for the Advent Calendar Challenge here!
Want to have the whole tutorial in a neat tidy Binder that you can print out? Check out this awesome Guide!
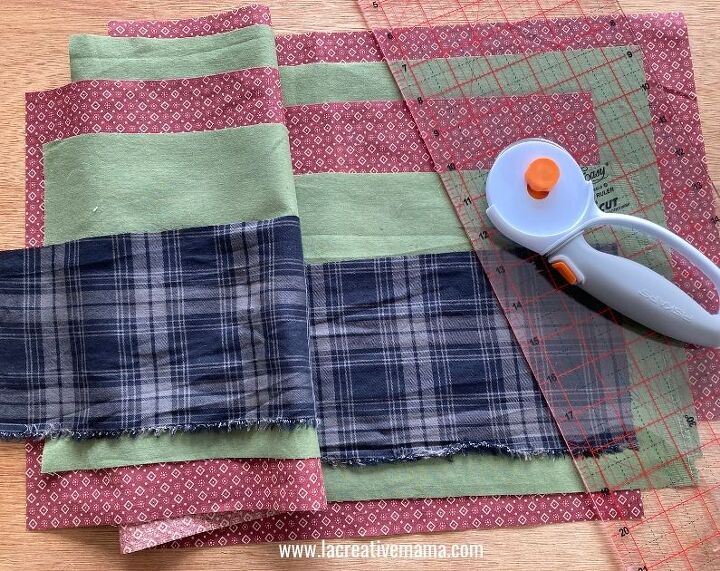
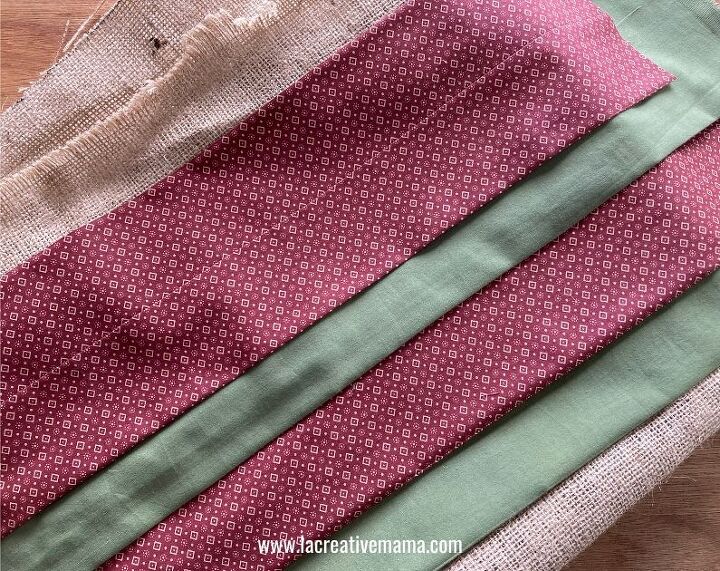
Step 1: Choosing the fabric for the advent calendar pockets
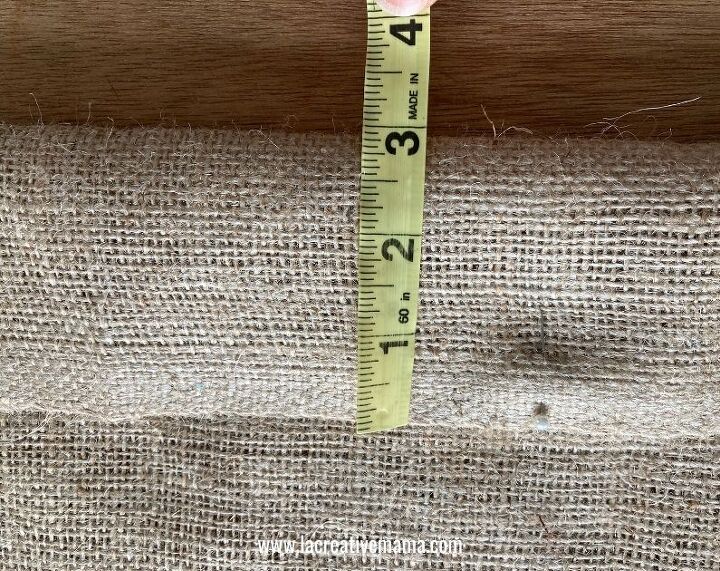
For the base you will need a piece of hessian fabric. I bought mine but you can easily re purpose an old coffee sack or potatoes sack if you get access to those!
Choose your fabrics for the pockets. Take into consideration fabrics that will look nice once they are combined with the hessian base fabric. Make sure they are 100% cotton since we will use iron fused appliques to it and it needs to withstands a very hot iron.
Cut 4 pieces of 11 inches by 26 inches. If you don’t have big enough scraps you can patch your scraps and make the pieces to this measurements.
If using a coffee sack unpick it and lay it flat on your working table. Cut the coffee sack fabric or the hessian fabric to measure 41 inches by 30 inches. this will be the base for the advent calendar.
You will have 4 lines of pockets in your calendar.
Step 2
Fold the fabric wrong sides touching each other.
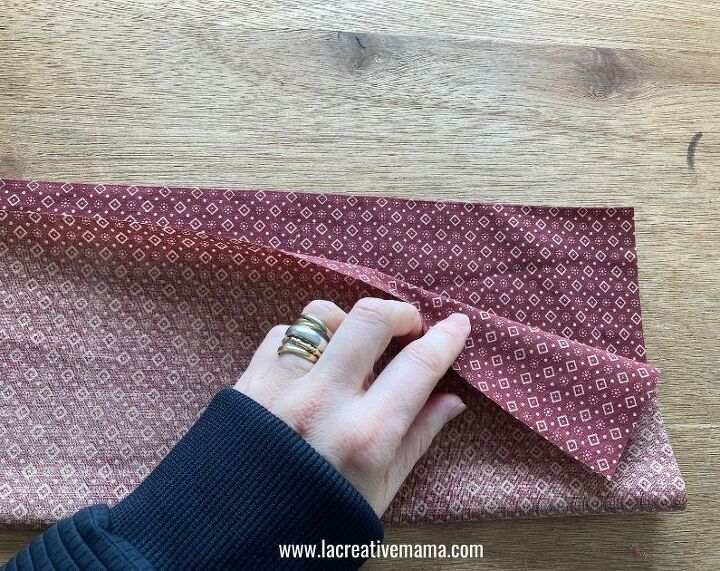
Pin the edges and sew a straight line. Leave both ends open.
Do the same with all four pocket pieces.

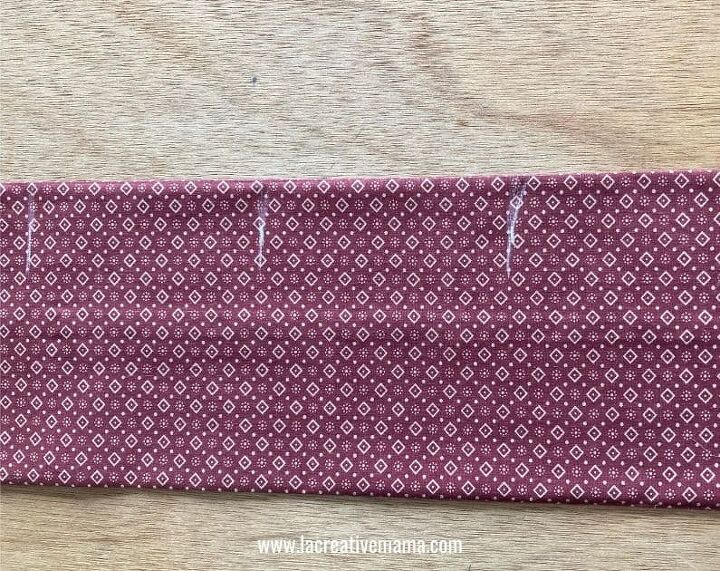
Once you have sewn the straight line manipulate the piece so that the seam end up in the middle of the pocket piece as shown in photo below.

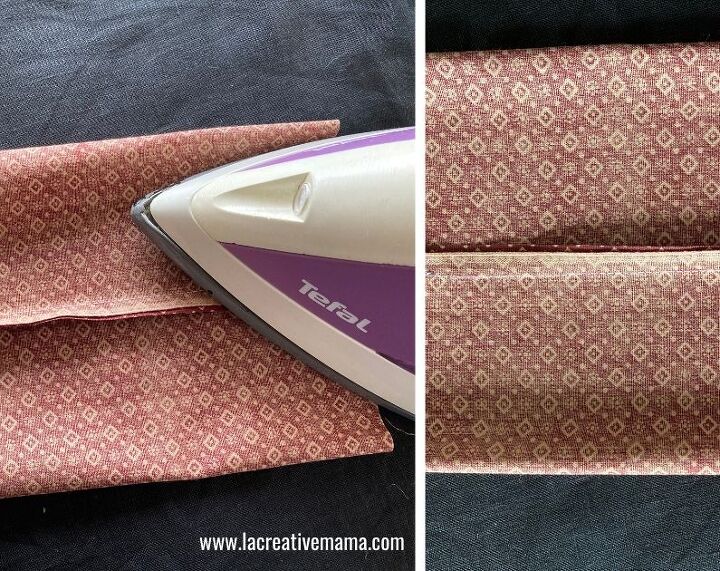
Press the seams to one side with a hot iron.
My pockets look like this. For one of the pockets I didn’t have enough fabric so I made it by using 2 different fabrics. The printed fabric will be in the inside area of the pocket so it won’t show in the final calendar.
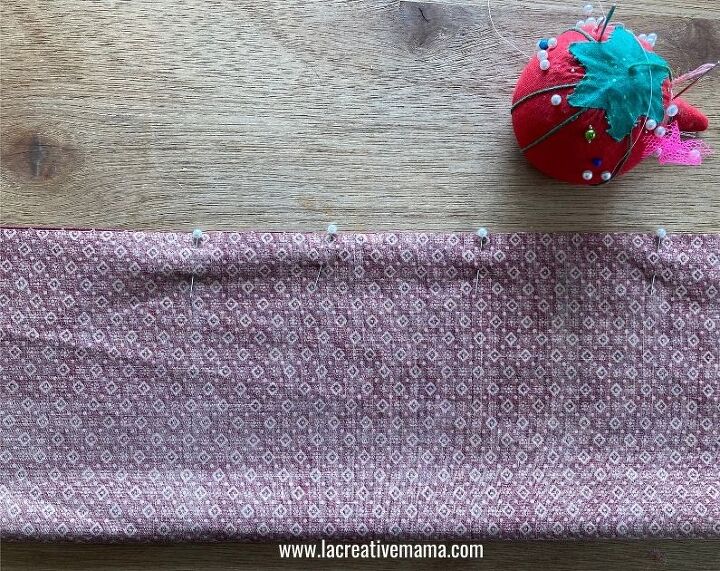
Step 3
Turn the fabric advent calendar pocket inside out through the open ends.
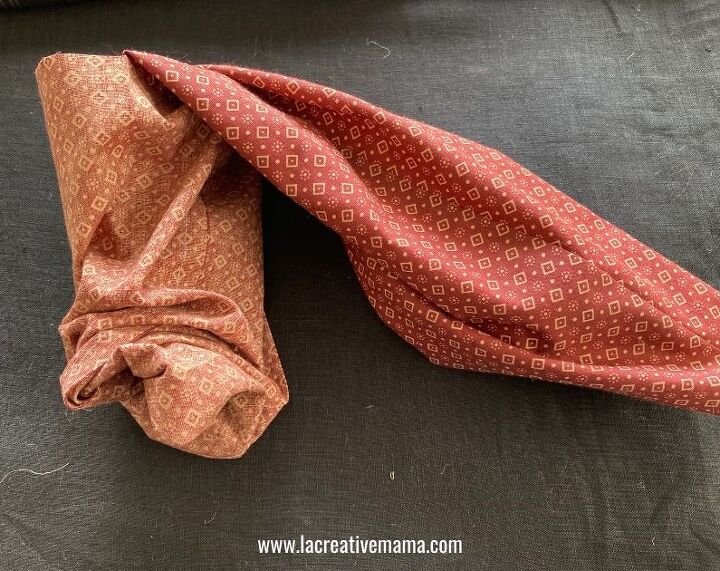
Give it a really good press leaving the seam in the middle of the pocket. Mark the top and the bottom edge really well with the hot iron.
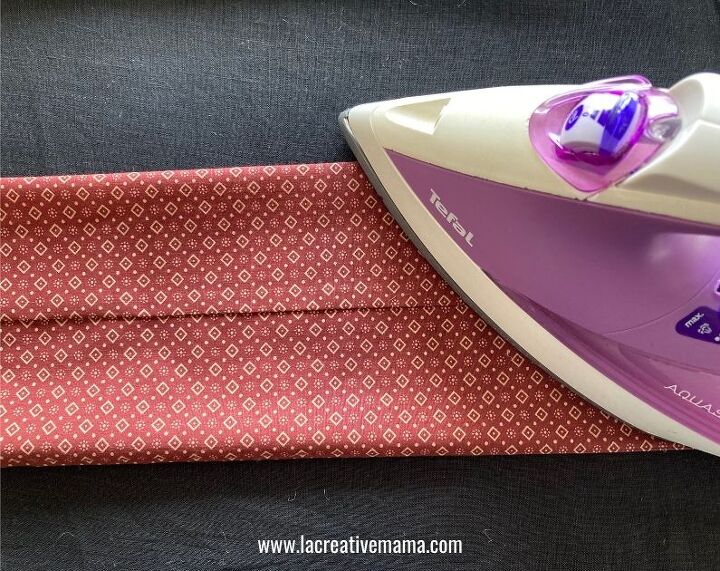
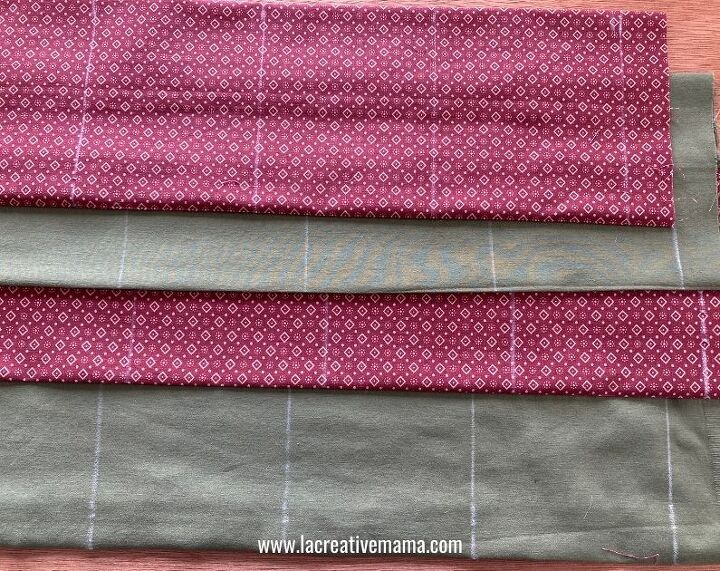
This is how the pockets should look like. I like these colors in combination with my hessian backing.
Step 4: Applique Fabric on advent calendar pockets
This is my favorite step in the whole process! Using these adhesible fusing sheets makes it super easy to create the applique numbers.
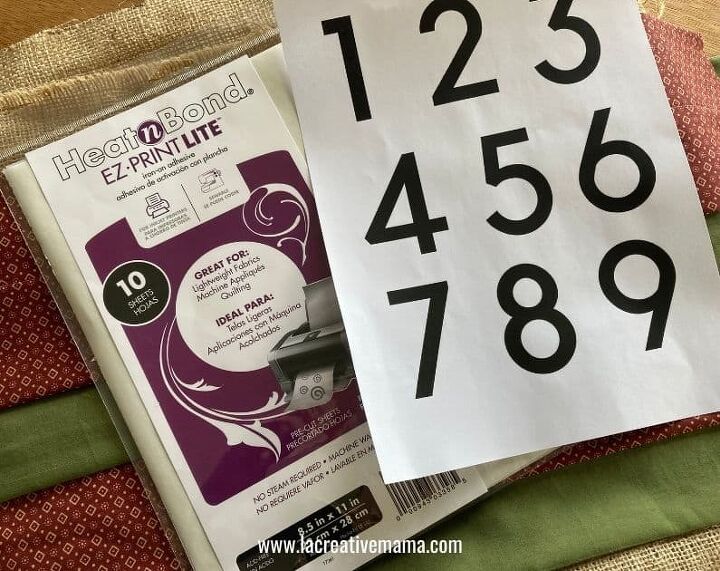
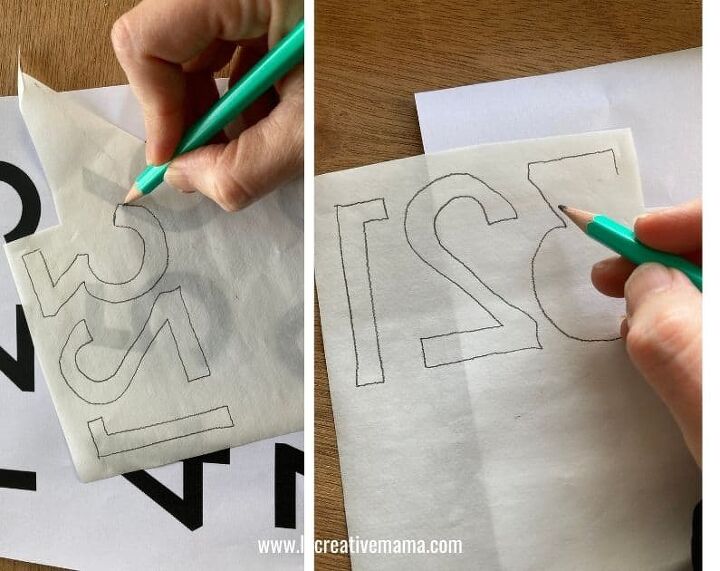
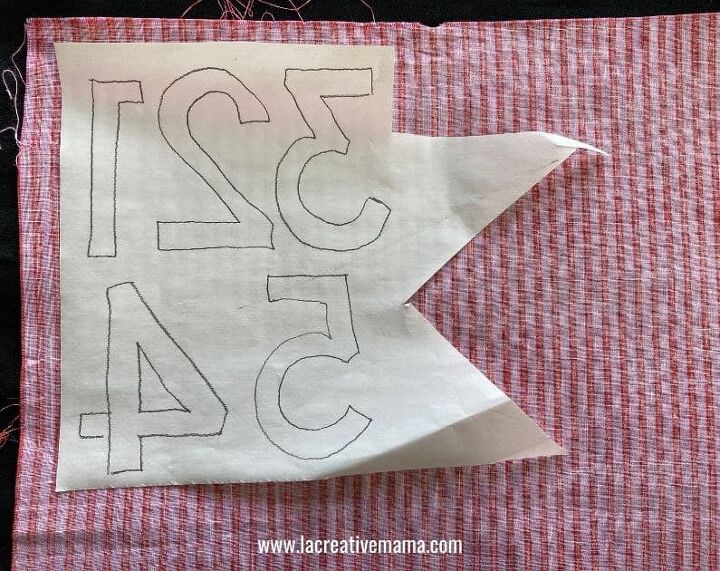
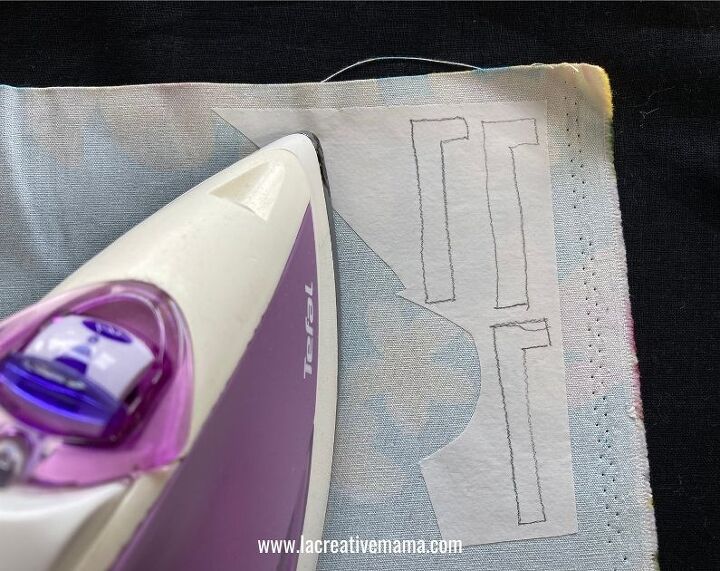
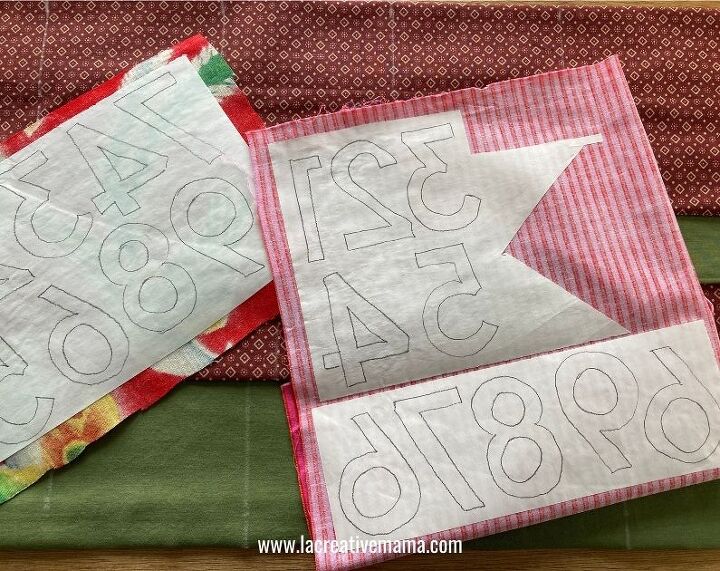
Download the Christmas Advent Calendar Numbers Applique Template (available in my FREE RESOURCE LIBRARY) by filling out the form below and trace the numbers.
Note that the numbers need to be traced in a mirrored way because you will applique it on the wrong side of the fabric.
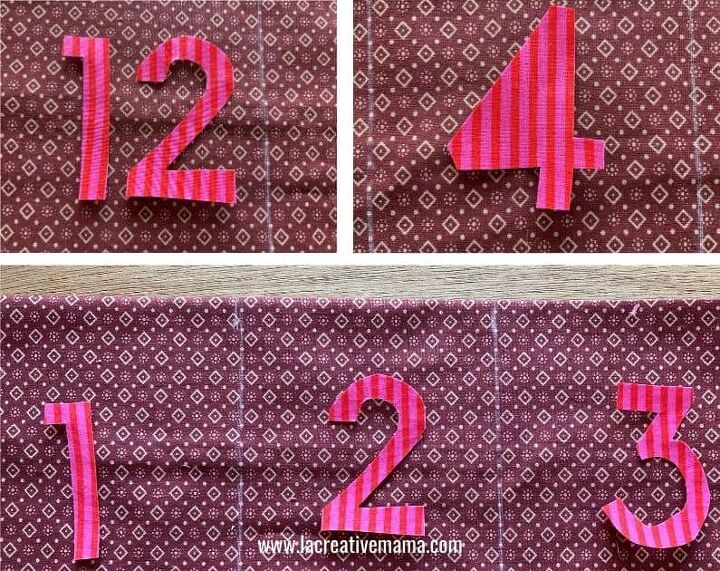
Trace the numbers from the Printable Template onto the paper side of the iron on adhesive sheet. I made the template numbers in solid black so that you can easily see through the iron on paper sheet.
You need to have number combinations all the way from 1 to 24 🙂 If you are like me you will get a bit confused but don’t worry! I did 1 to 10 and appliqued that batch choosing my fabric scraps. Then I worked my way up from there 3 numbers at a time.
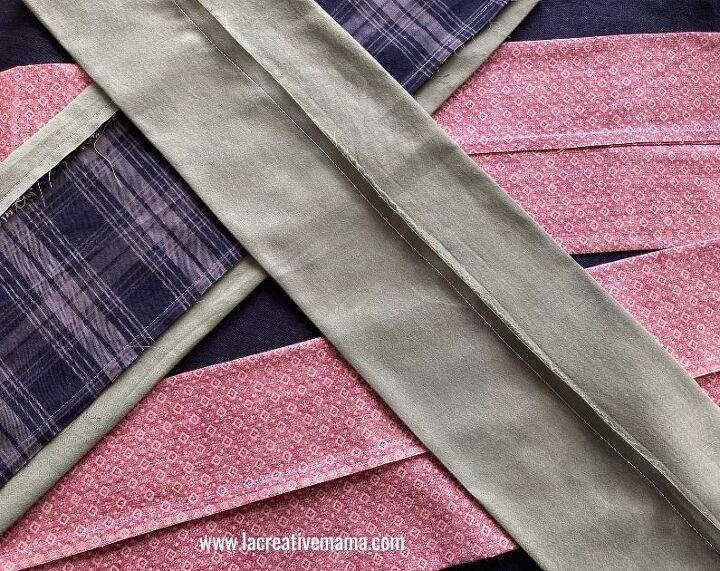
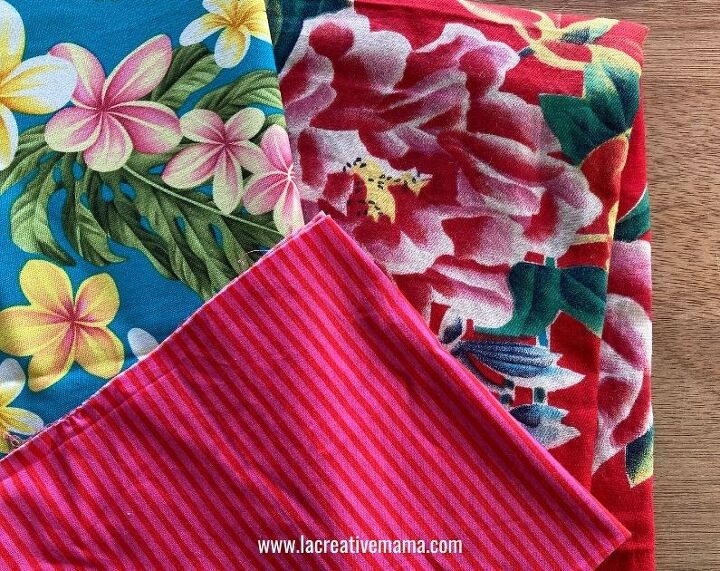
This is the time in which you choose your fabric scraps. I love this part because you can choose tiny pieces that you love or bigger pieces and just use the color bit that you most like out of the whole pattern 🙂 It’s really a lot of fun!
I have chosen fabrics that mean something to me. The red flower fabric I bought it in china when I lived there for a few years, he blue one I bought it with my mom in Hawaii a few years back and the pink stripe one I got it for my daughter’s dress. All left over fabric from previous projects 🙂
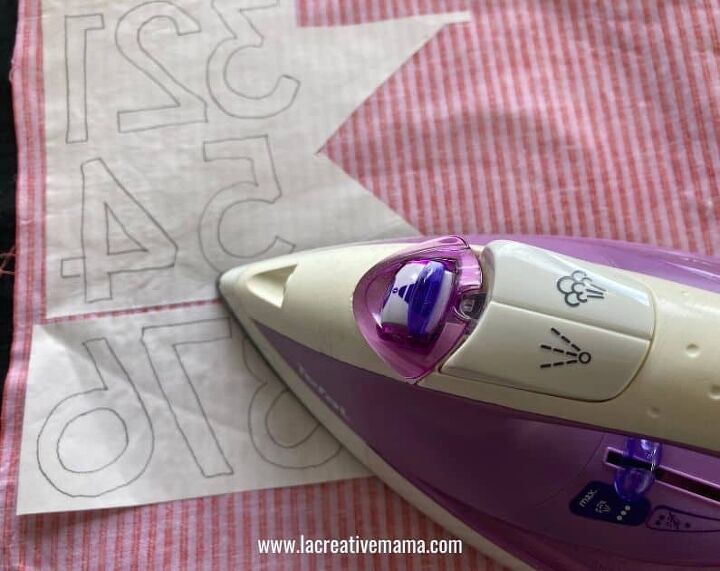
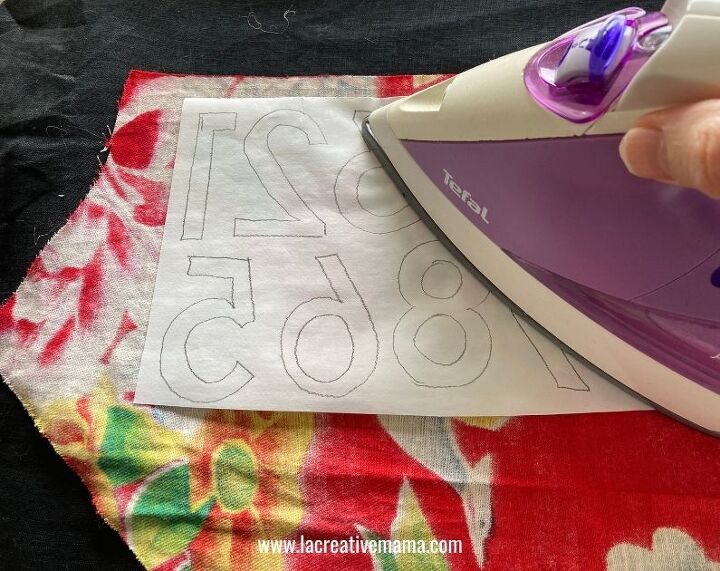
Place the traced numbers on top of your fabric scraps making sure that you are fusing the part of the fabric that you want.
Press with a super hot iron but without any steam. Be sure to check the manufacturer’s instructions for this step. Press for a few seconds and then release and repeat again until the paper fusing is totally stuck to the fabric.
It should look like this.
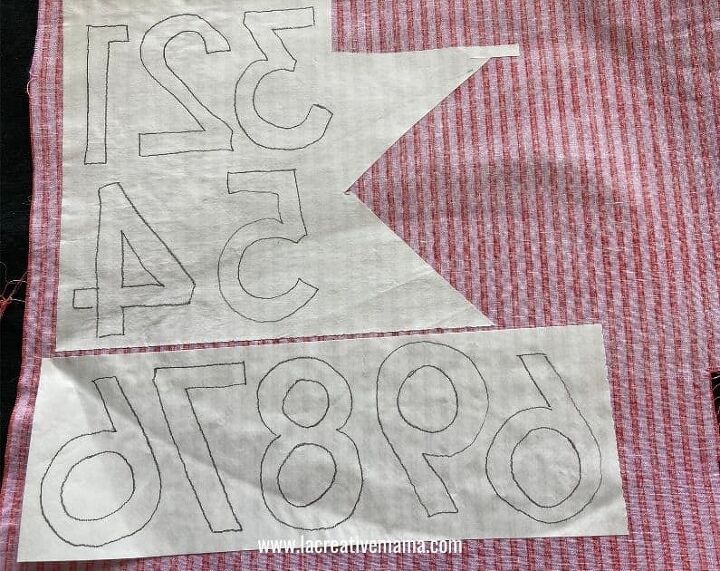
Repeat this process with all your different fabrics to achieve all the number combinations.
Step 5: Sewing the pockets on the fabric advent calendar
Using your fabric marking chalk mark 1 inch away from each end of the pocket pieces.
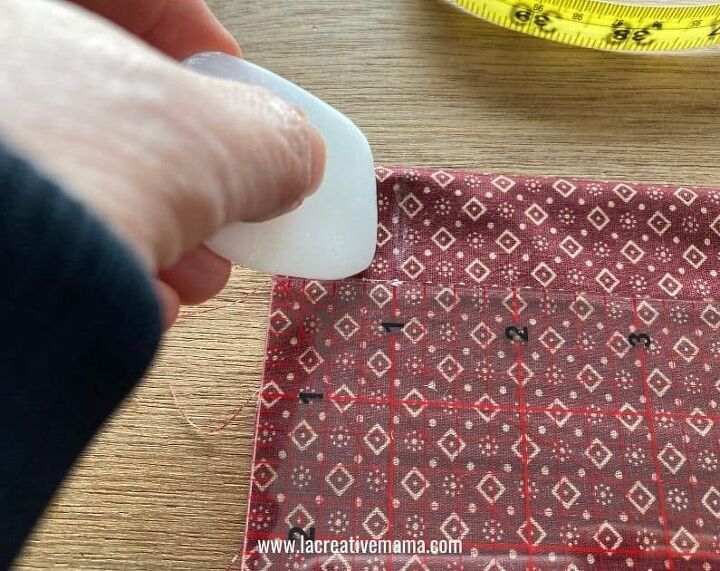
Also mark lines every 4 inches. This will create the 6 separate pockets once they are sewn.
Draw the lines the whole way through so that it makes it easier to set the applique in the right place. Don’t worry because the chalk lines will rub off.
DIY fabric advent calendar Tutorial RECAP
By now you should have:
- Cut the base hessian fabric
- Cut, sewn and marked all four lines of pockets
- Traced and fused all numbers on fabric scraps (from 1 to 24)
Make sure you download your FREE Applique Numbers Template by filling out the form below
Step 6: Applique fabric scraps on advent calendar pockets
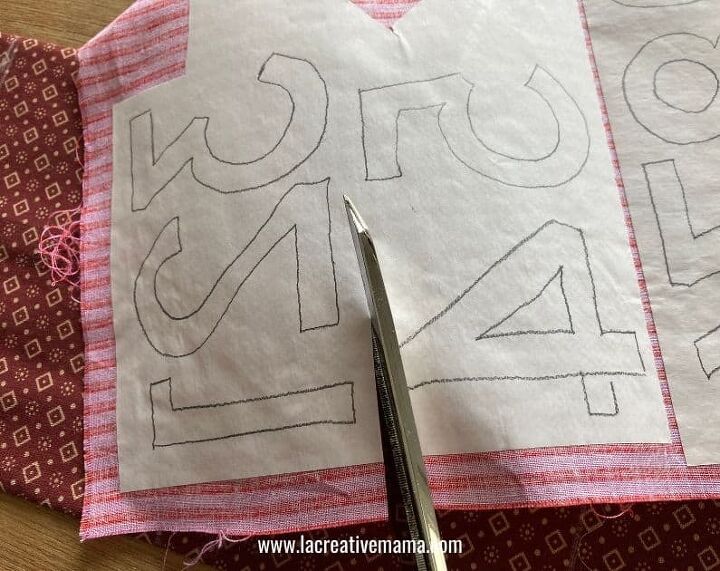
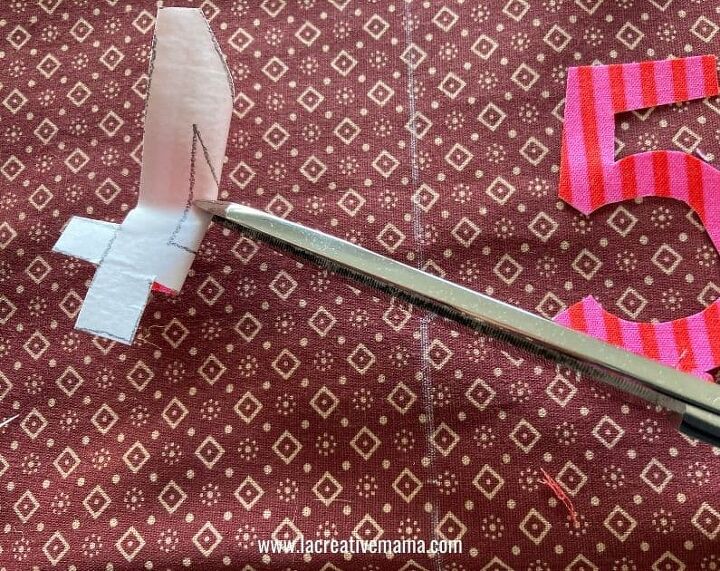
Cut around the fused numbers following your traced lines.
Place the numbers in the desired position
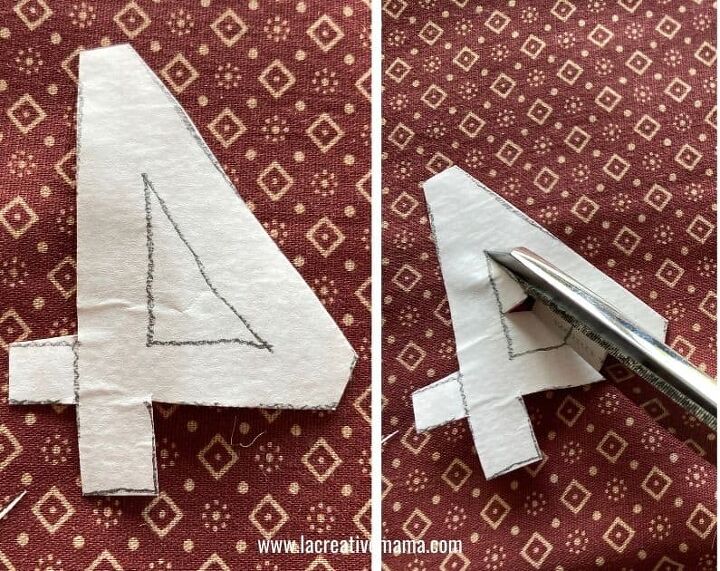
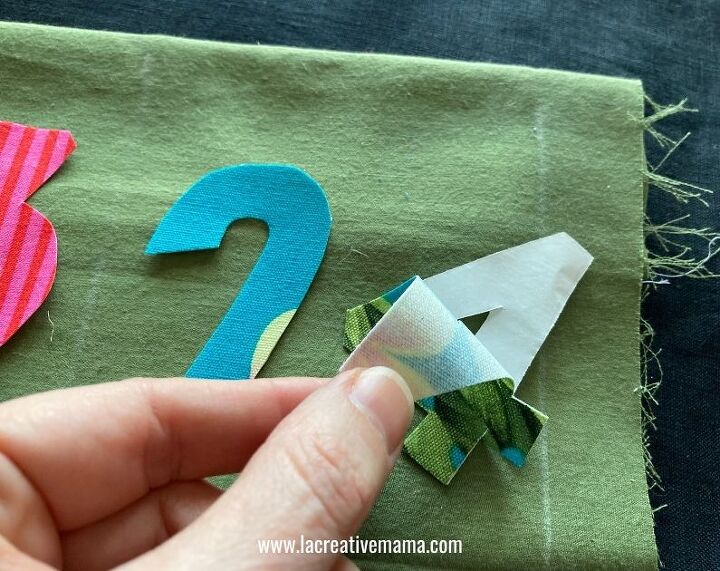
When it comes to tricky numbers such as 4, 6, 8 and 9 you need to make an incision in the middle of the number. To do this simply fold the number, make a cut and then follow the inside traced line, easy!
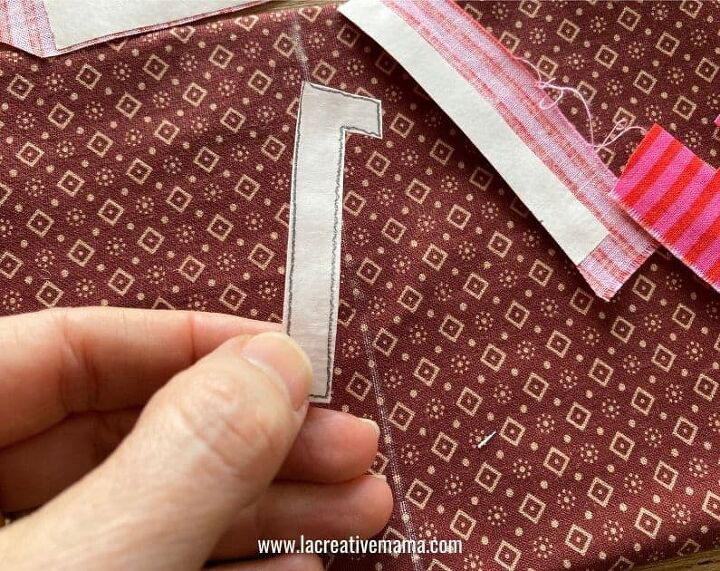
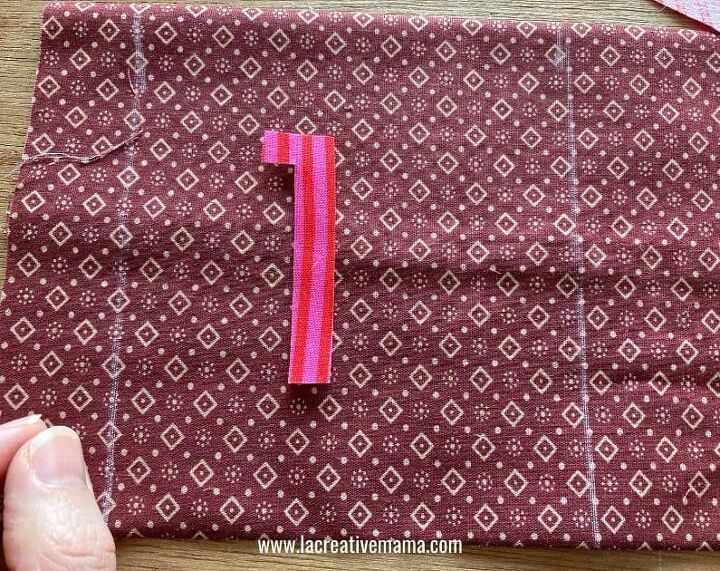
Once you have cut all the numbers and you are happy with the placement simply peel of the fusing paper. It will leave a glue residue on the back of the fabric.
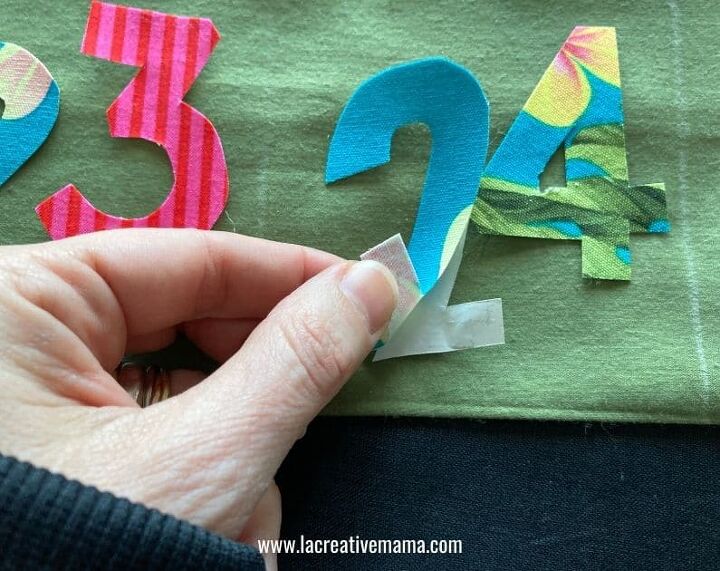
Press in place with a hot non steamy iron. Press in intervals of 6 seconds aprox until its fully fused to the backing fabric.
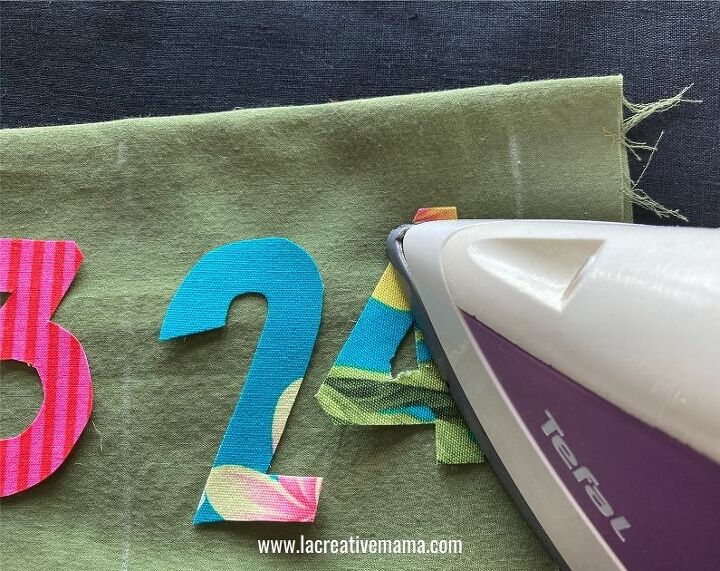
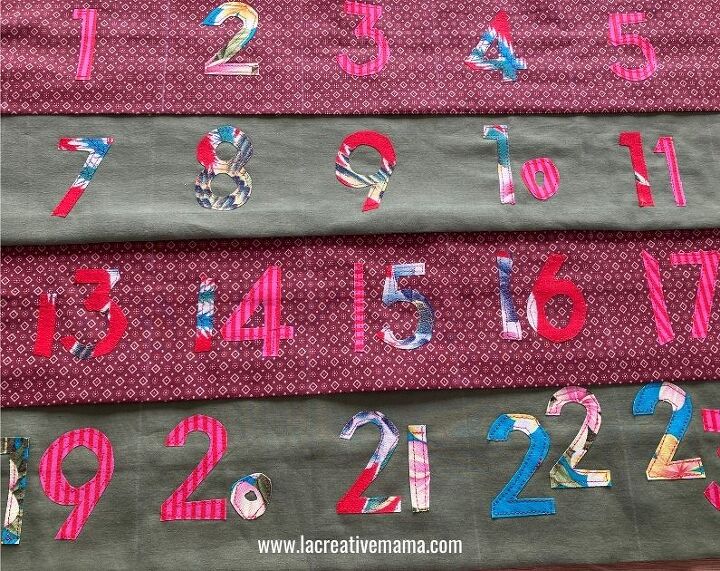
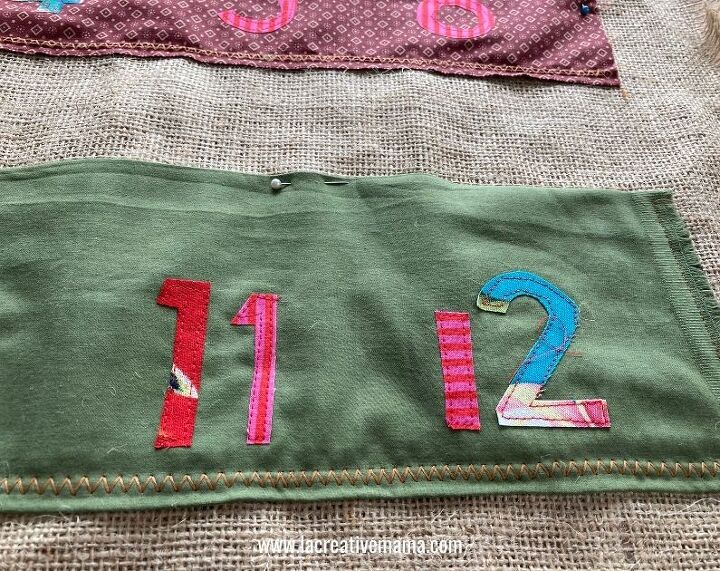
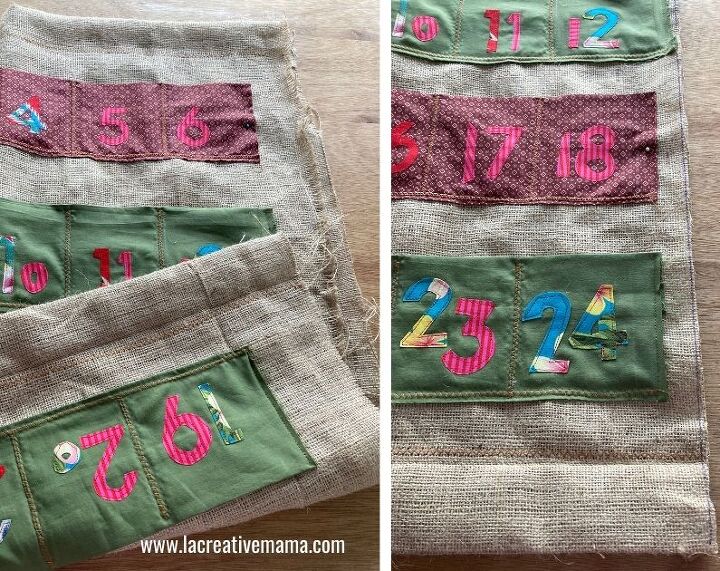
The fused numbers should look like this 🙂
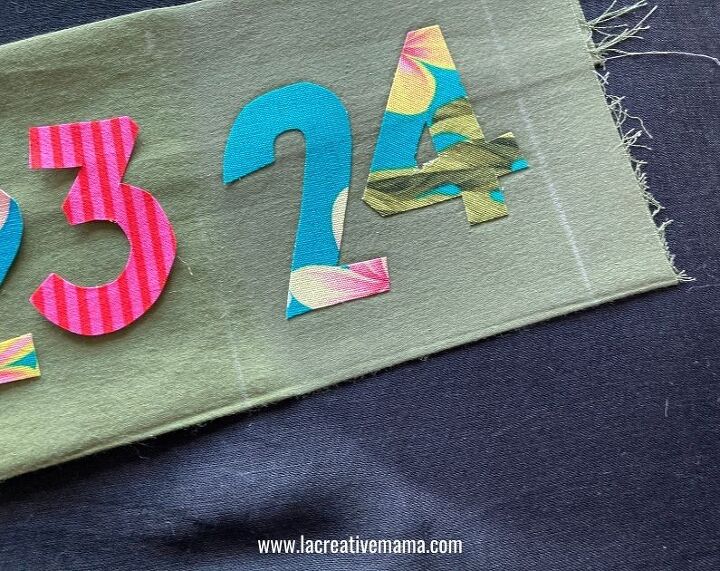
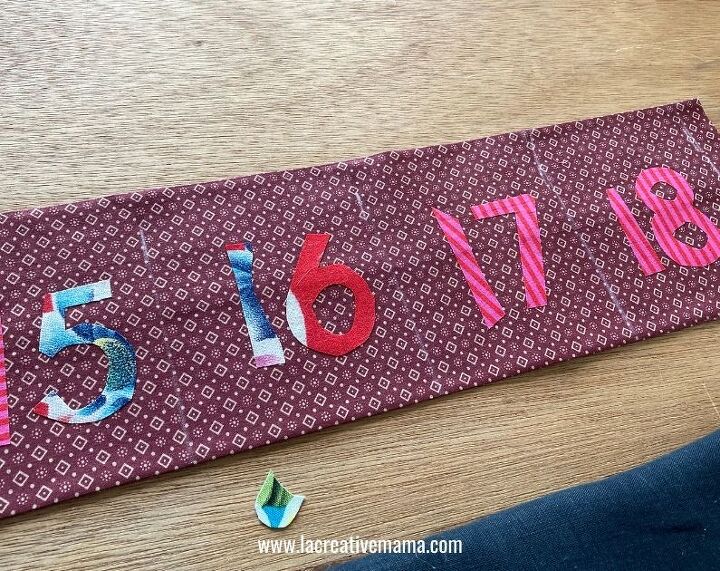
Here are all my numbers nicely fused 🙂
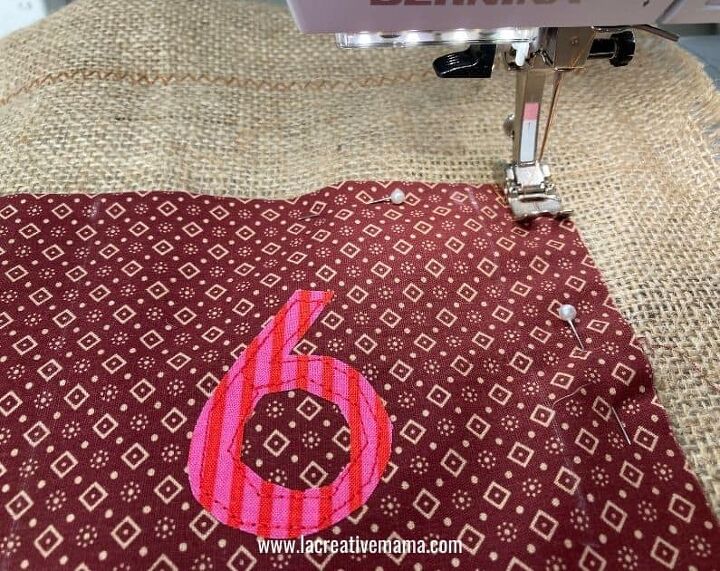
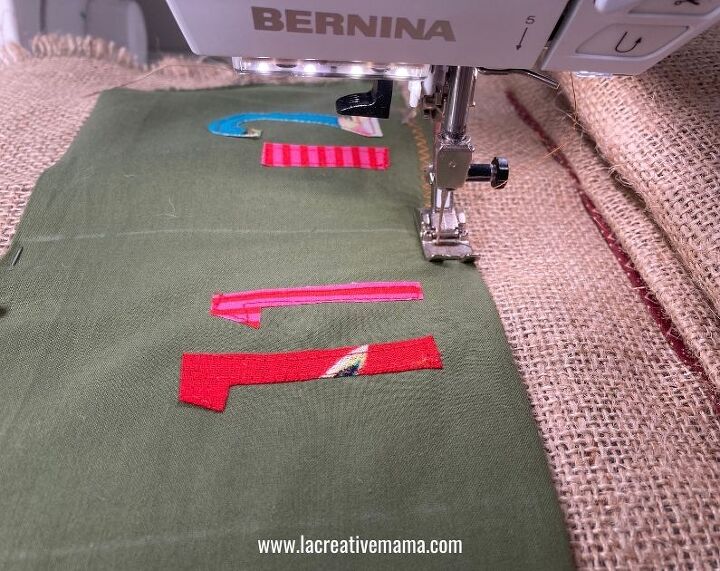
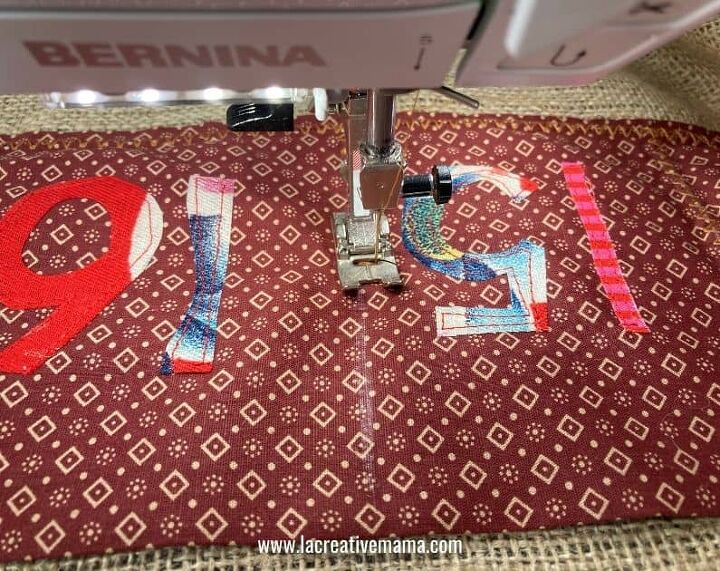
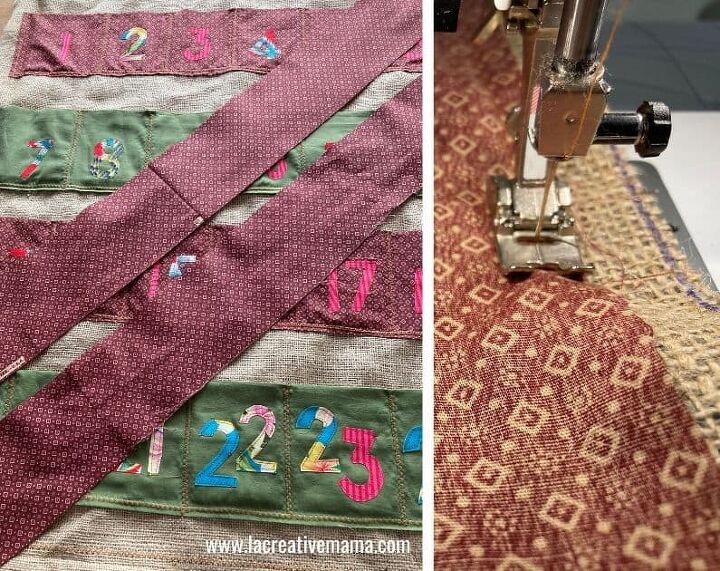
Step 7: Sewing the applique numbers of the advent calendar
Now its time to sew around your fused numbers so that they are set in place forever and ever and this calendar can be part of many many Christmases to come. This advent calendar is so awesome that it will be a heirloom on your household 🙂
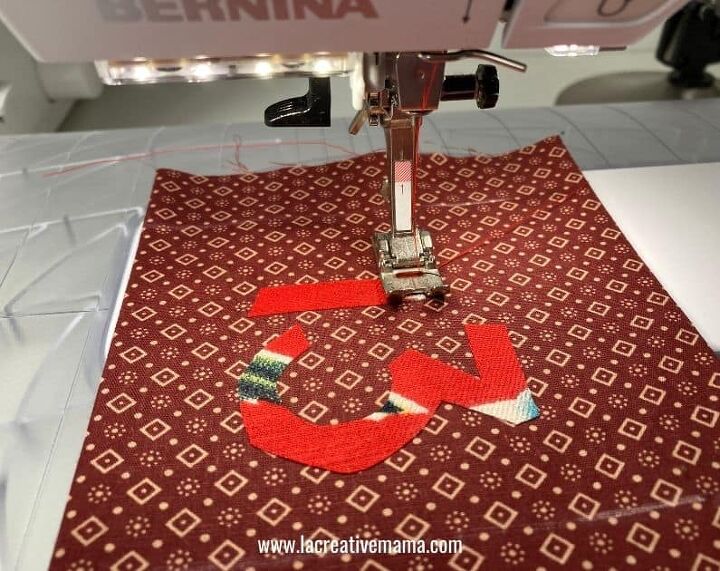
Sew around the edges with a regular thread and a regular stitch length. You can go around it once or you can sew a few times around the number, its up to you and what effect you like 🙂
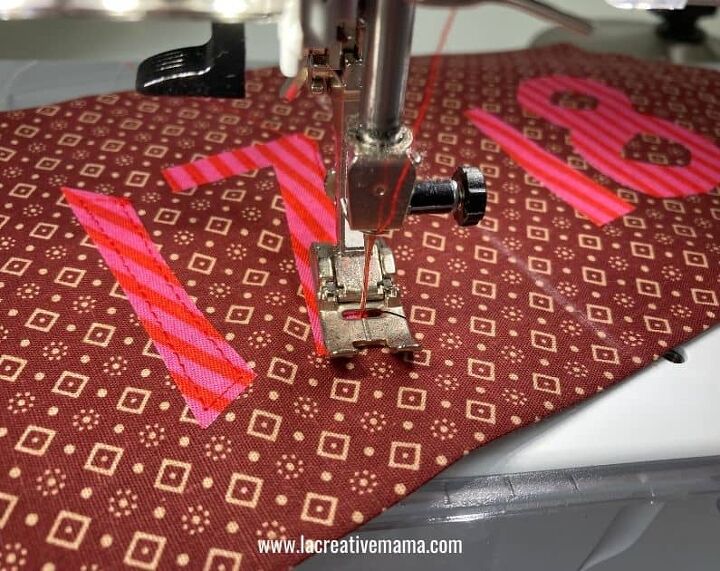
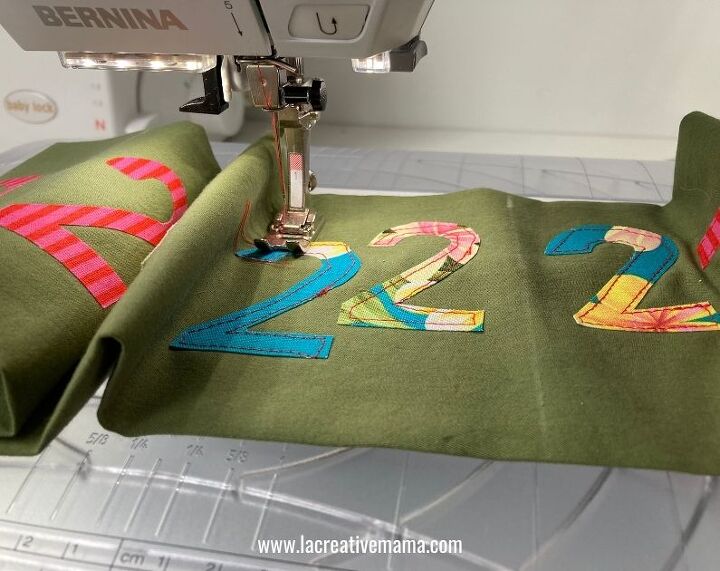
This is how mine looks so far! How does yours look?
Step 8: Sewing your DIY fabric advent calendar
Fold the top and bottom edges towards the wrong side of the calendar by 3 inches. This will be the hems.
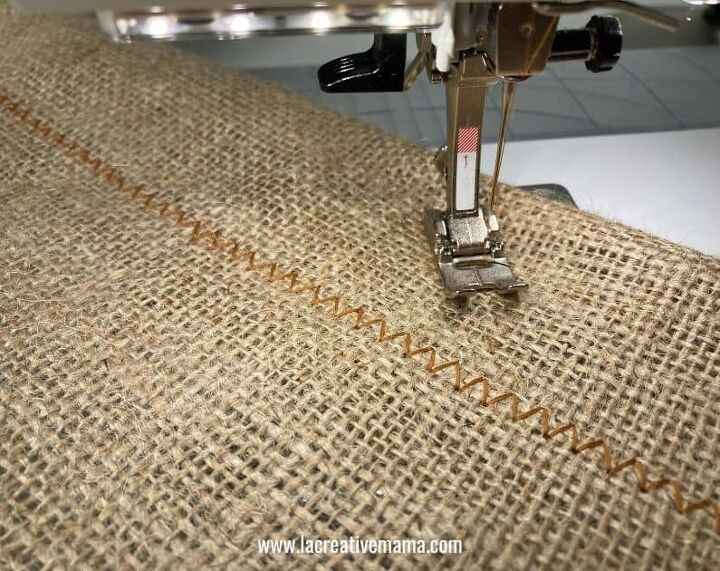
Sew a straight line using a zig zag stitch. I sewed from the front because I wanted to make sure that I was happy with the way it looked on the right side 🙂
This is how mine looks like 🙂
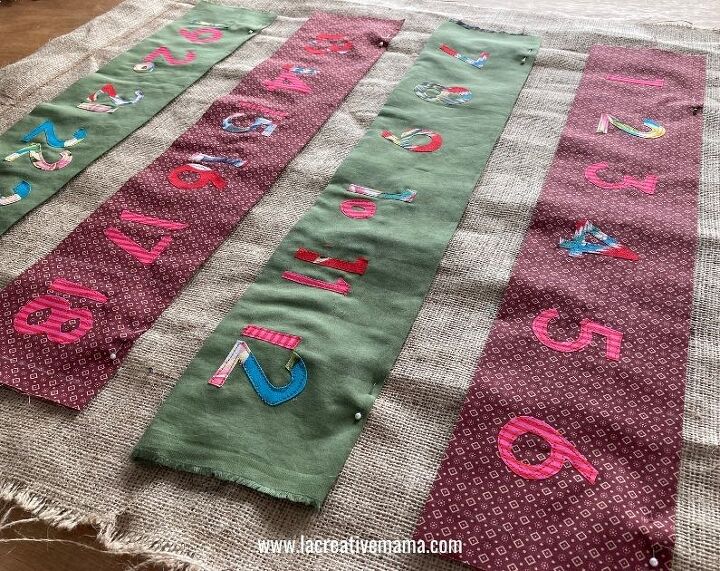
Place the 4 pocket pieces with all the appliqued numbers on top of the base hessian fabric.
ok, now its time to sew the pockets to the base hessian fabric. Pin the 4 pocket lines in place. Divide them evenly and make sure there is enough space in between them to place the goodies for the kids.
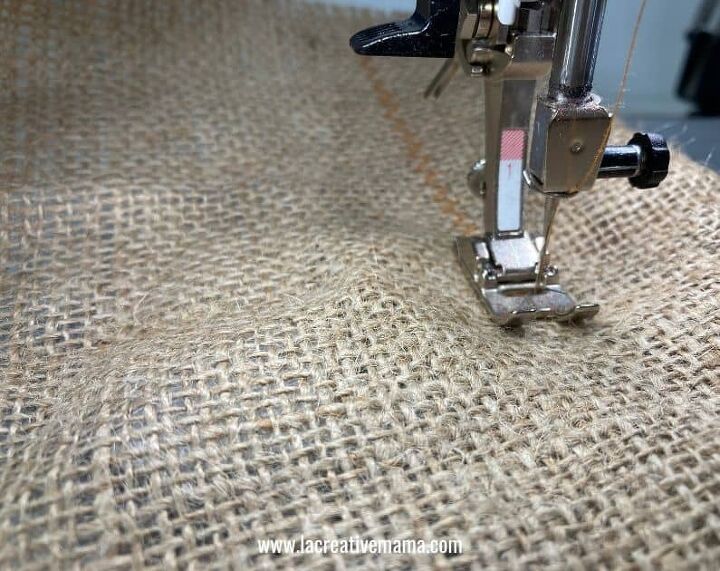
Sew the side edges of all 4 pocket pieces. You won’t see this seam its just to set the pockets in place.
Using the same zig zag stitch that you used for the top and bottom hems sew a straight line to attach the pocket piece to the hessian fabric along the bottom edge of the pocket piece.
This is how it should look like!
Using your quilting ruler re draw the chalk lines every 4 inches. These will be great to sew in the right places.
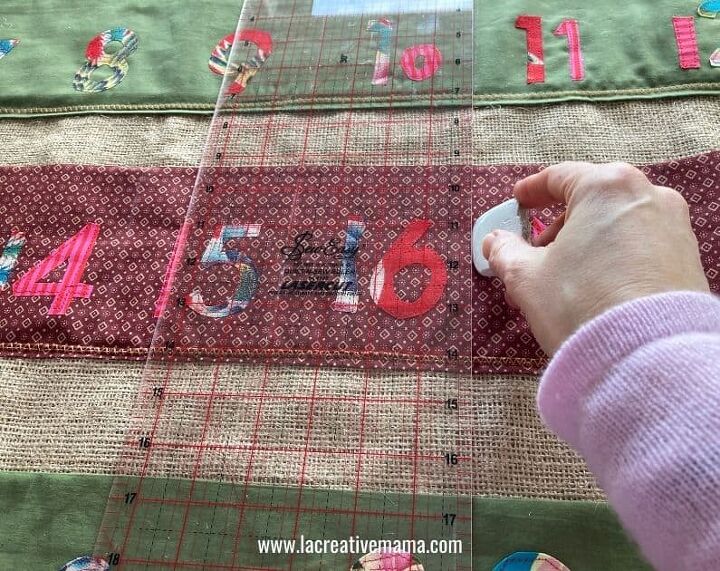
Using the same zig zag stitch sew the pocket divisions following the chalk marked lines.

This is the base of the advent calendar finished! Make sure to trim the edges on each side. Leave 1 inch on each side in order to finish it with a nice binding tape which is the next step 🙂
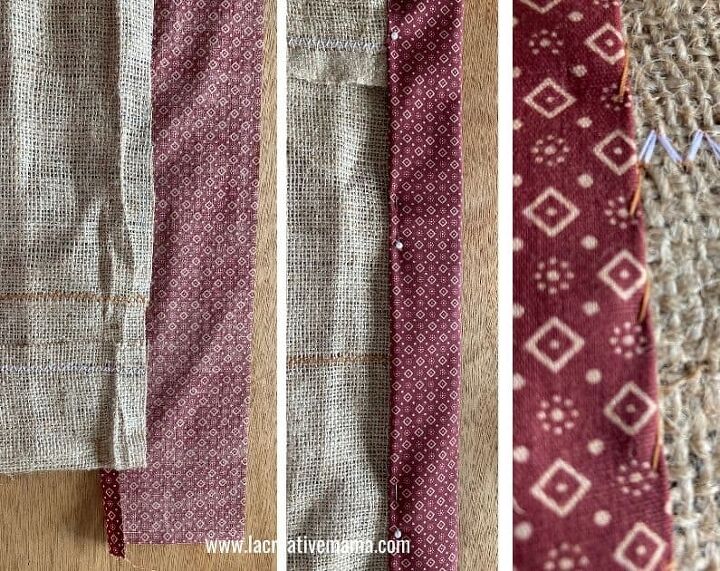
Cut 2 strips of fabric 39 inches long by 4 inches wide. I had enough fabric to use the same by sewing pieces together but you can also have a combination of different fabrics.
Place the binding tape right side touching the right side of the calendar. Make sure that the tape edge is on the edge of the pockets so that it will cover the stay stitch that was made initially to hold the pocket piece in place.
Pin in place and sew.

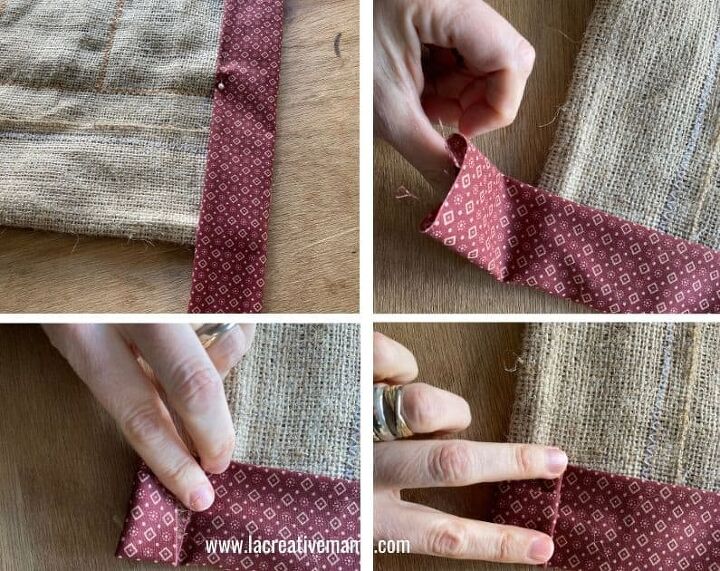
Turn the advent calendar to the wrong side and fold the binding tape in itself and pin. Sew this side of the binding tape by hand. Almost there!!!!!! One more thing!!!!!!
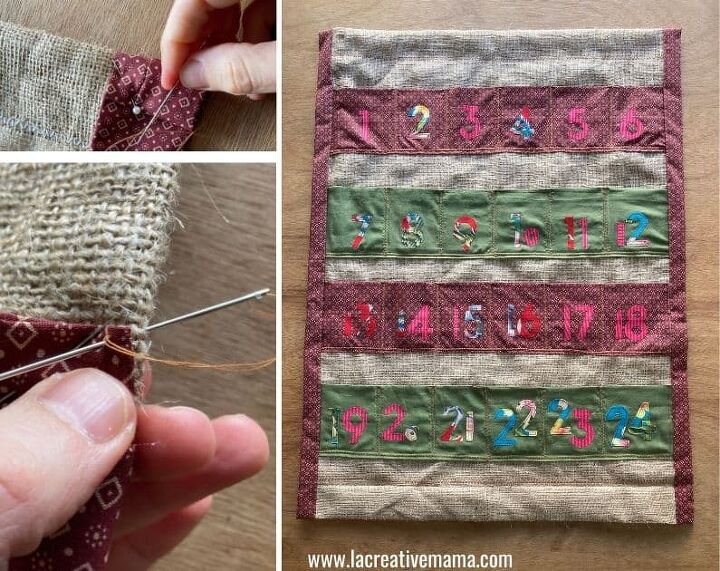
After you finish sewing the binding tape, fold the ends twice to conceal any raw edges.
Sew these ends by hand as well. VOILA!!!!!!!!! The advent calendar is done!
How to make an advent calendar wall hanging
Ok so now you have this amazing fabric advent calendar , let make it into an amazing wall hanging advent calendar.
Cut 3 stripes of fabric 6.5 inches by 5 inches. Fold in half and sew a straight seam alongside the 6.6 inches length. Press.

Fold in half so that one raw edge is inside the fold and the other is facing down. Place the looped fabric on the top edge of the calendar with raw edge facing the hessian fabric.

Sew in place using the same zig zag stitch. Sew one at each end and one in the middle of the advent calendar.

Now we are done !!!!!!!!!!!!!!!!!!!!!!!!!!!!!!! You did it!!!!
Hang it by inserting a wooden or metal rod through the fabric loops and hang it on your favorite Christmas spot 🙂
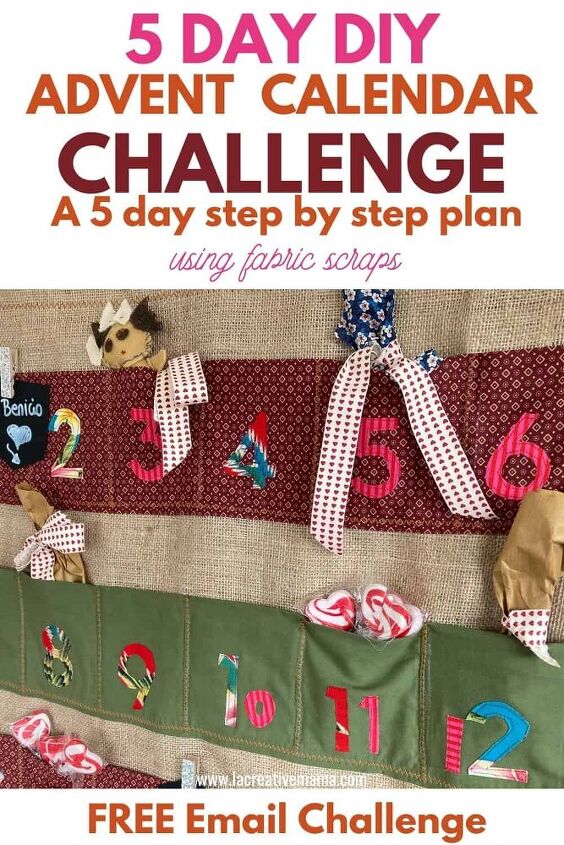
Join the 5 day DIY Advent Calendar Challenge!
A 5 day step by step guide to creating a beautiful advent calendar using fabric scraps and applique! FREE
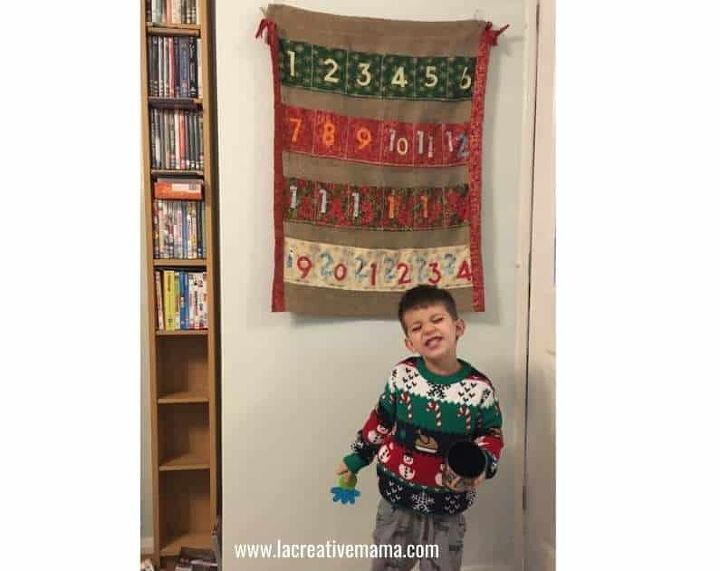
Check out these Fabric Advent Calendars made by creative mamas!
This Advent Calendar was made by Ros for her grandkids. This is her littleChristmas message:
“Thank you for the Advent calendar pattern. I made three, one for each of my three daughters and grandchildren. All the children really loved the calendar, so again, thank you.
Have a great Christmas”
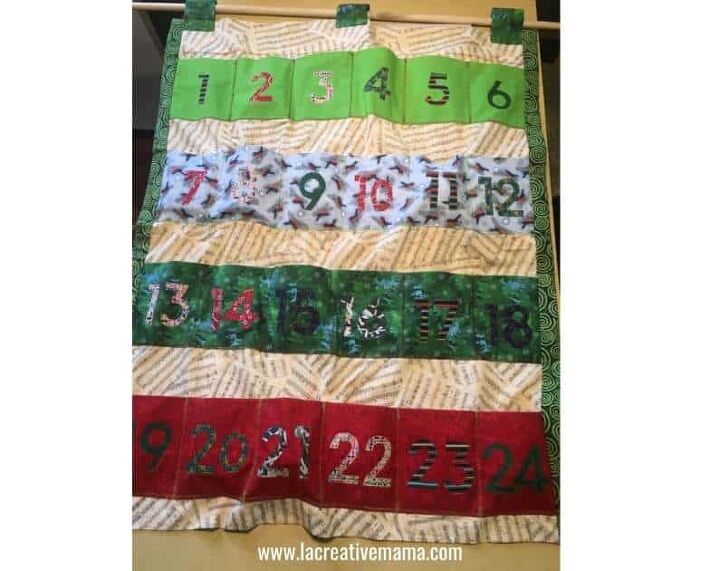
This other beautiful Advent Calendar was created by Diana. This is her sewing story:
“Giving this to my 13-year-old cousin. I didn’t have access to burlap (I’m guessing that’s what you call Hessian fabric,) so I subbed the music fabric instead. The recipient is quite a good violinist, so I thought she’d appreciate it.”


Frequently asked questions
Have a question about this project?