


Light Up Cardboard Advent Calendar

by
NerdyKat
13 Materials
$20
20 Hours
Medium
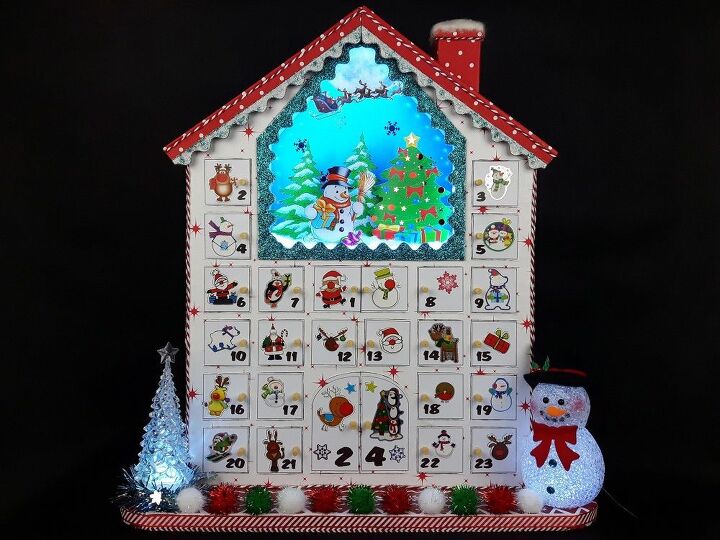
This year I decided to make an advent calendar for my little niblings (niece and nephew) to make their run up to the Christmas period a little more entertaining. The calendar is about 50cm tall, so if you would like to replicate this project you will need 4-5 larger boxes. Hope you enjoy this Instructable and have a lovely Christmas ;)
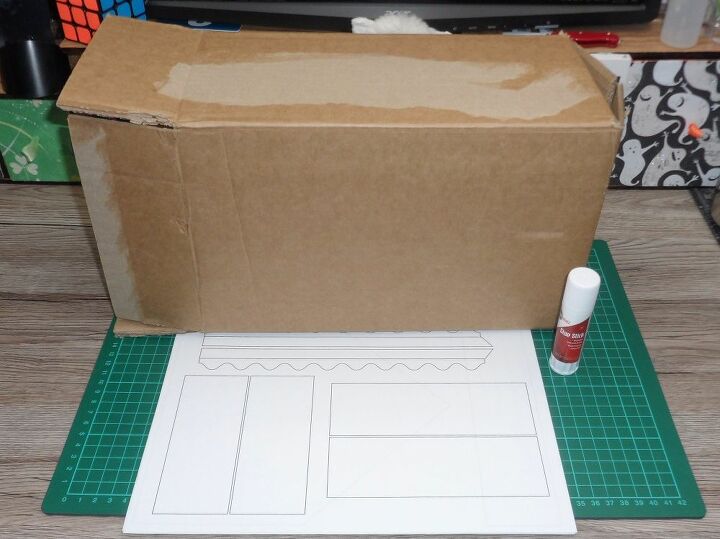
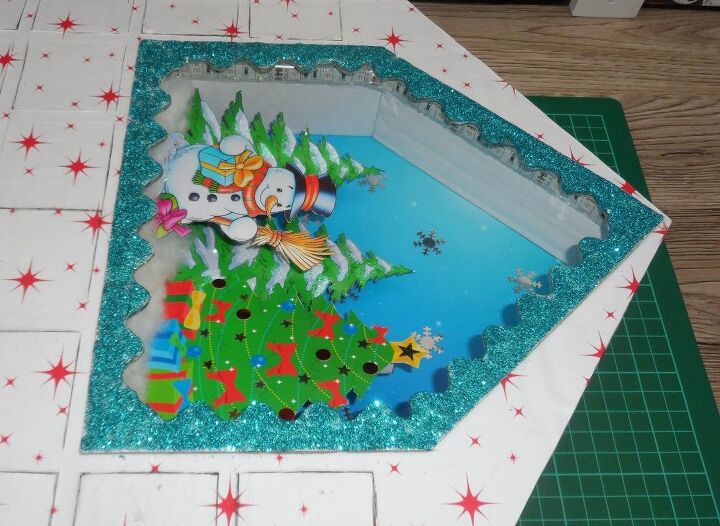
Print out the template (last 3 pages on A4 photo paper). Take the first three pages of the templates and glue them onto disassembled cardboard box with a glue stick. Cut out all of the shapes including the trees, snowman and snowy scenery.
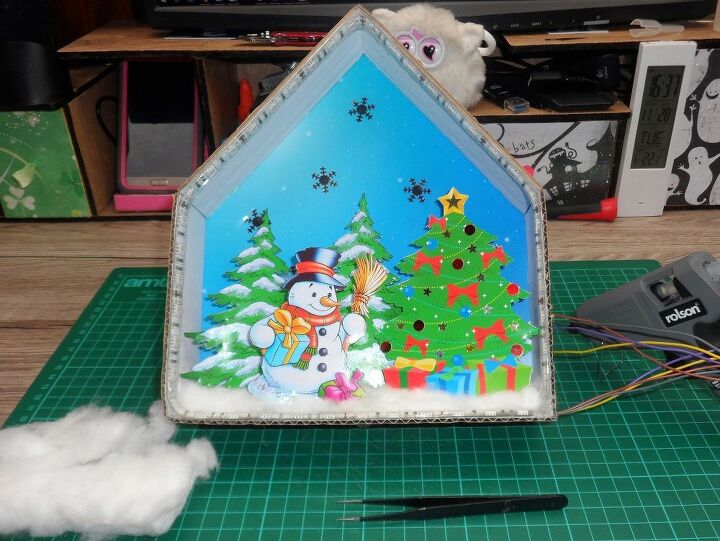
Glue the snowy background onto the house cutout with a glue stick. Attach the sides of the scenery with hot glue. Cut the LED strip into required length and remove the waterproof coating from the end of the strip if present. Gently score the LED strip contacts with a knife (this will make soldering easier) and solder on 4 wires. Make a hole in the right side of the scenery, push the wires through and glue on the LED strip. Apply the hot glue all around the LED strip, this will ensure that the strip won't detach itself after some time.
Make 4 stands out of the triangles and strips and glue them onto the trees and the snowman. Apply the glue stick onto the snowy/bottom part of the snowman and sprinkle glitter onto it before the glue dries. Do the same with the trees. Attach some ball and star shaped confetti onto the Christmas tree and some snowflakes onto the snowy scenery.
Glue the trees and the snowman into the scenery and attach some cotton wool around them with the hot glue.
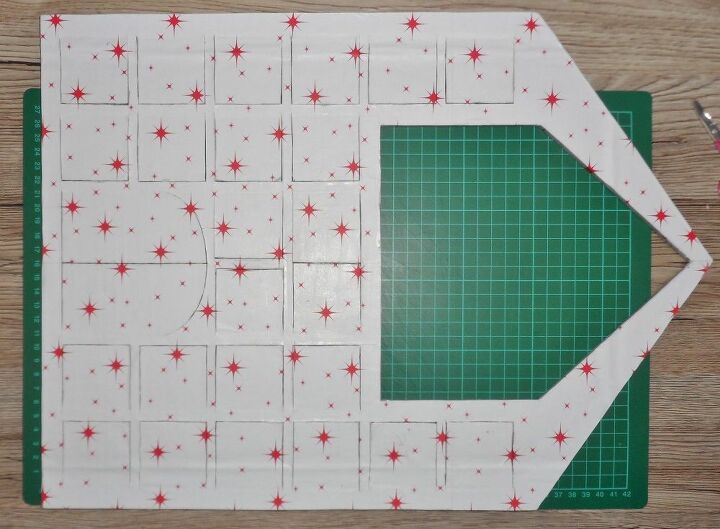
Take the pages 4-7 from the templates, align and glue them onto a larger cardboard piece. Cut out the main house shape and glue on a sheet of tissue paper from the inside and some plain white paper from the outside. Cut out all of the little doors (cutting 3 sides all the way and scoring the fourth one). The cardboard boxes I ended up using were quite thick and closing the little doors was a bit of a challenge, so I decided to cut the sides at an angle (the inside of the door would be smaller than the outside).
Take the magnets, align and stick them in their positions with clear tape. Apply the tissue paper from the outside and cut out once more.
Glue some plain paper followed by the tissue paper onto a longer piece of cardboard. Mark and cut out 9 x 5cm strips. Hot glue the Christmas scenery onto the house opening. Cut and glue in the strips so that you divide all of the compartments. Cover some more cardboard with the plain paper and the tissue paper. Measure, cut out and glue on the backing for the compartments.
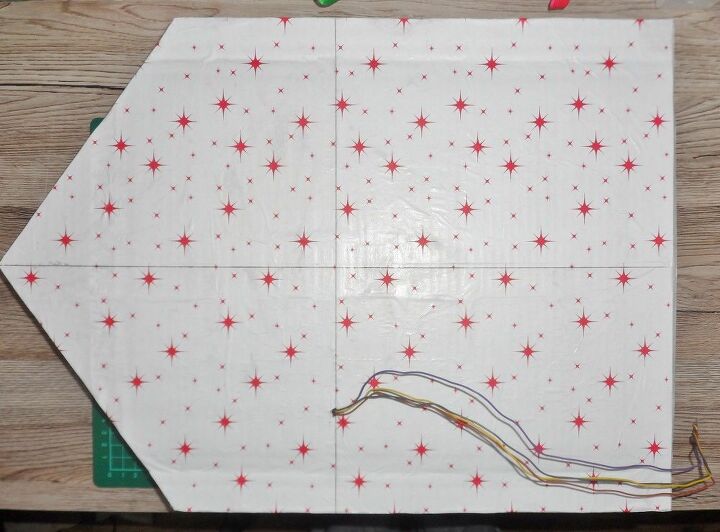
Take the template pages 8-11, glue onto the cardboard and cut out the back of the house. Measure and cut out 3 more strips for the sides of the house (approximately 5.5cm wide). Make a hole in the back of the house, pull the wires through and hot glue on the sides and the back. Glue on some plain paper to the sides of the house and cover the back and the sides with more tissue paper.
Attach the template from page 12 to a thinner cardboard box and glue on a plain piece of paper from the other side. Cut out with a hobby knife. Equally apply the universal glue onto the frame and sprinkle over plenty of glitter. Wait for it to dry and glue onto the house.
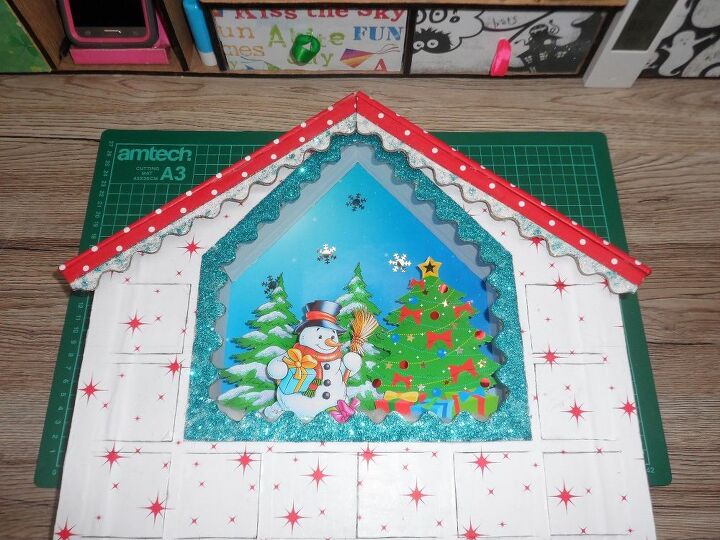
Cut out 2 pieces of cardboard 24cm x 7cm. Cover in plain paper followed by the tissue paper. On page 2 of the template you will find the roof eaves. Cut them out and cover the straight half of them in the tissue paper. Apply the universal glue onto the white parts of the eaves and cover them with glitter. Hot glue the eaves onto the roof pieces and glue the two roof pieces together. Attach the roof onto the house. Decorate the edges of the house with the red and white twine.
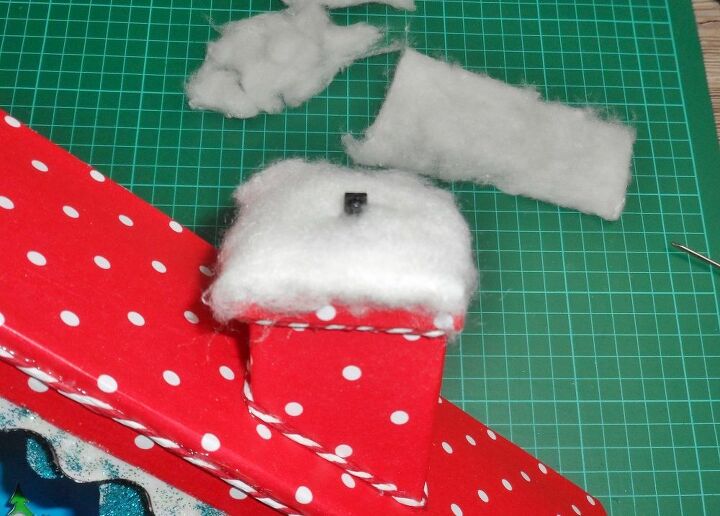
You will find the template for the chimney on page 13. Attach it to the cardboard and cut out. Score the lines for an easier bending and glue the chimney together with hot glue. Cover it with some plain paper followed by the tissue paper. Cut out three holes, one in the top of the chimney, one in the roof and one on the back of the house. Take the IR receiver and poke the IR end through the holes. Glue the chimney on the roof. Decorate the chimney and eaves with some more twine. To hide the IR receiver a little bit, cut a hole in the cotton wool, apply universal glue on the top of the chimney and attach the cotton wool. Make sure the IR end is still visible.

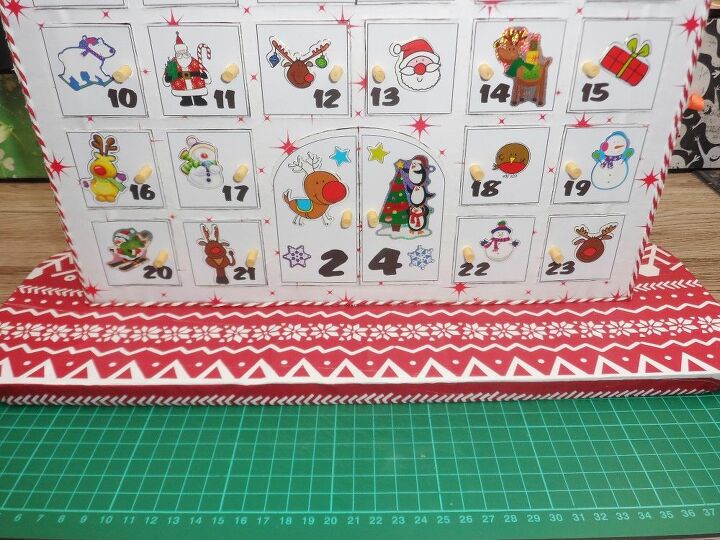
The templates for the doors are on pages 15 and 16. I decided to print them onto photo paper, but it's not necessary. Cut out all of the squares for the doors and attach them onto the compartments with the universal glue.
Roll the golden strips into little cylinders and hot glue them onto the doors. Take the stickers and affix them onto each compartment door.
Cut out two pieces of cardboard approximately 46cm x 16cm for the base and round the edges. Cut a few 1cm wide strips. Glue the strips around the base piece with hot glue and attach on the top base piece. Cover in the plain paper followed by the tissue paper. Mark the position of the house on the base with a pencil (approximately 2cm from the back) and secure it in place with hot glue.
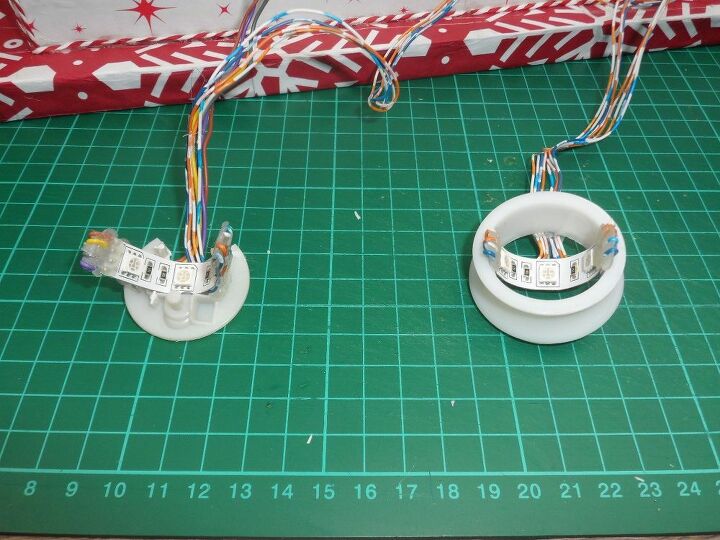
Remove the bases from the snowman and the tree. Cut off two pieces of the LED strip and remove the waterproof coating if necessary. Score the LED strip contacts and solder on the wire as you see on the photo. I wanted to mix the colours of the three LED lit features, so I swapped the wires around. Glue the LEDs into the snowman and the tree bases in a U shape. Cover the exposed wires with some hot glue to prevent any electrical shorts from occurring.

Glue the snowman and the tree bases onto the house base with hot glue. Affix the wires and cover with some tissue paper wherever possible. Attach some tinsel onto the tree base and a few tinsel pompom balls around the front and sides.
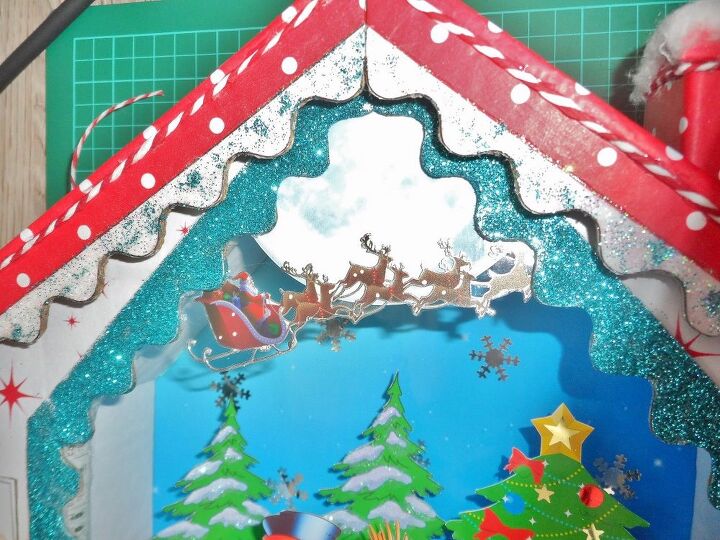
Take the moon template (page 13), cover with clear foil for protection and cut out. Glue the moon onto the inside of the frame with hot glue. Leave the Santa sticker on its backing foil and cut around. Mark the moons position on the Santas backing foil and cut out the moon shape without removing the sticker. Stick Santa onto the moon and hot glue the ends to the frame.
Generally this project was relatively easy, however I understand that not everybody is comfortable using a soldering iron. If this is you, but you would still like to make an advent calendar like this, you could just leave the standard LEDs in the snowman and tree in their original 'poundland state' and maybe glue around some of the battery operated LEDs for the Christmas scenery.
Merry Christmas ;)
{
"id": "4524094",
"alt": "",
"title": "",
"video_link": "https://www.youtube.com/embed/lq1P21SIBe8",
"youtube_video_id": "lq1P21SIBe8"
}
{
"width": 634,
"height": 357,
"showRelated": true
}
For more photos and the template go to: https://www.instructables.com/id/Light-Up-Cardboard-Advent-Calendar/
Resources for this project:
See all materials


Any price and availability information displayed on [relevant Amazon Site(s), as applicable] at the time of purchase will apply to the purchase of this product.
Hometalk may collect a small share of sales from the links on this page.More info


Frequently asked questions
Have a question about this project?