


The Easiest Milk Carton Gingerbread House in a Few Steps
I have a fun holiday DIY today. I am going to show you how to make the sweetest little milk carton gingerbread houses to display in your living room this winter.
Let's get started on this DIY gingerbread Christmas decor project, perfect for a Candyland Christmas!
This post was transcribed by a member of the Hometalk editorial team from the original HometalkTV episode.
You can also follow the video tutorial above.
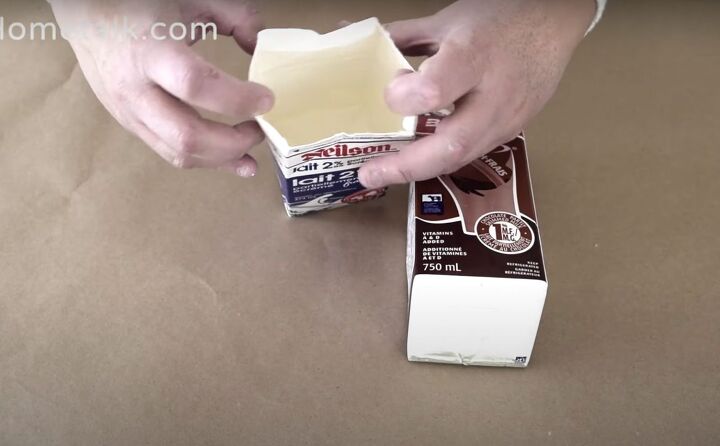
1. Clean the milk carton
I started my milk carton gingerbread house project by making sure the cartons were nice and clean. I washed them out with soap and water and let them dry.
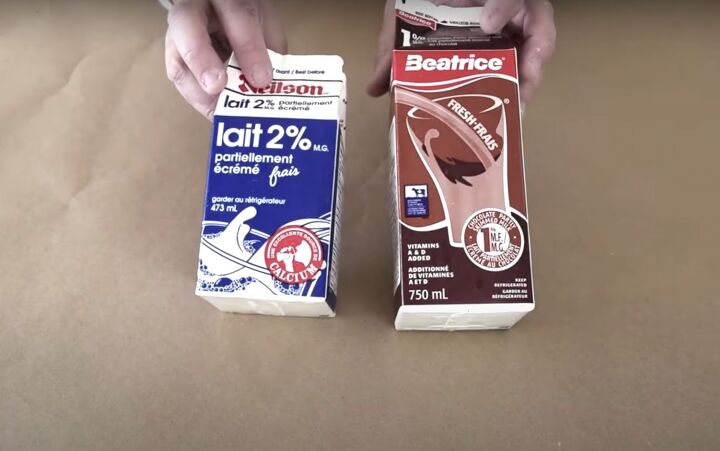
You can use any size of milk carton you want, as long as they are made from paper.
2.Paint the milk carton
After they dried, I opened up the tops and painted the outside of the carton with a thick layer of Annie Sloan chalk paint in Honfleur.
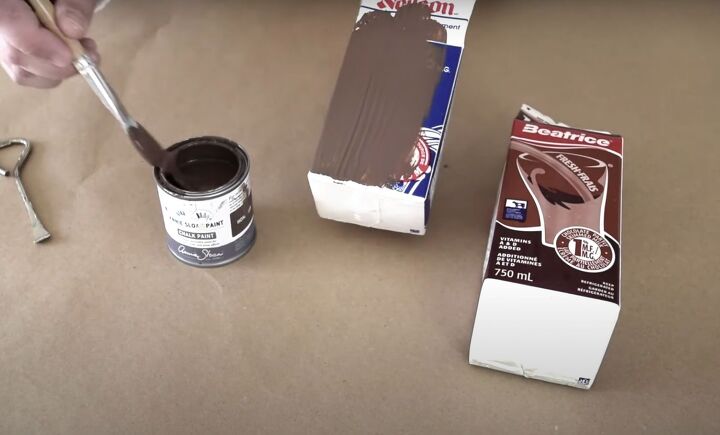
I used Annie Sloan chalk paint because the cartons have a waxy surface, and this particular paint sticks to anything.
Make sure you cover the entire outside of the milk carton without worrying about the bottom or the inside.
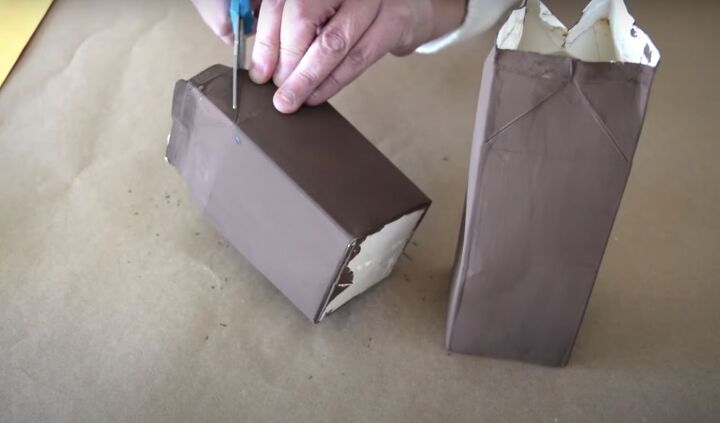
3.Cut the tops
After the paint dried, I trimmed the tops and cut down the folds so that I had a point for the roof. Be sure to use the side that goes straight up to where the fold comes in.
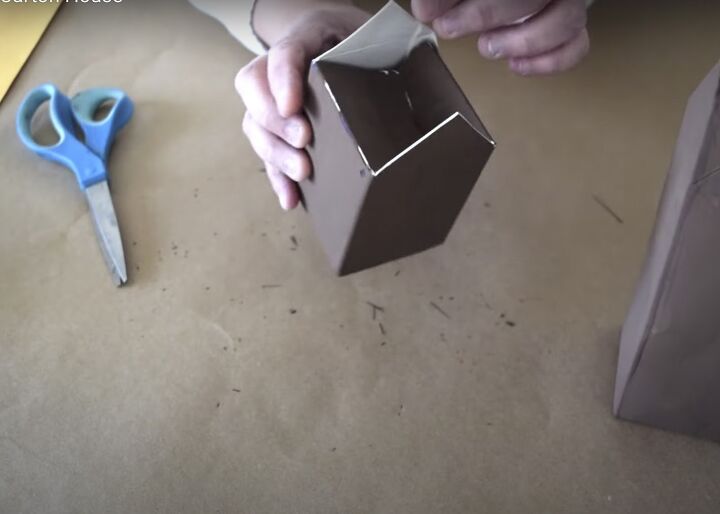
After you have cut both sides, you can take the side flaps and pop them right inside. They will give your milk carton gingerbread house a little more stability.
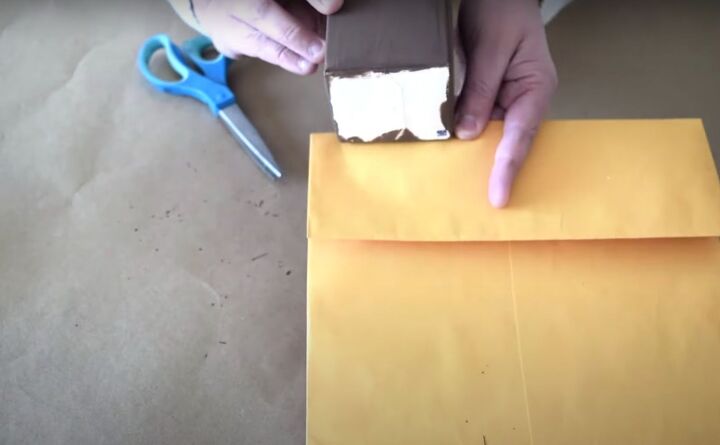
4.Add a roof
Next, I wanted to create the roof of my gingerbread house, so I took an old business envelope and made a fold on one end. I cut a piece slightly larger than the width of my carton. The fold will form the crease of my roof.
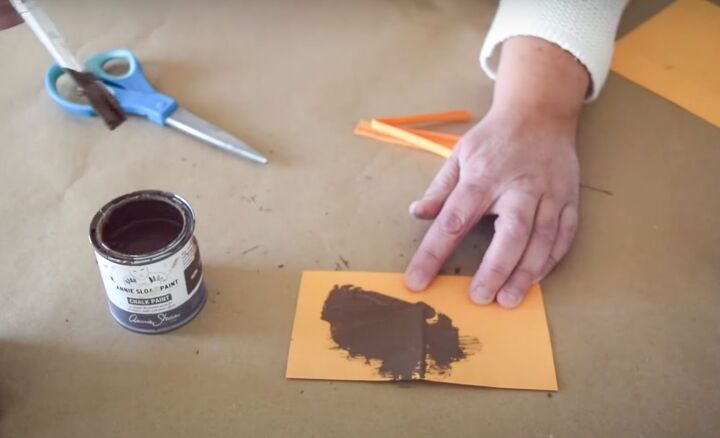
Once I had a little roof piece cut out, I went ahead and painted it with the same brown paint that I used to paint my milk carton. Make sure to paint both sides, and then let it dry.
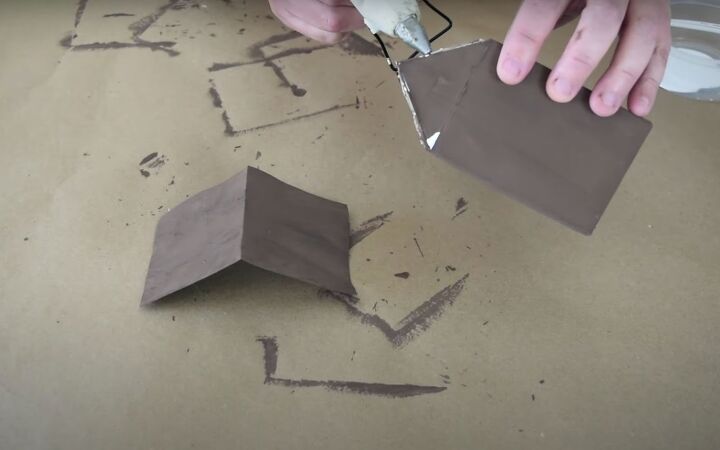
To attach the roof, I added a little hot glue to the top of the triangle and then pressed it into place.
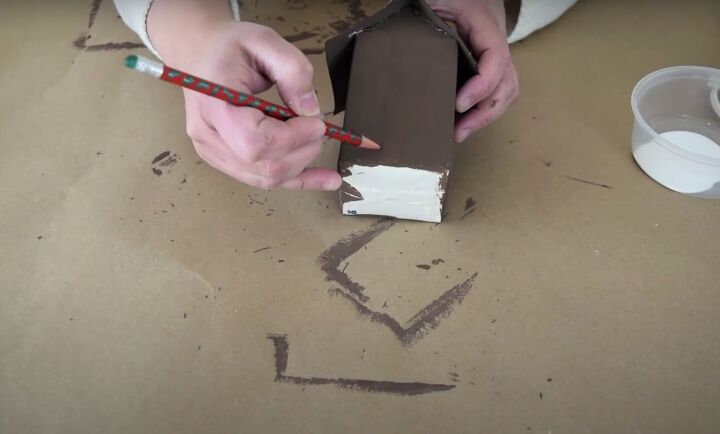
5. Decorate your milk carton gingerbread house
Now comes the fun part: decorating the little gingerbread houses. I wanted each house I made to be unique, but I started each by using a pencil to draw on some windows and doors. You can see the pencil, but it provides an outline for when I am ready to paint.
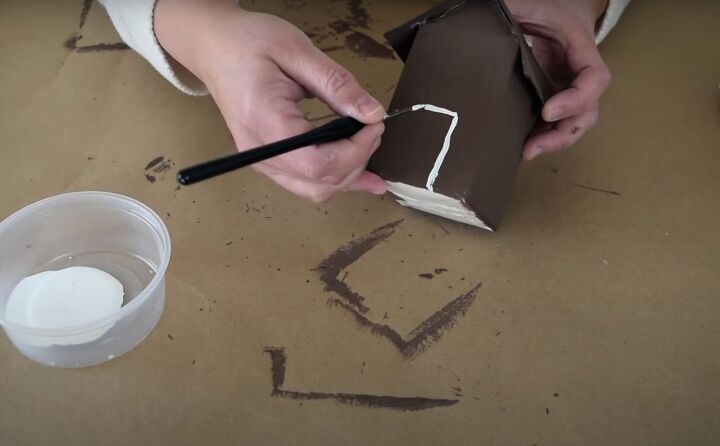
With the little windows and doors sketched out, I took some pure white water-based paint and covered the lines with it. I used a nice, thin synthetic brush to paint my lines.
You do not need to be perfect by any means because you want them to look like real gingerbread houses, and icing would never be perfect on a real one.
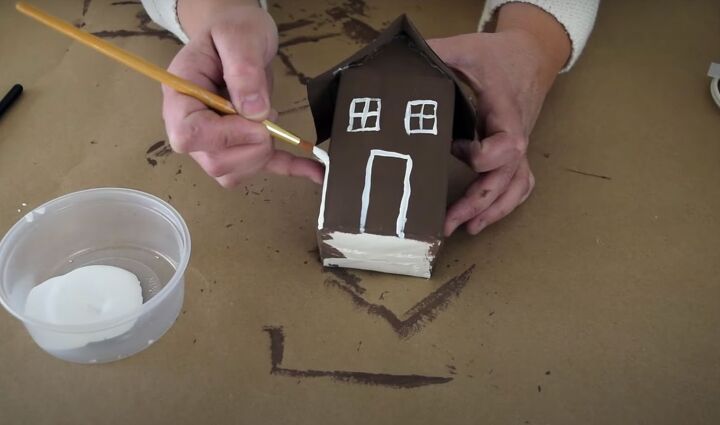
Next, I took a thicker paint brush and outlined the seams of my gingerbread house. I wanted it to look like the royal icing that would hold the side pieces of a cookie together if it were real.
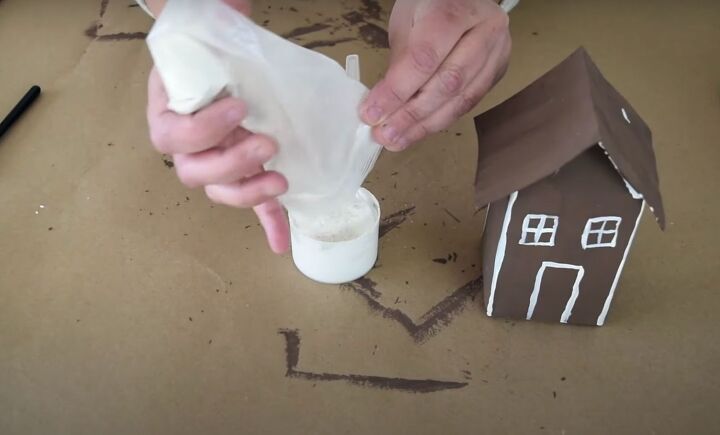
6. Add snow
With the basics done, I wanted to make some "snow." I used the same white paint as before and added a little Fusion Fresco powder. If you don't have Fresco powder, you can use salt wash, sawdust, or even baking soda. You just want to thicken up that paint.
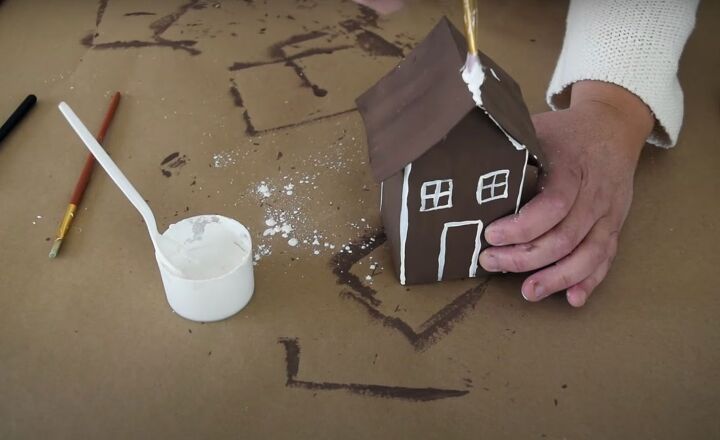
The thicker paint is perfect to put along the roofline to look like drifts of snow. You want to build it up so it resembles nice chunks of snow. I just dabbed the paint on and let it sit and dry. I also put some around the bottom of the roof and a little around the base of the house.
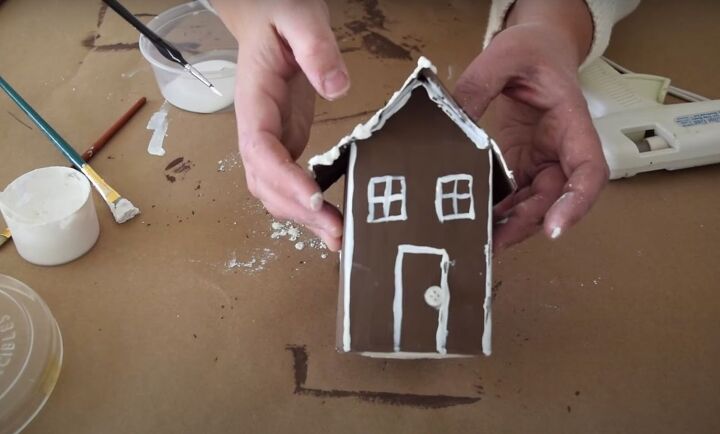
You can make each of your milk carton houses different. They can have different windows, roof tiles, or designs. I added some vintage buttons for door knobs and even sprinkled some glitter onto the roofs when the paint was still wet to add a little sparkle.
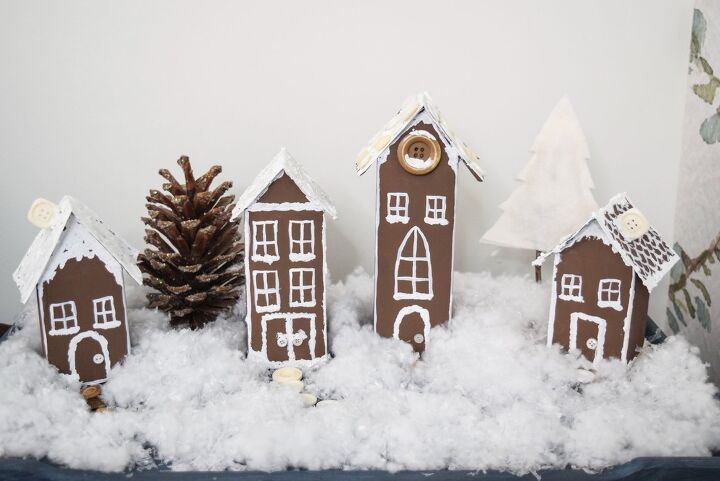
How to make a gingerbread house with milk cartons
How adorable is this little gingerbread village made from milk cartons? The next time you have some milk, be sure to save the carton so you can make one too.
This was so much fun to create, let me know in the comments what you think of my creation and how you plan on decorating this season.


Comments
Join the conversation
-
These are so cute!
-
Very cute!


Frequently asked questions
Have a question about this project?
What a great idea!