


My "Home for Christmas" Tour
How exciting it is to be included in the "Home for Christmas" blog hop hosted by and For my contribution, I've decided to share a few things from our home this year, and then one of my favorite DIY Christmas pallet projects from last year.
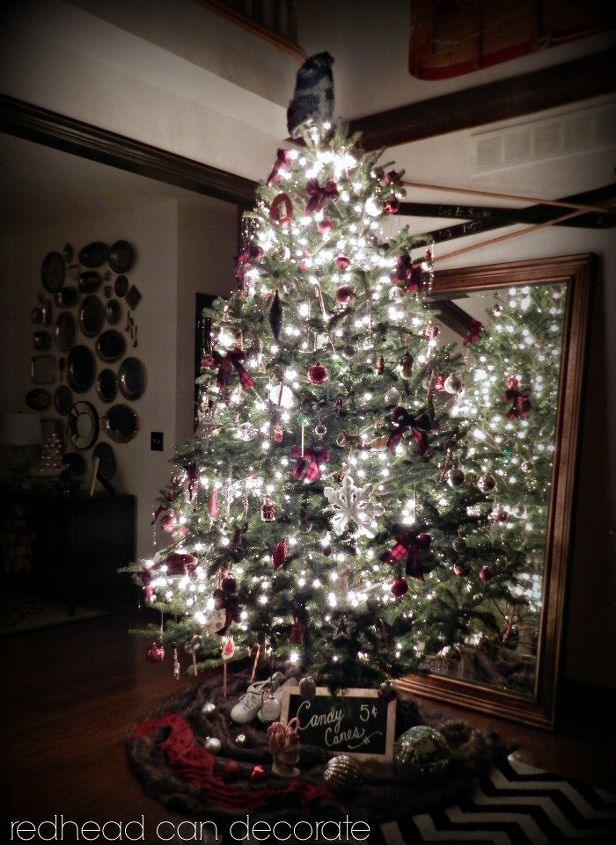
Lets start in the living room with our Christmas tree, and it's side kick, Sylvia the cat.
Lets start in the living room with our Christmas tree, and it's side kick, Sylvia the cat.
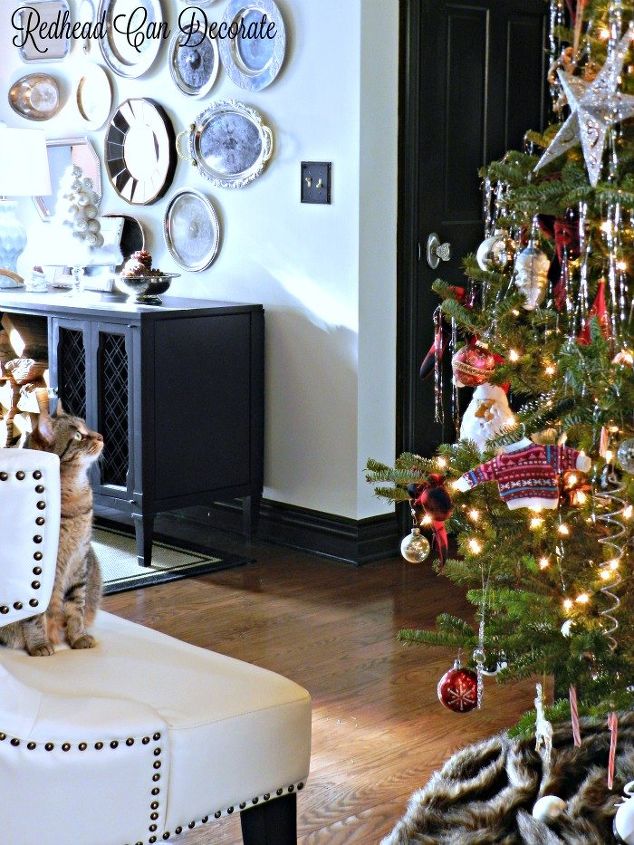
If you are looking for Syl, she can be found nesting under our real tree. Not only does she love to scoot the pine needles all over the place, she loves the warmth the Christmas lights give off. Definitely can't blame her. If I could lay under there, I probably would to. If you look closely you can see her under there in this photo...
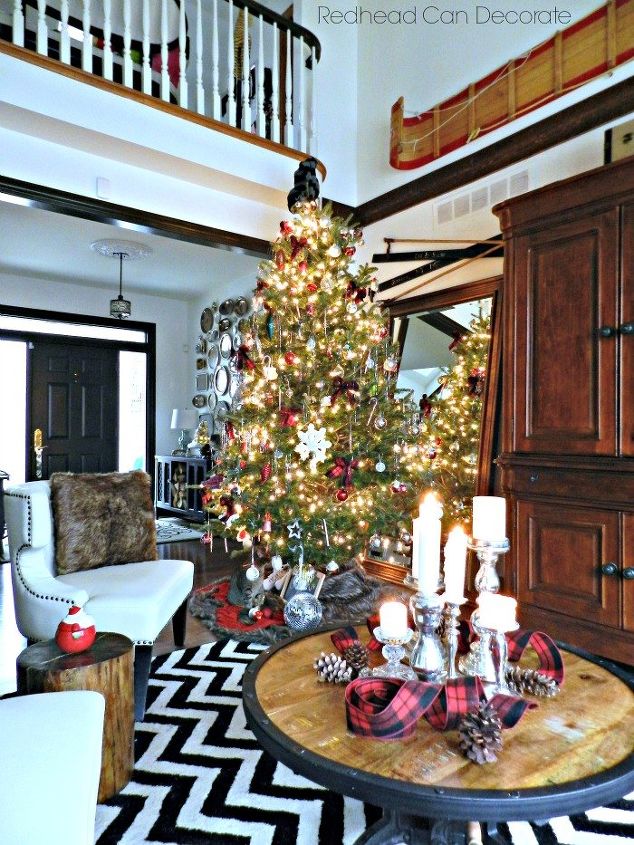
Our tree this year has a Candy Cane theme, but this is the very first time it's EVER had a theme. I thought I would switch up from our usual multi colored lights and ornaments to something a little more controlled. I stuck to our red, white, and silver ornaments and used flannel ribbon for bows. I finished it off with delicate silver tinsel just like my grandfather used. I tied in the table by adding a few scrolls of flannel ribbon.

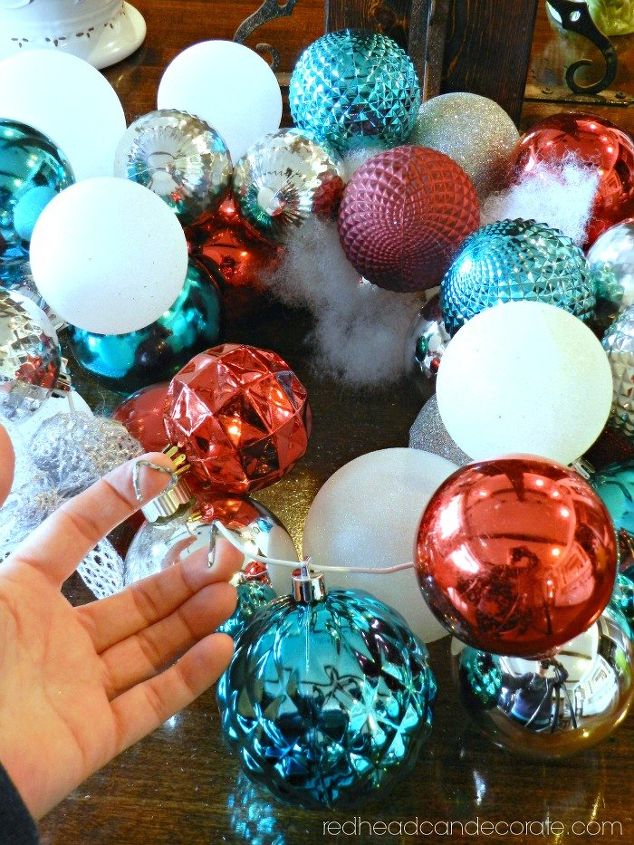
You won't believe it, but this ornament wreath was made by threading bulbs onto a wire hanger.
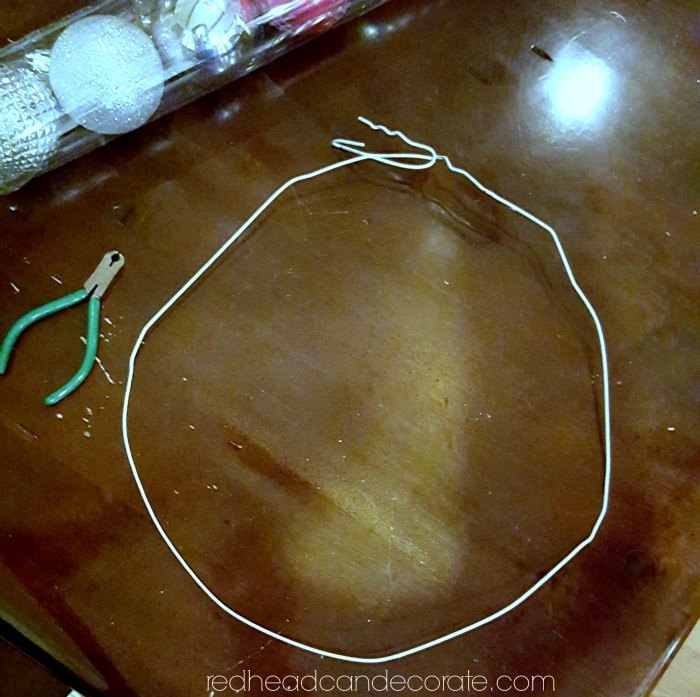
When you get the bulbs settled all the way around, just bring the wire together at the end and twist. That is where I placed the bow. We had to cut off a little of the wire with wire cutters. I also added poly pillow filler to cover up any spots that showed the wire.
What's really cool, is that I can use this for the Fourth of July, too!

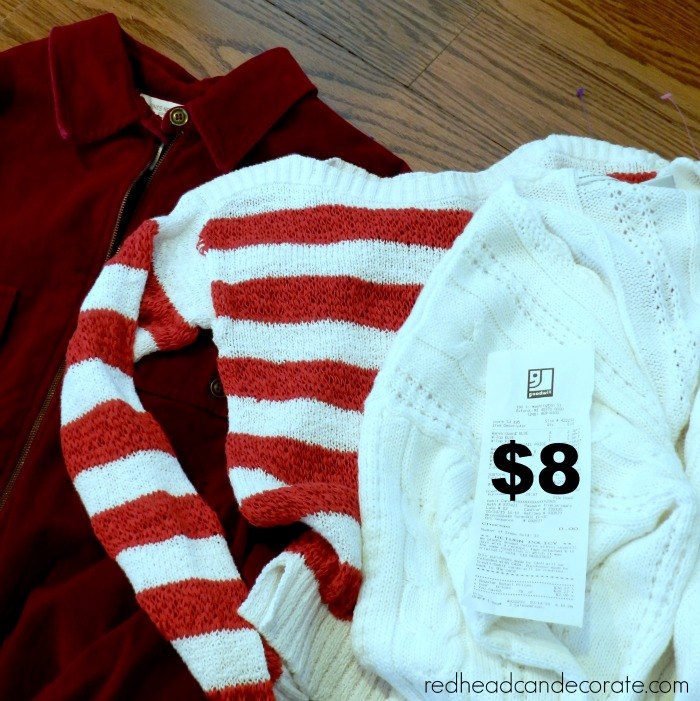
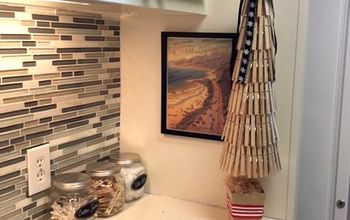
Also located on our kitchen hutch are these cute fabric trees that I made using FloraCraft cones, and sweaters I bought at the thrift store. I attached the fabric with tacks that were dipped in glue first.
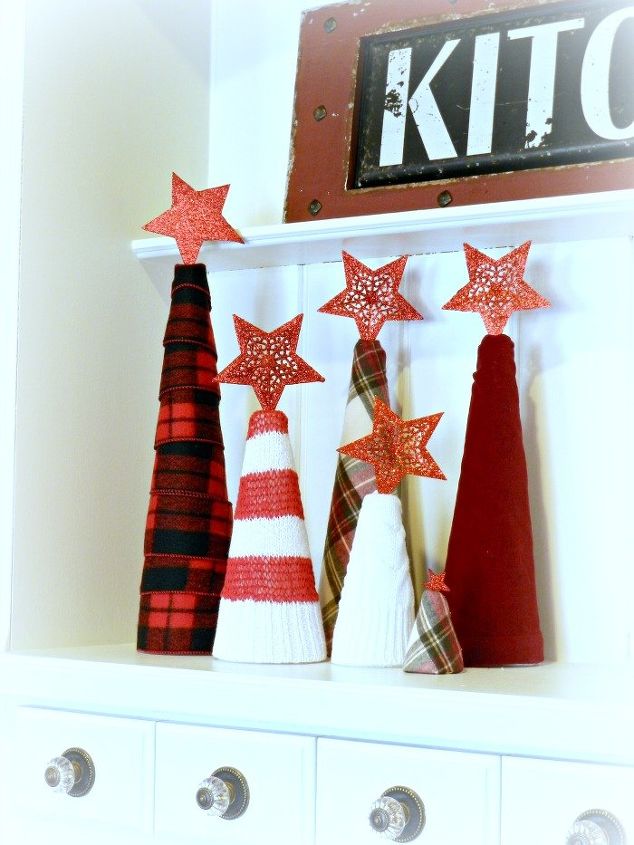
I also added a couple more trees in using an old pillow case (flannel), and the flannel ribbon. The stars are just from the dollar store. Sweet.
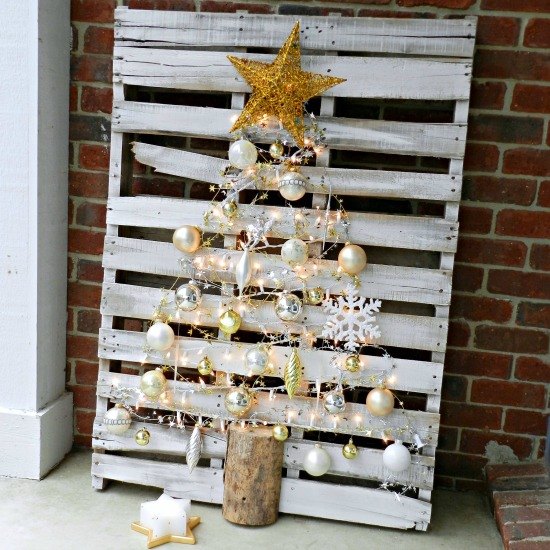
Last but not least...lets step outside. My all time favorite tree is waiting for you!

This Pallet Christmas tree happened by chance. We received the pallet under a brick delivery and I saved it for a rainy day. Inspiration struck last November when I pictured a tree on it.
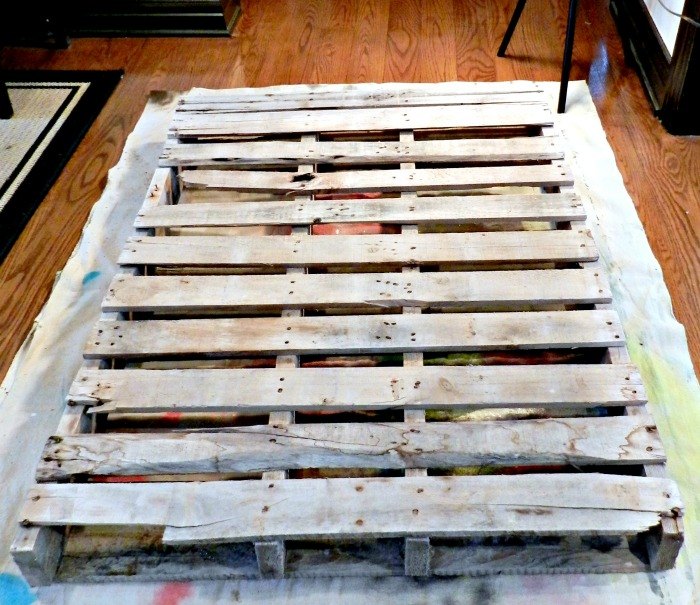
After I cleaned off the spiders, I dry brushed it with white paint. Any paint will due. Then I hammered in nails where you see the "x's" below.
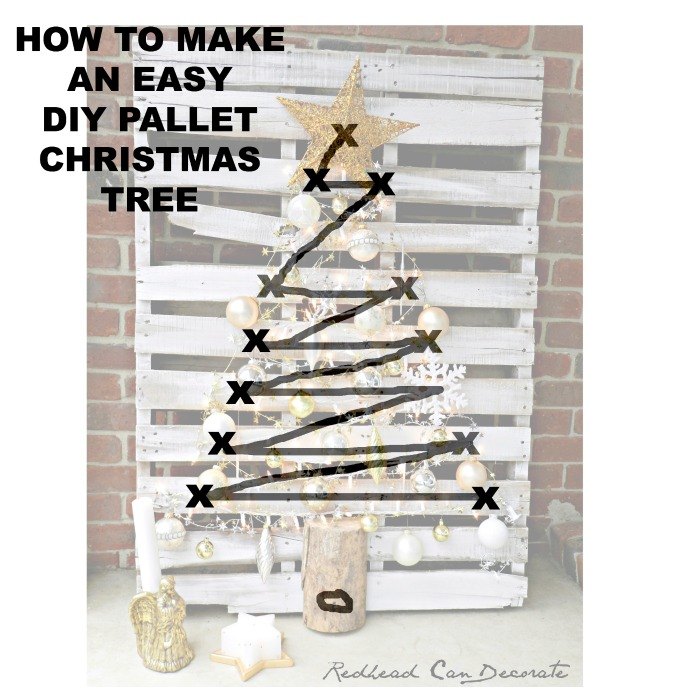
All it needs was a string of lights and a few ornaments from the thrift store. Oh, and I added silver star foil garland that really made it pretty. The final touches were the star that I also snagged at the thrift store, and the stump which is just a log cut in 1/2 and screwed in.
If you would like to see full tutorials and product buying information, please stop over at my blog redheadcandecorate.com. I hope you and your family have a wonderful Christmas!

Want more details about this and other DIY projects? Check out my blog post!
Comments
Join the conversation
2 comments
-
I am beyond obsessed with that pallet tree! <3 Your decorations are beautiful.
-
Very clever ideas! I used wrapping paper for my Sytrofoam trees. Many sizes and colors as well. Very fun.


Frequently asked questions
Have a question about this project?