


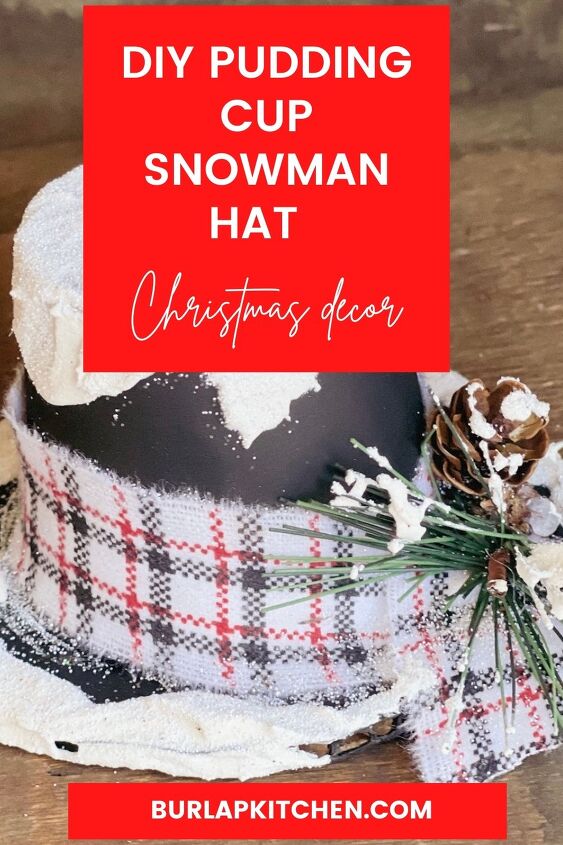
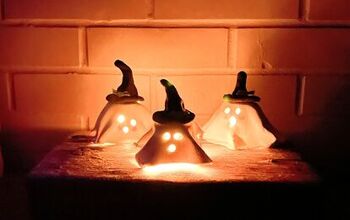
PUDDING CUP SNOWMAN HAT DIY
Today, I am so happy to share with you how to transform a pudding cup into a DIY snowman hat. This budget-friendly DIY snowman hat is such a cute Christmas craft to make. You will not believe this beautiful snowman hat came from a recycled pudding cup! These fun snowmen hats can be used for cute Christmas décor, or you can use them for your other Christmas crafting projects. These adorable little snowmen hats would also look so cute as Christmas ornaments on your Christmas tree!
Today, I am so happy to share with you how to transform a pudding cup into a DIY snowman hat. This budget-friendly DIY snowman hat is such a cute Christmas craft to make. You will not believe this beautiful snowman hat came from a recycled pudding cup! These fun snowmen hats can be used for cute Christmas décor, or you can use them for your other Christmas crafting projects. These adorable little snowmen hats would also look so cute as Christmas ornaments on your Christmas tree!
- Empty pudding cup that has been rinsed out
- cardboard
- black chalk paint
- material
- pine embellishment
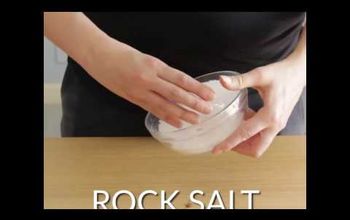
- fake snow – (1/4 cup baking soda, 1 Tbsp. Mod Podge, 1 Tbsp. white paint)
- glitter
- hot glue gun & glue sticks
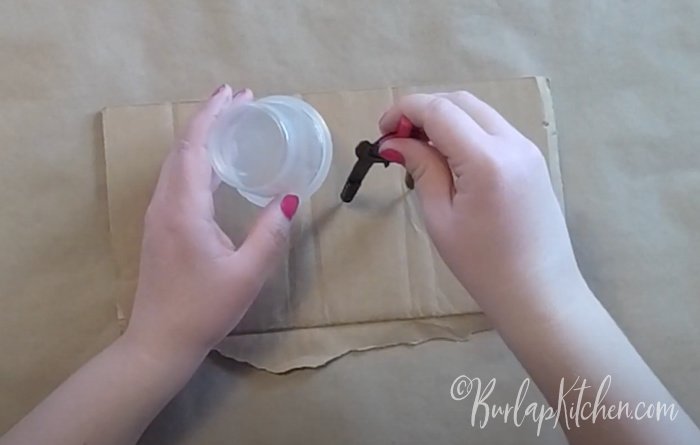
Step 1. Using a recycled Jell-O pudding cup, flip it upside down, and use a compass to draw around the top of the pudding cup, creating a circle that is slightly larger than the top of the pudding cup. Cut this out.
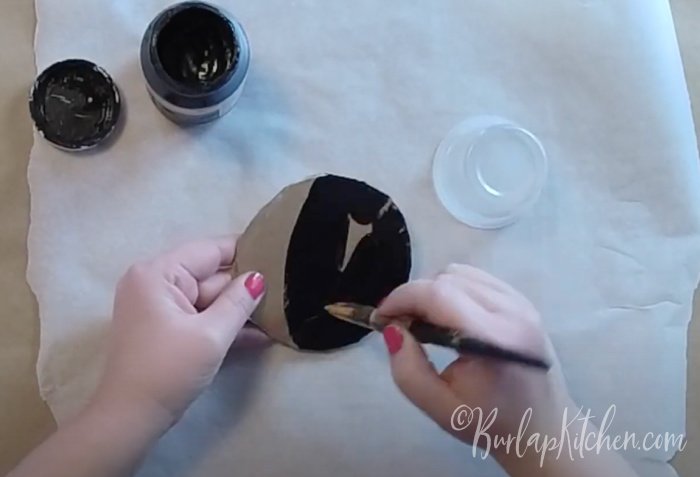
Step 2. Paint both sides of the circle cardboard cutout using black chalk paint, allow to dry. Paint the pudding cup with black chalk paint as well and allow to dry completely. You may need to apply two coats of black chalk paint to each, be sure to allow to dry in between each coat of paint. Dry.
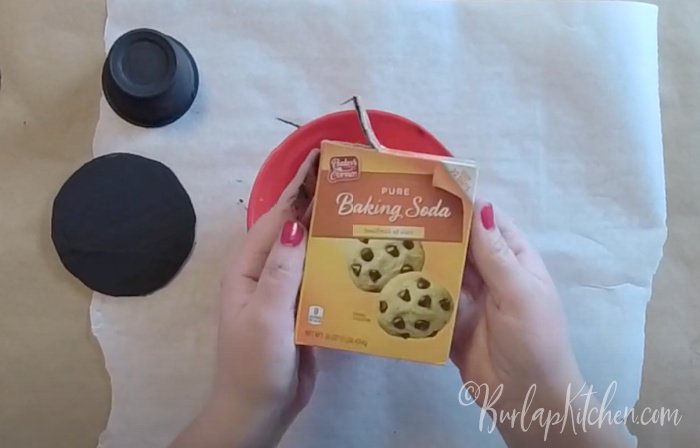
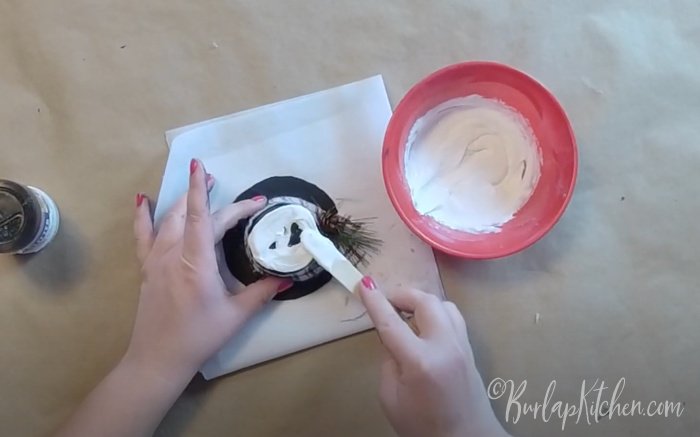
Step 3. Make some fake snow (I use A Frayed Knot’s recipe: ¼ C. of baking soda, 1 T of Mod Podge, and 1 T of white chalk paint). Be sure to mix the fake snow together well.
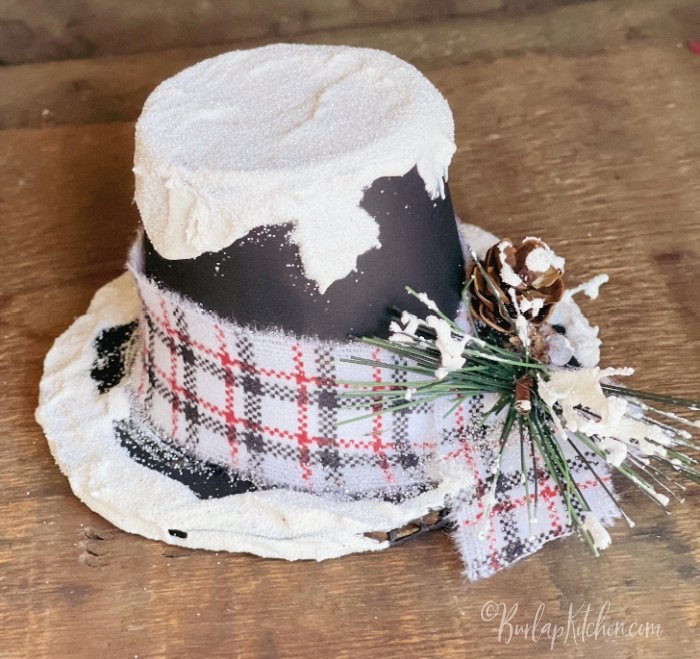
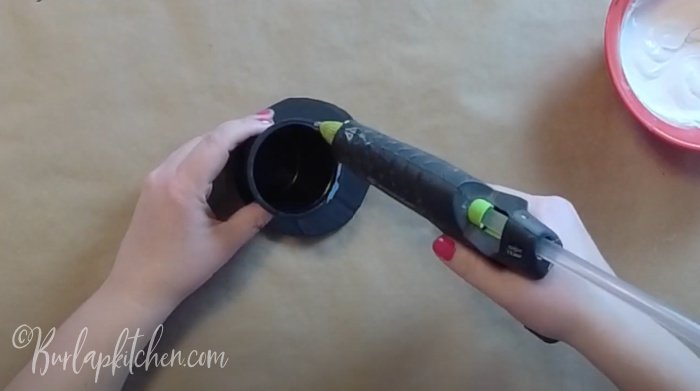
Step 4. Use a hot glue gun and glue around the top rim of the pudding cup, then flip the pudding cup upside down and adhere it to the center of the black cardboard cutout circle. This will create your snowman hat. Allow to dry.
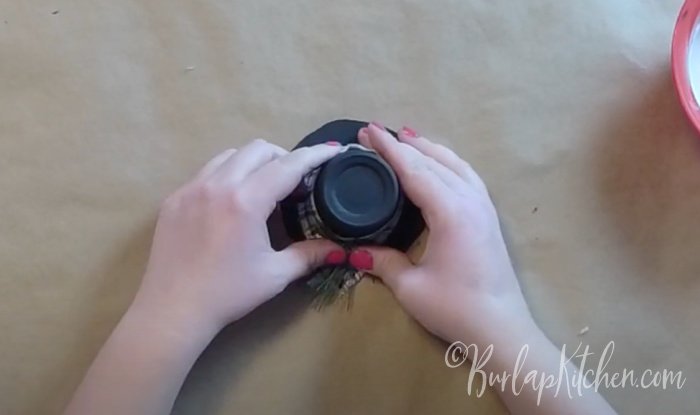
Step 5. Take some material of your liking, make a small cut at the end of it, and then use your hands to rip a small strand off. Hot glue this strand of fabric around the base of your snowman hat, going around the pudding cup. Trim away any excess fabric.
Step 6. Add a small pine embellishment over the piece of fabric on your hat and hot glue it on. You can use whatever embellishments you prefer. Then, take a small pinecone and hot glue it over top of the pine. Allow to dry.
Step 7. Add some of the fake snow mixture to the very top of the snowman hat. I used a popsicle stick for this. Then, dab some of this fake snow mixture around the bottom rim of the hat. I also dabbed some of the fake snow over the pine and pinecone embellishments. Then, sprinkle some glitter over the dabs of fake snow. Allow to dry and enjoy!
.
Tags: crafts, snowman, snowmen


Frequently asked questions
Have a question about this project?