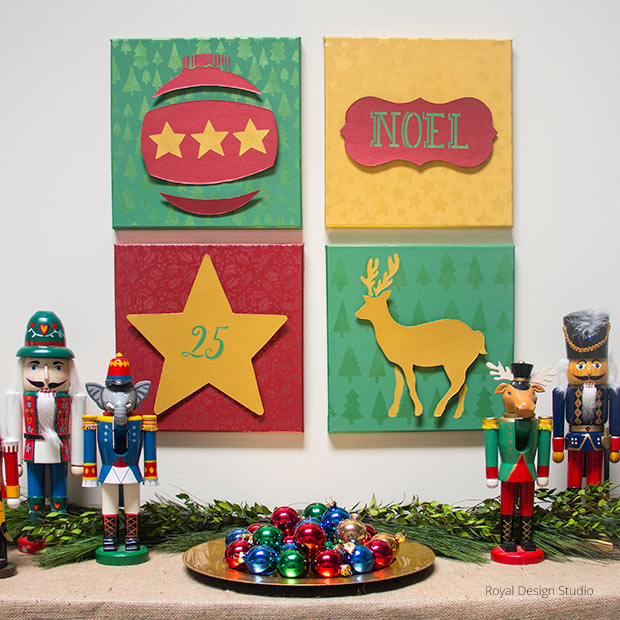
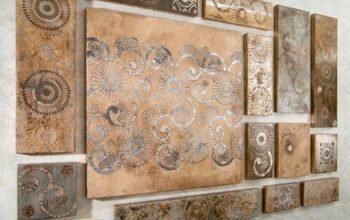
Stencil How To: 3D Christmas Canvas Wall Art That Really Pops

Royal Design Studio
by Royal Design Studio
Decorate your walls this Christmas Season with wall art that really pops! In this stencil tutorial, we will show you how to create three dimensional canvas art using our new Christmas Stencils by licensed artist Jennifer Rizzo. This stencil collection is designed to mix and match, so have fun with it because the possibilities are endless!
Supplies:


Royal Stencils: Holly Berry Christmas Stencil, Noel Lettering Christmas Stencil, Reindeer Christmas Stencil, Christmas Ornament Christmas Stencil, Pine Forest Christmas Stencil, Falling Stars Christmas Stencil, Marching Stars Christmas Stencil, Script Numbers Christmas Stencil, Standing Trees Christmas Stencil, Shining Star Christmas Stencil, Gift Tag 2 Christmas Stencil


Royal Stencil Cremes: Bright Yellow, Renaissance Red, Lime Shine


Royal Stencil Brushes & Supplies: Foam brush, 1.5" stencil brush, " Stencil Brushes, Foam Roller, Roller Tray and handle


Annie Sloan's Chalk Paint: Emperor's Silk, English Yellow, Barcelona Orange, Antibes Green, Greek Blue


Four square canvases


Supplies: X-Acto knife, Illustration board, Pencil, Painter's Tape, Paper Towels, Hot Glue Gun, and Ruler
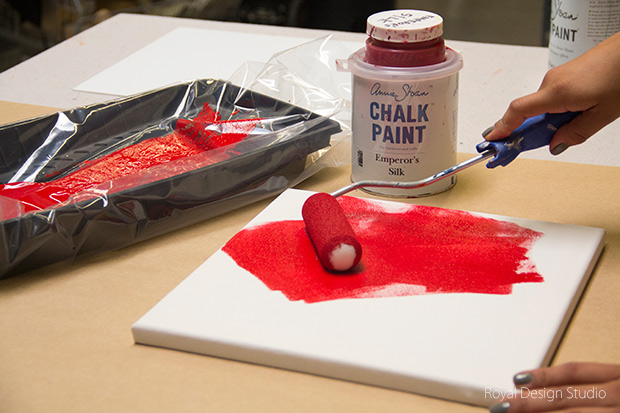
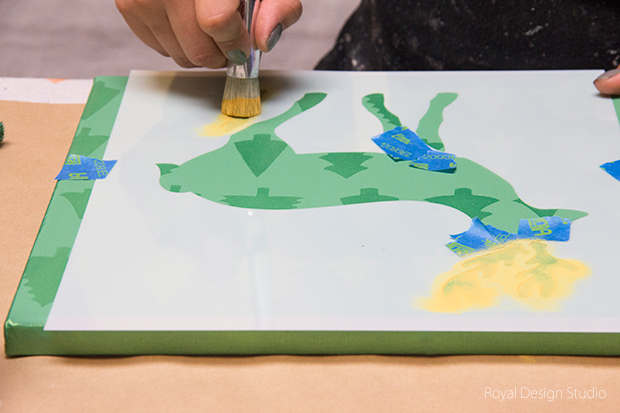
Part One: Painting the Canvases


Step One


Start by painting the background for each of your square canvases by using a foam roller and Chalk Paint. Let dry.


For this project, we painted:


Canvas 1 in Emperor's Silk Chalk Paint(R)


Canvas 2 with 1 part English Yellow and 1/10 part Barcelona Orange


Canvas 3 & 4 in 1 part Antibes Green and part Greek Blue
Step Two


Measure and mark the center of the first canvas with a ruler and pencil. Place your stencil of choice in the center of the first canvas. By starting in the center you set up the pattern to repeat properly in all directions. Use a 1.5" stencil brush to stencil the design. Then repeat going from the center outwards. This will create an allover pattern. Note: Remember to load your brush with paint, and then offload most of the paint on a piece of paper towel before stenciling. Let dry. Use the same Royal Stencil Creme used for each stenciled canvas to paint the edges using a 2" foam brush. Let dry.


For this project, we used the Holly Berry Christmas Stencil with the Renaissance Red, The Falling Stars Christmas Stencil in Bright Gold, the Pine Forest Christmas Stencil and Standing Trees Christmas Stencil in Lime Shine.
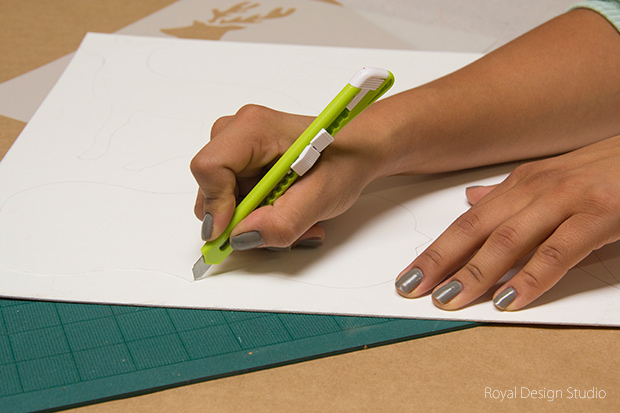
Part Two: Creating Cut Outs
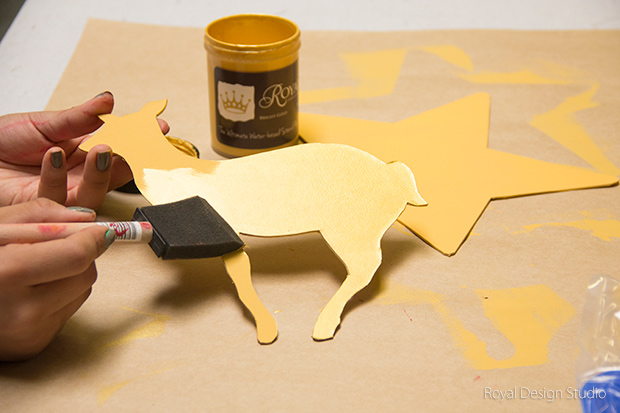

Step One


Place your stencil on top of the illustration board and trace the design.


Step Two


Follow the traced lines with an X-Acto knife to cut out the design. Repeat Steps One and Two with the stencils of your choosing.


For this project, we used the Reindeer Christmas Stencil, Christmas Ornament Christmas Stencil, Shining Star Christmas Stencil, and Gift Tag 2 Christmas Stencil.
Step Three


Use a foam roller to paint each cut out with Chalk Paint to create a nice base coat. Let dry.


For this project, we painted the Christmas Ornament and Gift Tag 2 Christmas cut outs with Emperor's Silk The Shining Star and Reindeer cut outs were painted with the yellow Chalk Paint mixture.


Step Four


Use a foam brush to paint the cut outs again this time with Royal Stencil Cremes. Painting the Royal Stencil Creme after Chalk Paint will make the coloring more saturated and vibrant. Let dry.


For this project, we painted the Christmas Ornament and Gift Tag cut outs in Renaissance Red over the Emperor's Silk and the Reindeer and Shining Star in Bright Gold over the yellow Chalk Paint mixture.
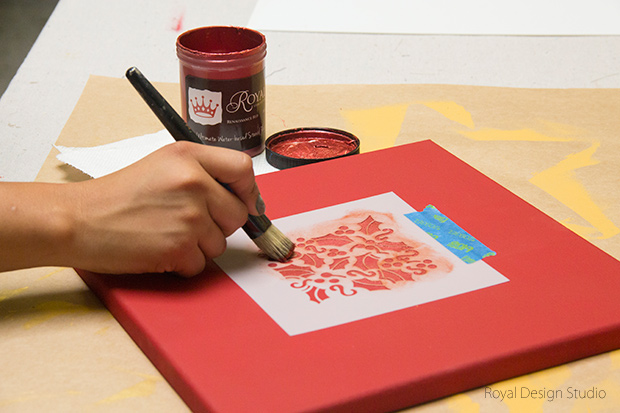
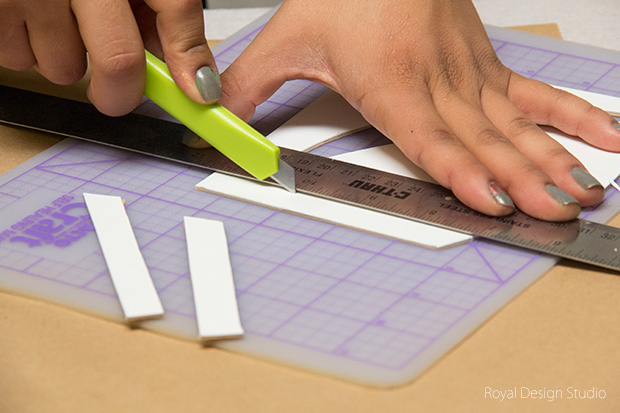
Part Three: Adding Flourishes


Step One


Now add some pretty details to your cut outs by mixing and matching the stencils as you wish! Let dry. Repeat this step using the coordinating Royal Stencil Crmes.


For this project, we stenciled the number "25" on the Shining Star cut out using the Script Numbers Christmas Stencil and green Chalk Paint mixture. We stenciled the word "noel" on the Gift Tag cut out using the Noel Lettering Christmas Stencil and green Chalk Paint mixture. Lastly, we stenciled the Marching Stars Christmas Stencil on the Christmas Ornament cut out with the yellow Chalk Paint mixture.


Step Two


On each of your canvases, stencil the elements that were too small to cut from the illustration board. Use the same paint used for each corresponding cut out in step 3 of Part 2 above. The benefit for doing this is that you will also have a cool 3D effect.


In this project, the small elements include the top of the Christmas Ornament, the Reindeer's antlers and legs.
Part Four: Piecing it all Together
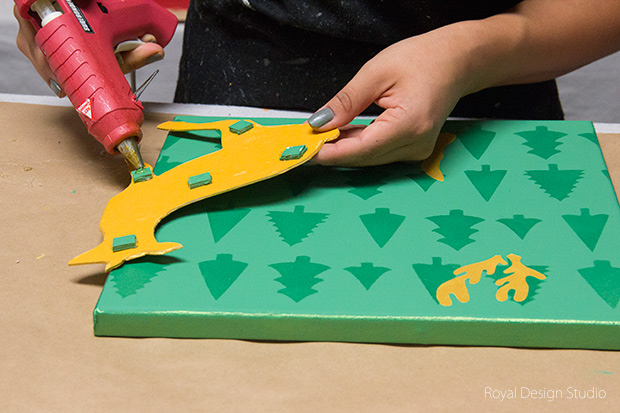

Step One


Cut " square pieces of illustration board with the X-Acto knife. Use hot glue to create multiple stacks with two pieces glued on top of each other. Paint each of the stacks with the some paint used for the cut out they will soon be attached to. Create and glue as many stacks as you wish. Note: The more stacks, the more stability the cut outs will have.
Step Two


Use hot glue to attach the stacks to the back of each cut out.
Step Three


You're almost done! Use hot glue to attach the other ends of the stacks onto the canvases.


In this project, we attached the Reindeer cut out to the Standing Trees stenciled canvas, the Gift Tag cut out to the Falling Stars stenciled canvas, the Christmas Ornament cut out to the Pine Trees stenciled canvas, and the Shining Star cut out to the Holly Berry stenciled canvas.


Now you have three dimensional wall art that will stand out at your holiday party! What other ways can you think of to deck your walls with our new Christmas Stencil Collection? Check out our blog Paint + Pattern for more stencil ideas!
Frequently asked questions
Have a question about this project?
Comments
Join the conversation
 1 comment
Next