


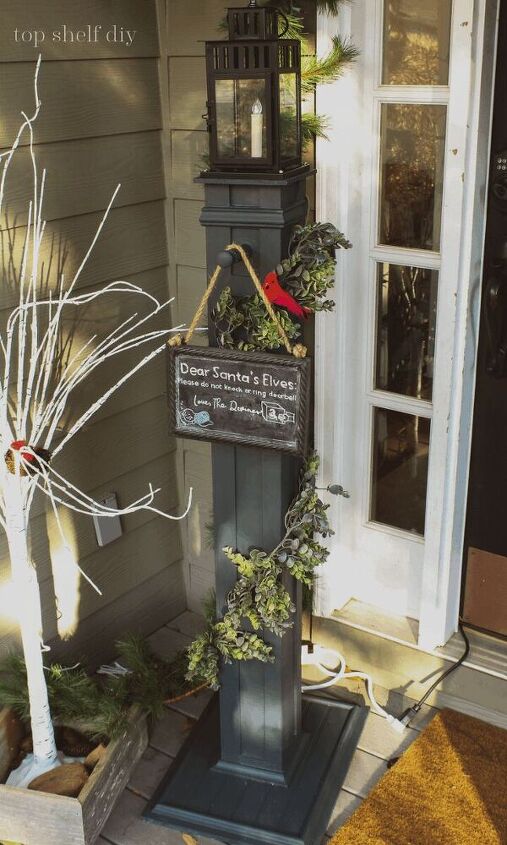
The Easiest Way to Make a Holiday Porch Lamp Post
I love a good Ikea hack, and this holiday lamp post is no exception.
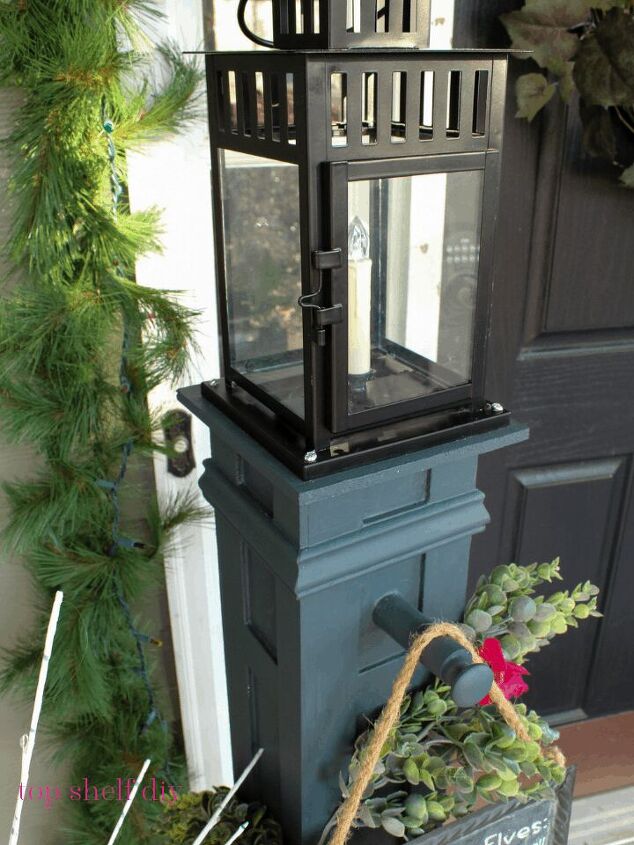
Would you believe this was made from a 4x4 post and the $10 Ikea BORRBY lantern? I made it for Christmas, but I'm tempted to keep this on my front porch all year long.
Cost: $100
Difficulty: Beginner
The cost of this project will be significantly less if you have scrap materials lying around. I used scrap plywood, scrap bead board, scrap lattice, and leftover painting/caulking materials. One of the many perks of keeping leftover materials in the garage!
This Ikea hack entails inserting a screw through each corner of the lantern while sitting on top of your post.
Tools for Your Lamp Post
- Miter saw
- Table saw
- Nail gun
- Caulking gun
- Power drill
- Drill bit to match width of your screws
- 1" Forstner drill bit
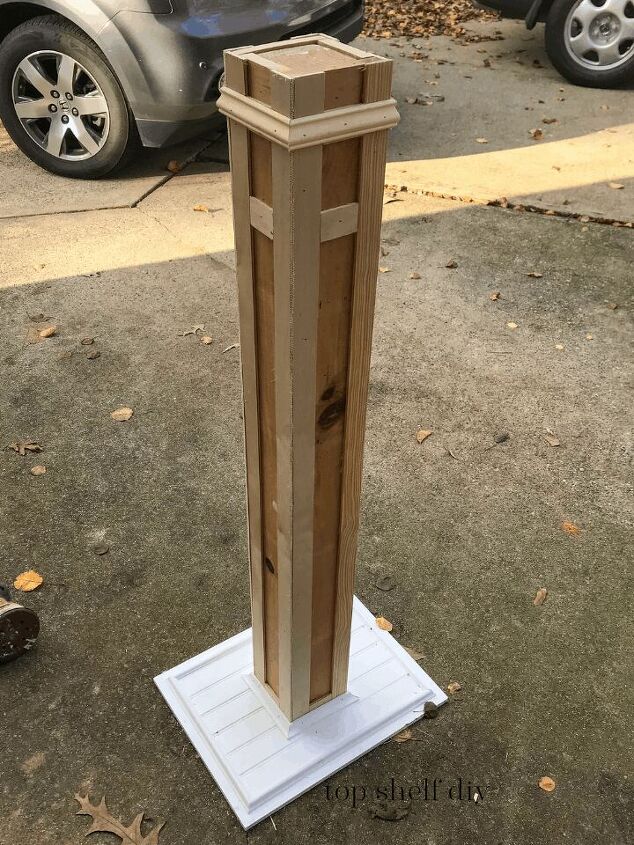
Start by cutting the base of your post.
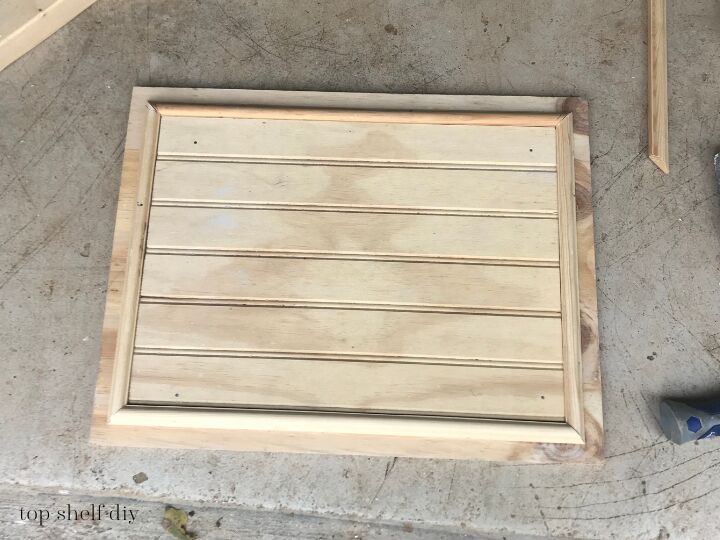
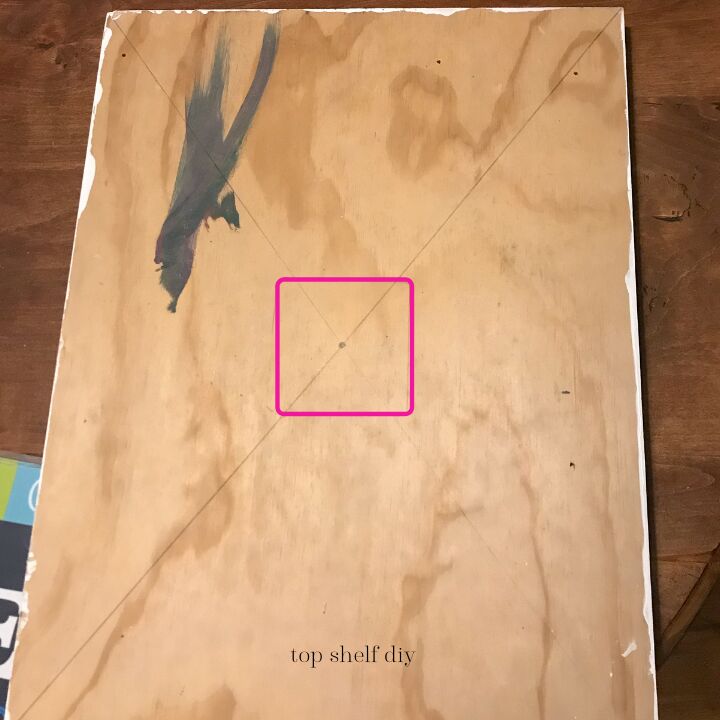
Using a table saw, cut your 3/4" plywood to 16 x16". Then cut your bead board or second layer of plywood to 13 x 13". Glue together with wood glue and secure with nails. I added some leftover ogee between the two layers. These little pieces were leftover from my fireplace mantel project.
Turn your base over and mark the centermost point. Then, pre-drill four holes up through the base.
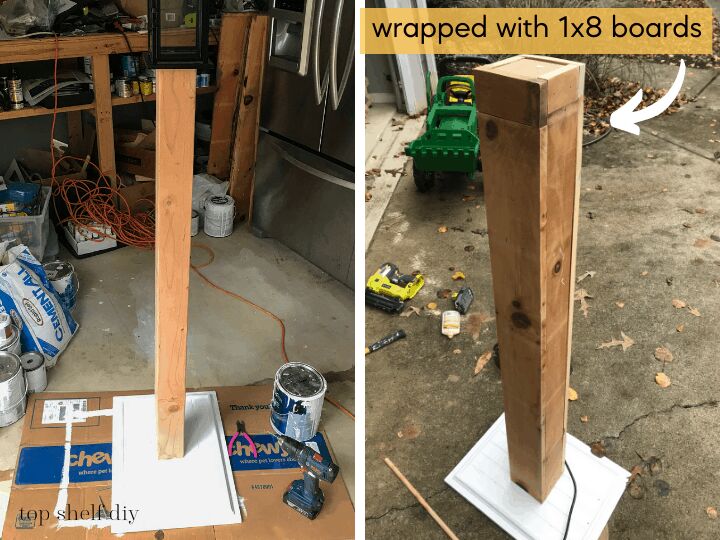
Using a miter saw, I cut my 4x4 fence post to 50". Then I screwed it into the base with 3" screws using my pre-drilled holes as a guide. IMPORTANT: make sure your post is level before you start adding trim! You can always add a shim underneath the base to even things up.
Now for my favorite part: adding trim! This is when things start to get fancy. I took four 1x8 boards and ripped two of them to 5" and two of them to 3.5". Cut them to the height of your post with your miter saw. Wrap these around your 4x4 post and secure with wood glue + brad nails.
I took lattice strips and attached them to my post in a grid formation. Once the lattice was in place, I added inside corner molding where the post meets the base. Then I added a small perimeter of chair rail trim along the top.
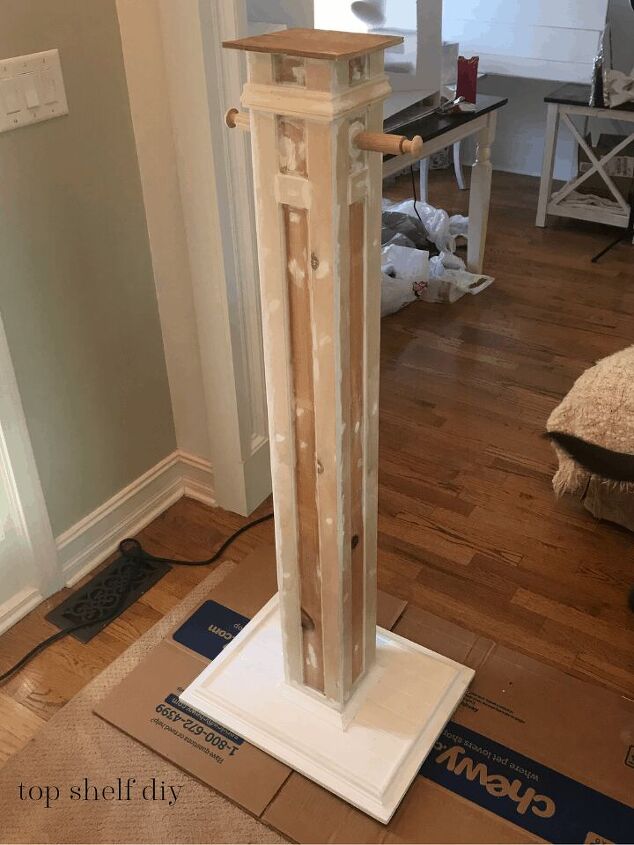
Cut a small square of scrap wood to cover the top of your post. I used some leftover wine crate wood. Literally any scrap pine will work as long as it's slightly larger than the size of your post. Secure to post with wood glue and nails.
Use a 1" forstner bit to drill a hole on either side of your post. Drill to a depth of about 1.5". Then, cut two dowel rods to 4". Add finials to the ends of your dowel rods using headless interior dowel screws. Insert dowels into your drilled holes after coating the tips with wood glue.
Fill in allll your nail holes with wood filler. Caulk seams between your trim. Sand everything very well for a smooth finish. Give the post 2 solid coats of paint.
Lastly, once your paint has dried, pre-drill four holes in your Ikea lantern (one at each corner). Secure to the base of your post with four metal screws about 1" in length.
Add a chalkboard sign, garland, Christmas birds, and a battery-powered tapered candle on a timer.
If you don't own a Cricut, here's how I make my chalkboard designs with graphite tracing paper. I have the freehand drawing abilities of a 7-year-old; tracing paper is a Godsend.
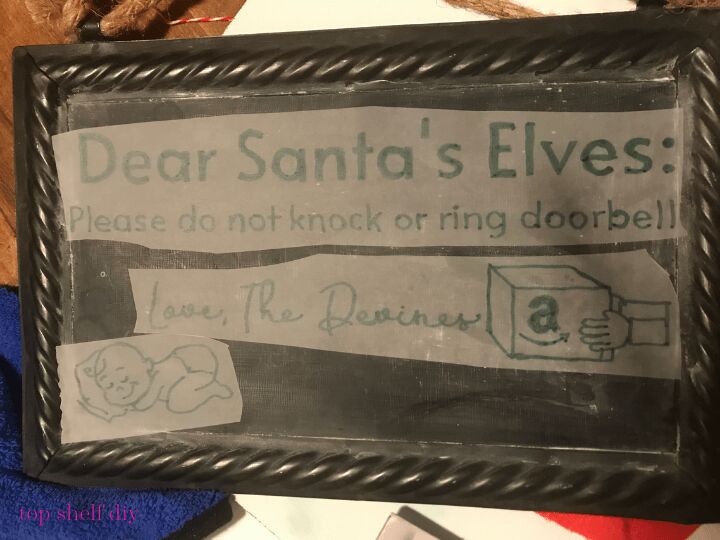
Here's how the finished sign turned out.

And a closeup of the top.

Comments
Join the conversation
-
Very cool! Love it!
-
This is really neat. I just love it ! I think I am going to try to get someone to make me one !!


Frequently asked questions
Have a question about this project?