


DIY Bottle Opener

by
Rachel Metz
14 Materials
$10
1 Hour
Medium
Coming at you with a Monday DIY! And what better way to kick of this week than making you think about cooling down with a nice cold beer? Or whatever cold beverage the requires a bottle opener. This is not only the perfect addition to your BBQ’s and parties but it’s the perfect DIY gift for him! Or yourself. Don’t forget to come DIY with me in Studio City July 29th! You can purchase your tickets here: https://www.eventbrite.com/e/diy-wood-signage-tickets-34712394707 Stay rad you beautiful humans and keep DIY’ing! I’ll see you Wednesday for another project xx.
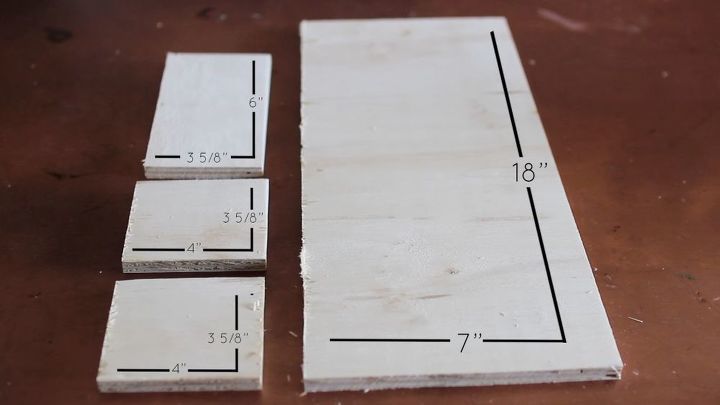
Cut your wood into whatever dimensions work best for where you want to hang it. These are the dimensions that worked best for me.
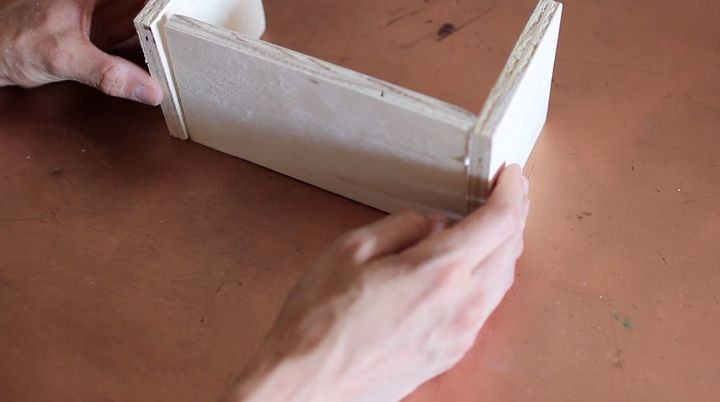
Take your two 4 inch pieces and your one 6 inch piece and put them together like so. Wood glue them together - we are creating the "catcher" right now.
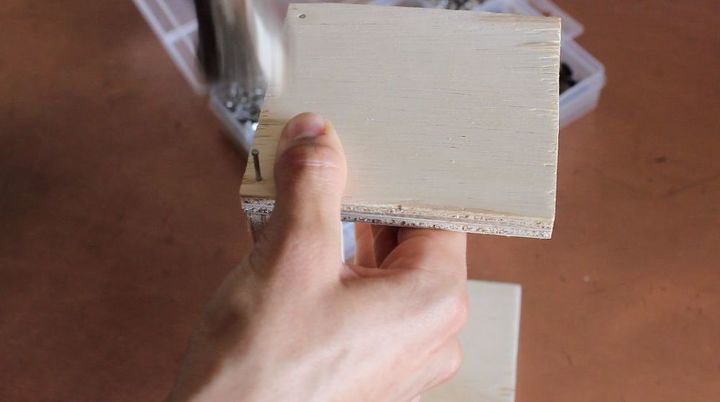
Optional but if you want... secure it on the corners with some finishing nails.
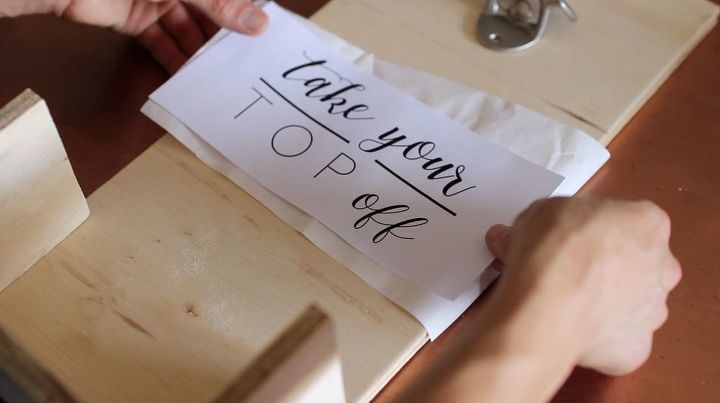
I don't have the best freestyle handwriting so I always opt for tracing paper and something I design on the computer. I decided to make it a little sassy by putting "take your top off" since the majority of my house is full with professional skateboarders who are little boys at heart - so why not make it fun around here for them?
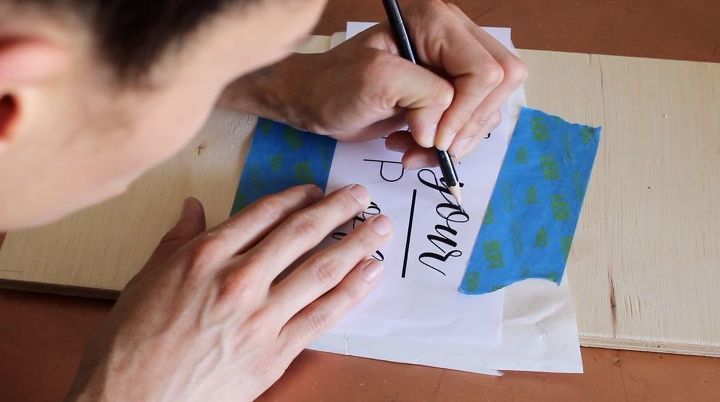
You'll place the tracing paper underneath the design, trace over the design with pencil (make sure that you trace over the ENTIRE thing).
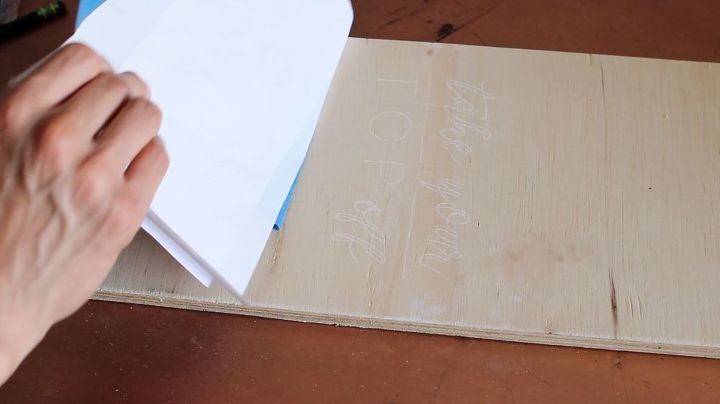
Pull it off and you'll reveal a beautiful outline of whatever your heart desires that you just need to paint in.
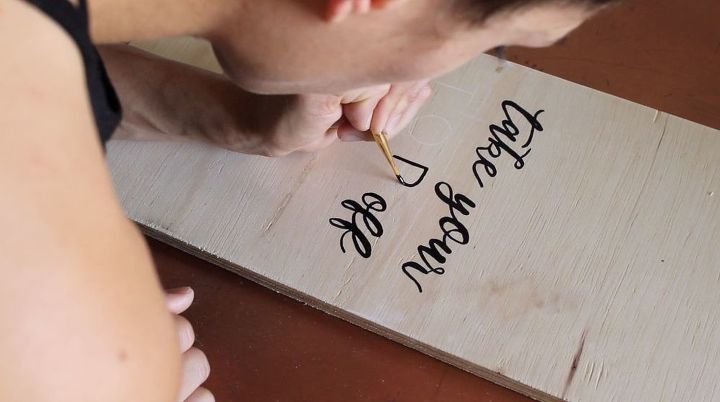
I used a thinner paint brush and some regular craft paint from Michael's craft store but again - the possibilities are truly endless! You can burn into the wood, add stickers or a decal, you can just write on it with a paint pen or add a stencil. Do whatever you are feeling for your space!
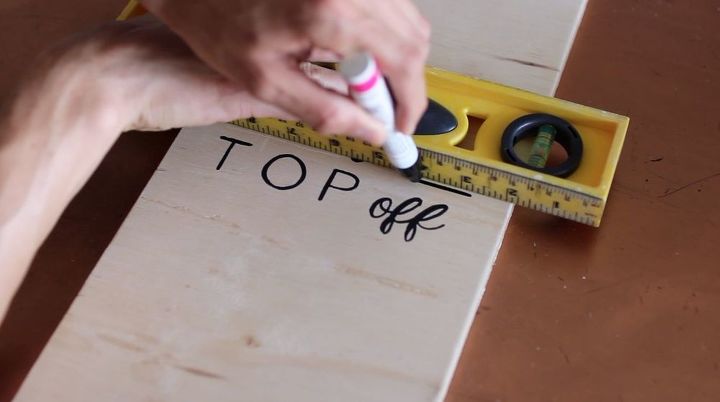
A tip for making straight lines if you have a shaky hand like me: take a level and use a Sharpie paint pen to create the perfect lines.
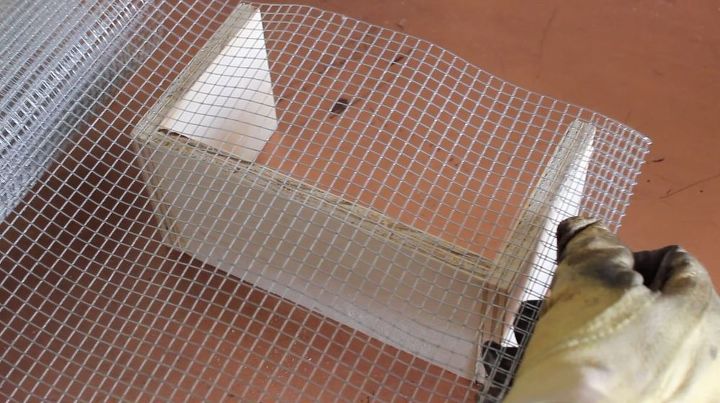
I wanted to be able to see the bottle caps so I opted for adding chicken wire to the front. I picked it up at my local Home Depot and used some work gloves while handling it because it is a little sharp around the edges. I laid it over the front and cut it with my metal sheers.
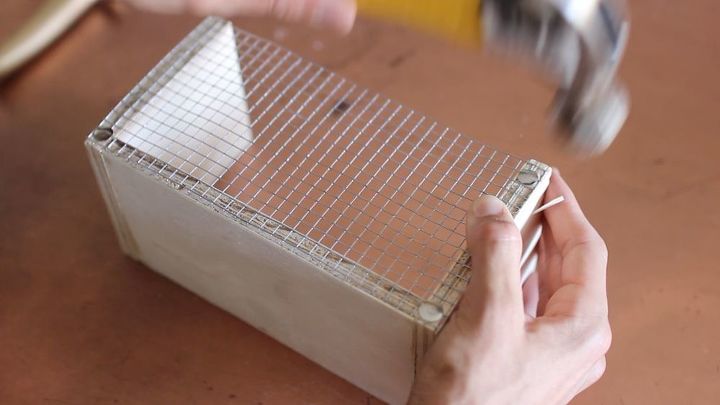
Once I had it to the size needed, I grabbed some push pins believe it or not and hammered them around until the wire was secure.
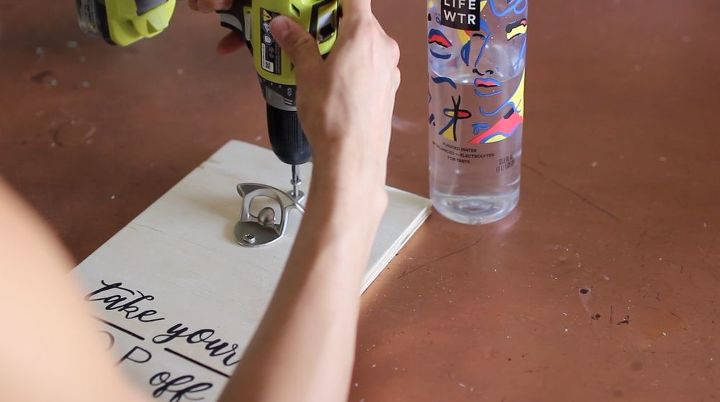
The bottle opener that I also picked up from Home Depot comes with two screws so that makes life easy. I made sure it was centered where I wanted it then screwed it in with my Ryobi Wireless Power Drill.

Once everything on the backboard of the opener was handled, I moved onto adding wood glue to the back of the catcher and lined it up to the bottom corners and let it set for a second to dry.
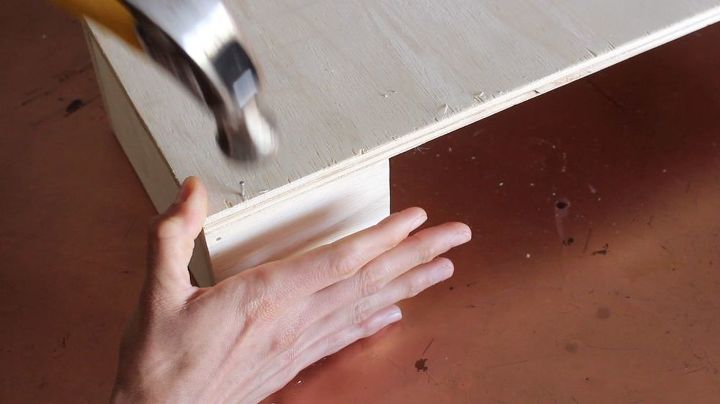
To ensure that it is super secure, I made sure to add finishing nails through the back to each corner.
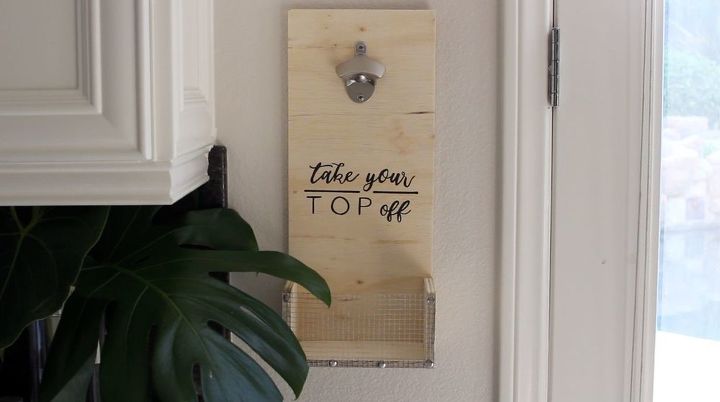
And voila! Hang it up wherever you want and now you have a place where everyone can go to take their top off haha! Instead of them asking you for the opener every five seconds like they do in my household.
{
"id": "4006590",
"alt": "",
"title": "",
"video_link": "https://www.youtube.com/embed/2f0WroFa8NE",
"youtube_video_id": "2f0WroFa8NE"
}
{
"width": 634,
"height": 357,
"showRelated": true
}
Be sure to check out the full tutorial if you need a little more insight - I go into more detail on my YouTube channel which please be sure to subscribe to and show some love. Thanks guys for taking the time to check out this DIY!


Frequently asked questions
Have a question about this project?