


DIY Charcuterie or Cutting Board
Oversized charcuterie and cutting boards are very popular. Are you a fan? I love them and am going to share how to DIY a charcuterie or cutting board. These are made from a hardwood – black walnut. It’s a beautiful wood but is a very messy tree to have in your yard.
Trust me I’ve scoured Pinterest and Google trying to find something crafty to do with the black walnuts. Other than practicing my throwing into a trashcan to dump in the woods, I came up empty.
In the beginning of 2020 we had two black walnut trees taken down from our front yard. We have several on our property but these two were responsible for multiple dents in my new car and breaking the windshield of the truck.
The previous year Carmine watched Youtube and purchased gear to climb and cut down a huge tree out back. Because I can’t afford the mortgage on my own, I offered to pay to have these taken down.
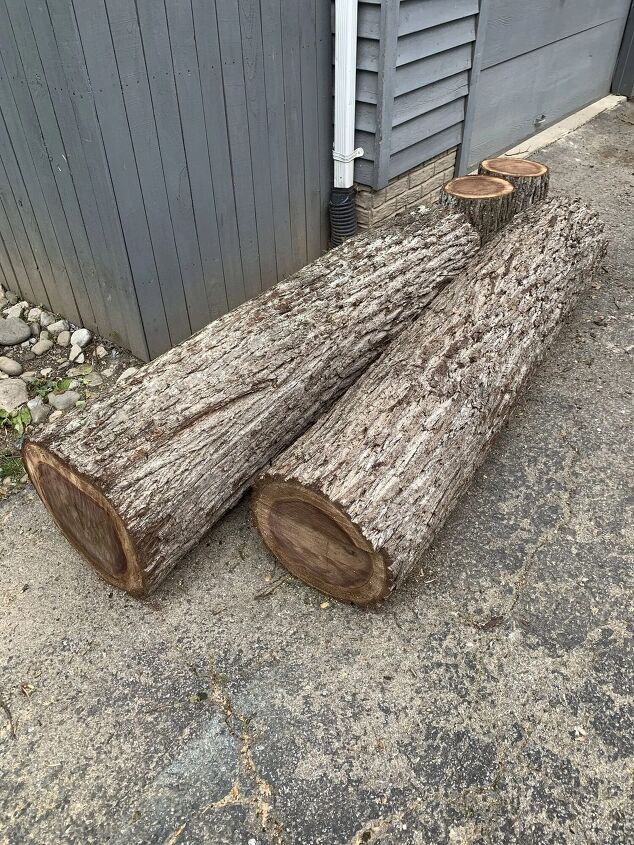
Hauling away the wood was part of the cost, until I got the ear of one of the workers who I convinced to leave two huge logs and two baby ones.
I may have heard once or twenty times from Carmine that if I didn’t do something with these logs…
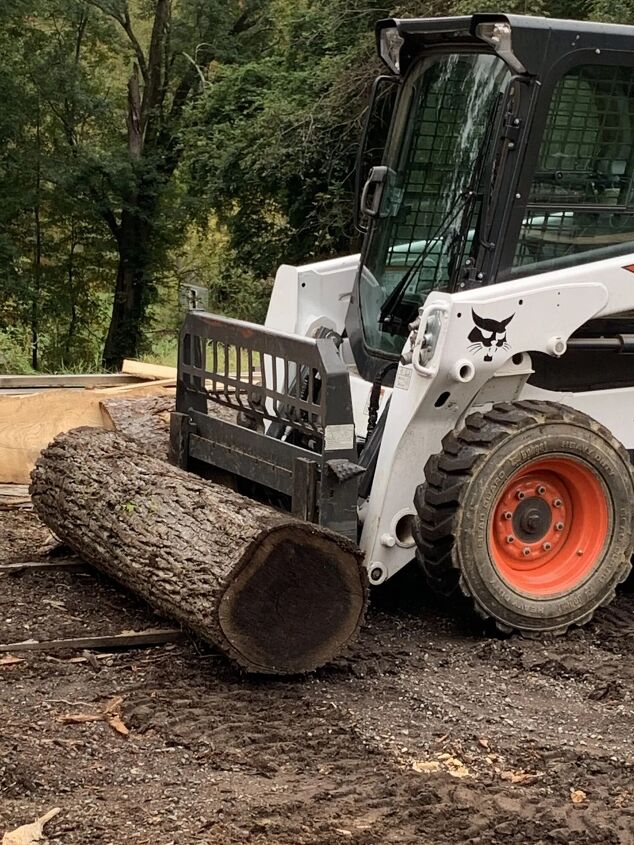
Fast forward a few months and we got them loaded (with help) into the truck and took to get them milled.
USING LIVE EDGE WOOD FOR PROJECTS
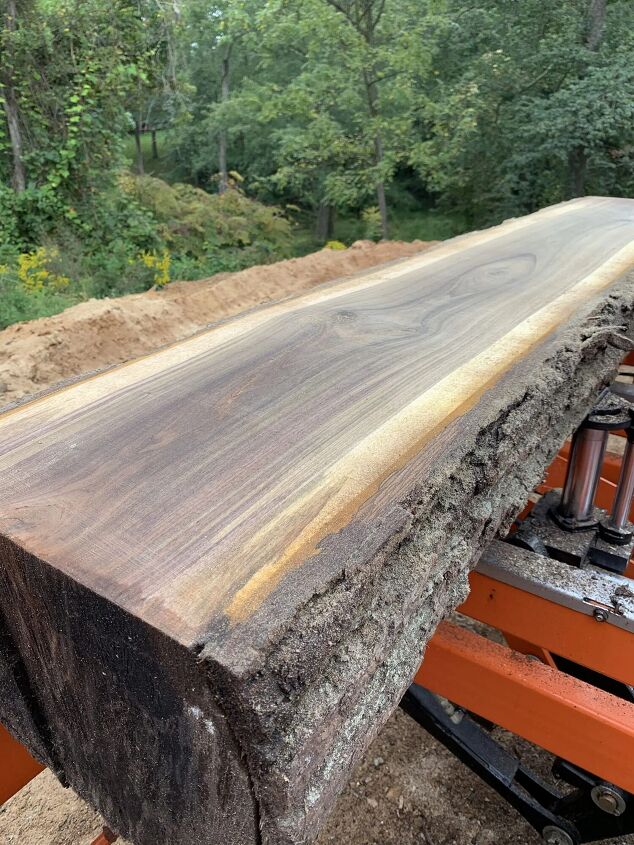
It was a great learning experience to watch how easily and quickly they were sliced up.
We brought them home and stacked them in the shed to dry.
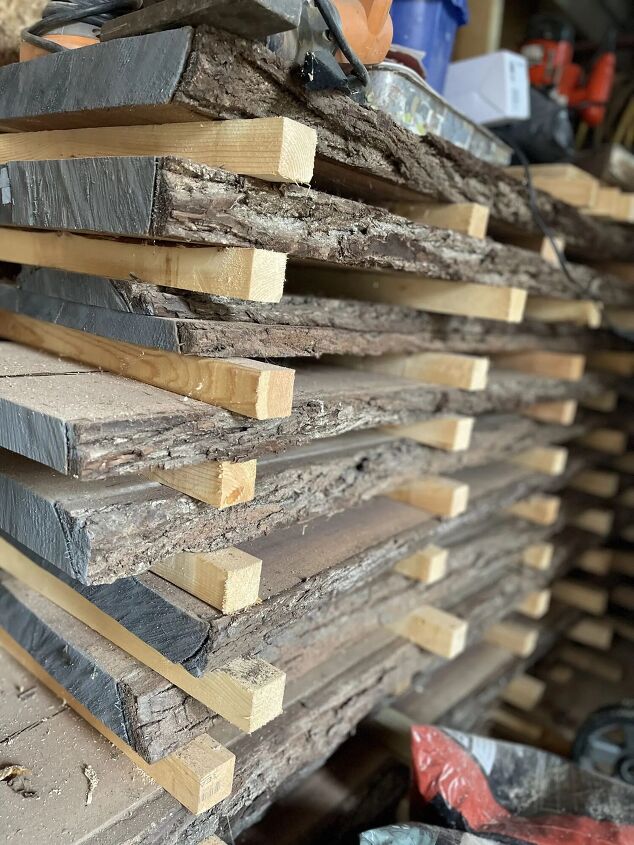
They had to dry out and be kept separated for a long period of time before using to build. So if you follow me, you know patience is sometimes difficult, I love to dive in and get something made.
Rule of thumb is to let the wood dry 1 year for every inch, Well I’m not great in math and they look pretty thin right? Wrong, most of them are this thick and it’s only been 1 year and 4 months.
But the good news here is I can tell you why you should wait, everything else is the same. The reason you is because fresh cut wood is full of moisture. Why must you wait? If you begin to work with it and there is still moisture present, as it dries, the wood will shrink and can crack or split.
If you wait the designated amount of time, 1 year per inch, then you will be fine.
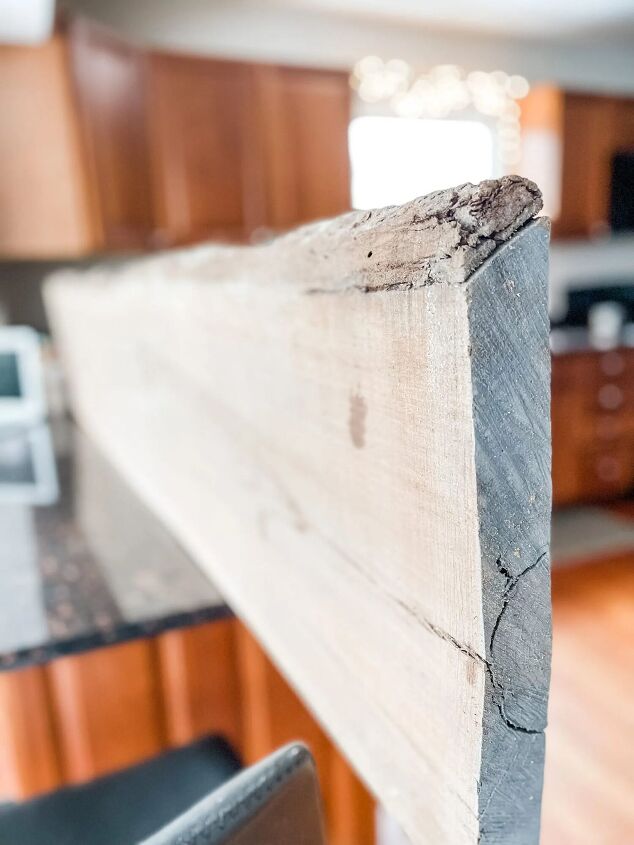
The only other prep was to remove the bark. Ours came right off by hand. No tool needed.
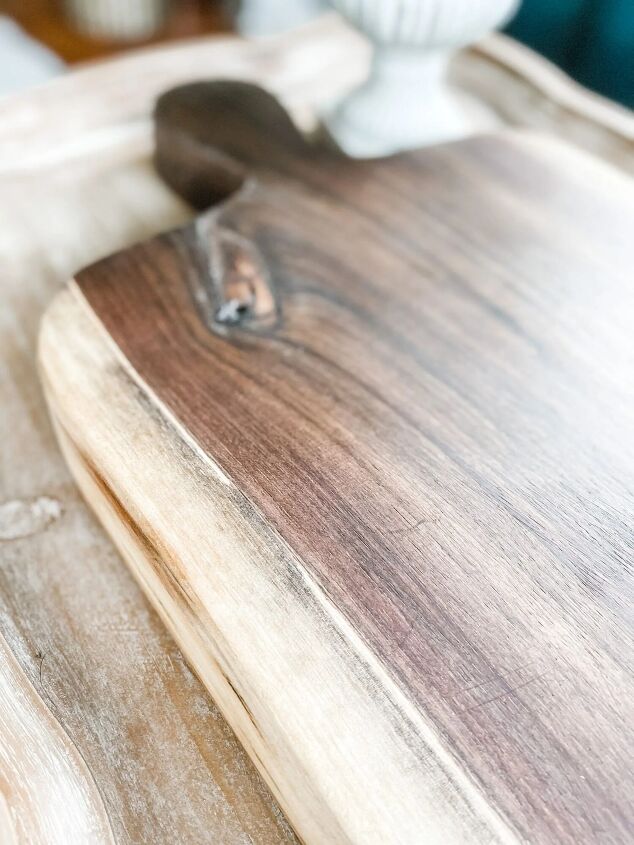
BLACK WALNUT WOOD
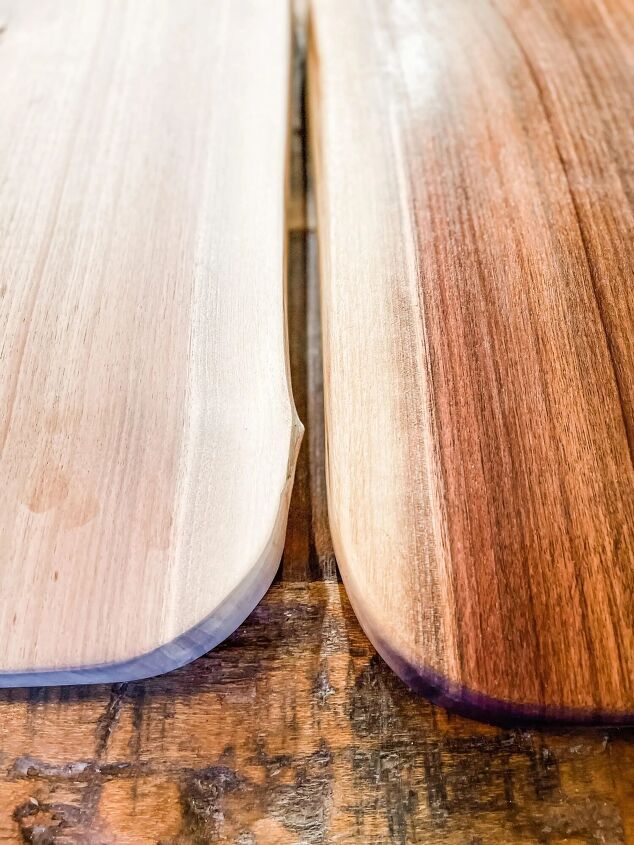
It’s a hard, dark and dense wood. Beautiful and sought out by woodworkers. The least likely wood to crack or split is Cedar. It’s very dense but this is what was in the yard so…
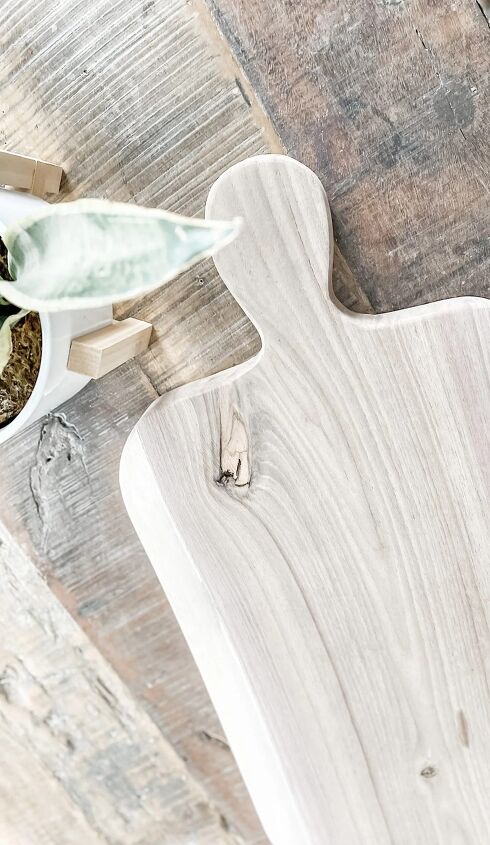
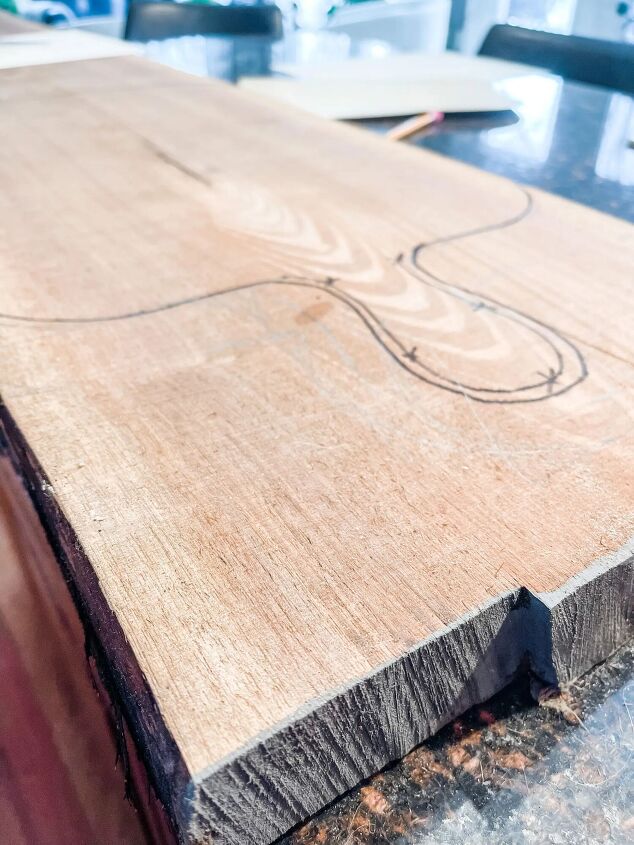
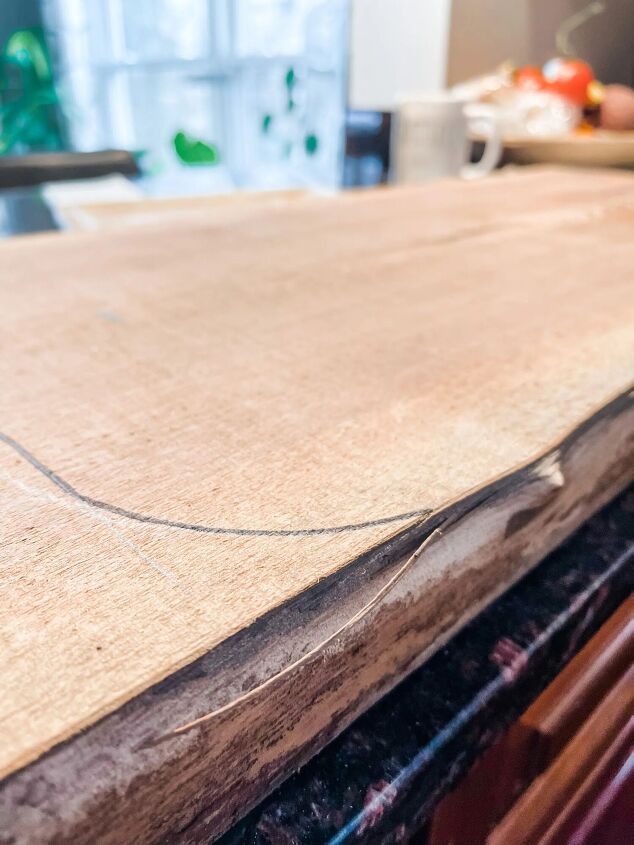
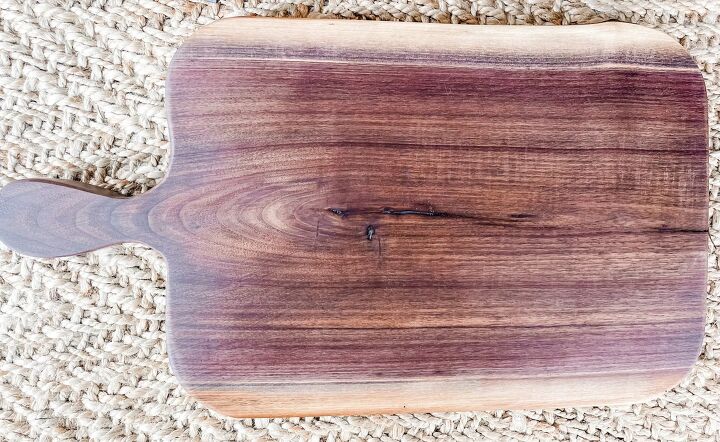
CUTTING THE BOARDNow it’s time and I’m so excited about how they look.
We began with this slab. Next step was to draw my design. I began with a pencil and then went over it with a sharpie.
You don’t have to worry about the marker because you will be sanding a bunch and it will go away.
Also, I wasn’t worried about it being perfectly even because I wanted that handmade look.
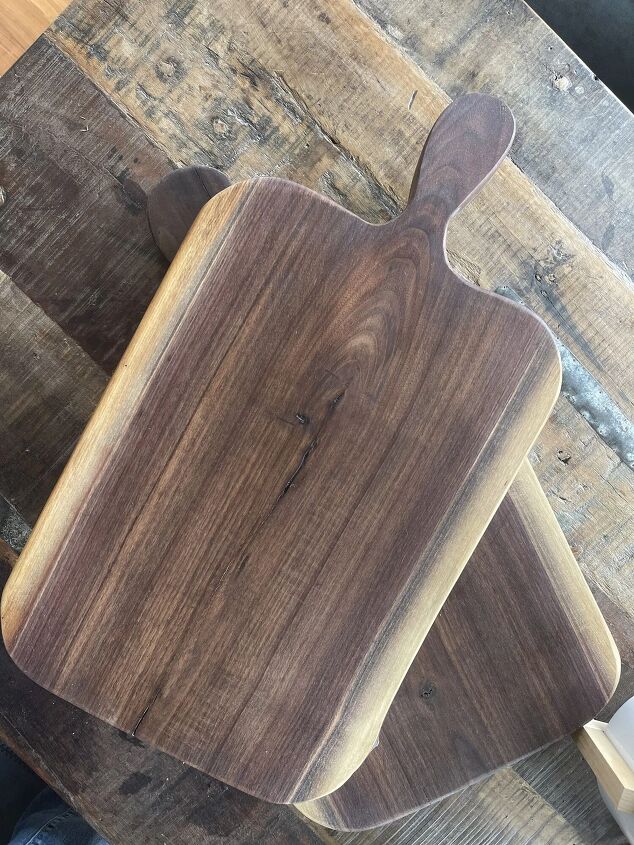
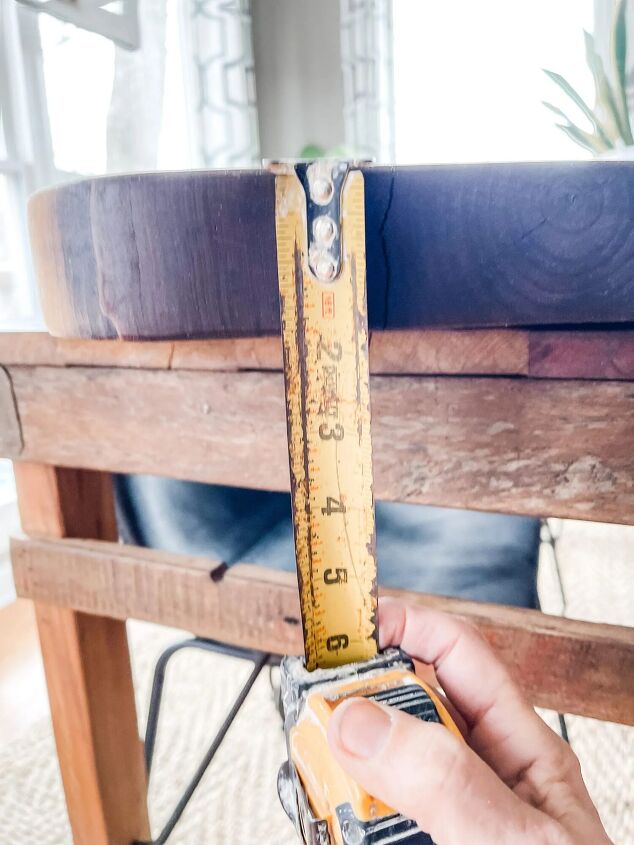
Ours is pretty large. It’s about 14 inches wide and 19 inches long, not including the handle.
Because of the thickness, my regular blade for the saw wasn’t long enough. We found one we needed at Lowe’s. The ones at Home Depot were not long enough but you can get them on Amazon also.
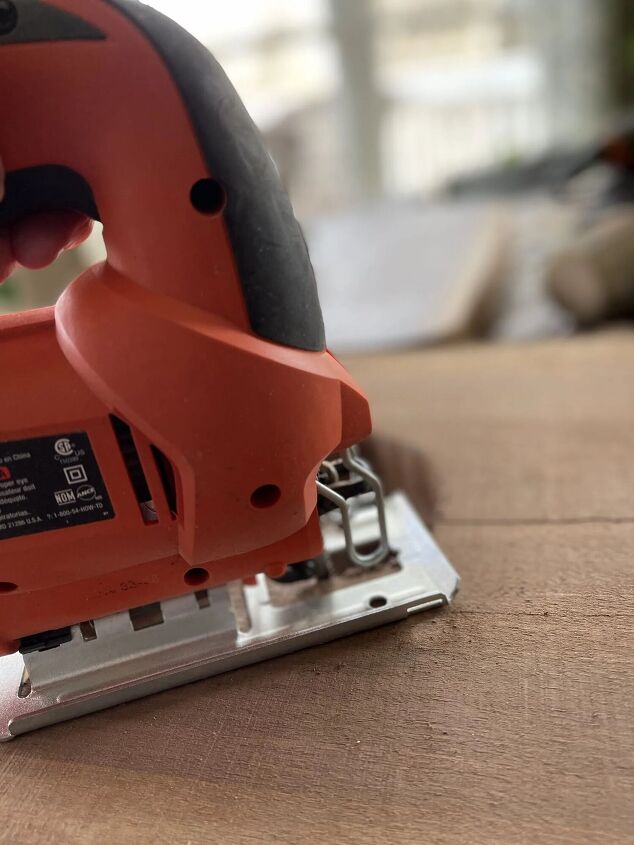
A jigsaw was all that was needed with the longer blade. You want to go slowly as you cut. A band saw would be another good option to use.
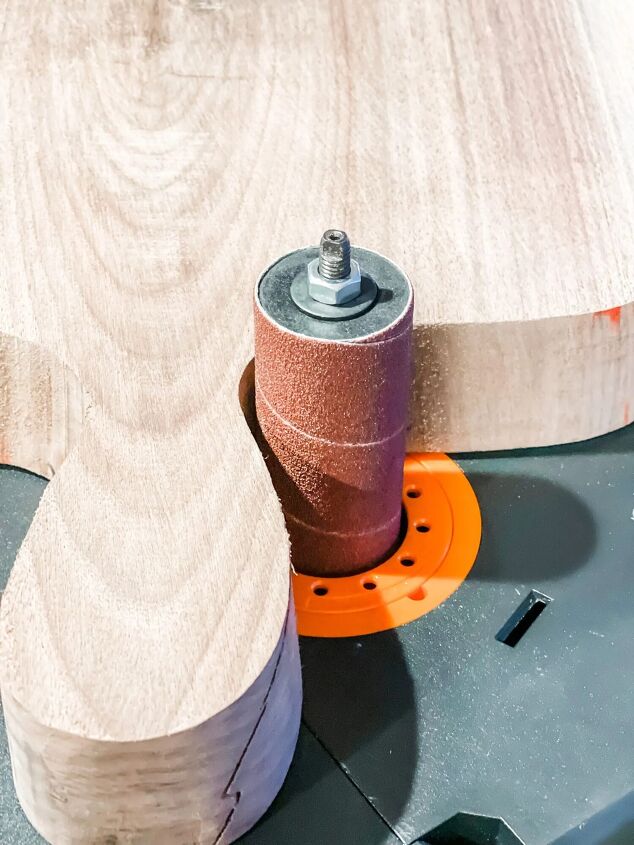
SANDING, SANDING AND SANDING THE CUTTING BOARDThe plan was to run it through the planer but ours is not quite wide enough. So next step was to sand.
We began with a palm sander all over the board. We began with an 80 grit, then moved on to 100 grit.
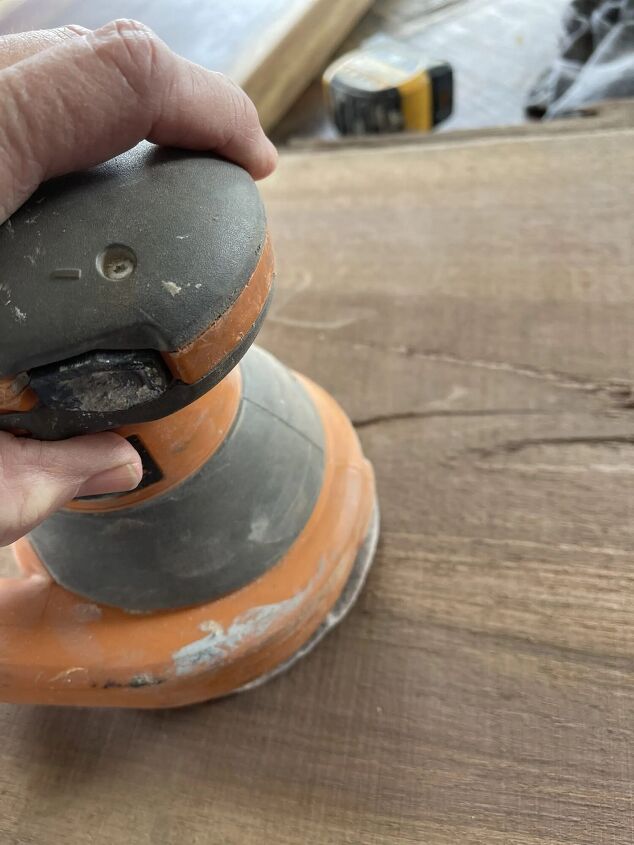
After it was sanded with 220 grit, I learned a trick where you spray it with water then let it dry. It’s like getting a chill and the hair stands up on your arm. Then after it’s dry, you sand it again, we repeated this two times.
It is super smooth after that. That way the first time you wipe down your board you won’t get the little fuzzies popping up. You will have sanded them all away.
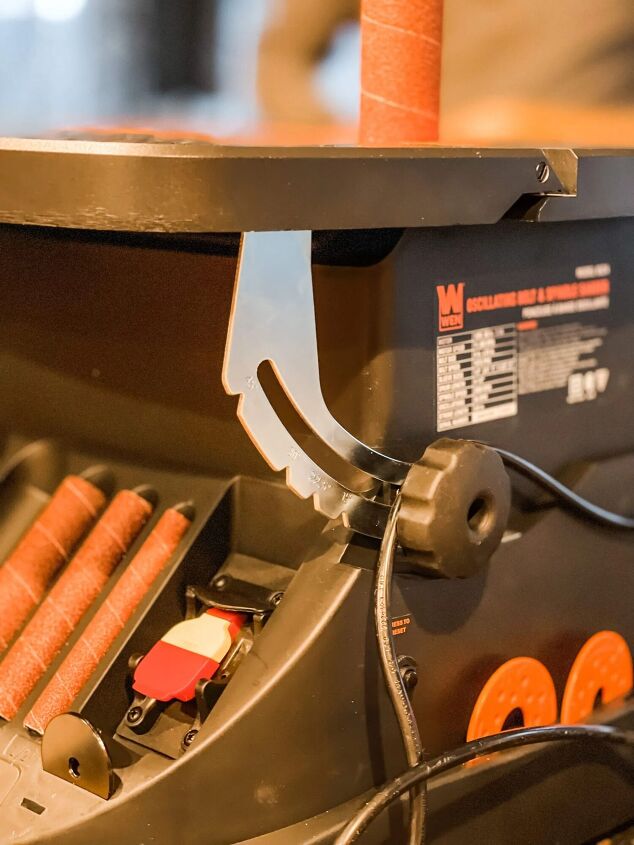
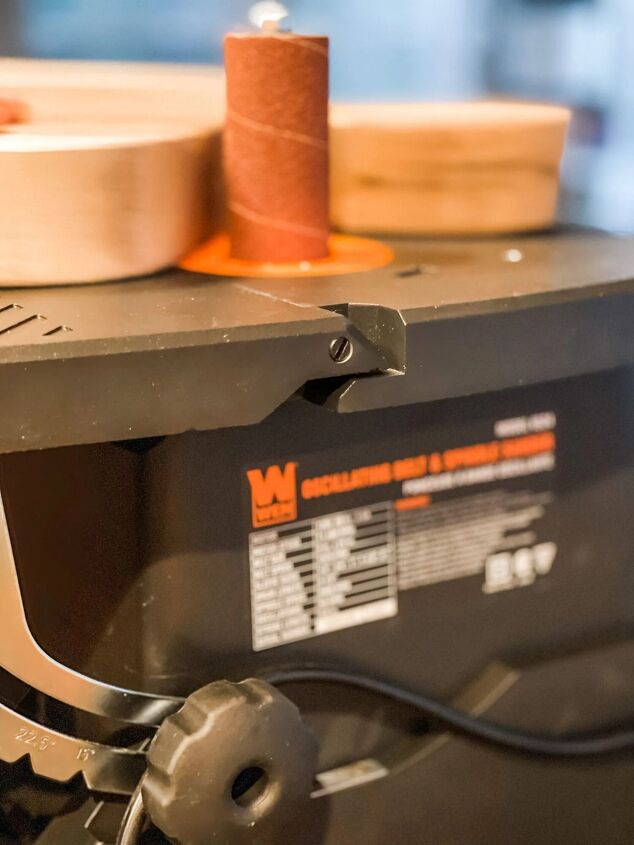
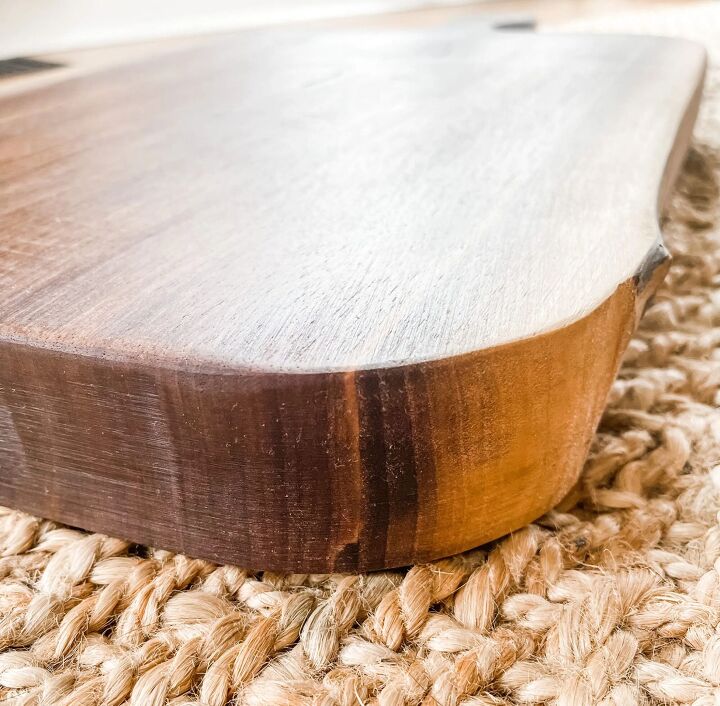
I thought it looked great but to make sure the sides were squared off, we purchased this sander to use.
It’s made by WEN. It did an amazing job of evening up the sides, I’ve included a link below for your convenience.

PREPARE & CARE OF THE BOARD
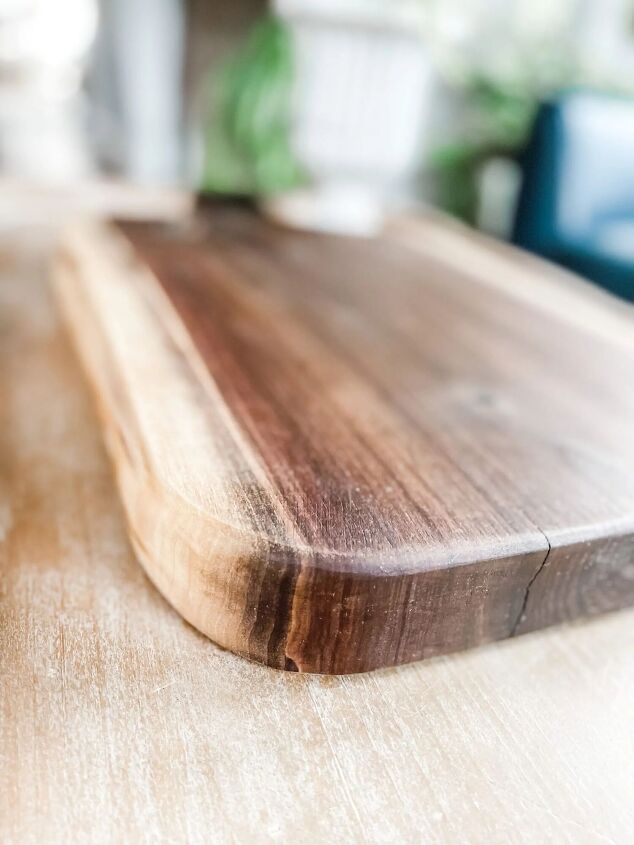
I did some research and the type of oil you want to use to finish your board is mineral oil. Here is a highly rated blend I ordered from Amazon. It’s called Walrus Oil.
Thank goodness there are no walruses injured in the making of this product. It is a blend of beeswax, mineral oil and coconut oil. I put a generous coating on at night and then the next day I wiped off the excess. It really soaks into the bottom edge. Another application was added and I waited 12 hours before wiping back again.
Look at the difference? The beauty of this black walnut really shows up once it’s oiled. By the way, this is a food safe oil.
You want to wipe this down and wash by hand using dish soap like Dawn. Do not put in the dishwasher or soak in water.
 WALRUS OIL

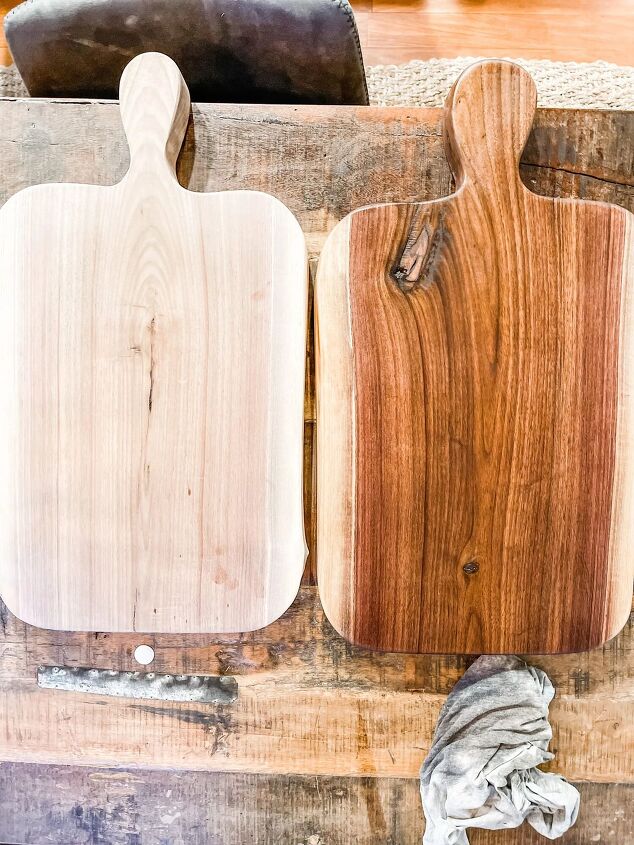
What a beautiful piece to display in your home or use for get togethers and parties or to actually cut on!
So far we have made two of them but I’m so in love with them I’m sure there will be more in the future.
The next project with the wood is to make a sofa table for my son, a desk for Carmine and an end table too.
Maybe I’ll force myself to wait a few more months.
If you don’t have a black walnut tree just itching to come down, some reuse warehouses like my favorite, Community Forklift has planks of live edge wood for sale. The prices are reasonable but there is always Amazon or Etsy.
I really love learning and working with wood, you can see a few other projects using wood here: How to Create Rustic DIY’s From Wood and Wooden It Be Nice.
LET’S GO SHOPPINGIf you shop from these links, there is no cost to you, but you are supporting my small business. Thank You!
WEN OSCILLATING BELT A ND SPINDLE SAW

WALRUS CUTTING BOARD OIL
BLACK AND DECKER JIGSAW

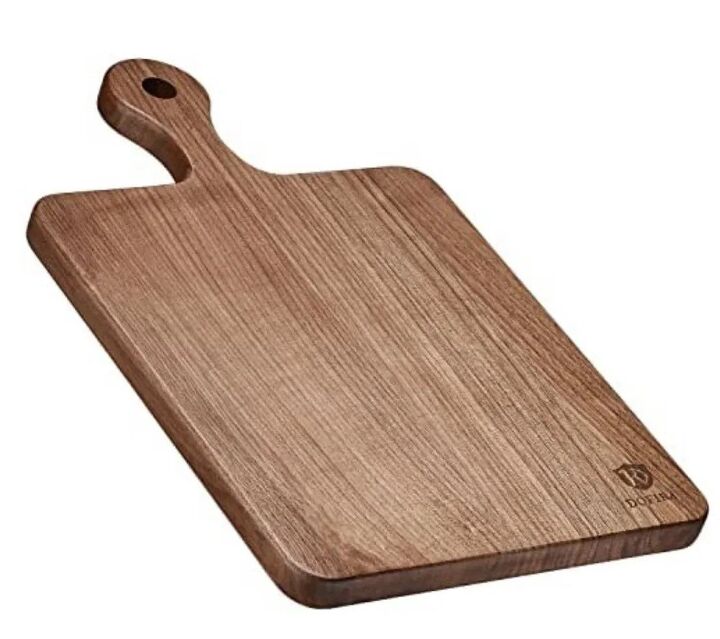
BLACK WALNUT CUTTING BOARD
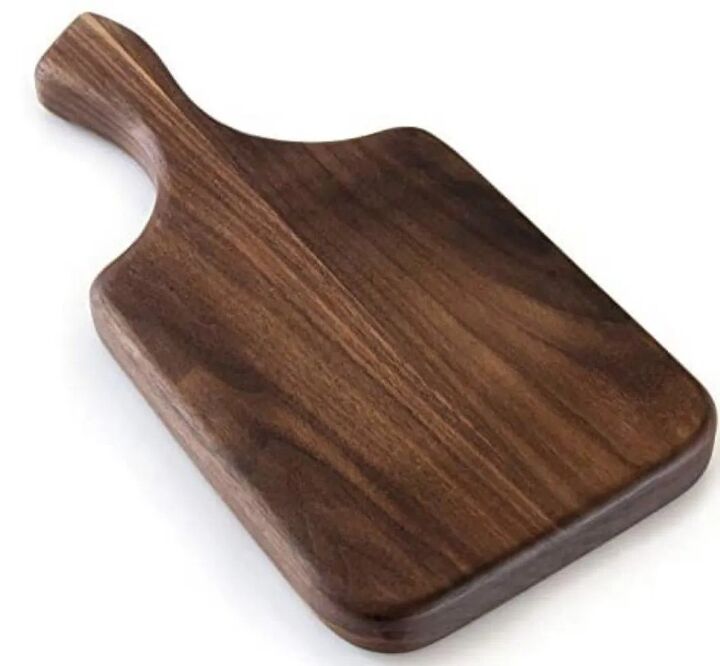
BLACK WALNUT CHARCUTERIE BOARD
Thanks so much for coming by Saved From Salvage! I love sharing my ideas and projects with you and hope you get inspired to try some yourself. The best part is you can learn from my mistakes and your first try will be perfect!
I hope you are staying warm, I’m tempted to keep bundled and just watch the birds out my window but there’s always another project just around the corner.
If you like what you read, subscribe to the blog or leave me a comment, I love to read them and I’ll get right back to you. Feedback is always appreciated.
XO, Regina

Comments
Join the conversation
-
These cutting boards are beautiful! Have your ever considered selling them? I really think others would love these in their kitchens!
-
Candy - thanks for the kind words. No I've not thought about that...


Frequently asked questions
Have a question about this project?