


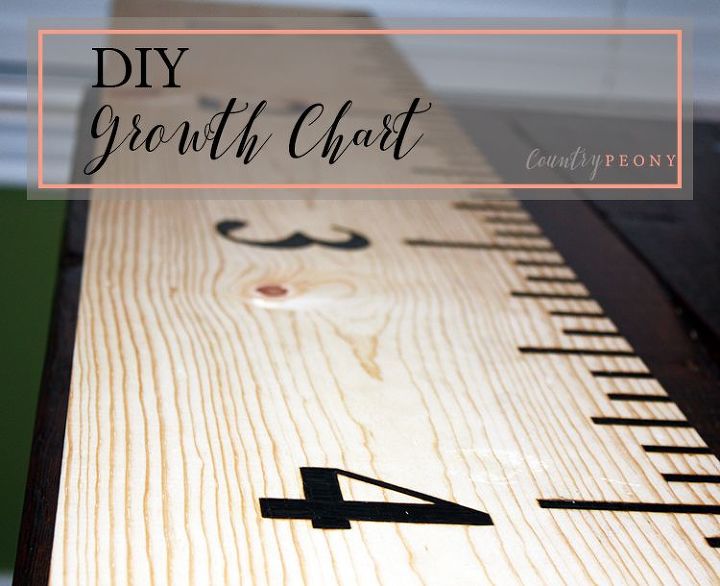
DIY Growth Chart
14 Materials
$35
2 Days
Easy
I grew up in the same farmhouse that my parents still live in. Its beautiful old walls have many dings and marks from wear and love over the years. The marks I remember the best are behind a dresser in my parent's closet. Every year my four siblings and I would stand next to that wall behind the dresser and my mother would make a mark on the wall to indicate our height and age. It was so fun to compare growth ticks with each sibling and ourselves each year. I wanted the same for my children, but I knew we wouldn't be in our forever home for a while. So, with my husband's help we created a DIY growth chart for our children that we can take with us to keep forever.
For this project we were inspired by April Wilkerson's very helpful DIY Wood Burned Growth Chart Ruler video via her youtube channel. (link at the end of post)

For this project you will need:
- Square Edge
- Painter's or Masking Tape
- Tape Measure
- Clamps
- Woodburner (we used the 1/4" flathead)
- Wood Pencil
- Numeric Stencils
- 1X12 - 6 ft long wooden board. We used pine. Look for a board that is straight, without cracks, and doesn't have knots where you will place the numbers. The drier the wood the better for application.
- Fan
- Mounting Hardware
- (Affiliate link) Stain. We used Minwax Wood Finish stain in Dark Walnut
- Foam Brush or rag to apply the stain. We used a foam brush, because we wanted a nice, even application without brush marks.
- Polyurethane
- Fine Grit Sandpaper

Step 1: Clamp the tape measure to the end of the board. We started the board at 6 inches, because we assumed we would hang the board 6 inches above the ground due to baseboards. If you plan to place your board directly onto the ground clamp the tape measure at the beginning of the board starting at 0 inches.
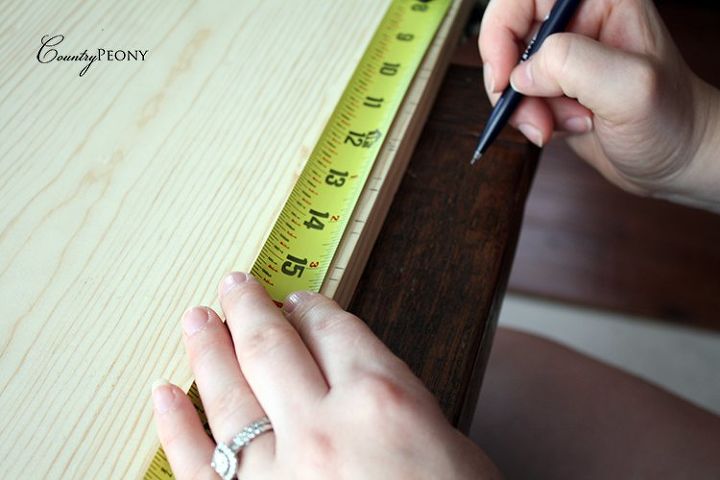
Step 2: Mark out every inch. Then mark out an 1/8" on either side of the inch mark to account for the width of each inch tick mark. Leaving each tick mark to be 1/4" thick.
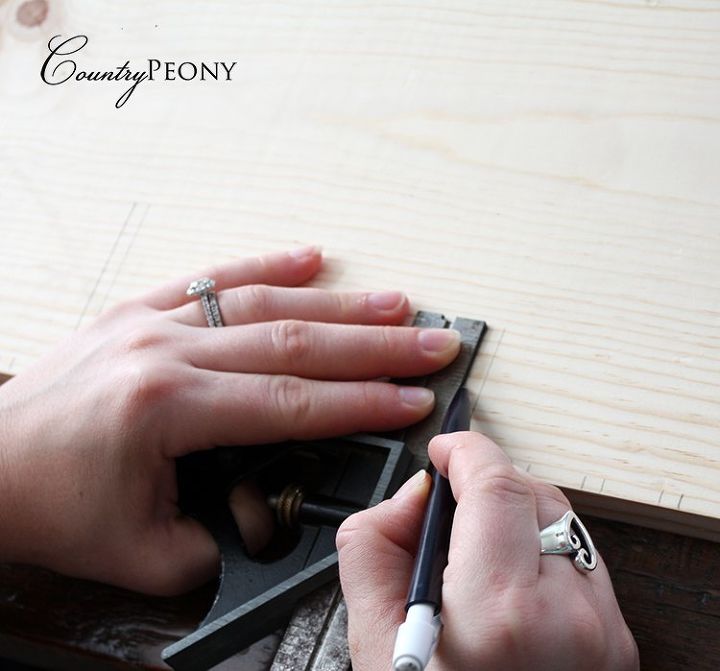
Step 3: After you make your tick marks, take your square edge and make a line to represent the different dimensions. For reference:
- Each tick mark representing a foot is 3" long
- Each tick mark representing 1/2 foot is 2" long
- Each tick mark representing 1/4 or 3/4 foot is 1 1/2" long
- All other tick marks are 1" long
Then connect the two lines to block off the tick marks.
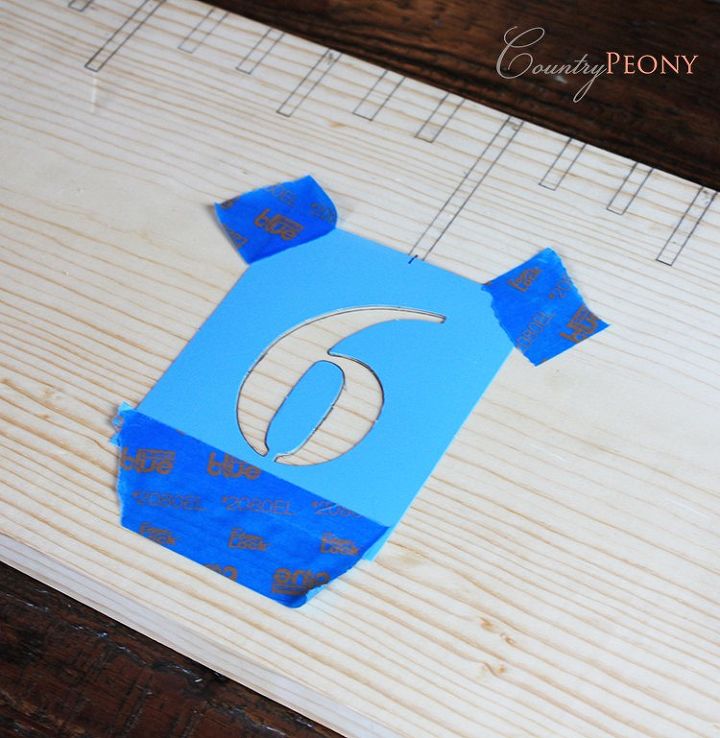
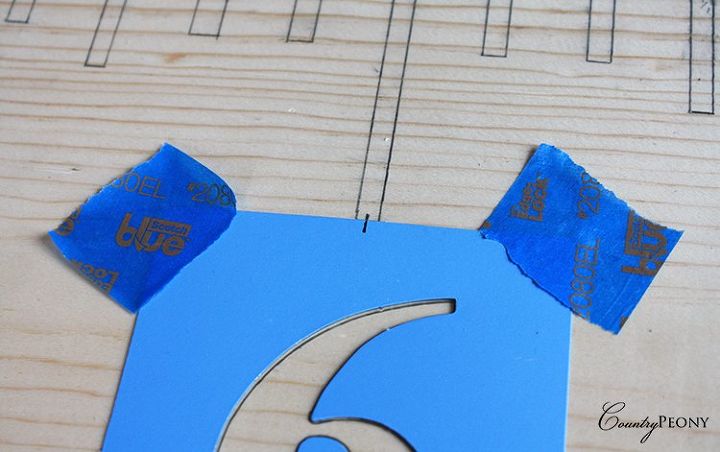
Step 4: Now take your stencils and center them on the tick marks representing each foot. Tape the stencil down with painter's or masking tape. Ensure that you stay consistent and aligned with how far your numbers are away from the tick marks.
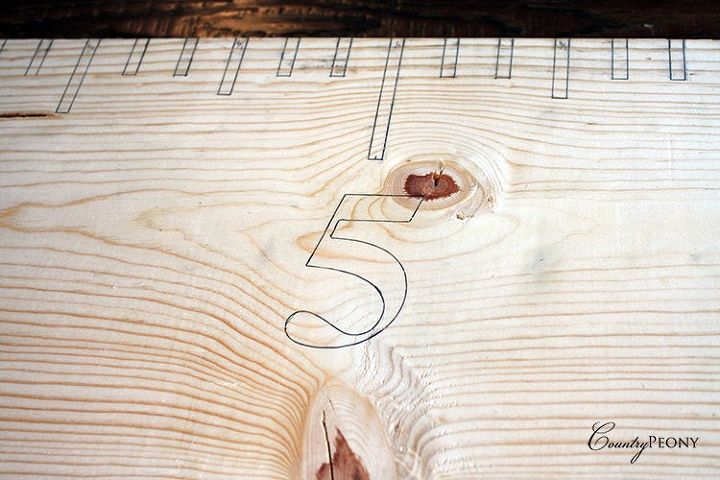
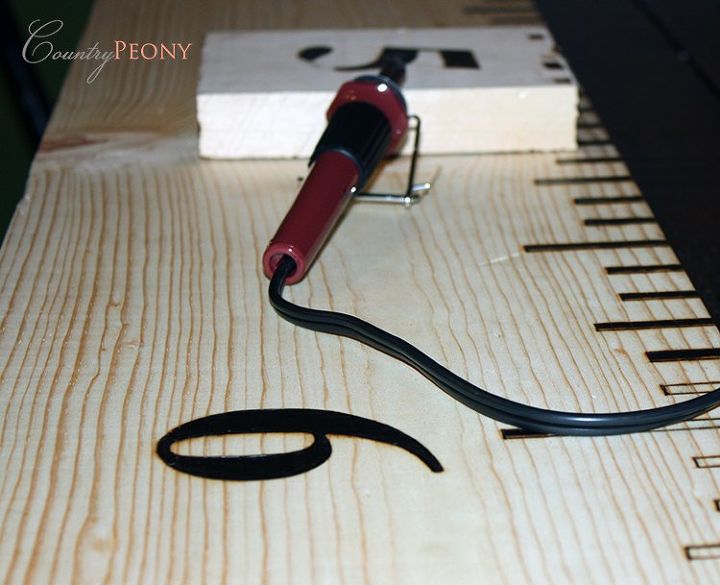
Step 5: Once you stencil out the numbers it is time to start the wood burning process. Use the wood burner to blacken all of the tick marks and numbers.
*Tip: we found it helpful to outline the tick marks and numbers first and then filled in to create a crisp and even line. This ensured that we didn't burn past the lines.
Some wood, including pine, contains sap. As you burn, the sap may seep out and you will have to clean off your wood burning tip. If you have a piece of scrap wood, you can use it to scrap the charred sap off the wood burning tip.
It is important that you burn the wood in a well ventilated room. We also used a floor fan and overhead fan to ensure the smoke circulated.
The wood burning process takes a long time. It is important to be patient if you want a quality finished product. My husband (the more patient between the two of us) completed this project, and I couldn't be happier with it.
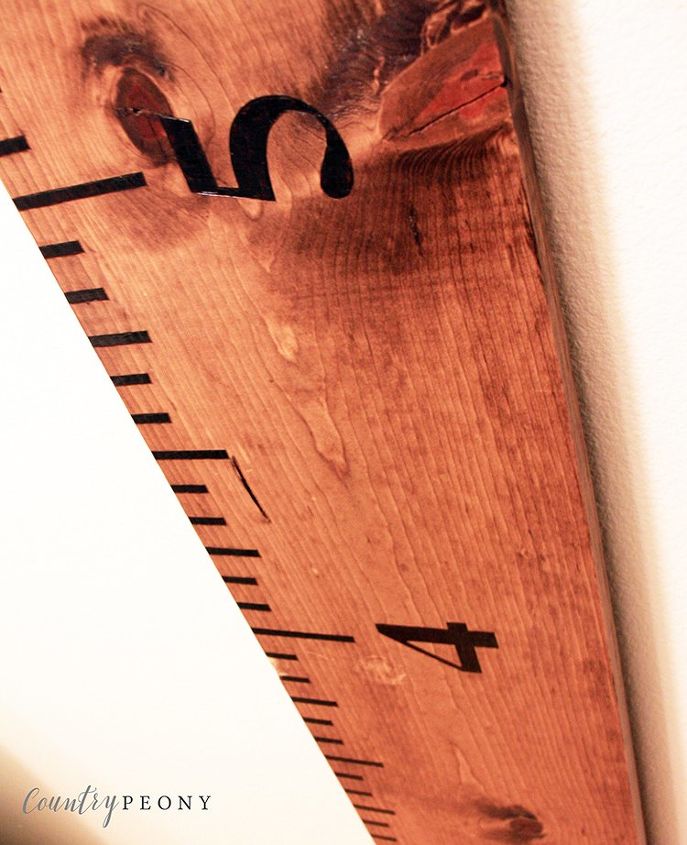
Step 6: From here you can decide to stain and polyurethane your growth chart to help protect it. We used Minwax Wood Finish Walnut Stain (see link above in Tools list) since we wanted a darker finish. Follow the recommended directions on the staining product you use. We applied one coat of stain and three coats of polyurethane. We used 120 fine grit sandpaper in between each coat of polyurethane to ensure a smooth finish.
Step 7: Apply mounting hardware and enjoy watching your little ones grow.
For this project we were inspired by April Wilkerson's very helpful DIY Wood Burned Growth Chart Ruler video via her youtube channel.
Resources for this project:
See all materials


Any price and availability information displayed on [relevant Amazon Site(s), as applicable] at the time of purchase will apply to the purchase of this product.
Hometalk may collect a small share of sales from the links on this page.More info

Want more details about this and other DIY projects? Check out my blog post!


Frequently asked questions
Have a question about this project?