


DIY Leather Handled Charcuterie Board
A DIY leather handled charcuterie board is relatively simple to make. With scrap wood or leftover butcher block, you can make a beautiful and timeless gift.

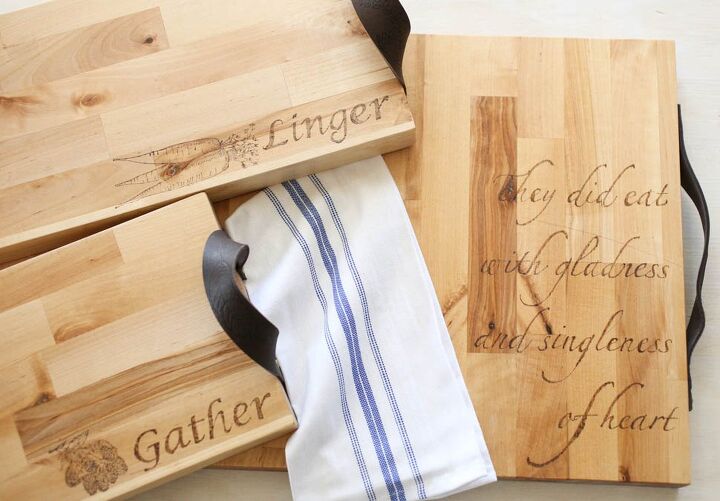
These boards are so fun serve food on. It makes a lovely display for your guests. With the Holidays right around the corner, I am so glad that I made these boards. I have used them twice already, and I see them getting lots of use in the future. A bonus is that you can leave them sitting out on a table or ottoman, and they look beautiful as decor!
Well, technically it is a French word that has to do with prepared meats. Like preserving them. Really it's just a big word we use for a meat and cheese tray. You know when we are trying to sound fancy. Charcuterie is pronounced "shahr-ku-tuh-ree". At least that's how we say it in English!I am calling this a charcuterie because that is what is trendy right now and I just love to be in on all the trends! Ha!We can still be friends if you call it a serving tray or a meat and cheese board or if you pronounce it wrong!
What Type of Wood for a Charcuterie Board?
Really you can make one out of whatever type of wood you would like if you are just going to use it as a tray. However, if you plan to serve food on it, a non-porous wood is your best choice. Hardwoods like maple, cherry, and teak are ideal. Oak, while considered a hardwood is not ideal because it is a porous wood and will absorb odors and such.I chose to make my boards out of butcher block. We had some remnants left over from our kitchen island renovation. Butcher block is usually made of maple, teak birch, or walnut. I think ours is mostly birch. The nice thing about using butcher block is that it gives such a beautiful variation in the colors on the finished board. Plus it is very substantial looking.You can always buy butcher block if you don't have any lying around. Check places like Craigslist or Marketplace for remnants that others may be getting rid of.
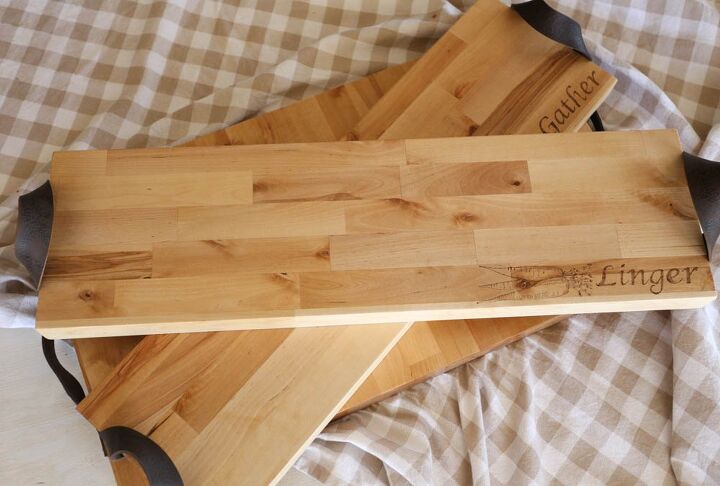
This is entirely up to you! I had a super long thin remnant that I cut into two boards. My thin ones are 28"x 8" and the larger one is 27"x 15". The width of 28" was about as long as I could make it and still comfortably hold it by the handles. The larger one is quite heavy and not ideal for using as a serving tray. I assembled that one in place. While the handles look pretty, I don't feel entirely comfortable holding it by the handles. It really feels like it needs to be supported by my hand underneath.
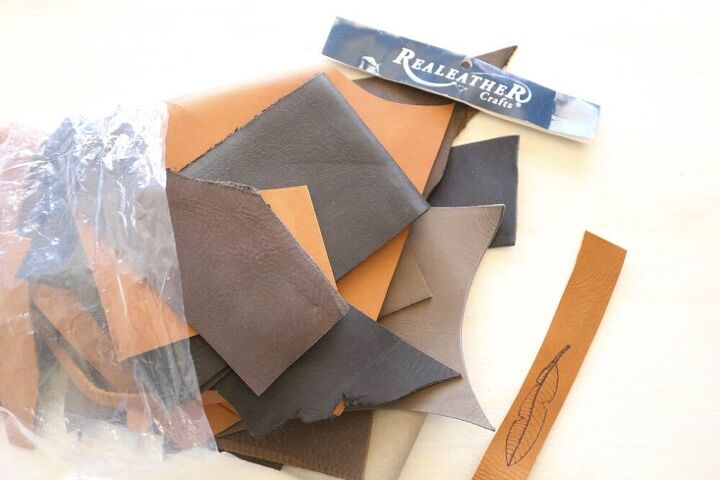
I went to Hobby Lobby to buy the leather for my handles. I was searching for a few different colors as I wasn't sure which one would look best. The prices weren't too bad, but I wasn't wanting to spend much money.Here's a tip: Look on the bottom shelves in the leather section! I almost missed this! On the bottom shelves are bags of leather remnants. All sorts of colors and shapes. All of the pieces are fairly large and very usable. The entire bag was $14.99 and then of course I used my 40% off coupon!
Step 1:
Choose the wood and cut to size. I used a mitre saw to cut my pieces down to sizeYou may need to use a table saw if your pieces need to be cut from a huge block.
Step 2:
Sand down the top and sides using a coarse grit paper like an 80 or 100 then finish with about a 150 grit sandpaper.
Step 3:
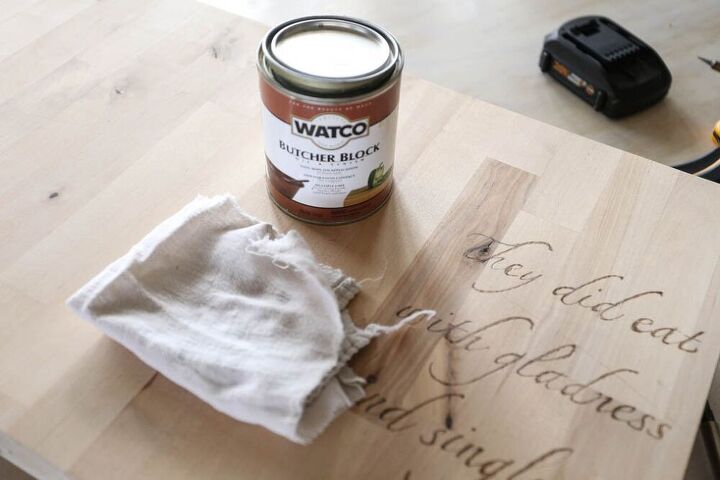
Seal the board with a butcher block sealer. I used Watco Butcher block oil and it worked very well. This will take 3- four coats and you will need to sand with 400 grit sandpaper between coats. It will be amazingly smooth when you are done!
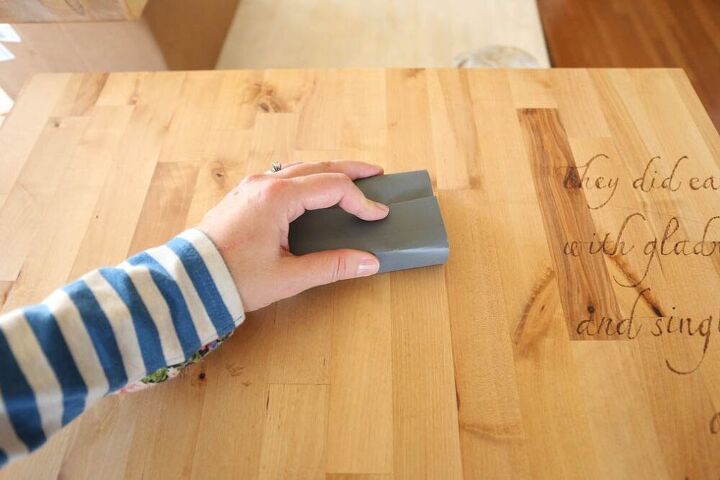
Be sure to seal both the top, the bottom, and the sides of the board. If you do not seal the bottom, the air will not circulate through board evenly and it may warp over time.
I used Watco Butcher Block Oil because I wanted to ensure that the boards were food safe. There is much debate if you read about how to seal a butcher block. Many say that polyurethane and other hard finishes are food safe once they are cured. I would tend to believe this, as we don't think twice about letting our kiddos eat food that has been sitting directly on the dining room table. It has likely been sealed with polyurethane. However, since I was planning to put food directly on these boards, I wanted to use something that stated it was food safe on the can. Especially if I was planning to recommend it to you!
Staining the butcher block is also an option, but I wanted to keep this project simple, and I wanted the words and designs to really stand out. I think they would have been lost in a dark walnut finish.
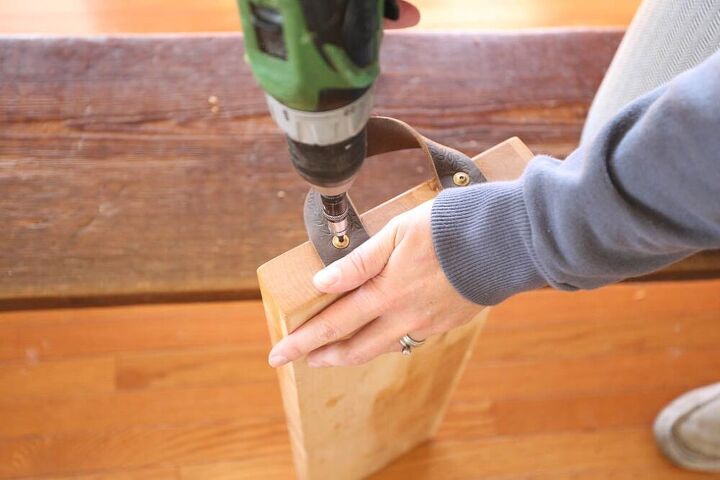
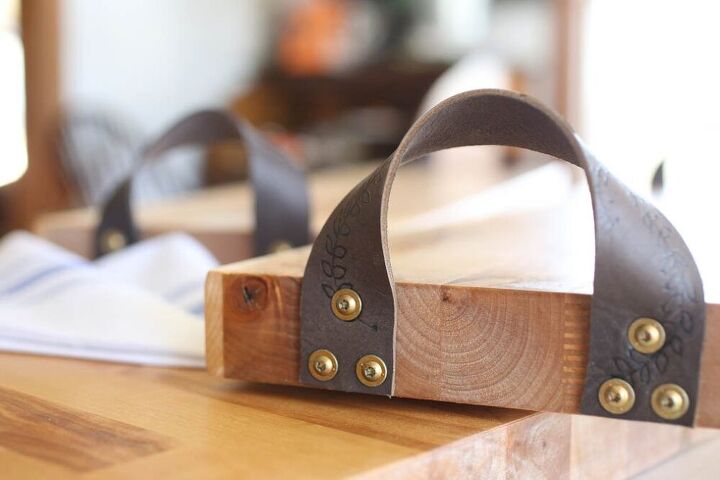
Next, you will need to cut some leather strips to size. My leather strips were about an inch to an inch and a half wide and around 9" long for the thin trays.For the longer tray, I did the handles a bit differently and they are closer to 10" long. These were attached with cabinet screws to give a more finished look. Tacks of some sort may look nice as well, but I really wanted mine to be sturdy.Be sure to pre-drill the holes prior to putting the screws in. We drilled through the leather and the board at the same time and then put the screw in.
Enjoy your beautiful charcuterie board. Use it for entertaining, or give one as a lovely handmade gift!
I have another post on how to burn the pretty designs into your board. Look in my profile for the post on HomeTalk, or check below for the link to my blog.
Resources for this project:


Comments
Join the conversation
-
I love it. A very contemporary look. Great share


Frequently asked questions
Have a question about this project?
How did you do the lettering?