


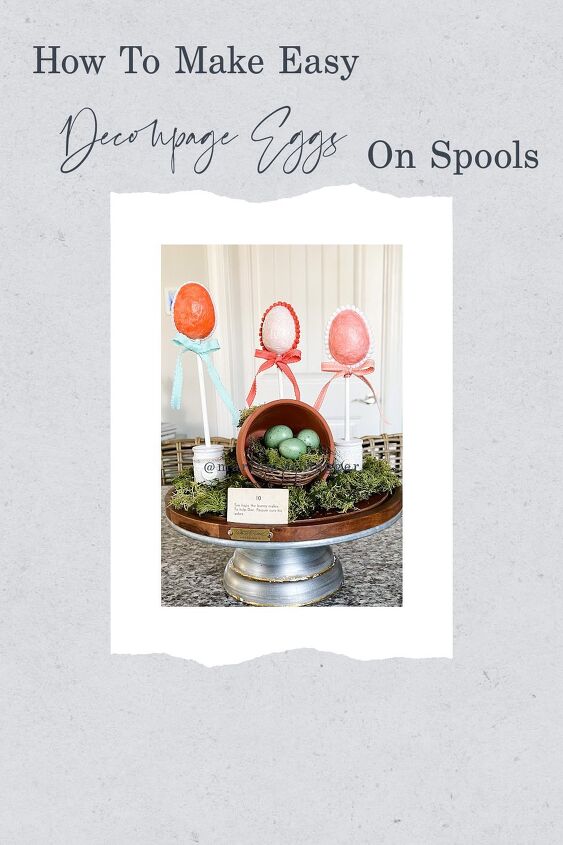
How To Make Easy Decoupage Eggs on Spools
Looking for a fun spring craft project? Let’s me show you how to make easy decoupage eggs on spools. A simple Easter project!
Tutorial How To Make Easy Decoupage Eggs on Spools
Supply List:
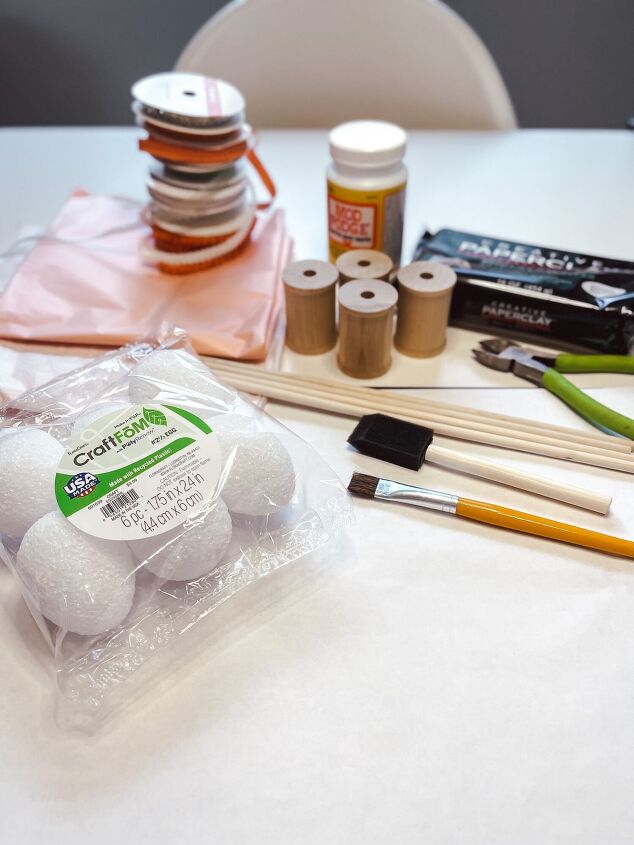
- Styrofoam Eggs
- Wooden Spools (2 x 1-1/2-inch)
- Dowels that will fit in the spool
- Paperclay or Modeling Clay
- White Mineral Paint or Acrylic Paint
- Dark Wax or Distressing Brown Ink
- Tissue Paper with color or design (you can use decorative two ply napkins)
- Modge Podge
- Tacky Fast Drying Glue
- Ribbons
- Embellishing trims
- Buttons
- Lace or wider ribbon to fit around spool (optional)
- 2 foam brushes
- Scissors
- Wire Cutters
- Ruler
- Sanding paper
- Sponge
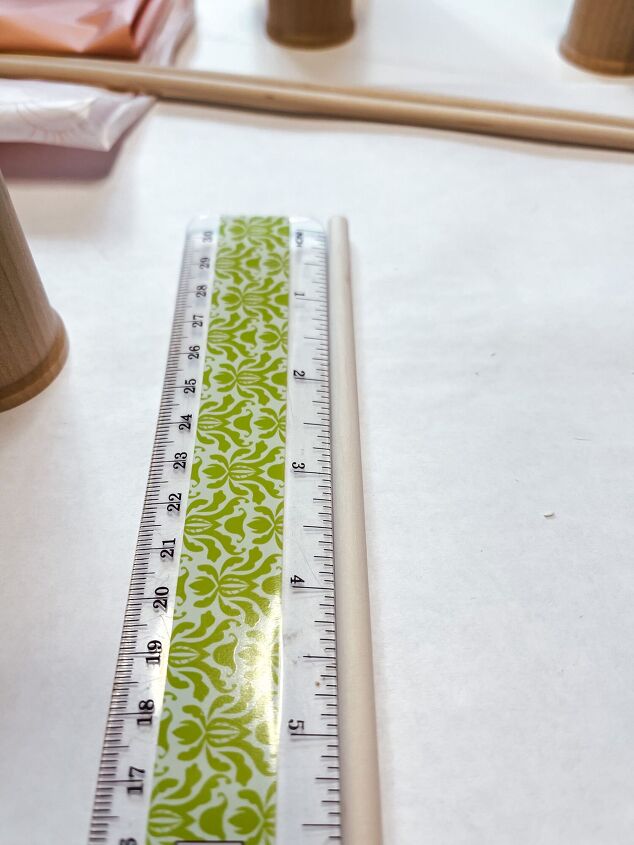
First, you will measure the dowel to the height for the tall egg.
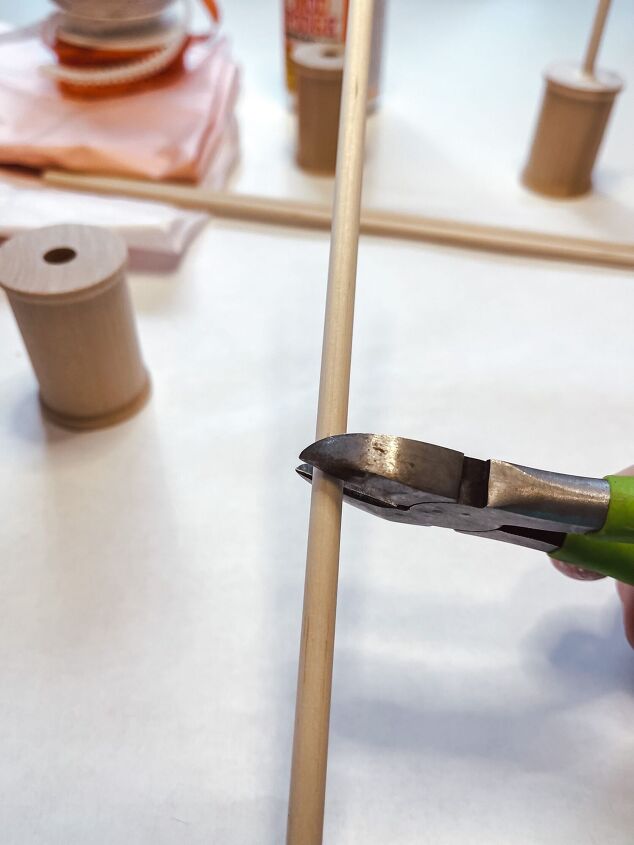
With wire cutters, you will need to make a score line to snap the dowel.
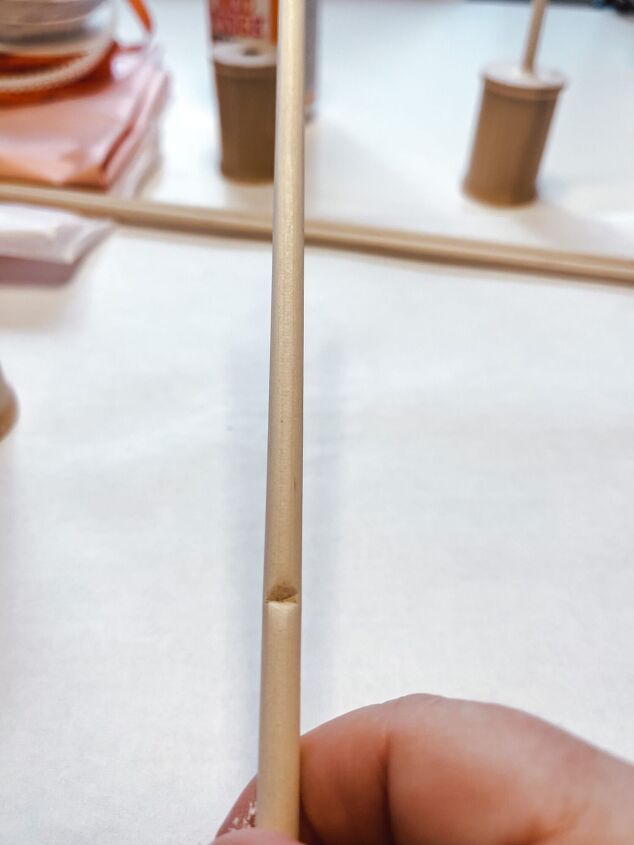
Now just snap the dowl along score line.
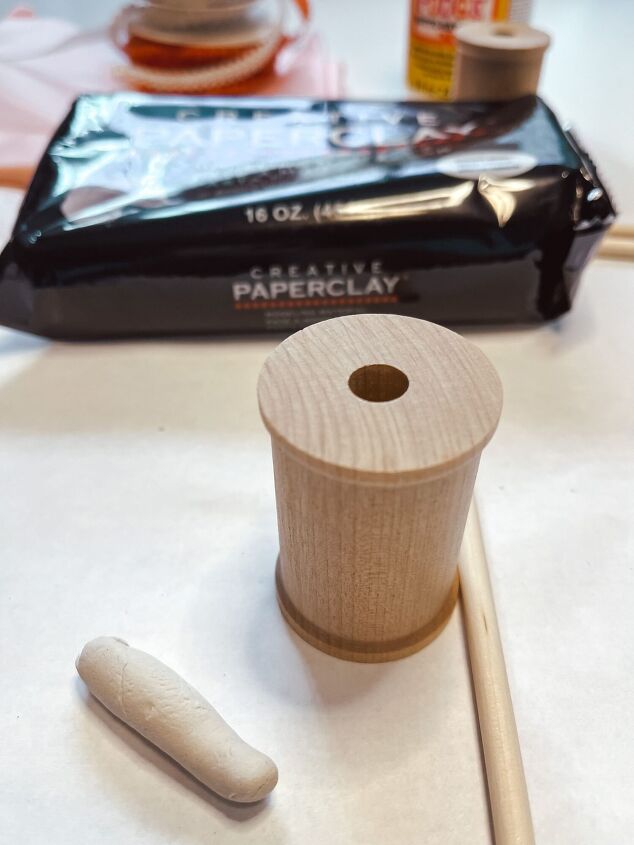
If the dowels are a little smaller than the hole on the spools, you can roll into a log some Paperclay or modeling clay and push it into the hole on the spool.
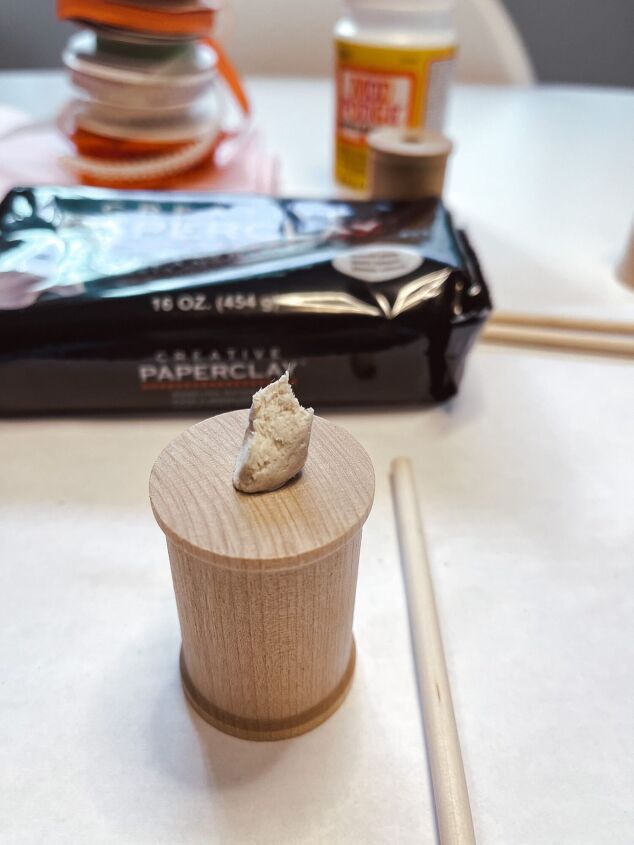
Now roll some Paperclay into a log and push it into the hole on the spool. Next, you will insert the dowel into the hole and smooth the Paperclay around the dowel.
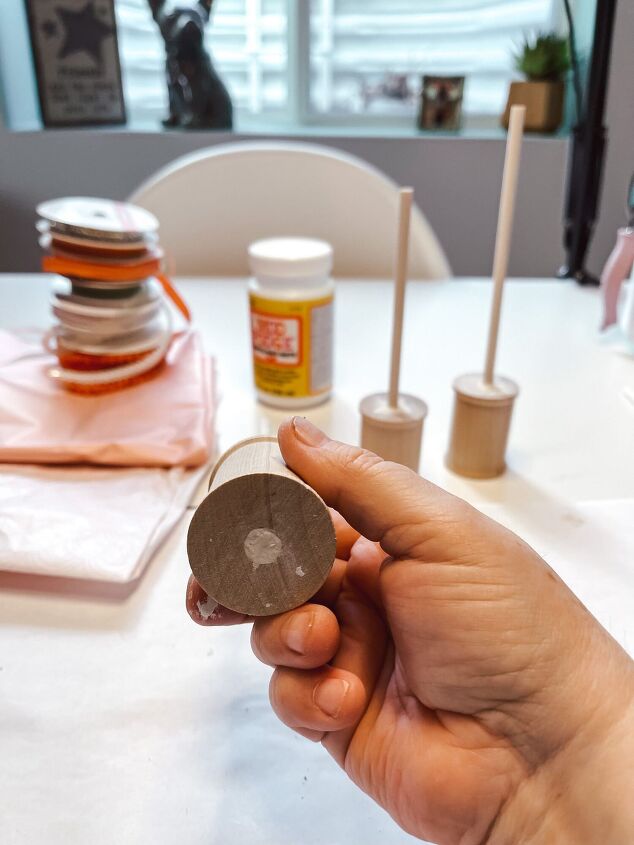
The hole on the spool should be completely covered. Flip in over to smooth the bottom of the spool from any clay overflow.
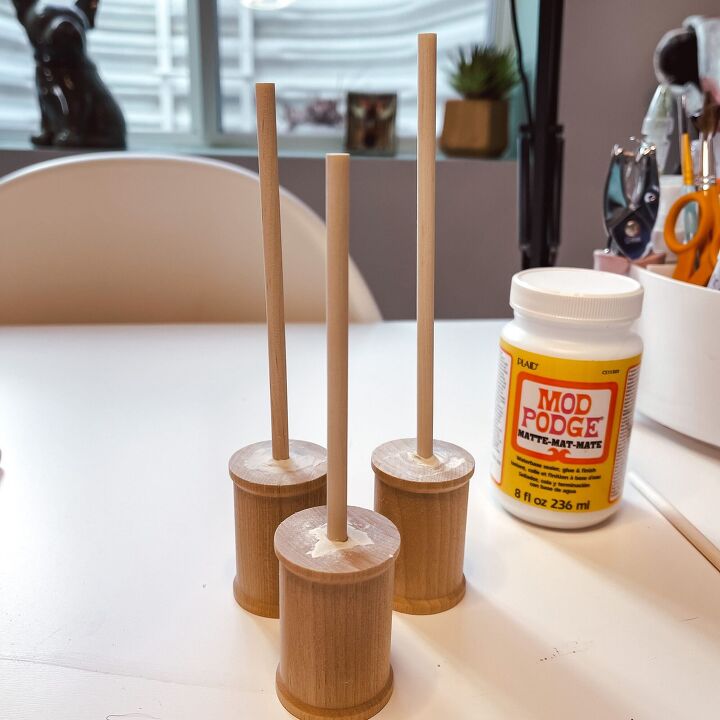
Let them dry for approximately 1-2 hours.
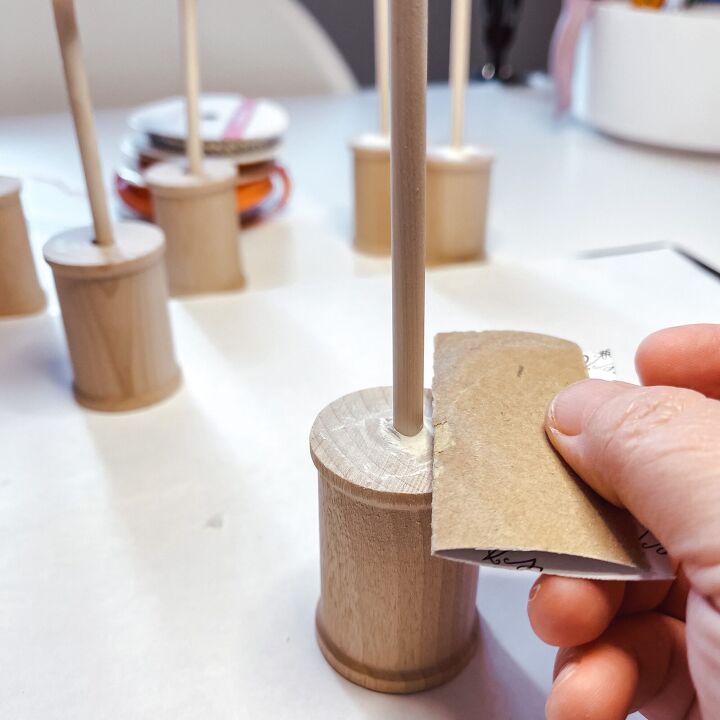
When the clay has dried, sand it so that it is smooth.
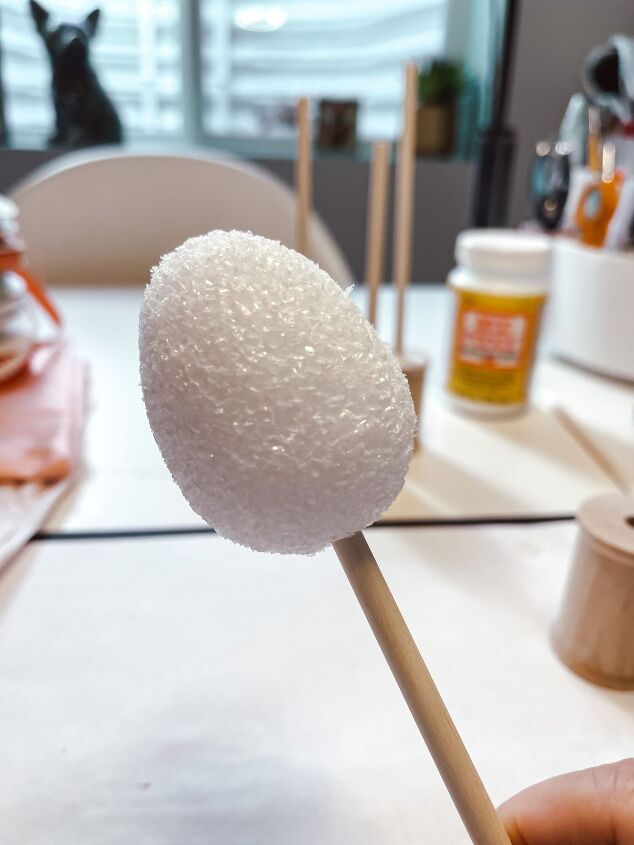
While the clay in the spools are drying, place one of the Styrofoam eggs on a spare piece of dowel. Push the dowel into the egg to hold it but not too far into it.
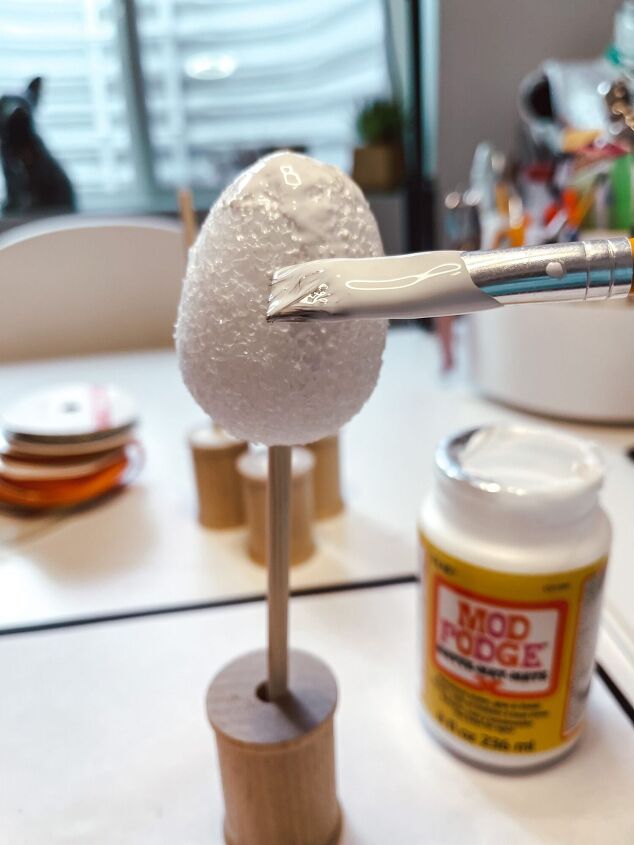
The tissue paper needs to be torn in small pieces and set aside.
With a foam sponge begin applying Modge Podge over the egg.
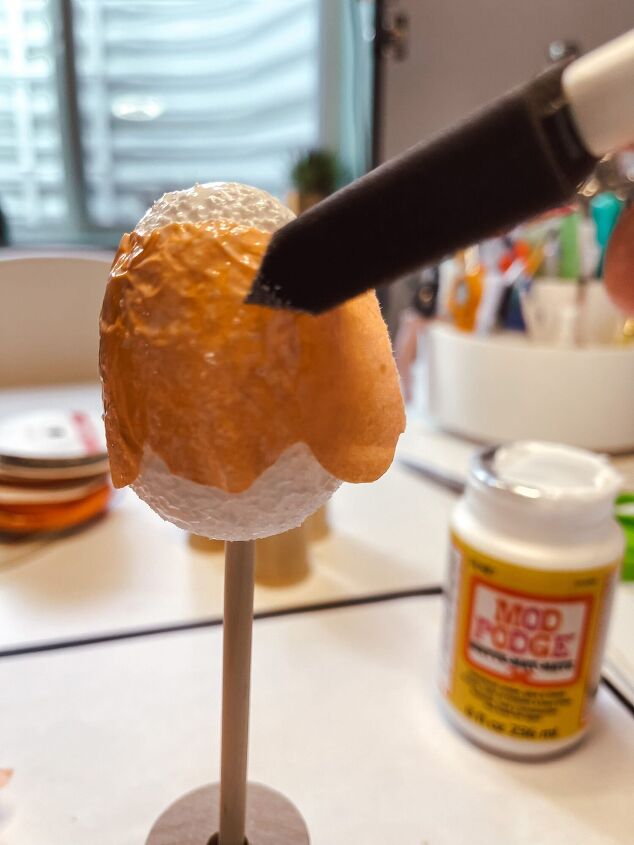
Next start working the tissue paper over the egg and applying more Modge Podge on top of the paper. Let’s be generous with the Modge Podge!
Sometimes your finger works best to smooth out the lines. Continue building up your eggs with tissue and Modge Podge over the tissue until you get the desire look.
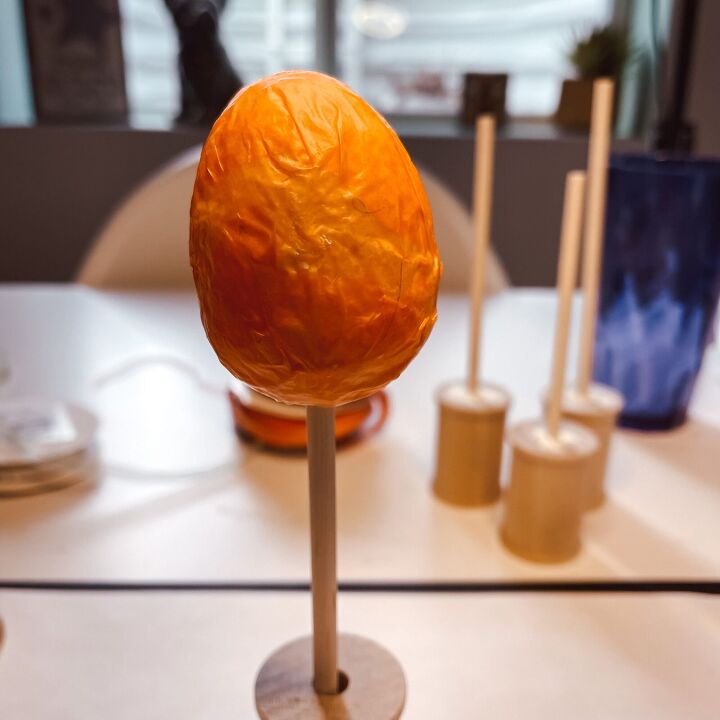
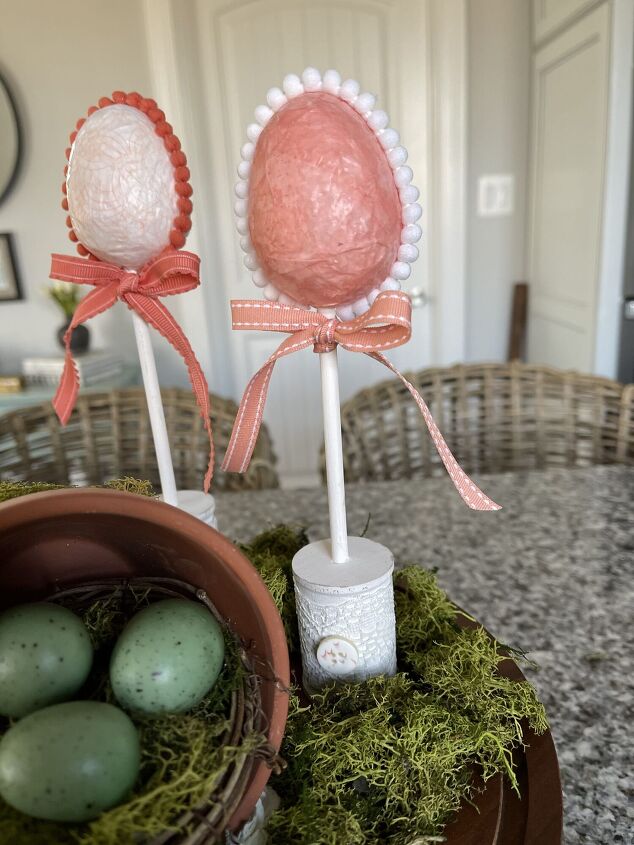
For this project, the eggs have two layers of tissues paper.
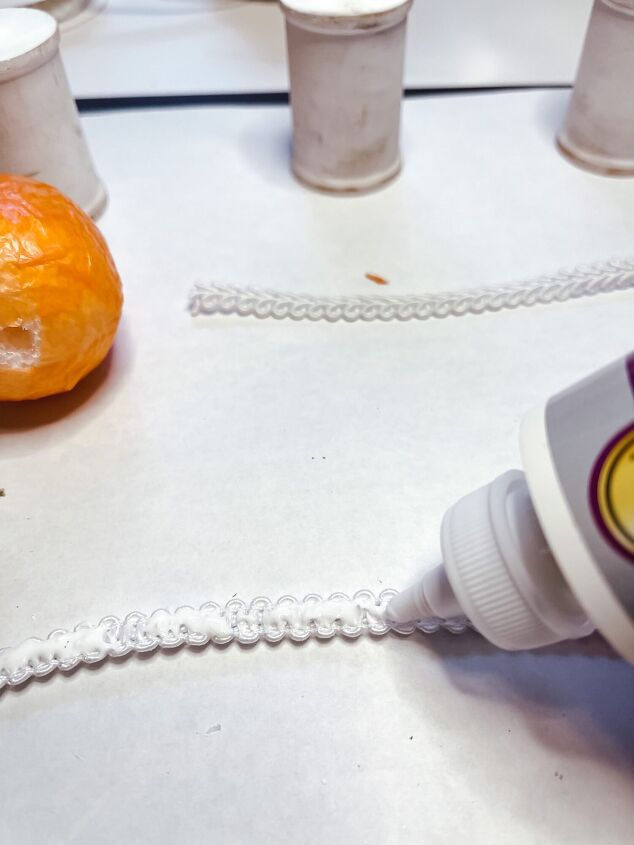
Decorative trim can be added to the egg once it had dried.
It is important to allow the egg to completely dry. If not you risk tearing the paper if handling the egg too soon.
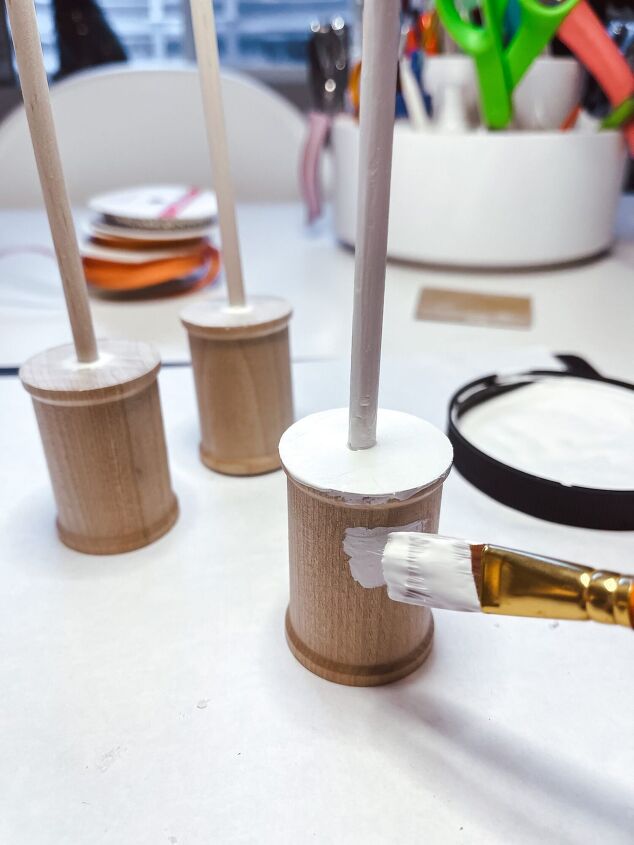
While the decoupage eggs are drying, the spools can be painted. You can use any color paint.
I am using some Dixie Belle white paint that I had on hand. It is the Silk All-In-One in the color White Cap. This mineral paint has a built in primer, paint and top coat. It is perfect for this project. Each of the spools and dowel got one coat of paint. It dries pretty quick.
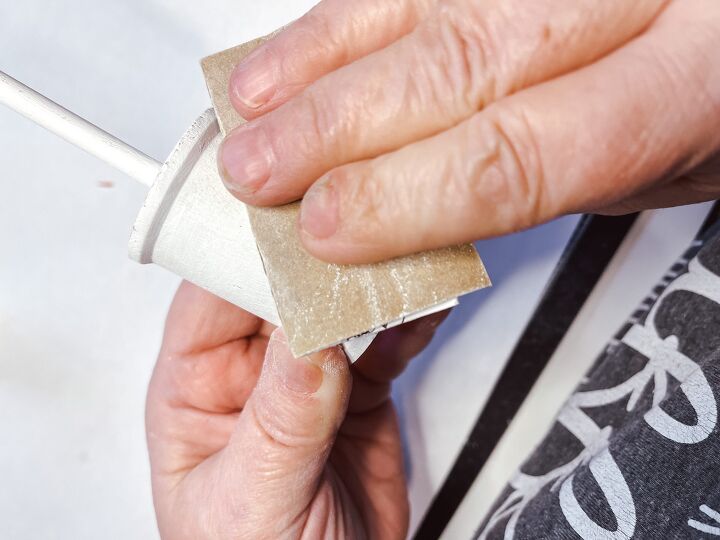
Next you will can distressed the spools with some sand paper.
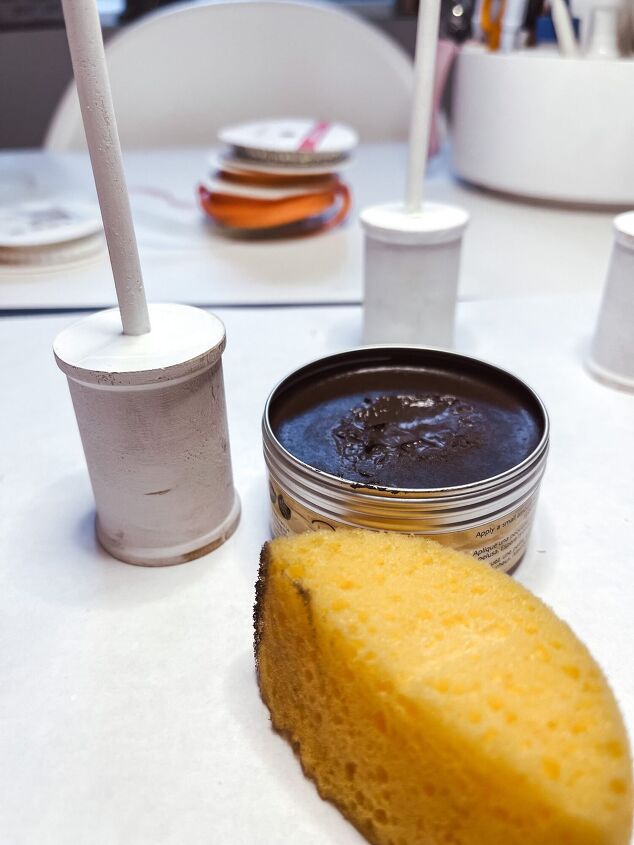
Add some Dark Wax to give it a little of an age look.
The fun part is to embellish your spools with ribbon, rhinestones, pearls, buttons, etc. Whatever you have on had from your scrapbooking days, pull it out to use.
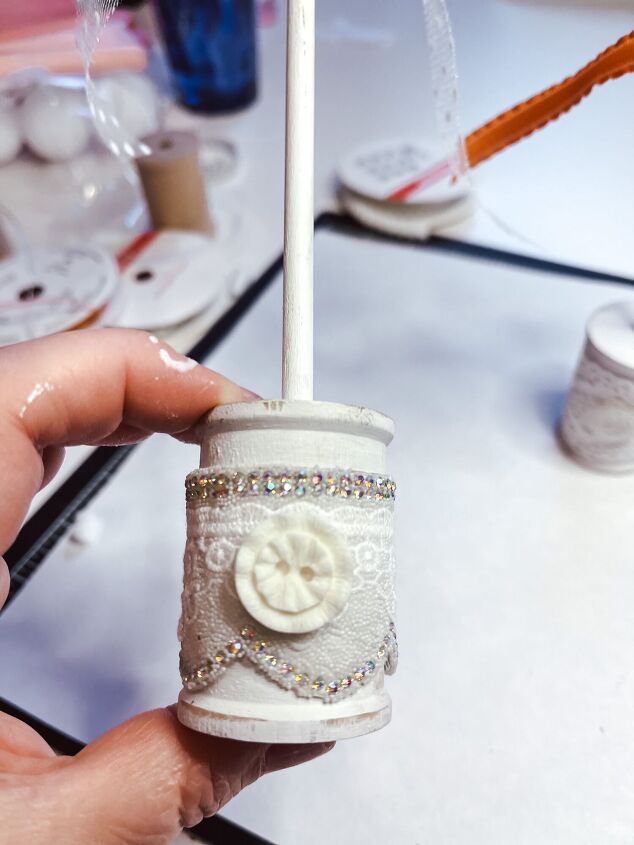
You can use a hot glue gun on the spool. Do not use it on the Styrofoam eggs. It will melt it.
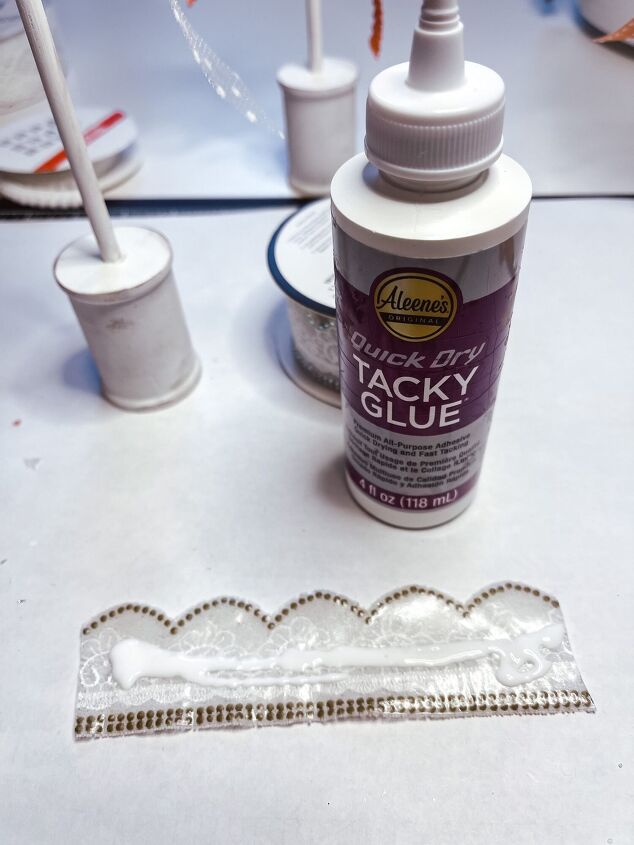
I love Quick Dry Tacky Glue. It sets in a matter of minutes.
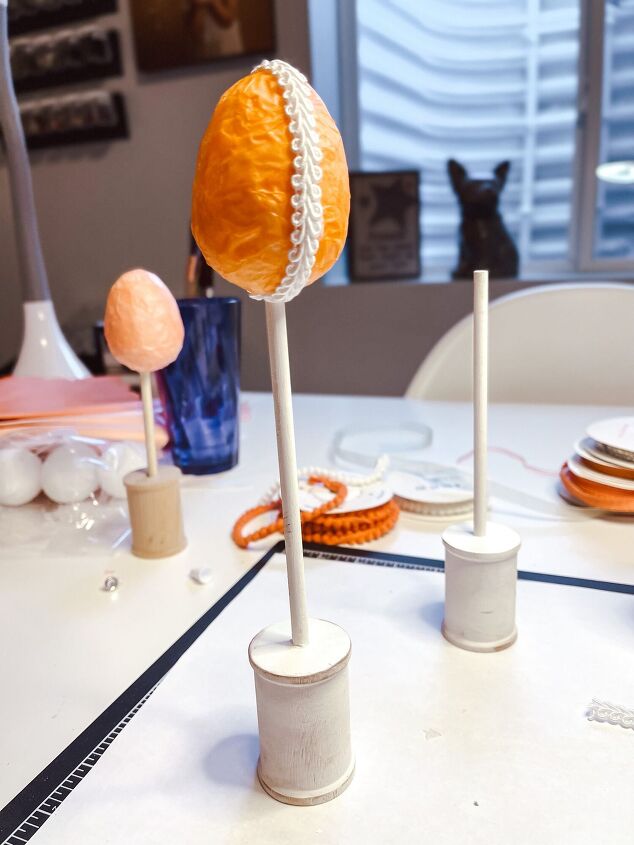
To add your egg to the dowel, pour some Quick Dry Tacky Glue into the hole. Then push the dowel into the egg where it is well secured.
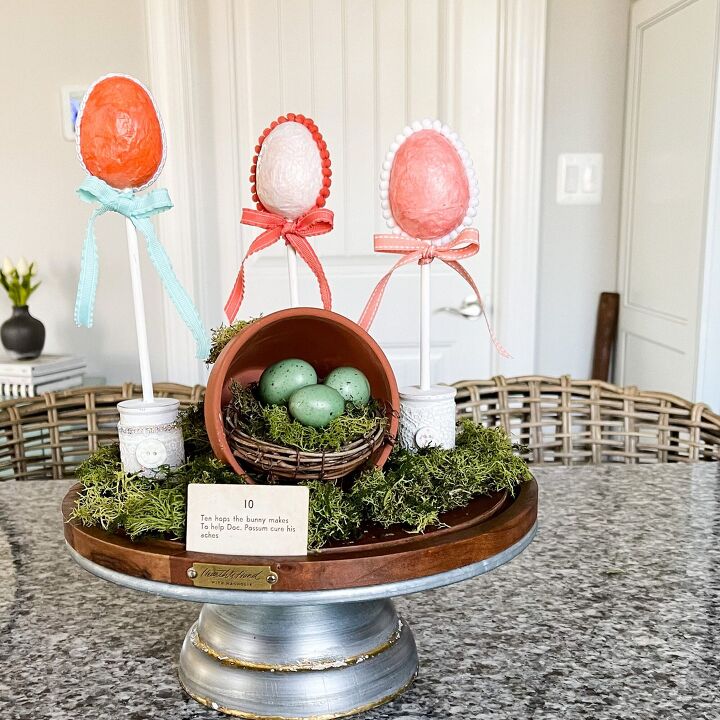
Here is a quick island center piece with the Decoupage Eggs On Spools. These Decoupage Eggs would look cute on a shelf group together or single.
Each of the eggs were done slightly different but all coordinate. The one egg appears in the photo as orange but it is more of a coral color.
The tissue papers were in shades of corals from light to dark.
Here is a close up of another spool with just lace and button.
Resources for this project:
See all materials


Frequently asked questions
Have a question about this project?