


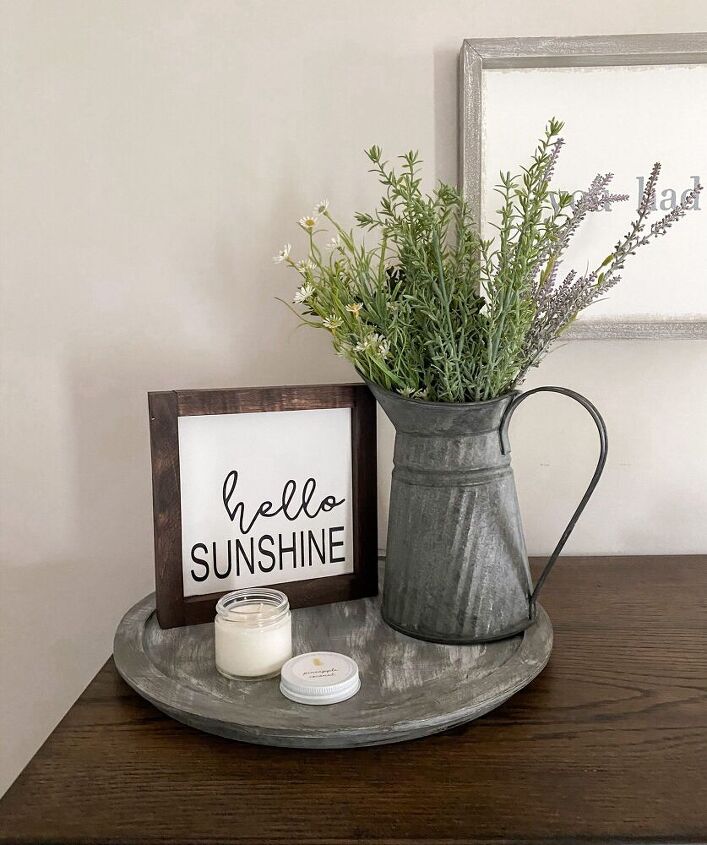
Easy Tray Refresh Project

A little while ago, I had some extra time off of work and I was itching to do a DIY project. But I didn’t want to spend a lot of money on something and I didn’t really have anything in mind. Then, I remembered I had an old wooden tray that I didn’t particularly care for that just sat in the cabinets. I also had some leftover paint and antiquing glaze so I figured why not. That’s what started this easy tray refresh project! I gave this old tray some new life and now I am loving how it looks. It definitely goes better with my farmhouse style now. So I thought it would be fun to share exactly how I did it in case you have something similar you want to give a facelift to in your home as well!
This post contains affiliate links. Click here to read my disclosure policy.
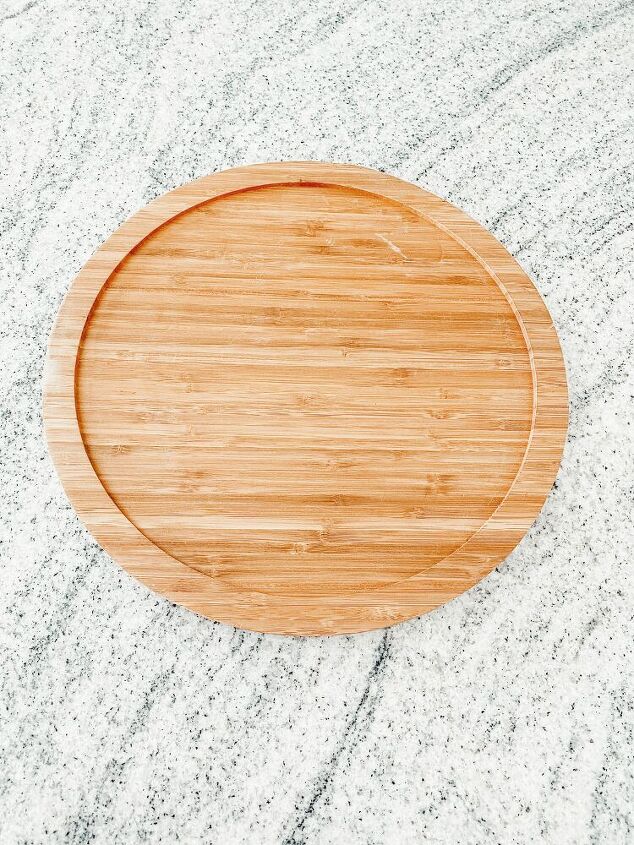
Sand The Tray Down
The first thing that I did was sand the tray down a little bit so the paint would adhere better to it. I just used a piece of sandpaper and lightly sanded it down. No need for the heavy duty electric sander for this project. I also sanded the bottom of the tray too because I wanted it painted as well to match the top. After sanding it, I wiped it off with a microfiber cloth to get rid of any debris that was still leftover on the tray. This makes it all nice and smooth and ready for some paint!
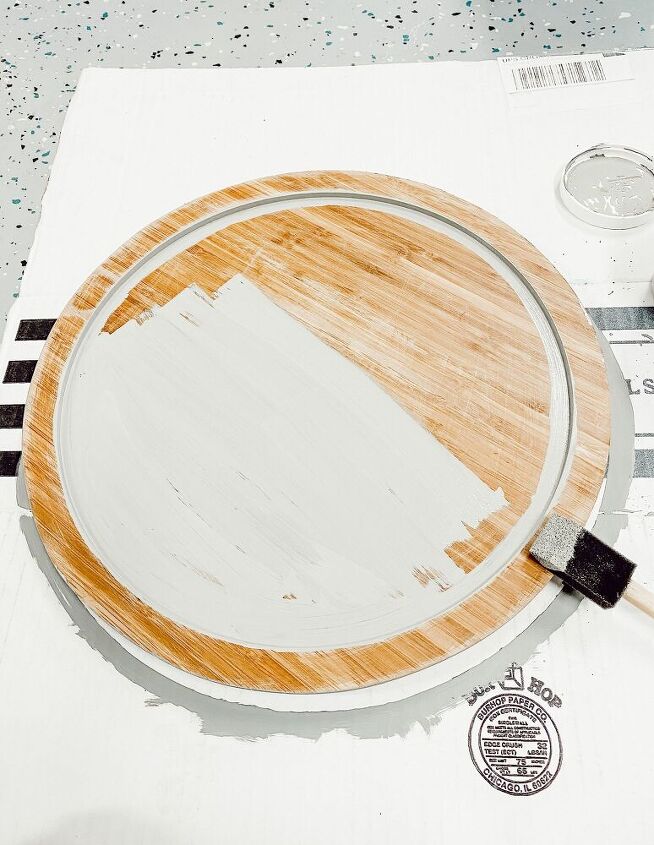
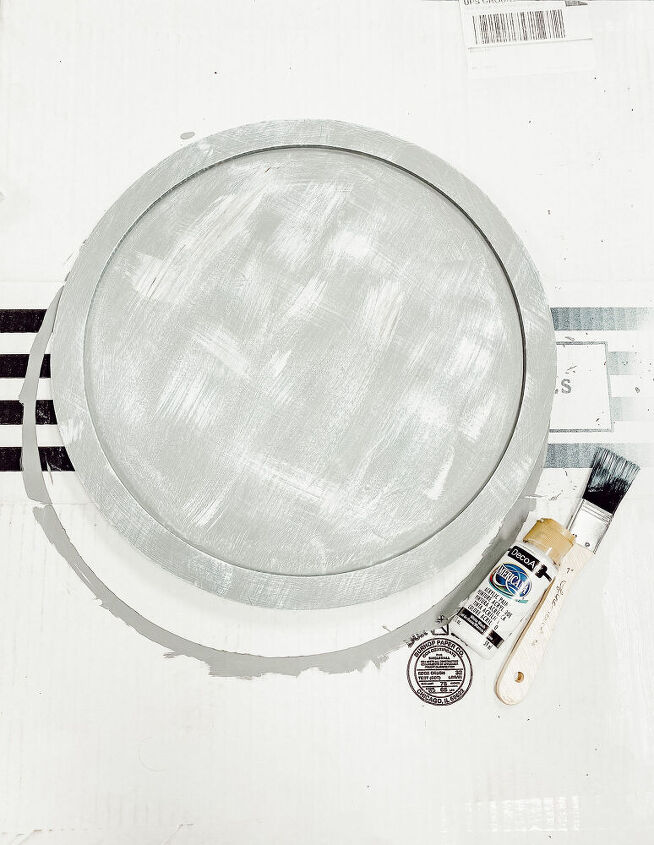
Start Painting The Tray
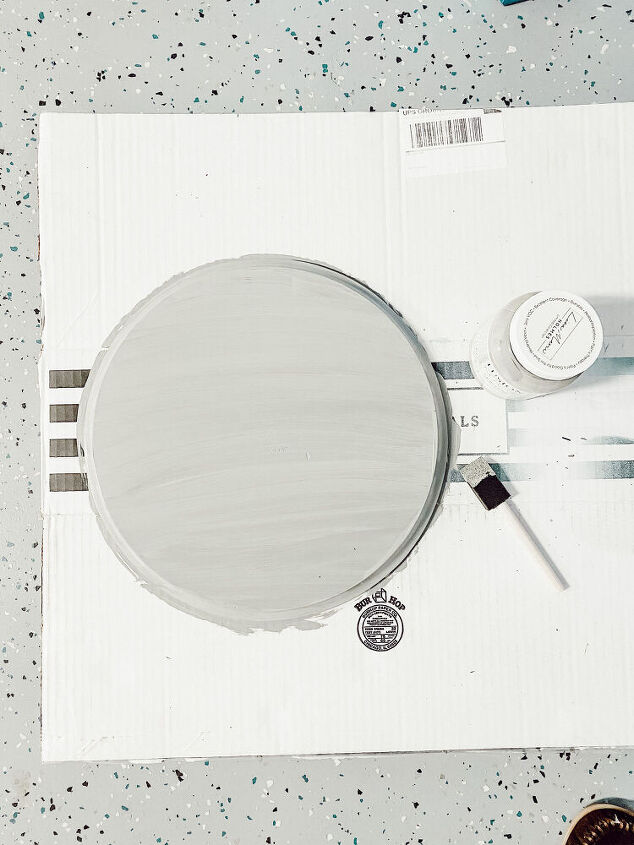
For this tray refresh project, I used Fusion Mineral Paint again. If you have been following me for awhile now, then you know I am a huge Fusion Mineral Paint fan. Their paint goes on so well and so smooth and it’s perfect for a little project like this. I used the color Sacred Sage and if you remember that is the same color that I painted Toby’s room in too.

It took me a total of two coats and like I said above I had to do the front and the bottom of the tray. So I had to wait a little bit in between coats to let it dry. But all in all, it wasn’t bad and this really was such an easy tray refresh project to do. Fusion Mineral Paint also dries pretty quickly so I didn’t have to worry about waiting too long.
Dry Brush the Tray
To add in some texture to the tray, I decided to do a dry brushing technique. I did this back when I painted my own pumpkins for fall too. It’s pretty easy and simple. You just dip your dry paintbrush in some paint, get rid of the excess, and then very lightly brush it on top of whatever you are painting. I used white paint since it would pop good against the gray color of the tray.
Now, you can either stop here or continue on to my next step. If you like the way the tray looks just dry brushed, then by all means just leave it as is. But, I wanted to add in a little more texture and dimension. So I decided to do a final step of adding in some antiquing glaze to the tray.

Add Antiquing Glaze to Tray
I love using antiquing glaze. I have used it for several other projects in the past such as my gum ball machine refresh and mirror project. This stuff is amazing and lasts forever. You just need a little bit to apply so it is awesome to keep on hand to reuse for project after project! I just apply a little bit to a rag and wipe it all over the tray. And don’t worry if you apply too much and it is too dark. This stuff is vey forgiving and can be buffed off if need be.
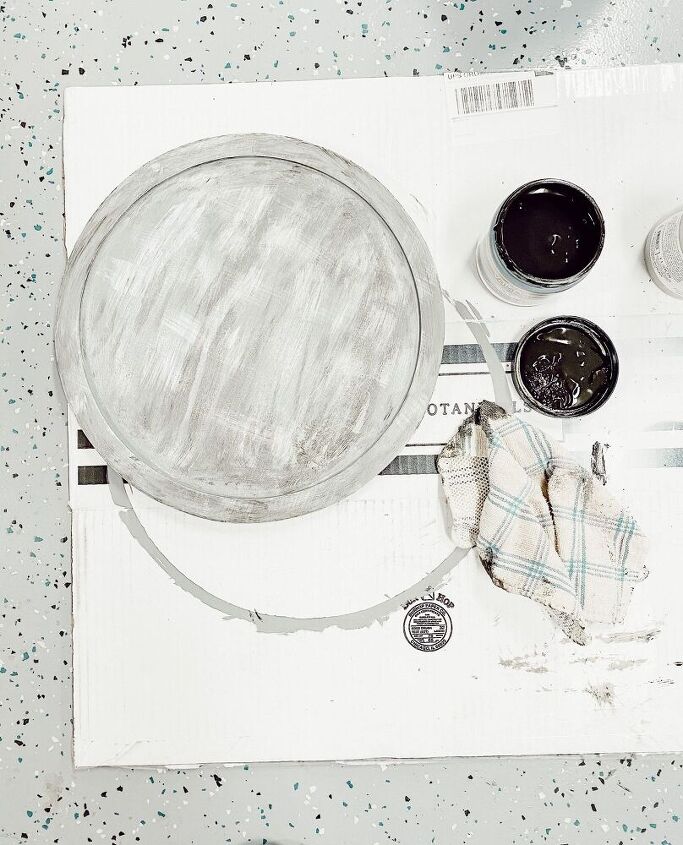
After applying the antiquing glaze to the tray, I just let it dry overnight. And then viola! It is done! Super easy and simple. I didn’t apply a sealer or anything to it because I am just using it as decoration and placing it on a shelf. If you were to use it a lot more than that, you may want to add a sealer onto it too, but again that’s totally optional.

Conclusion
Well, I hope you guys enjoyed this easy tray refresh project! I enjoyed doing it and it soothed my creative soul for awhile. I love being able to find things like this to do around the house that costs me no money! What about y’all? Do you enjoy doing simple and easy DIY projects like this? I think I just love anything that has to do with painting. For me, it relaxes me and it a lot of fun to transform something old into something new!


Frequently asked questions
Have a question about this project?
Your tray is exquisite and the colors turned out beautiful.
I have been looking for a simple tray like that. Do you remember where you bought it? Thank you.