


DIY Painted Wooden Bead Garland With Tassels

9 Materials
In this tutorial, learn how to create a unique, wooden garland with handmade tassels. The wooden beads are painted with Country Chic Paint All-in-One Decor paint and the tassels are crafted with yarn!
On Thursday May 4th at 7pm EST you can watch us make this project on Hometalk live, so make sure to tune in on the Hometalk Facebook page!

For this project, you’ll need:
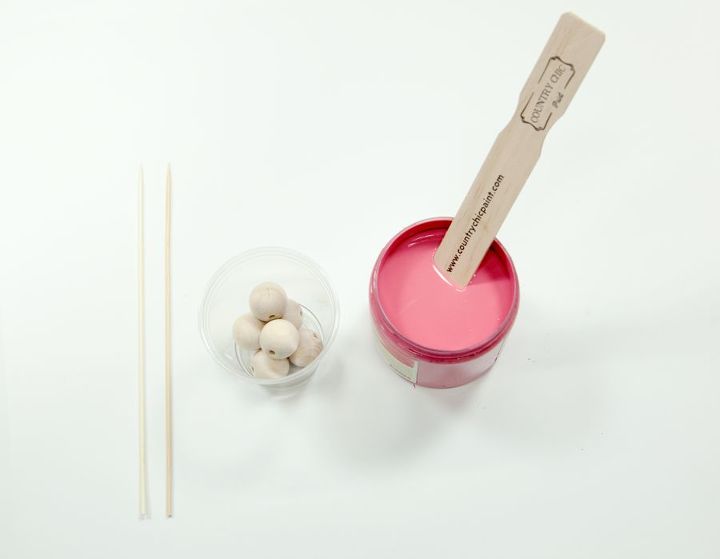
- Stir sticks to mix the paint
- Wooden skewers to dry the beads
- Wooden beads (small and medium size)
- Foam brush for the Metallic Cream
- Plastic cups for mixing and separating
- Yarn (color of your choice) for the garland and tassels
- A few small pieces of cardboard for creating the tassels and for covering the cups
- Country Chic Paint All-in-One Decor Paint in the following colors: Vintage Cupcake, Cherry Blossom, Lazy Linen, Pebble Beach
- Country Chic Paint Metallic Cream: Silver Bullet
Step 1: To start, make sure you know how you want the beads to appear on your garland so you know how many beads to paint in each color. For our garland we made the beads in the following colors:
- 9 medium beads: Cherry Blossom
- 9 medium beads: Vintage Cupcake
- 9 medium beads: Lazy Linen
- 16 small beads: Silver Bullet (pre-painted in Pebble Beach)
We left 32 small beads with the “raw wood” look.
Now you can start painting! Start with 9 medium beads in a plastic cup. Before you open up the paint, be sure to shake the jar well and stir it with the stir stick.
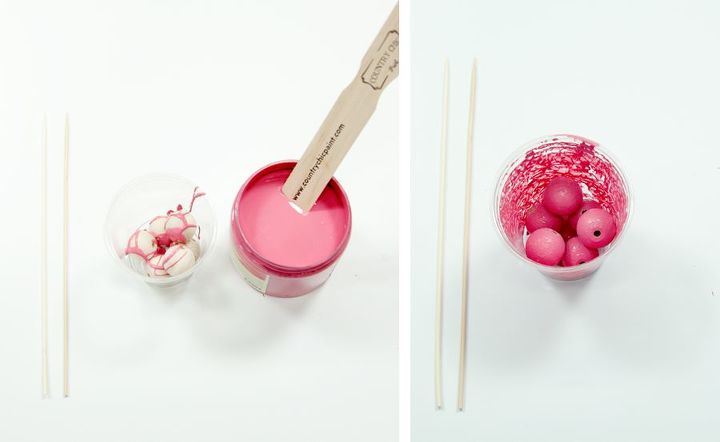
Step 2: Use your stir stick to add a little bit of paint into the cup over the beads -- you don’t need much! Cover the cup with a piece of cardboard to keep the paint trapped inside and give it a good shake. Painting your beads like this will evenly spread the paint over the beads and save you lots of time.

Step 3: To dry the beads evenly, spread them across a wooden skewer and place that between two cups. This will allow your beads to air dry.
Step 4: Repeat the same steps with the colors Vintage Cupcake and Lazy Linen.
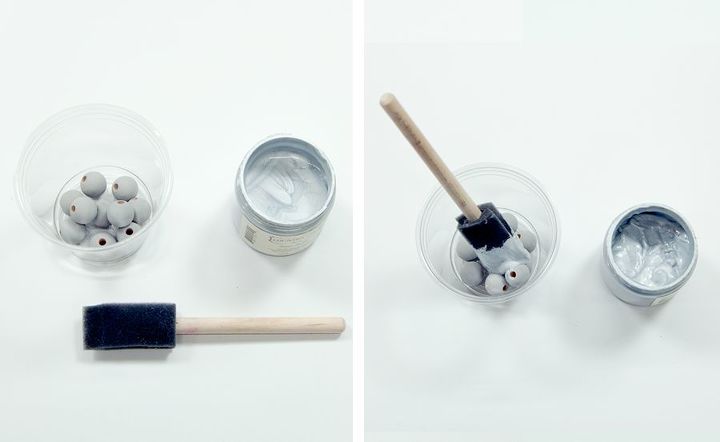
Step 5: To paint the small silver beads, paint them with a base coat of Country Chic’s All-In-One Paint in the color Pebble Beach following the same steps as above.
Step 6: Once the beads are completely dry, add them into another cup and add some Silver Bullet. Because the Metallic Cream is significantly thicker than the paint, you won’t be able to shake it in the same way. Instead, you can grab a small foam brush and mix the beads around to cover them with the Metallic Cream. Lay the beads out to dry on a skewer like the other painted beads.
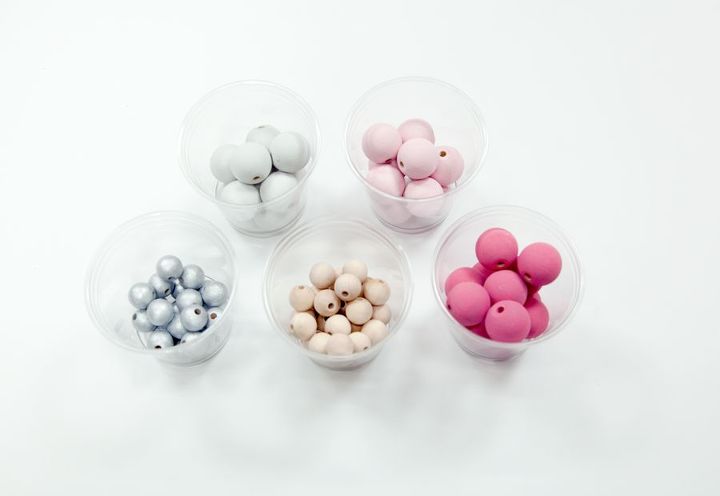
Step 7: Once all the beads are dry, keep them organized by placing them in plastic cups. This will help you keep track of how many beads you have left for your garland.
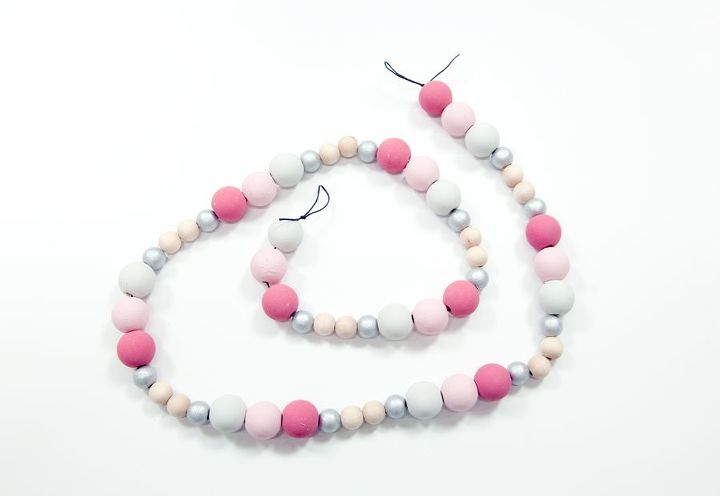
Step 8: Add the beads onto a long piece of string or yarn in the order and pattern that you’d like and tie the ends to keep the beads in place.
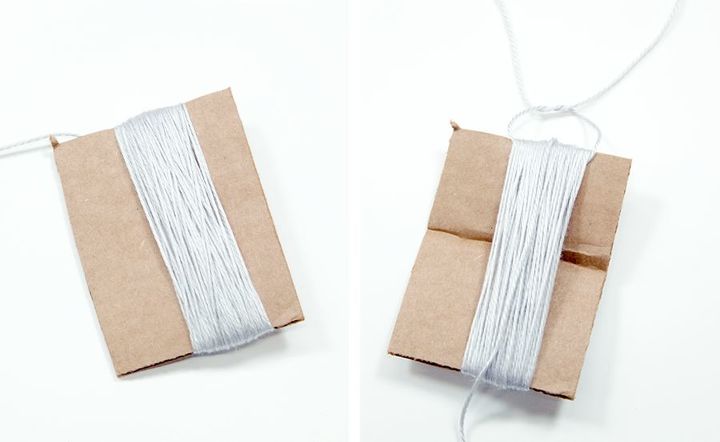
Step 9: To create the tassels, wrap the yarn around a piece of cardboard. You can cut the cardboard to the size that you’d like the tassel to be. We cut our cardboard to be about 4.5” in height. Once you are finished wrapping the yarn, cut the yarn. Cut a 12” piece of yarn and pull it through the wrapped yarn. Tie a double knot to keep the yarn together.
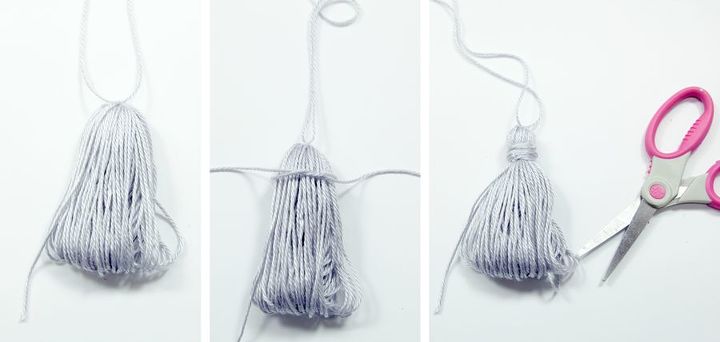
Step 10: Carefully remove the cardboard. Cut a 40” piece of yarn and tie this piece of yarn around the top with a double knot. Continue to wrap that piece of yarn around the top until you’re happy with the look and create another double knot to keep the yarn in place -- this will be the top of the tassel! When you’re finished, cut the yarn on the bottom of the tassel to free the looped strands and trim the ends.

Step 11: Attach the tassels to the garland to complete the look!
If you have any questions, please feel free to visit www.countrychicpaint.com; there is a “live chat” option for you to get immediate replies to your questions!
{
"id": "3843025",
"alt": "",
"title": "",
"video_link": "https://www.youtube.com/embed/TvGCU0n7MRs",
"youtube_video_id": "TvGCU0n7MRs"
}
{
"width": 634,
"height": 357,
"showRelated": true
}
Comments
Join the conversation
4 comments
-
hi this is very beautiful. I think I might try this for a different Christmas tree look 😊.
-
I really love these. Still working on my bedroom makeover and think this would make awesome curtain tiebacks. Or drap in scallops along the top of the curtains maybe. Will depend upon the price of the beads and paint. Thank you so much.


Frequently asked questions
Have a question about this project?