


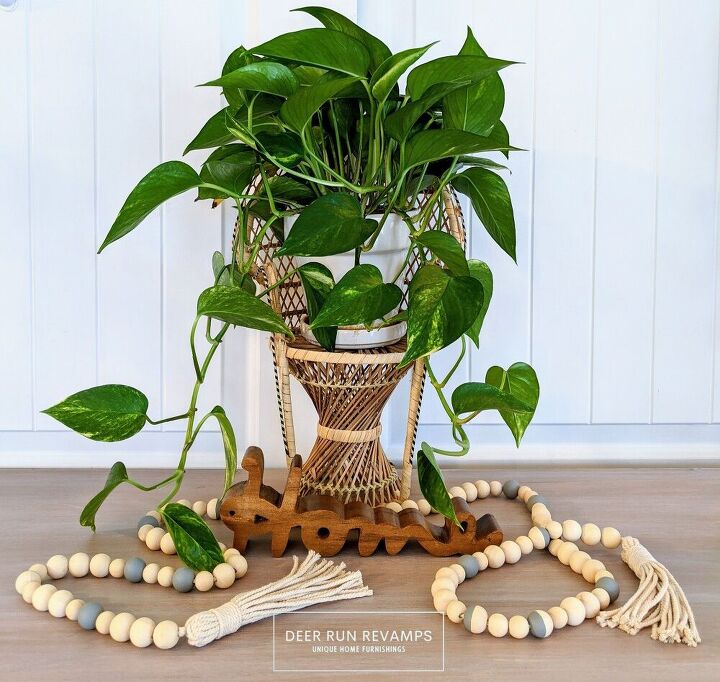
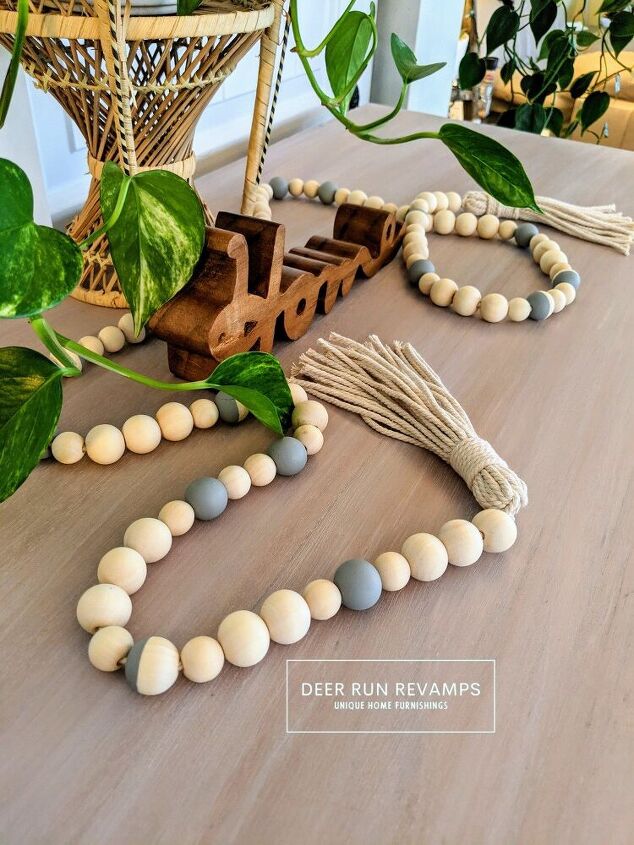
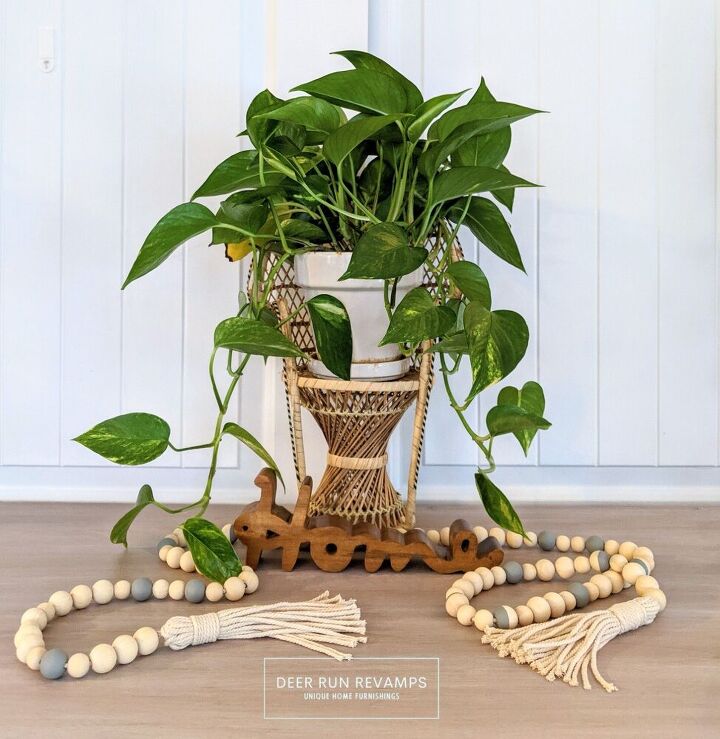
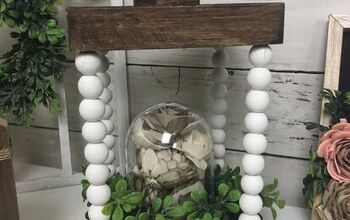
How To Make A Farmhouse Bead Garland With Attached Macrame Tassels

So, there are A LOT of different ways to make wood bead garland. This is the way that I do it...
I hope I've explained this well enough to follow...it was difficult trying to put these steps into words. If you have any questions or would like some clarity on a step, feel free to reach out! Our Facebook page is linked at the bottom of this tutorial, you can message us there and we'll get back to you in no time 😁
*Price is based off of the amount of product used, you will have a lot left for many other projects
Gather your supplies...
I used 3mm natural macrame cord
20mm wood beads with 4.5mm holes
16mm wood beads with 4.5mm holes
Frenchic Furniture Paint in City Slicker
Frog tape
Paintbrush
Electrical tape
*The number of beads needed all depends on the length of garland you'd like. Most places sell them in bulk, but I would get at least 100

First, paint some beads
I taped off half the bead with the frog tape, and then painted the other half with City Slicker. I did 8 beads painted this way, and 8 beads where I painted the entire bead

Once dried, peel off the tape
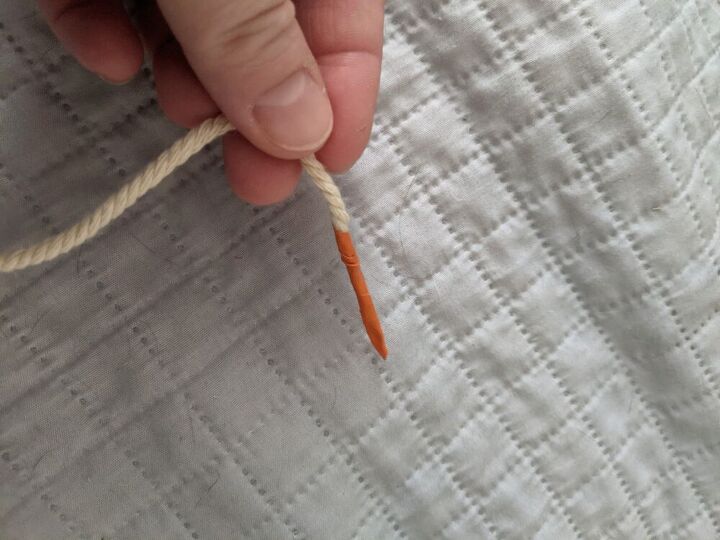
Take your macrame cord spool, don't cut the piece off just yet. It's much easier to just string on your beads and cut afterwards rather than possibly cutting the strand too short.
Wrap a piece of tape around the end very tightly. I like to use electrical tape for this.
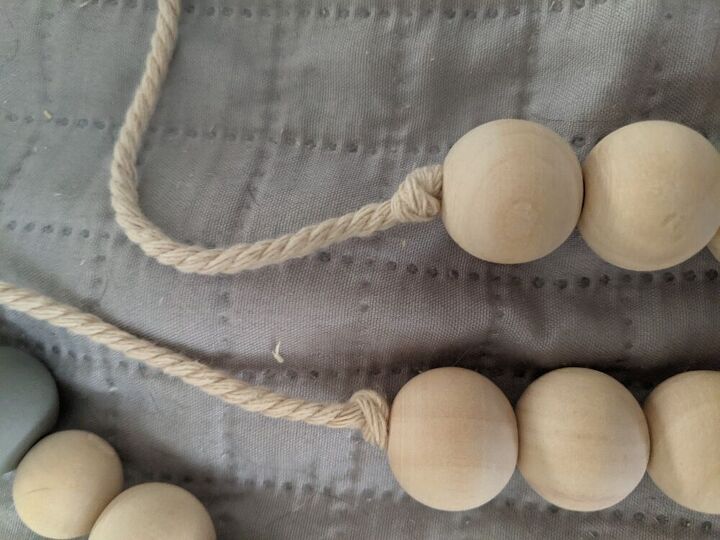
Then, string on your beads in a pattern of your choice.
My pattern went like this...
3 20mm, 1 16mm, 1 fully painted, 1 16mm, 2 20mm, 1 16mm, 1 half painted, 1 16mm, and then start over again. Every 3rd set, I added another fully painted or half painted (according to pattern) and another 16mm.
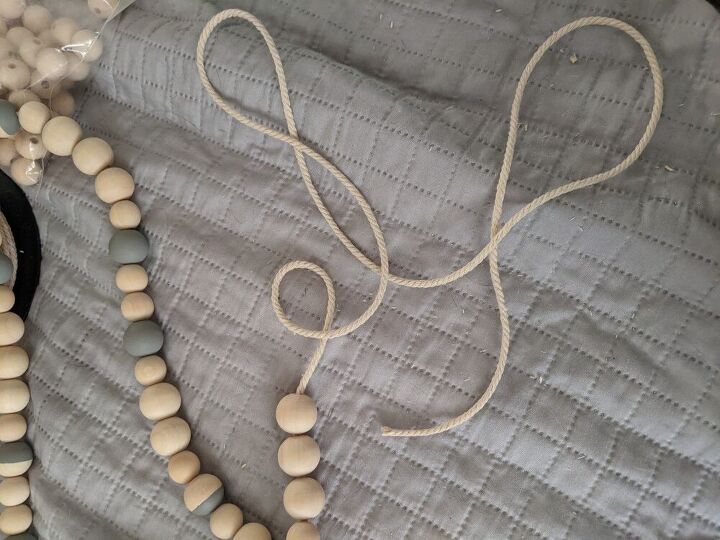
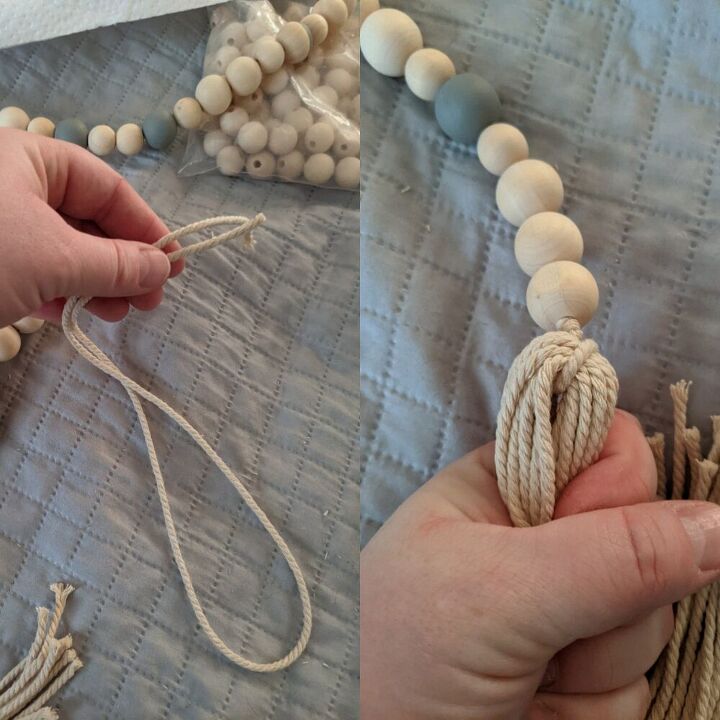
Now that your beads are strung, cut the cord to allow about 12 inches extra on each end.
Tie a knot at each end to stop the beads from moving down the cord.
Now, let's learn how to make tassels.
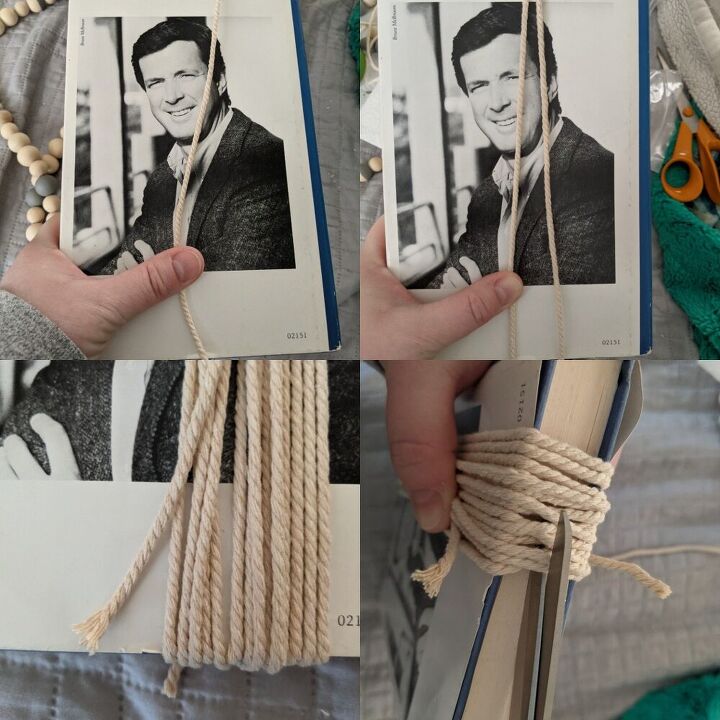
Grab a hardcover book about 10 inches long. Hold the end of the macrame cord at one end of the book and continue to wrap the cord around the book 16 times, ending with cutting the cord on the opposite side of the book as the other end.
Then, squeeze your scissors in-between the front and back covers and cut the cord
Don't lose the middle of the strands
Now you have 16 strands.
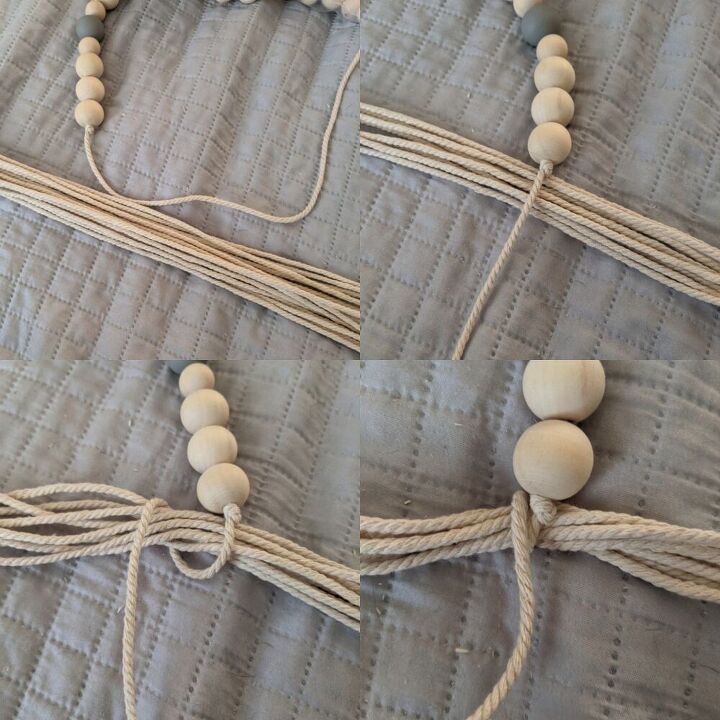
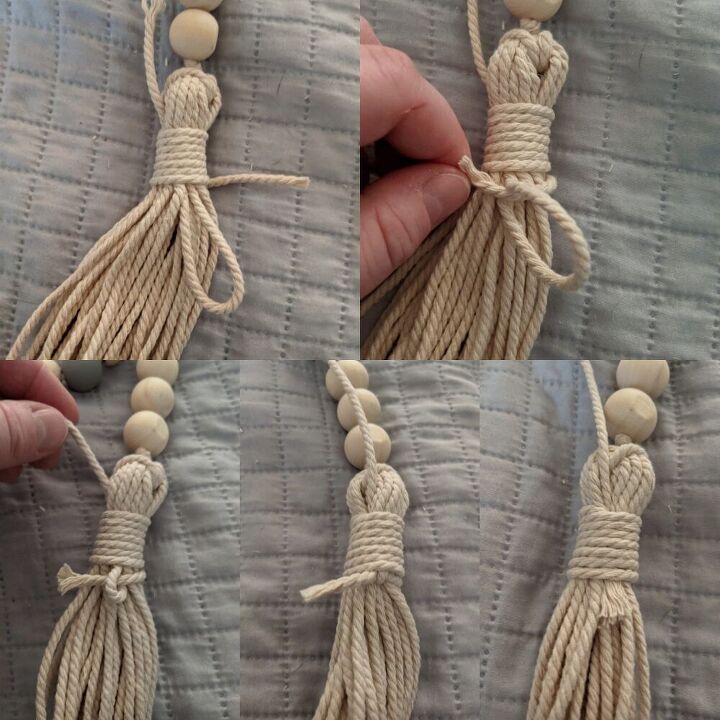
This is where it starts to get tricky.
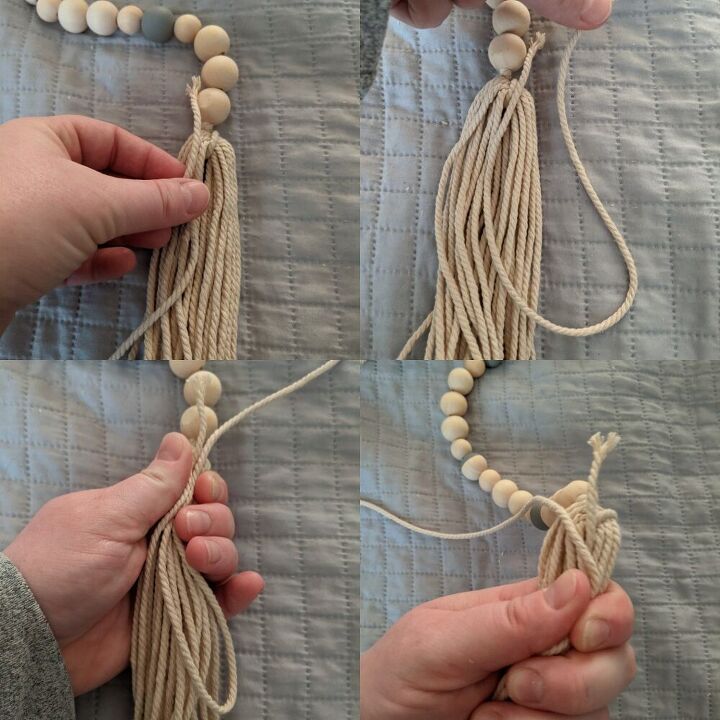
Place 8 of the strands just below the knot holding the beads into place.
Wrap that strand (the main strand that the beads are strung on) around the 8 strands and pull tight.
Remember this main strand. Keep it separate so that you can easily find it
Now, place the other 8 strands ontop of the other 8. Take the main strand again and wrap it back behind all 16 strands
Take the end of the main strand and put it through the loop that you just made and pull tight. Make sure this knot sits more towards the middle of all 16 strands
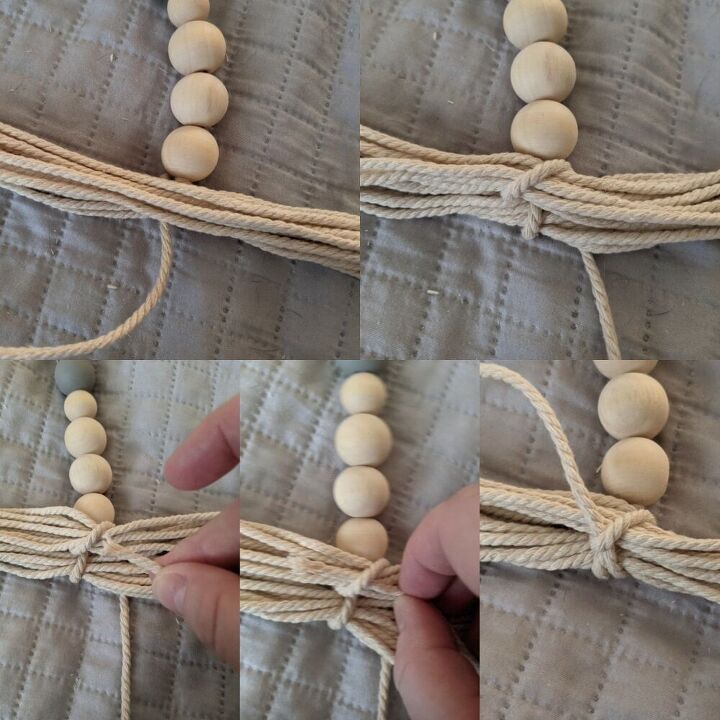
Pull all of the strands down and we'll start to form the tassel. The above photo is what it should look like now
Cut another strand about 24 inches long.
Bunch up the 16 strands to form the "head" at the top
Time to make the wrap knot. There are plenty of videos on YouTube if you'd rather a video tutorial, just search for Macrame wrap knot.
Take the strand you just cut and form a U over the 16 strands. You want the left side of the strand to poke just past the "head" of the tassel. Hold all of the strands in your hand with the right side of the U crossed over top of all the strands and out to the side
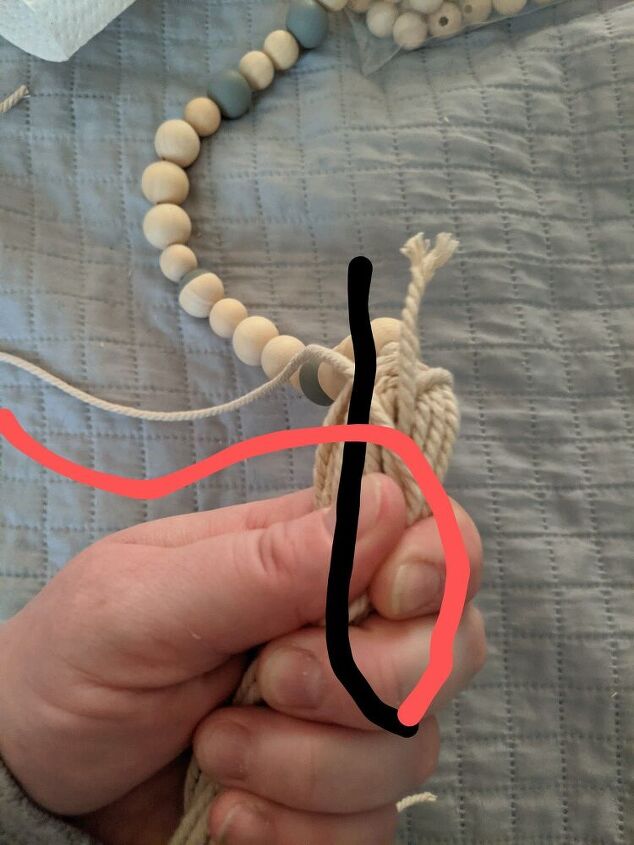
Left side is black, right side is red
Using that strand, start to wrap it around all of the strands tightly. With this one strand, you'll have the loop at the bottom and a bit sticking out at the top of the "wrap"
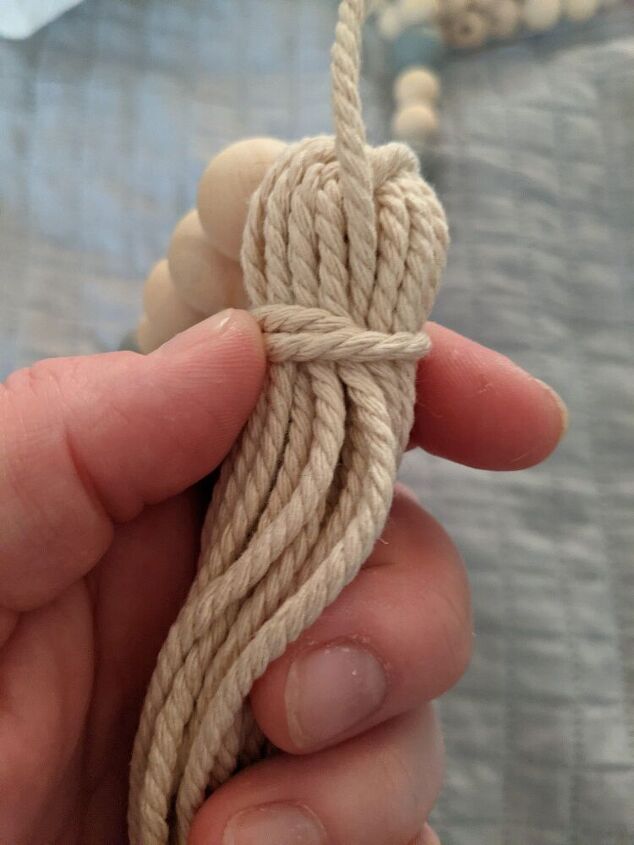
Once you've wrapped it enough to your liking, taking the end that is the wrap, put it through the loop that we formed under the wrap. Hold the strand in place and slowly pull on the end that is sticking out of the top above the wrap. You'll see it start to pull up the other end that you just out through the loop. Continue pulling that end until the "knot" formed from the loop and other end of the strand is in the middle of the wrap.
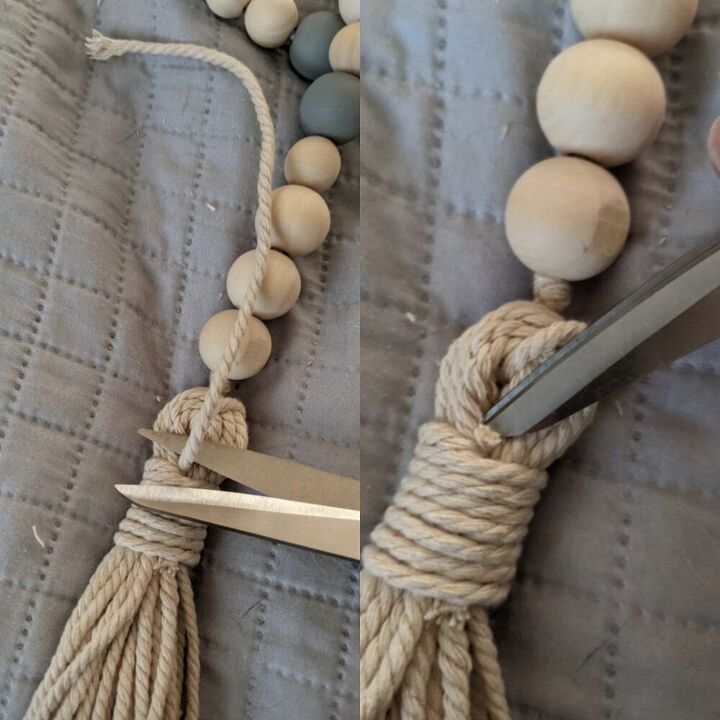
Cut off the rest of that strand that is hanging out of the top and bottom of the wrap. Get as close as you can without accidentally shipping any other cord. Then you can push any of the strand that's left into the wrap so that it completely disappears
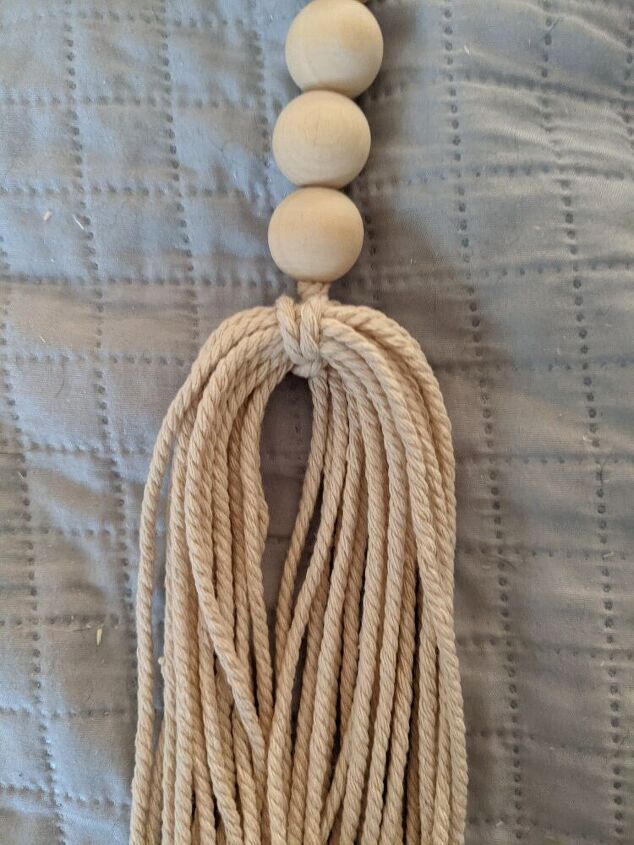
Now you have a tassel! Trim the cords of the tassel so that they are the length you want and all even.
You can also pull each strand of the tassel to tighten the "head" if it's too big. If you tighten it too much, you can push the wrap back down a bit
Repeat the same steps for the other side
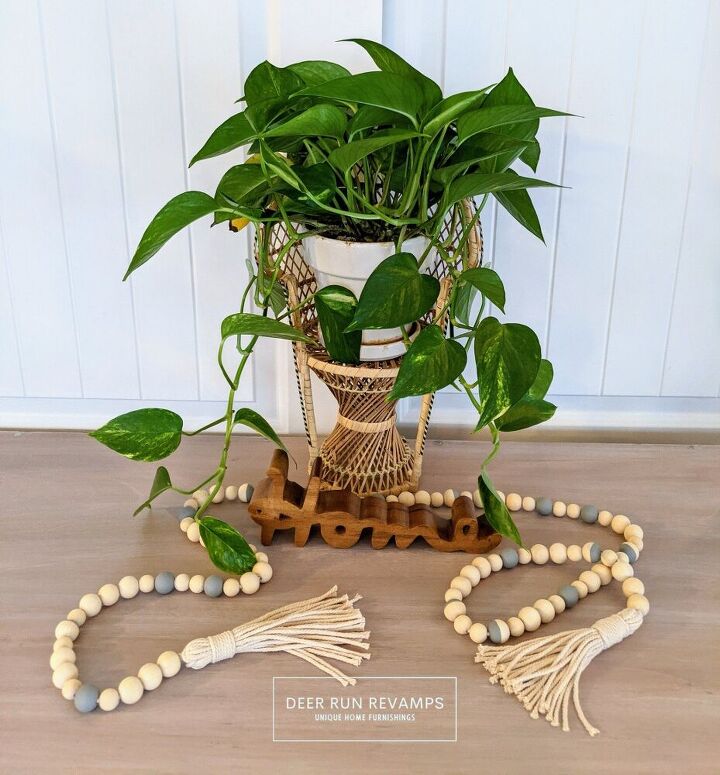
The most important step, decorate with your new farmhouse beads! 😍
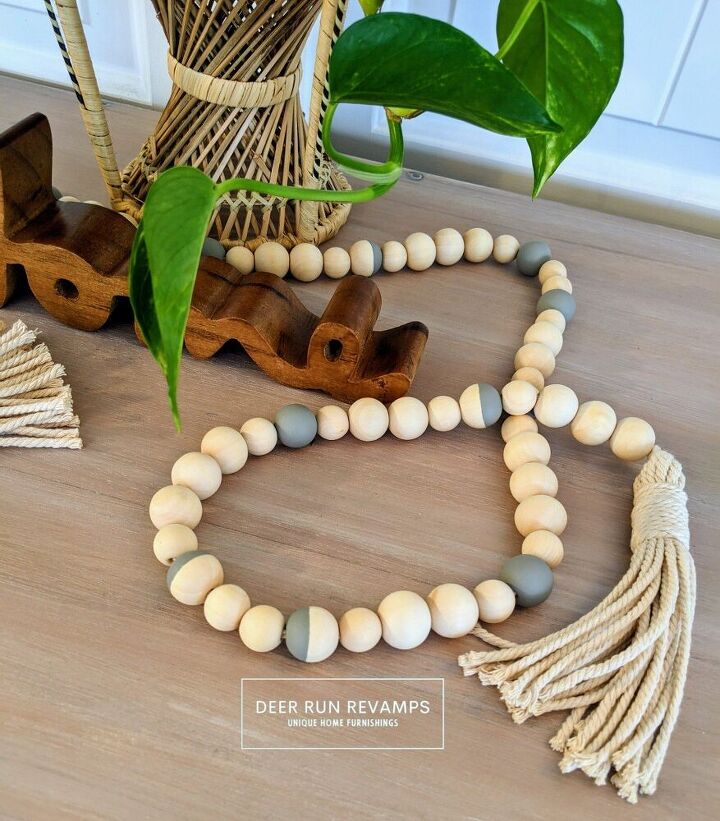
You can really get creative here. There are so many different size beads, different shapes, paint them different colors, or since they're wood, stain them! Use different color macrame cord for the tassels! There really are endless options ♥️
We do carry paints, wood stains, brushes, and so much more in our Etsy shop! We love everything DIY so our shop is packed full of goodies from top brands!
I hope this tutorial has inspired you to create something beautiful 😍
You can find us on Facebook..we post our furniture and home decor projects often! And we'd love to hear from you!
Resources for this project:
See all materials


Comments
Join the conversation
-
Thank you for showing how to make a tassel the correct way. A nice smooth wrap with no knots showing on the outside.


Frequently asked questions
Have a question about this project?