


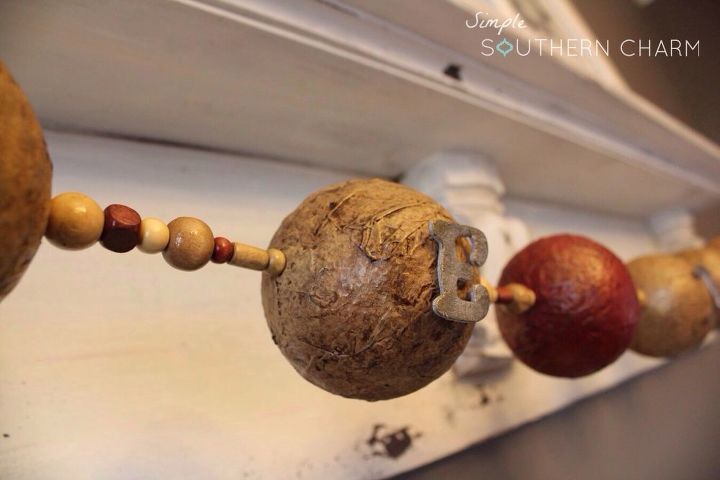
DIY Give Thanks Garland
Well, y'all, Thanksgiving is right around the corner and I'm hustling to get the final touches to our new dining room done. My hubby and I built a farmhouse table that you can check out on my blog. We hung a new chandelier and painted and I built a really cool mantel shelf (also on the blog!) for our big, empty dining room wall. After that was hung, there wasn't really much to do aside from the fun part, decorating! Since the mantel shelf is a focal point of the room, I really wanted to add a subtle touch of festivity. It's a pretty informal room, so I wanted understated, but still Thanksgiving-y.
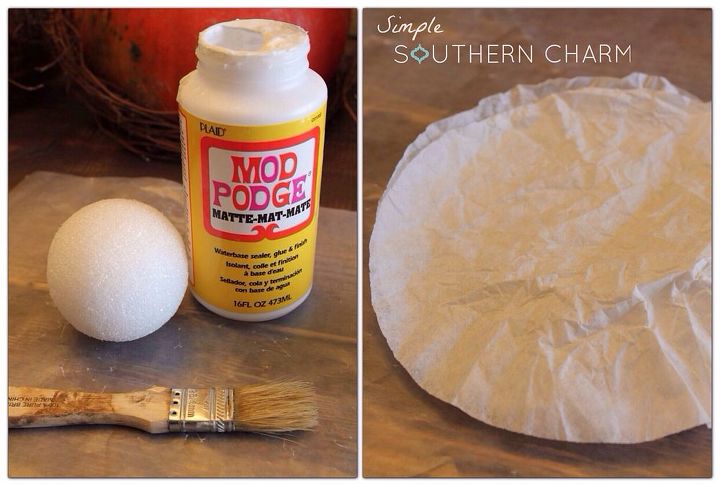
Like so many cool crafts, my DIY garland started with Mod Podge and coffee filters!
Like so many cool crafts, my DIY garland started with Mod Podge and coffee filters!
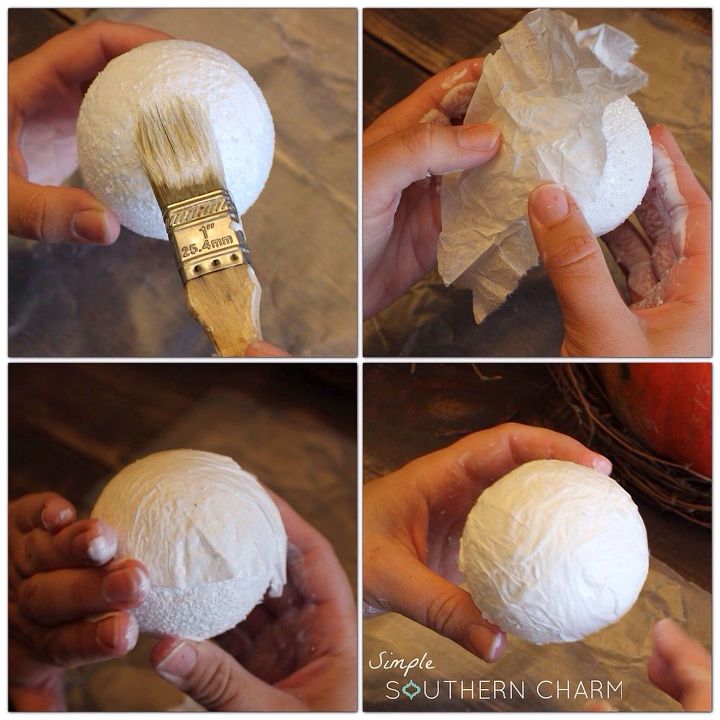
used about 30 coffee filters. I ripped some in half and some in thirds and then crumbled 'em up to give them some texture. After smoothing the filters out, I started applying the mod podge with a chip brush. True story, I actually decided it was much faster and easier to pour the mod podge onto the styrofoam ball, spread it around with my hands and apply the coffee filters. Sticky hands aren't great for picture taking, so you got the pretty, paint brush version! Feel free to get messy! Once my filters were completely smoothed out and since my hands were already mod podgey, I added a bit more to even out the outside. I set them aside on wax paper to dry over night.
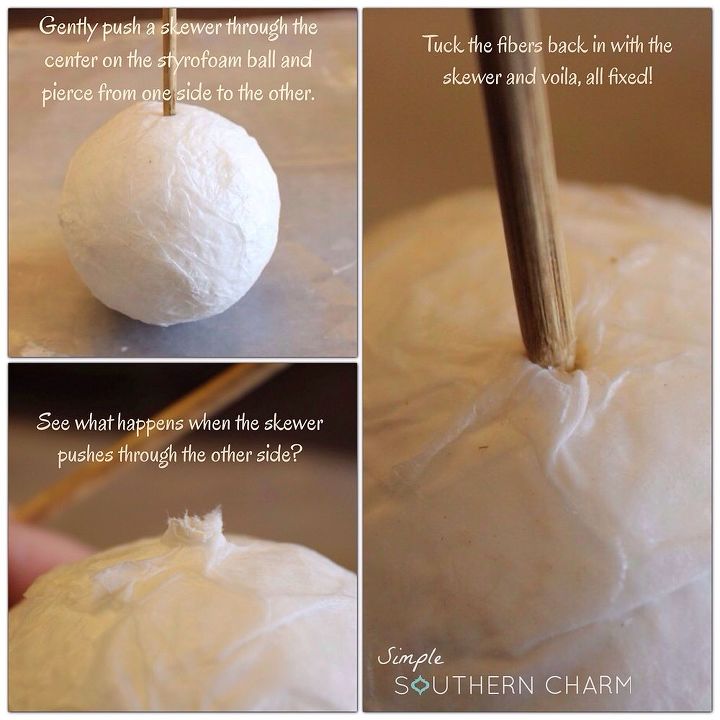
Take a skewer and stick it through the center of the styrofoam ball. DON'T POKE YOURSELF! You'll want to make sure the skewer comes through the other side. When it does, you'll likely end up with coffee filter fibers sticking up. No worries! Smush 'em back down with the skewer and it's all gravy!
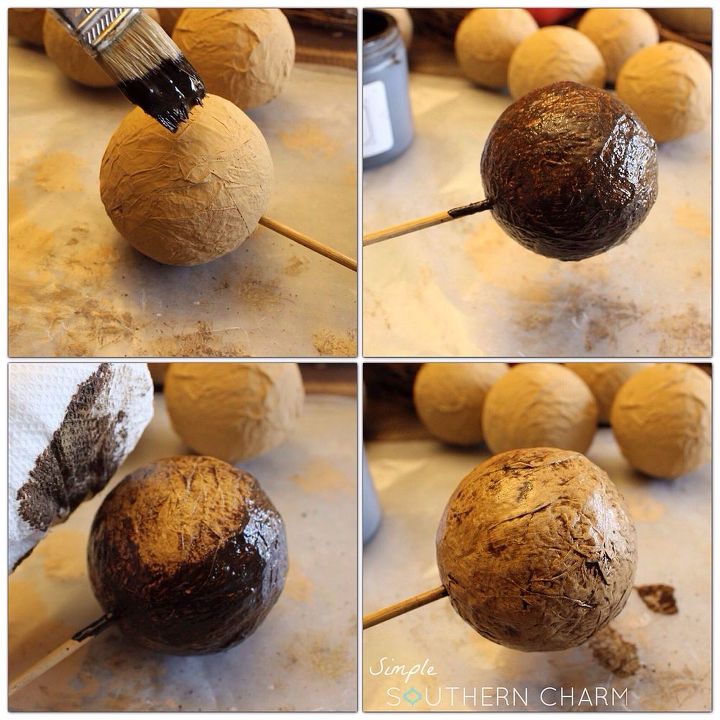
Time to paint! I chose a really pretty gold as the main color and red (not pictured) for my word separator. To make my life easy, I popped each styrofoam ball on a skewer to paint. Made it loads easier to handle and may hands didn't get too messy. To remove the styrofoam balls, I parted the bristles of my chip brush, pressed down and pulled the skewer right out. If there's any extra paint, just give it a swipe with the brush to remove. You can let these dry for a few hours or if your impatient like me, you can take a hair dryer and expedite the process. Patience is not a virtue when crafting! As a side note, you could use brown coffee filters instead of painting. I really wanted gold, so it made no difference for me.
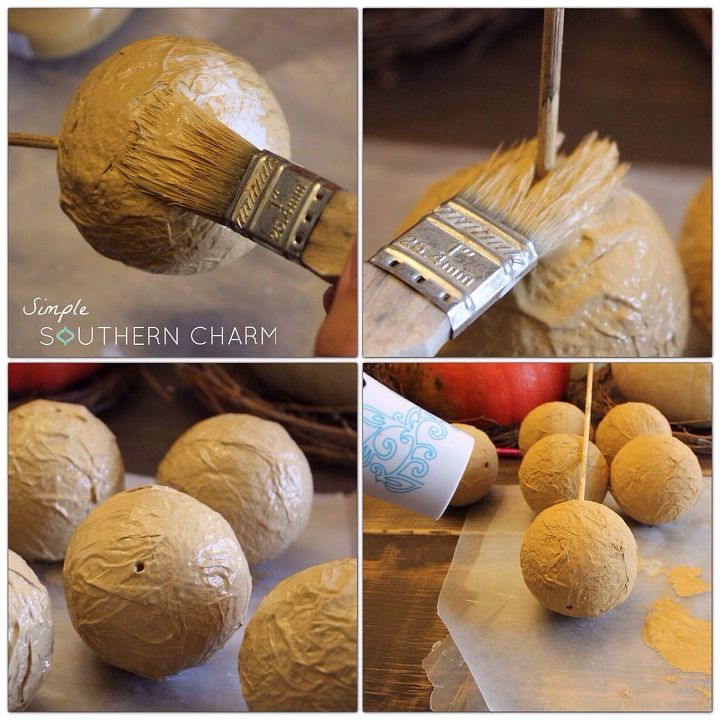
Let's get our glaze on! I pulled out my handy skewer, put the styrofoam ball on it and glazed with Van Dyke Brown. Make sure you really work the glaze into all the nooks and crannies. This is what will really highlight the details. I removed the excess and softened the glaze with a paper towel. Set them aside on wax paper to dry.
Alrighty y'all, let's make this garland! The length will vary depending upon the size of your mantel. I left about a foot extra on either size when measuring.
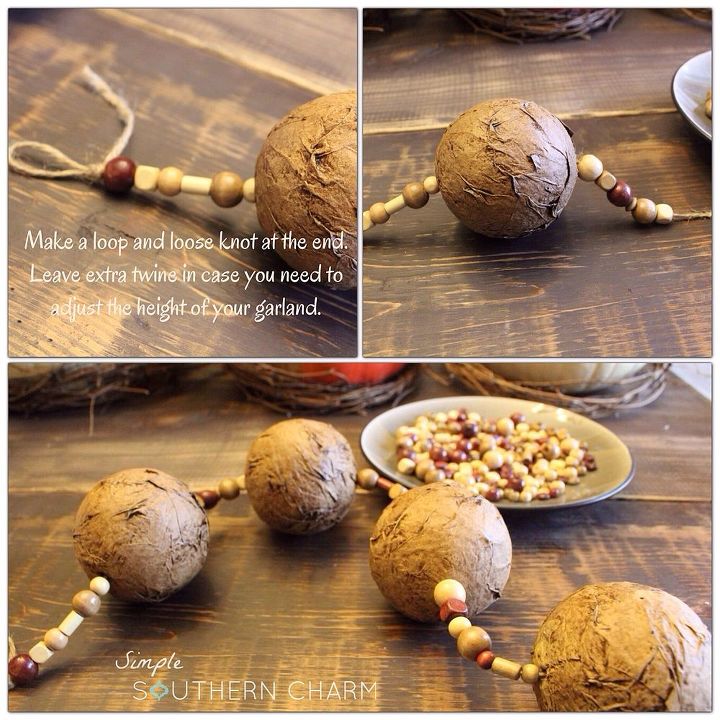
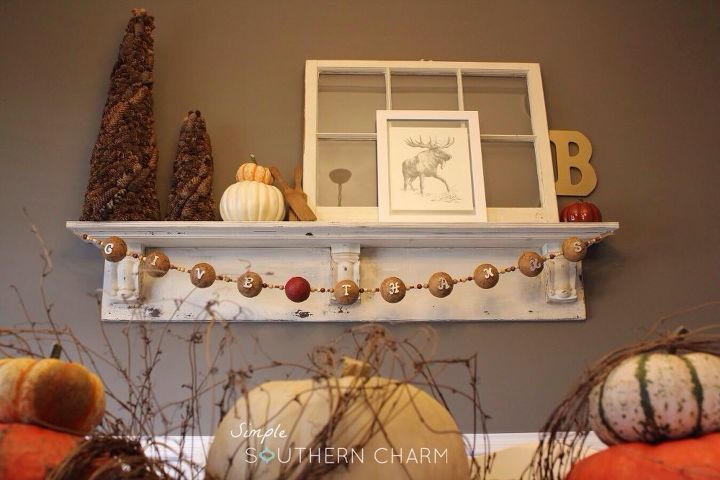
This is super important! If you're adding letters, DO NOT add them until the garland is hung? Pop on over to my blog for deets on why!
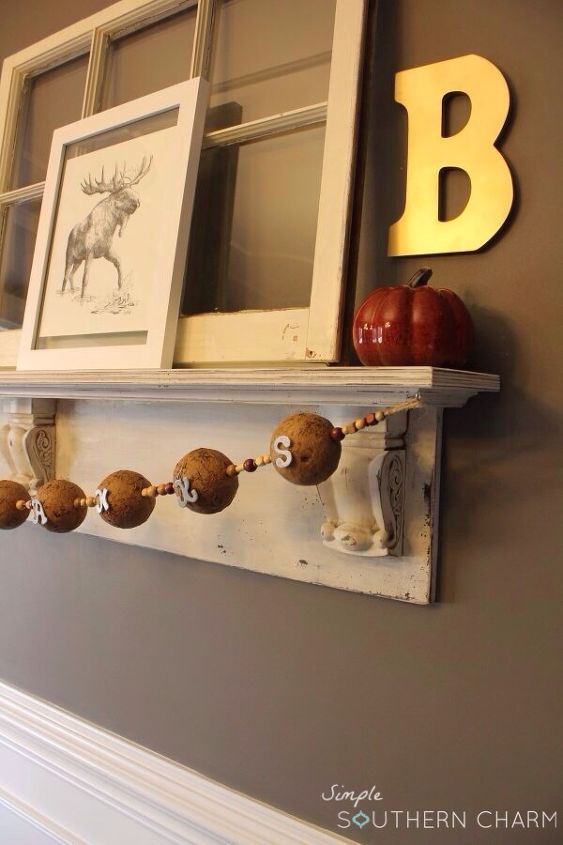
Here she is Hometalkers! All done and just in time for Thanksgiving! I'd love to hear your thoughts and please, if you have any questions, ask away. I have some really great tips on my blog, so head on over if you plan on making this garland...I'd love to see your finished projects, so please make sure to post your pics on Hometalk. Thanks a bunch! xo

Want more details about this and other DIY projects? Check out my blog post!


Frequently asked questions
Have a question about this project?