


Flexible Arm Rest Table

The layout of my living room is less than ideal, there isn’t enough space for end tables at each end of the couches, so it’s inevitable that someone won’t have an end table for a drink l, so I went to Amazon!
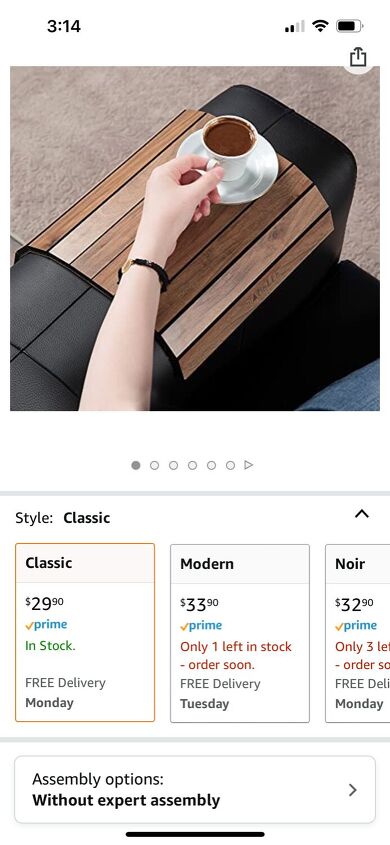
Amazon had so many good options, but I really liked this one, it’s flexible can be rolled up and stored when not in use, and could fit on any style of couch in case we get a new set anytime soon! I just couldn’t spend $30 on this. It’s nice, but I’m trying to really dial in my spending…. So it will be our inspiration for this project!
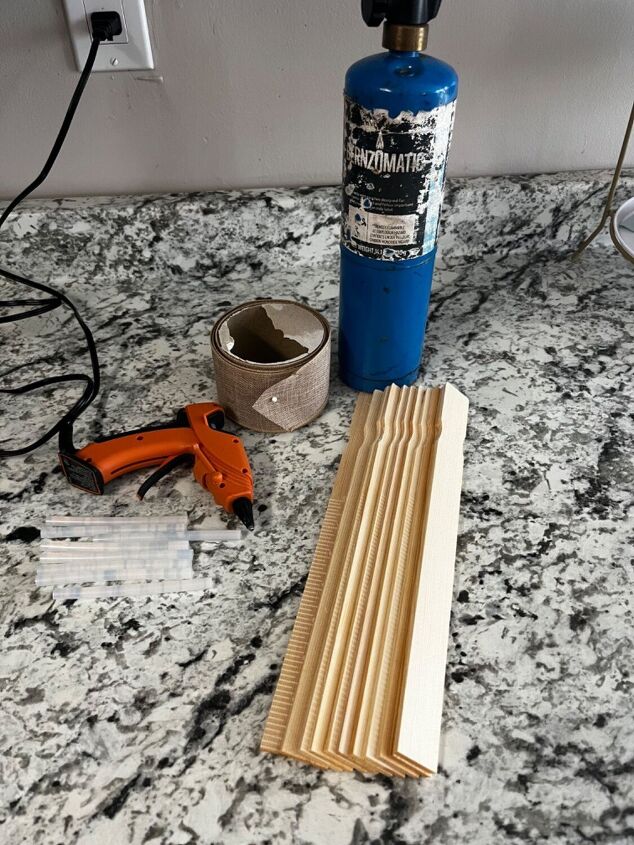
I always have dozens of paint sticks on hand! So I decided to utilize what I had on hand! This project cost me $0! But if you have none of the supplies would still cost less than the original product!
You will need:
- paint sticks, I used a 11, they come in a 10 pack, you can get them at Home Depot in bundles
- hot glue and sticks
- ribbon
- butane torch or stain
- water base poly (or oil if you prefer it’s just too hot here in the south to have to be outside!)
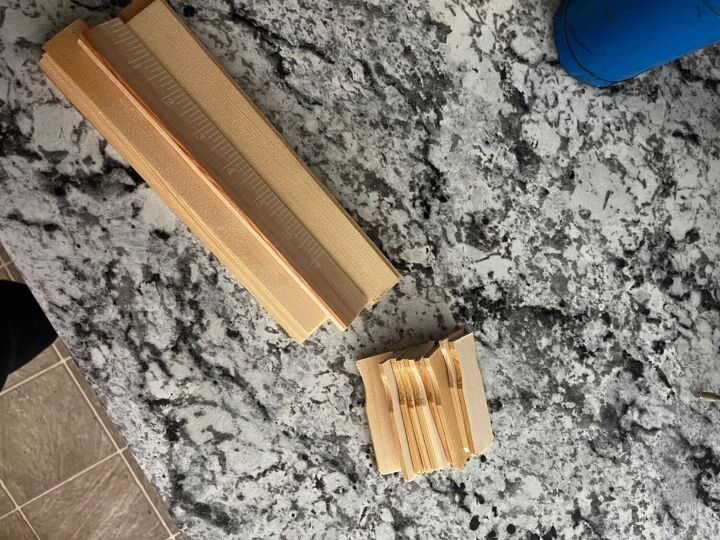
Start by cutting off the handle end of the stir sticks. I stacked them in my miter saw and cut them all in one pass! But you could easily use a hand saw, or score and snap them with an sharp box cutter and straight edge!
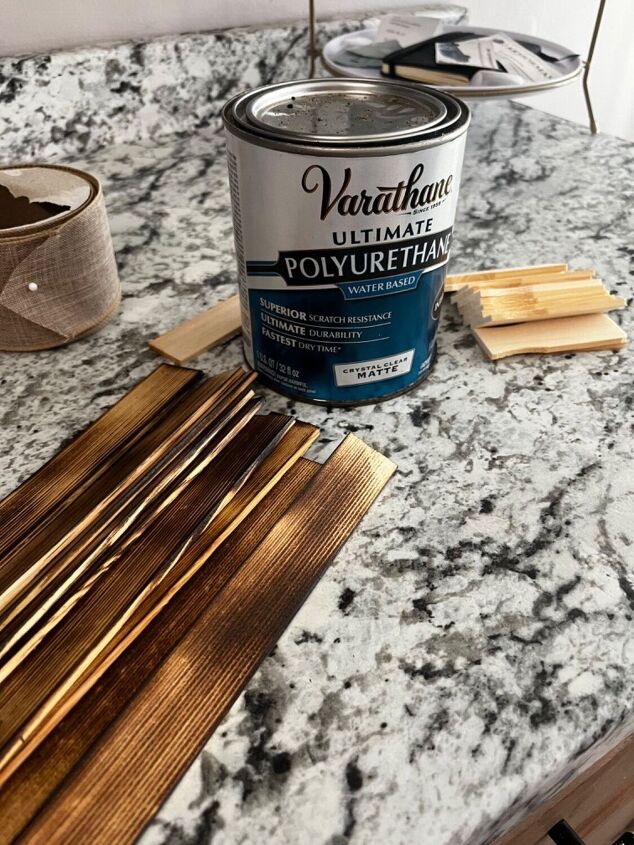
If you have been following me for any amount of time you already know I love to burn my wood whenever I can, I have a sofa charging table and floating shelves behind the couch this will be used on that are burnt so I decided to keep it consistent. I went in with a poly to help water proof since this will be used for drinks.
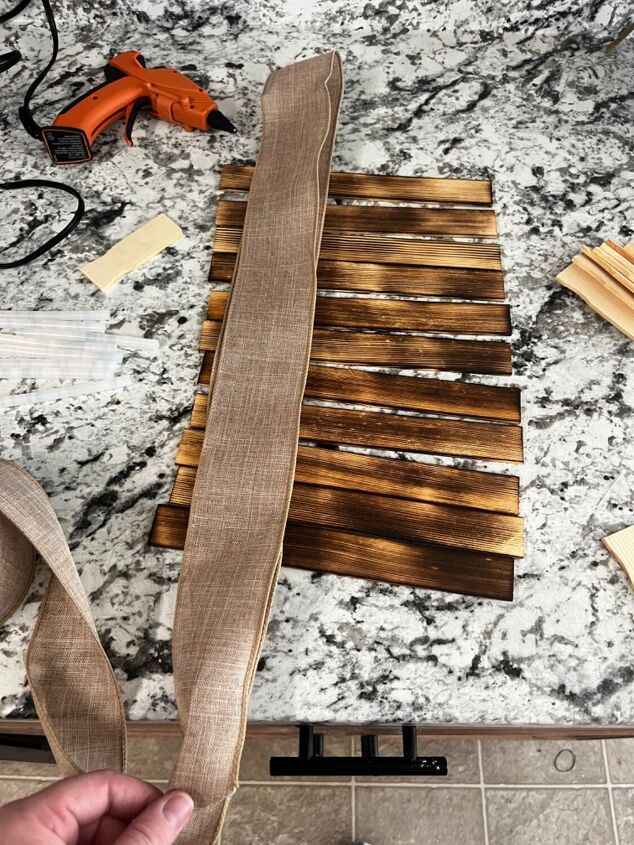
Lay out your planks and cut your ribbon. I use my long, it can always be trimmed later. You will need 2 pieces the same size.I
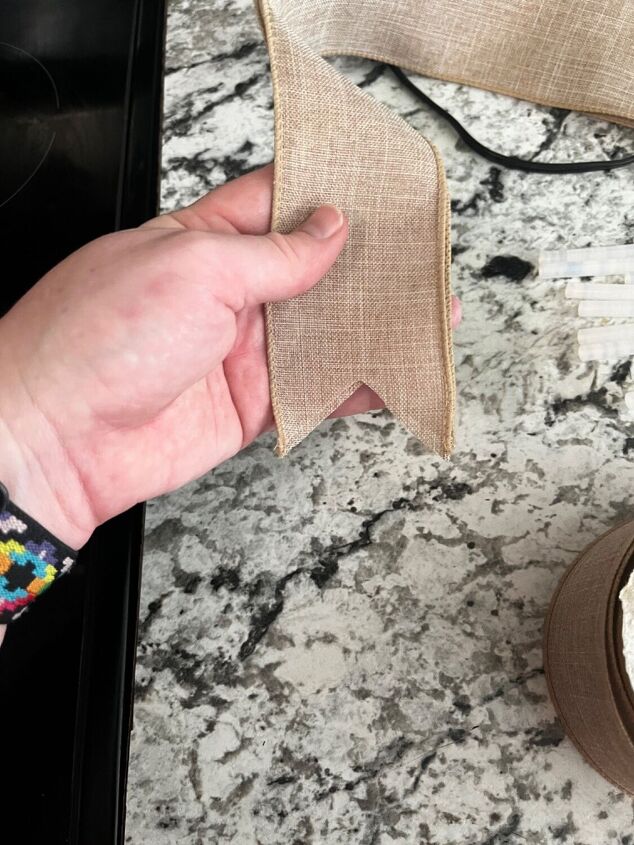
I thought I would like a little flare on the ends and decided to dove tail the ribbon, there are after photos with and without the tails, it’s cute but ultimate I decided to cut them off.

Time to start glueing! I folded my ribbon in half and got the middle board and started there. I glued the ribbon to the back of the board, and used my super specific measure system to make sure both ribbons where evenly spaced from the end… haha. I did it a fingers width from
the end of the board on each side.
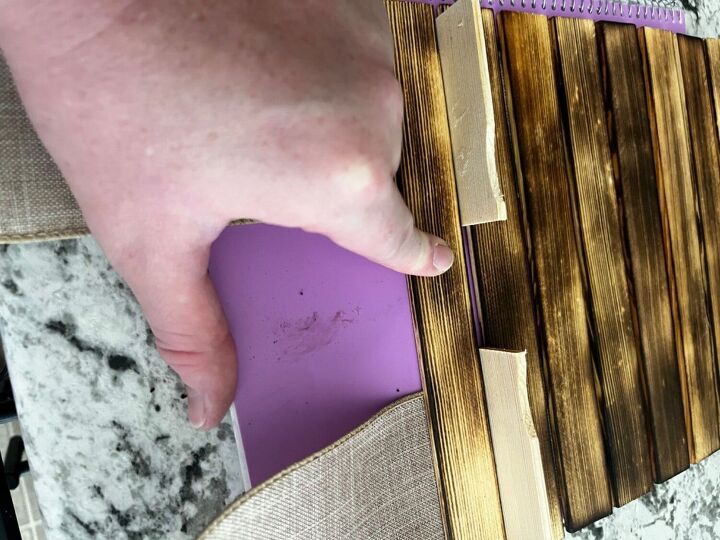
Once the initial board was on I flipped it over and started gluing the rest, I put it on top of a plastic notebook so I didn’t glue to my work surface, I used the cut off ends as spacers between planks. Glue each piece onto the ribbon!
Here is the finish project with the dove tail ribbons, it was cute, but I decided to trim it off so it looked more like the original product!
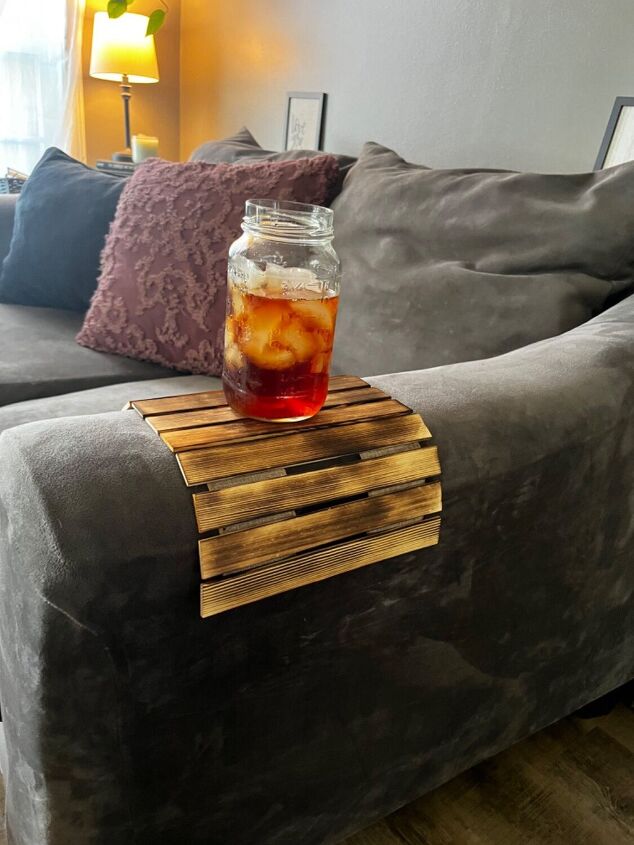
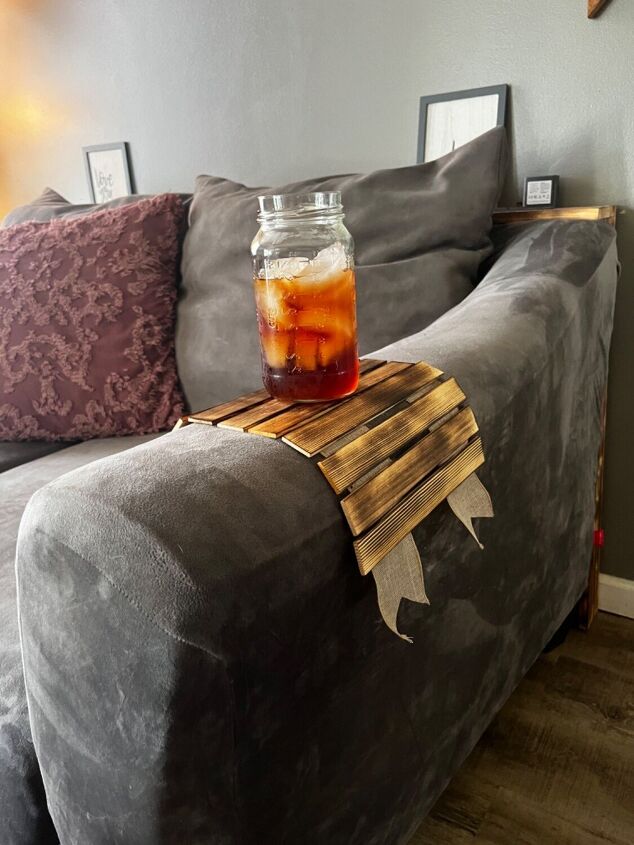
And here it is! It’s pretty sturdy! I wouldn’t let my 7year old use it since it does have a little give to it, I have a different style in mine for her, but for myself or my husband it’s going to work great! I’m so excited I was able to dupe this for free! $30 isn’t terribly expensive but it’s $30 more than free! I hope you like this project! Happy crafting!
Resources for this project:
See all materials


Comments
Join the conversation
-
Love it, although my lot would spill everything. So cute
-
Just use a bamboo placemat.


Frequently asked questions
Have a question about this project?
Ribbon looks familiar. Is that the Dollar Tree Jute ribbon with wire in it? That adds a little more stability? We use a folding table because we'd probably spill it, we're clumsy, and then there's the kitty!! But cute idea.
Brilliant! I'm eyeing my spending too and asking, of everything, how can I solve this with what I have :-)
If the jar sweats won’t the water run down on the couch ?