


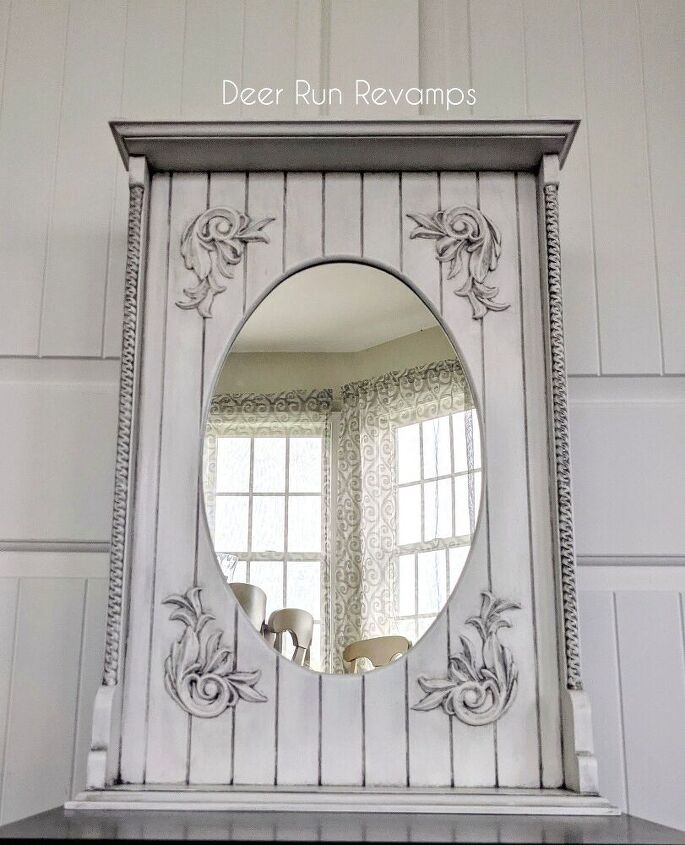
Adding Details To A Mirror Using Silicone Molds And Air Dry Clay

I've had this old mirror for quite some time now and it's just sat in the back of a closet waiting to updated.
We're closing on our dream home at the end of the week (August 13th, which is Friday the 13th 😳), so I wanted to create something to put in our entryway 😍
Read on to see how I completely changed the look of this outdated mirror
*Time estimate is based on work time only, does not include dry time.
Dry times will add about 25 hours since the clay takes about 24 hours to completely harden.
*Price estimate is based off of 2 Silicone Moulds and the amount of product used, not the initial price for the paint, wax, glue ect..
The Silicone Moulds will last basically forever, and this project uses very little paint, wax and clay, so there's plenty leftover for more fun projects!
Learn how to make silicone molds yourself.
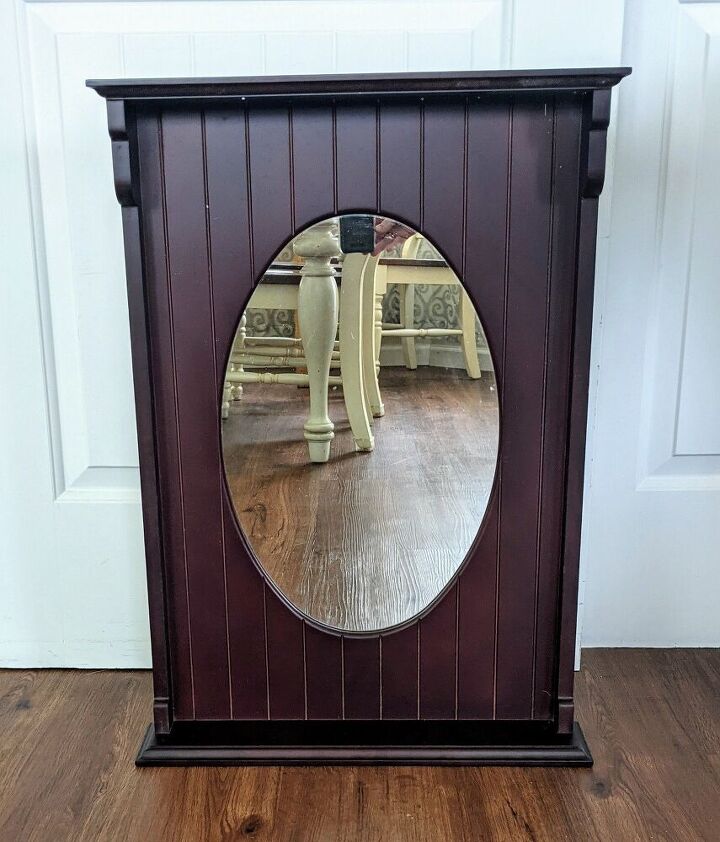
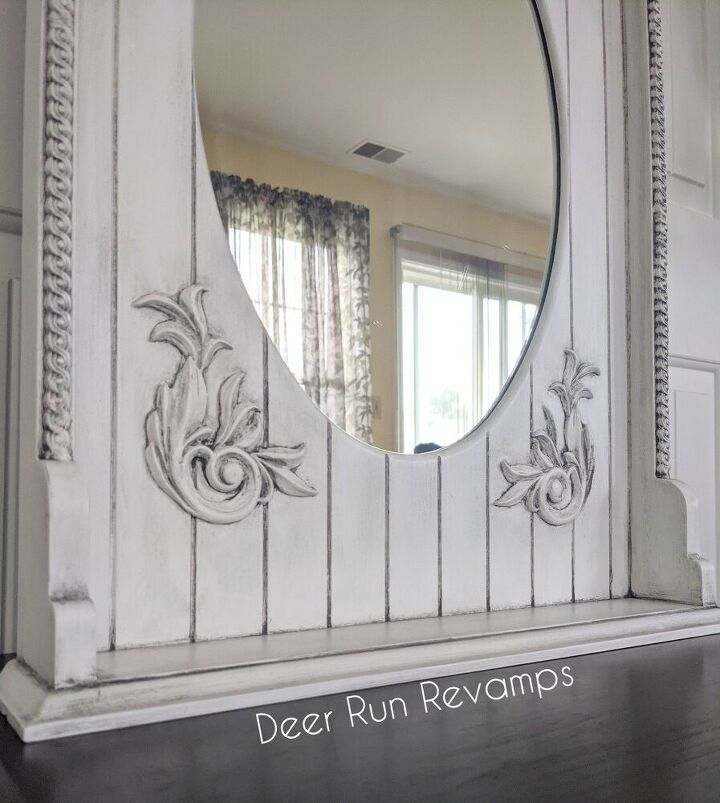
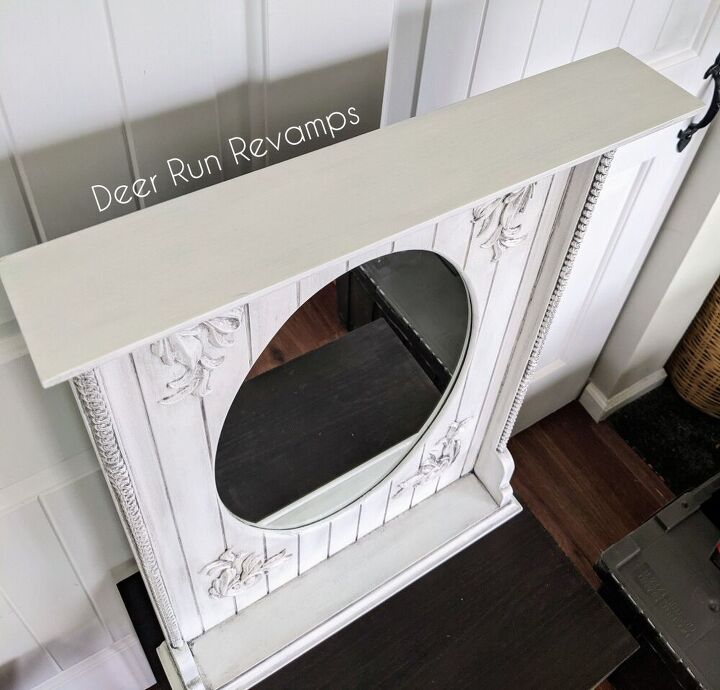
I love the lines and small shelf details, but it was too dark and just needed more...I'm a more kind of girl 😁
So I brightened it up and gave it more ♥️
First, prep
Remove the mirror if possible. If it's not possible to remove the mirror, tape it off to avoid getting any paint on it or scratching it with sandpaper.
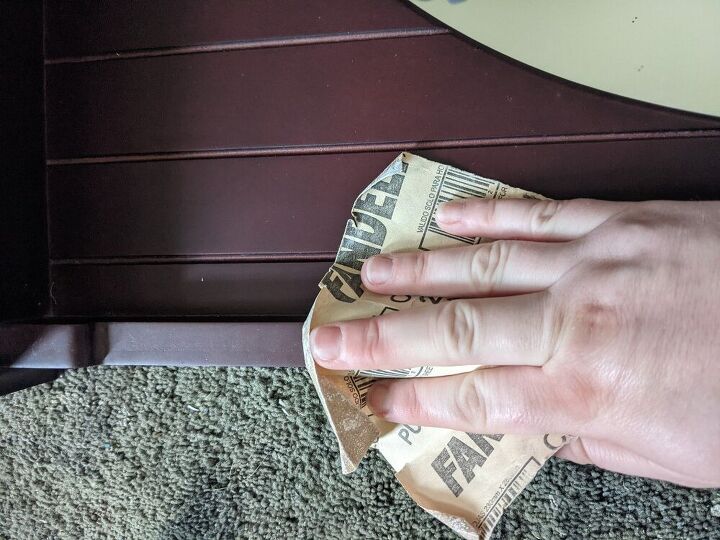
Clean the piece really well using a degreasing cleaner such as krud kutter, a tsp alternative, or even totally awesome from the dollar store works well.
Once it's clean, take 220 grit sandpaper and do a quick scuff sand to rough up the surface. This gives the paint something to really grip onto.
Then, take a clean damp rag (water) and wipe down the piece to remove any dust and residue
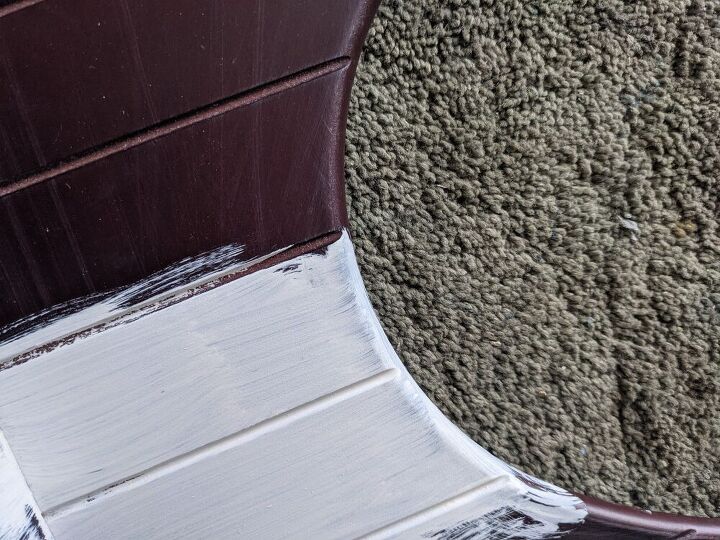
Now, paint.
Make sure you get the inner rim area since it can still be seen with the mirror in.
I used Frenchic Furniture Paint's color called "Virgin". This is a cool white with a very slight gray undertone. A link to purchase this color from my Etsy shop is in the materials section at the end of the tutorial.
I needed 3 light coats for complete coverage, allowing to dry completely in between coats.

As the final coat was drying, I got together the products needed to create the appliques -
*Redesign With Prima silicone moulds of your choice - I used Antique Scrolls and Regal Trimmings (also linked below in the materials section for purchase from my Etsy shop)
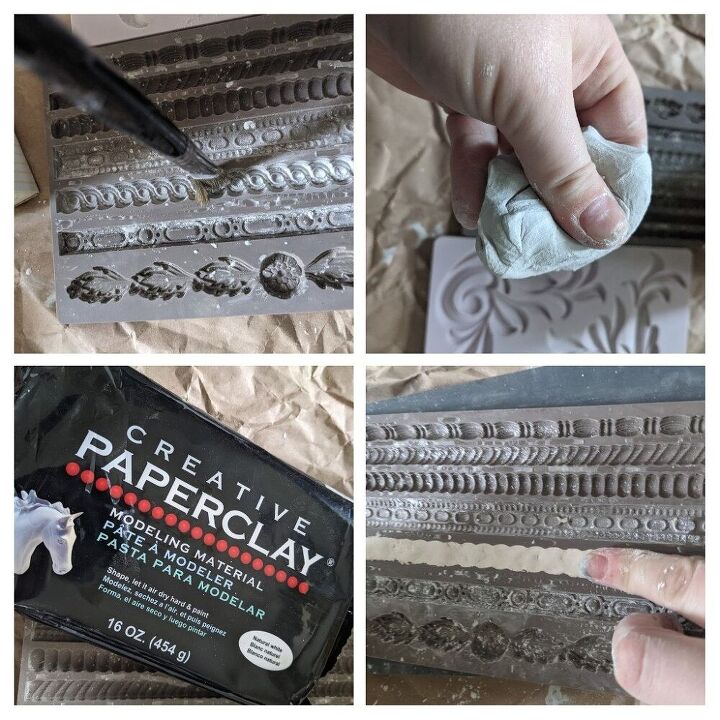
*Creative Paper Clay - linked below in my Etsy shop
*Corn Starch
*Wood Glue
*Two detail Paintbrushes
Here's how to make the Paperclay appliques
1. Dust the decor mould with corn starch
This allows the clay to easily pop out of the mould. Dust off any excess cornstarch. You don't want it piling up in the details, you want just enough to form that barrier between the clay and silicone mould
2. Press the clay into the mould
As you're pressing the clay into the mould, be sure to remove any excess hanging over the sides. Press down well and get that clay into all of the details, and make sure that it is level and even with nothing hanging over the edges
3. Flip the silicone mould over and slowly peel it back so that the clay applique pops out
You may have to gently help the clay out of the mould
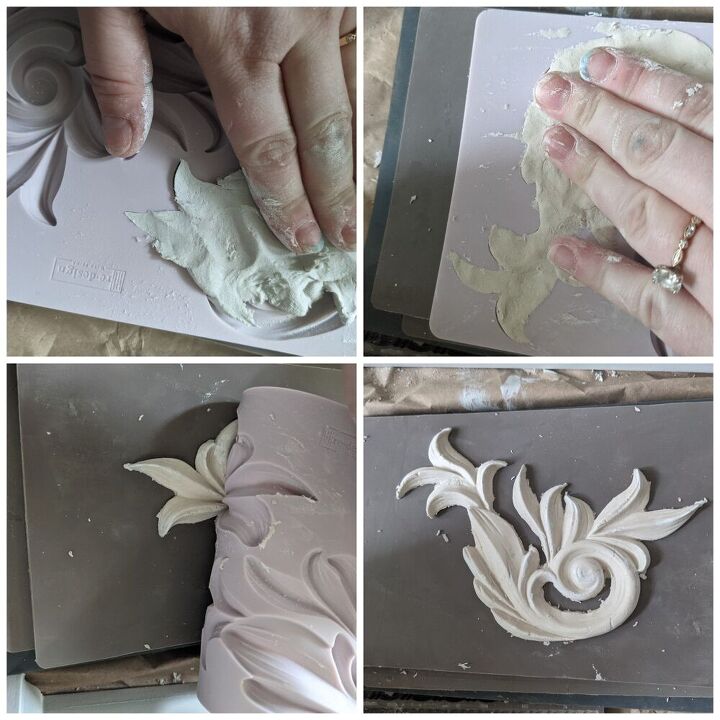
The detail in these scrolls is incredible! There's a lot of high/low points. If there's excess clay around the edges, carefully remove it using a sculpting knife or small paintbrush

4. Turn the applique over and apply a thin layer of wood glue to the back
Make sure that the edges have a very thin layer, you don't want the glue to ooze out when you press it onto the surface, but the edges are the most important area to adhere to the surface
5. Ever so gently press the applique onto the surface, especially the edges
You can overlap the Paperclay appliques. Just be sure that it's adhered to both the applique under it and the surface (if it's touching the surface)
Continue this process until you're happy with you're design
Paperclay takes about 24 hours to dry.
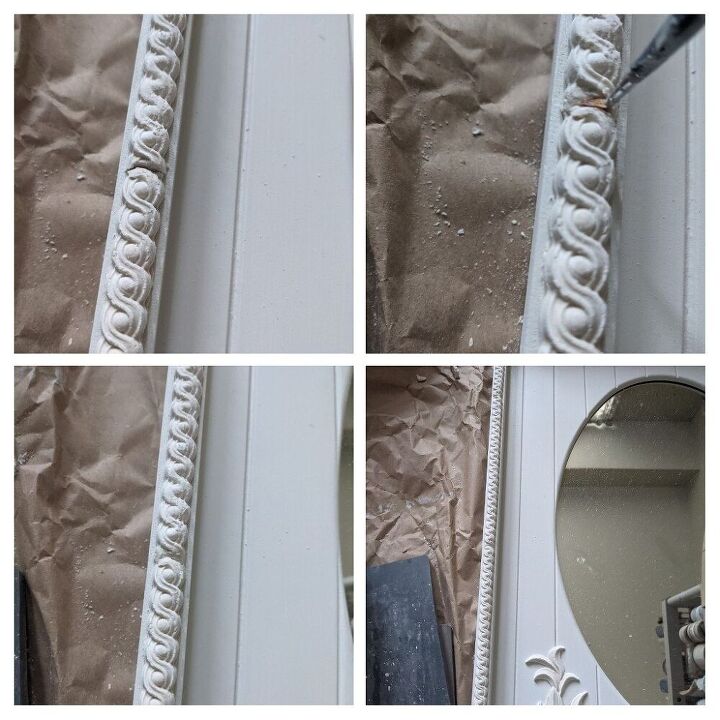
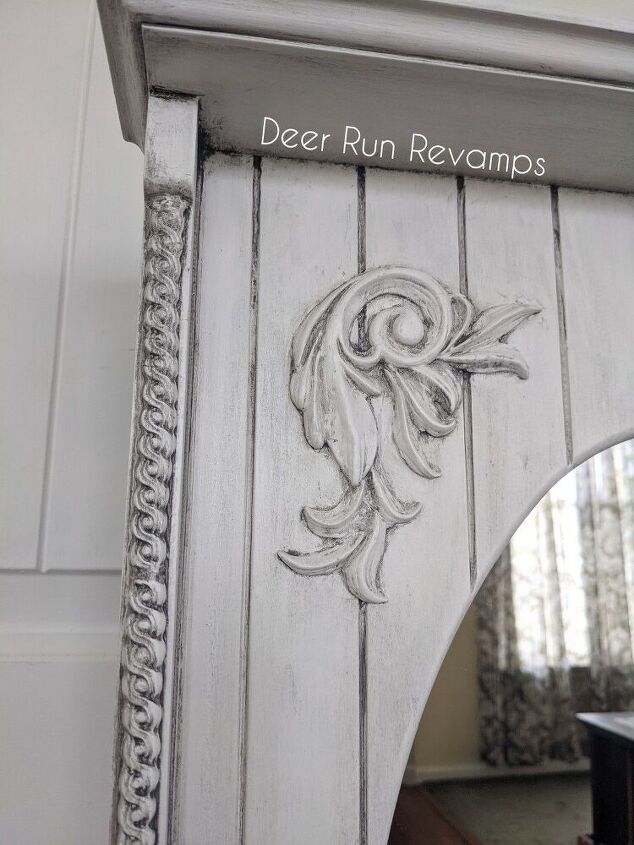
When you need to apply numerous trim pieces to fill an area, you'll need to make one at a time and line them up. I butt them up next to each other, and then fill in any gap with a small piece of paper clay and mold it to create a seamless continuing trim piece, or as close to seamless as possible. At the edges where it meets the wood surface, I took a small detail brush and really molded the clay to the surface.

Allow the paper clay to dry for 24 hours or until it's hardened.
As the clay dries, it may crack. This gives the details character and adds age to the piece, but, if you don't like it, you can just add more paper clay into the cracks!
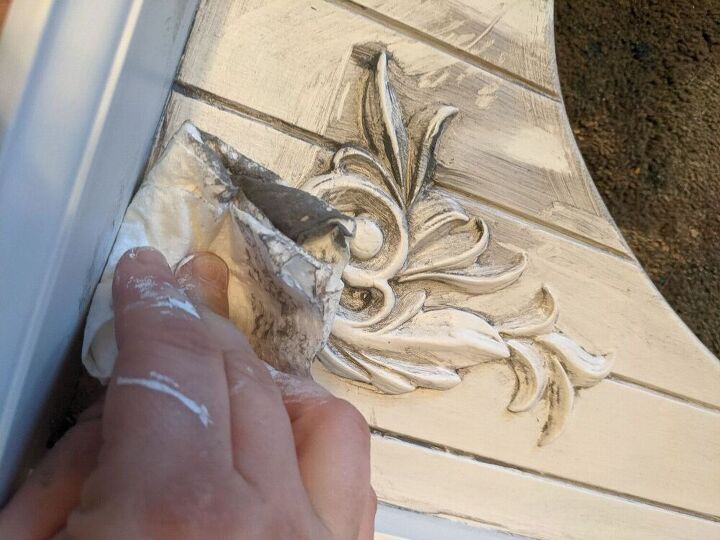
I love the aged look paper clay gives my appliques, but where the trim pieces connected, there was a good size crack in a couple spots that I did not enjoy....
*Take a very small piece of paper clay, dip a detail brush into water, and press the paper clay into the crack 😁
If you want a perfect, crisp, no crack look to your appliques, use epoxy. There's a quickset epoxy that cures white in 10 minutes. Works great for certain projects
Here is a video showing how I make and apply the paper clay appliques on a different project
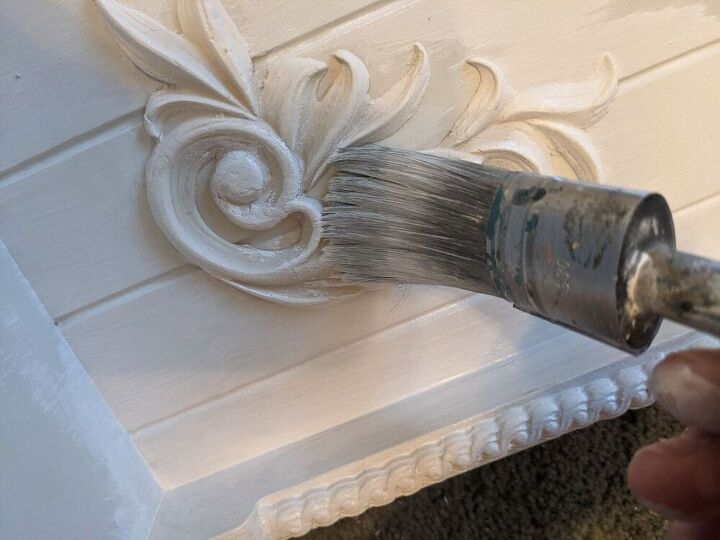
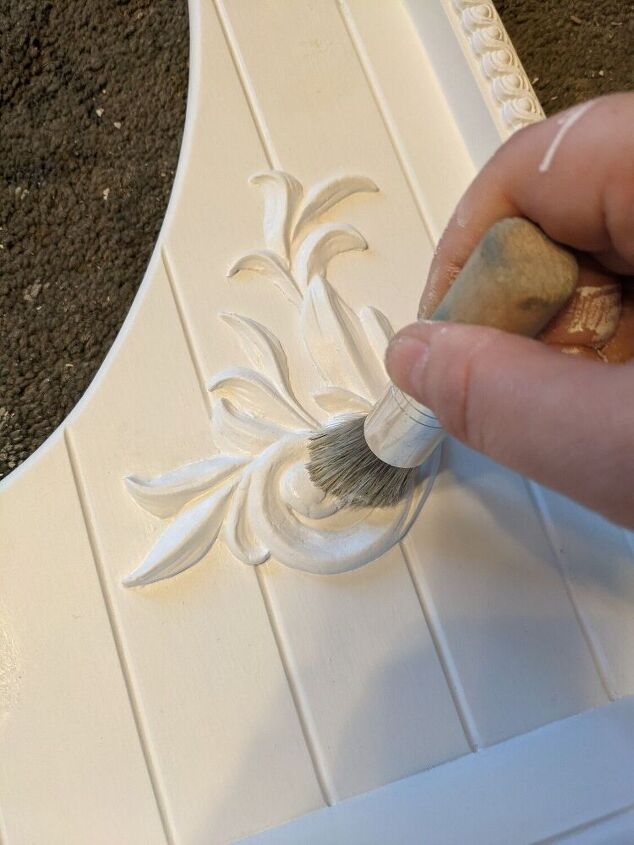
Now that the paper clay has hardened, it's time to paint them 🖌️
Using the same color as your base, paint the appliques. Be sure to get into all of the details and edges. I use a small detail brush for getting into those really small details, creases, and edges.
After the paint has dried, apply a clear wax, being sure to get into all of those details.
If you prefer, you could apply a water based topcoat instead of wax for extra durability. Since it's just a decor piece, I wasn't worried about durability.
*Always apply a clear wax or topcoat before a colored wax. If you apply a colored wax directly onto a flat, chalk or mineral style paint, the paint will just soak up the wax and you won't be able to blend it.
Applying the clear wax or topcoat first gives you plenty of work time to blend and remove excess wax
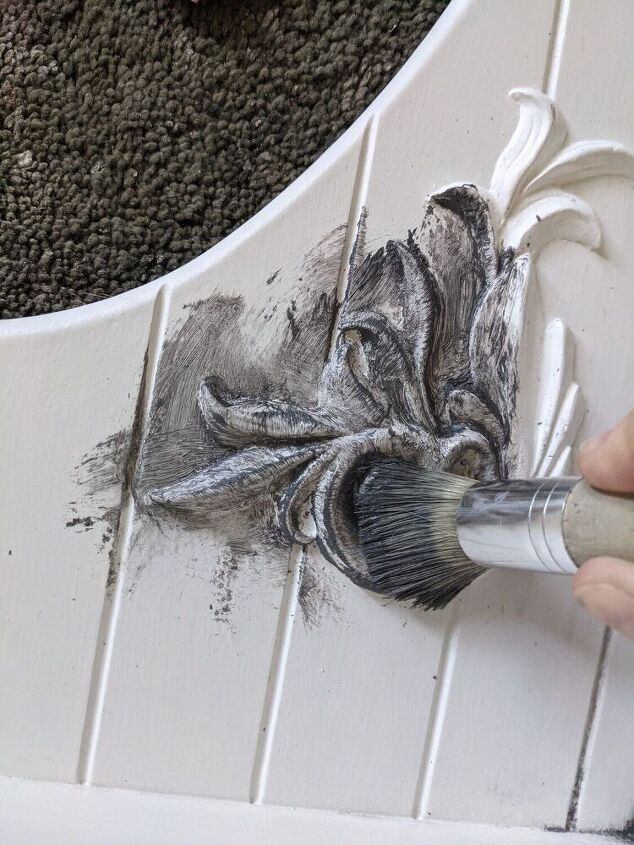
Frenchic's Defining Wax is a great gray color. It's not as dark as a black wax, giving the piece a much softer look.
Working in small sections, apply the gray wax over the appliques making sure to get into all the nooks and crannies.
Remove any excess wax and blend
I also applied the wax in the lines, corners and edges
*If you apply too much colored wax and it's not coming off with a paper towel, you can remove it with either more clear wax or mineral spirits. If you use mineral spirits, just be sure to apply clear wax in that area again before the colored wax
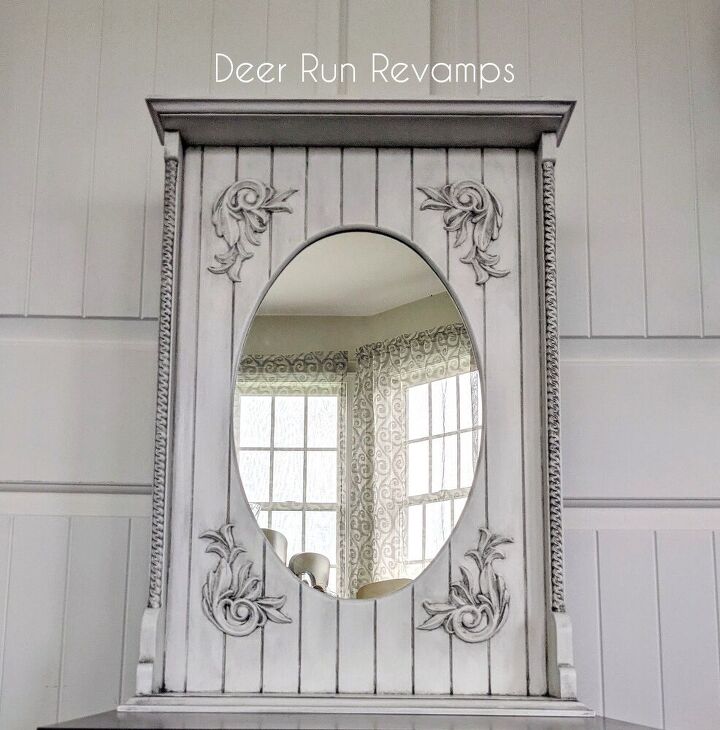
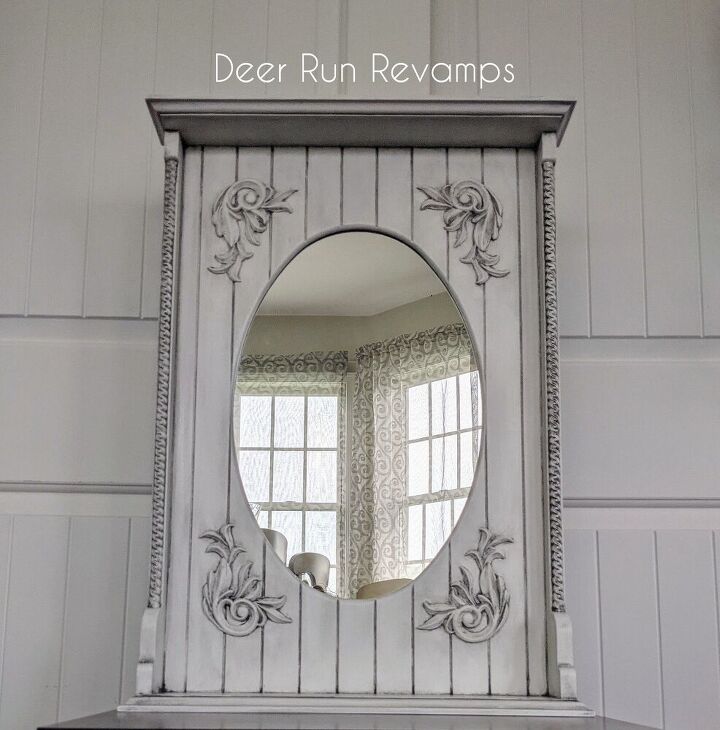
Sit back, relax and enjoy your project 😍
I can't wait to hang this beauty up in our new home!
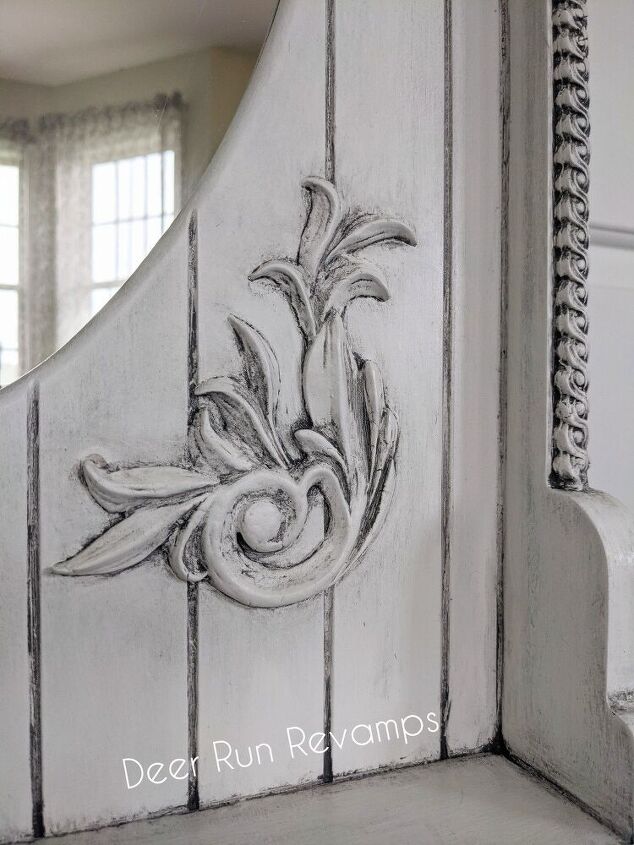
I love the way the wax really makes the details POP
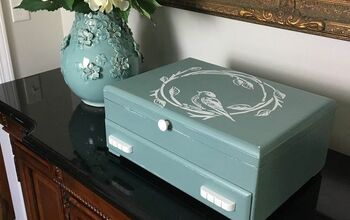
I'm thinking I'll add a plant to the shelf 🤔
What would you display on the small shelf? Let us know down in the comments
If you'd like to see other projects of ours, check out our Facebook page
You can visit our Etsy shop to view/purchase the products used here along with over 400 other designs/colors/styles/products to help bring your projects to the next level
Thank you so much for reading! We hope this tutorial has inspired you to create something you'll love ♥️
And as always, if you have any questions, don't hesitate to reach out 😁
Resources for this project:
See all materials


Comments
Join the conversation
-
Gorgeous! You can also use hot glue in the moulds. It comes out bendable, never cracks and can easily be cut & trimmed with scissors. It can also be painted. When I'm not going for a rustic aged look (cracks) I use hot glue and have had great success with it.
-
So much better!!! nice job!


Frequently asked questions
Have a question about this project?