


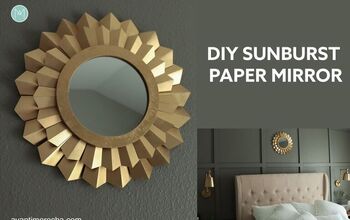
Here is How to Make Easy DIY Paper Sunburst Mirror
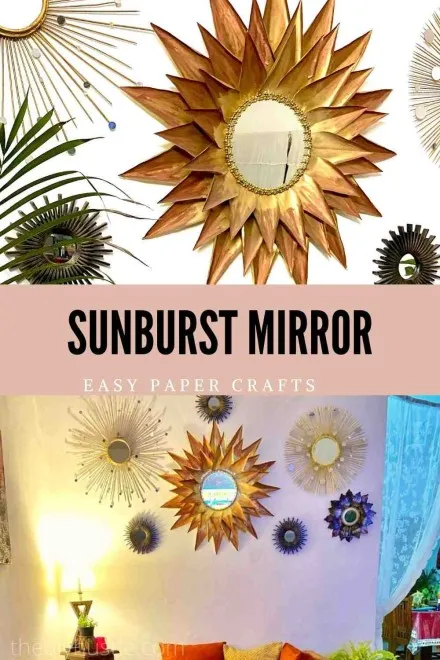
Hey Peeps, Today I am back with another DIY Paper sunburst Mirror tutorial. When I first laid my eyes on this I knew I had to make this. By now you must be aware of my obsession with the Sunburst Mirrors. If you are new here, please check how to make a Basic Sunburst Mirror Here.
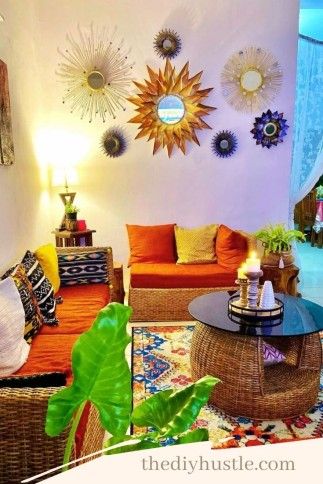
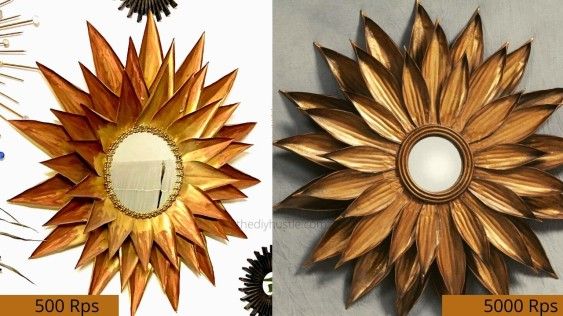
So coming back to this, you know how expensive these mirrors are. Here you will find an easy Step by step tutorial to make a huge, inexpensive Paper sunburst mirror that will complement your wall at a fraction of the cost. If I were to buy all the sunburst mirrors as I planned for my sunburst mirror wall I would go broke…Haha!! Besides, DIY is a better and cheaper option for me. Moreover, it’s fun to make things that fascinate you, Isn’t it ??
I already had a mirror, spray paint, and a glue gun with me, so all I needed was a good cardstock paper. Yes, that’s right; this is made of paper. So, I have used 200 Gsm cardstock for this.
Here are all the things you need to make the Sunburst Mirror
- Cardstock Paper (Heavy)
- Mirror
- Command hook
- Gold Spray Paint
- Beads / old necklaces
- Metallic Wax
Pin this if you don’t have time to read it now, you can pin it for later.
Instructions
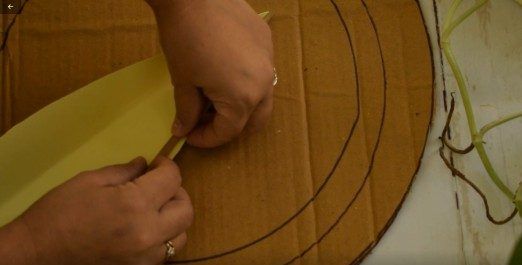
First off outline a circle around the embroidery hoop and cut it out. This will be the base of your mirror. You can also use cardboard or Mdf Board for this, the process would be the same.
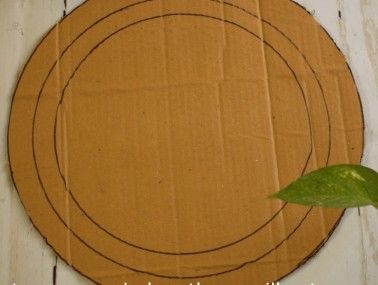
Secondly, Draw two more circles within the cutout, a medium, and an innermost circle. For example, If the mirror is 14 inches, the innermost circle will be 14 inches, the middle would be 16 inches and the outermost would be 18 inches. These circles will act as a guide to where will the layers of sunburst go.
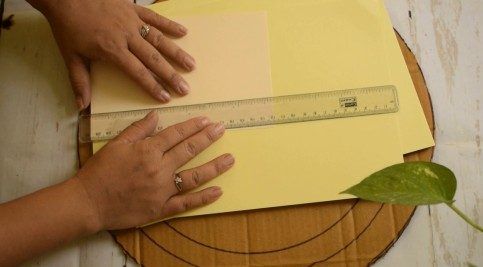

Next up, we will make templates for the leaves. For this, you need to draw a stencil for the leaf pattern in three different sizes large, medium, small and cut them all out. You can refer to the video for a better understanding.
At this time, I ended up needing 15 large, 15 medium, and 15 small ones. The number of leaves will depend on the diameter of the respective circles. I would suggest laying out the leaves as you cut them to get the idea of how many would be required.
You can also Pin this to Read Later.
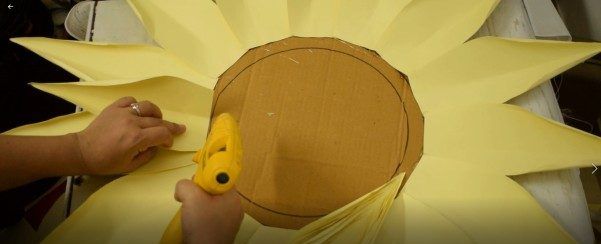
Thereafter, it’s time to shape the leaves, fold them in half, and curl up around the edges with the help of a skewer. Once you are ready with all the leaves, start by gluing the bigger-sized leaves on the outermost circle. Likewise, medium and smaller ones on the middle and innermost circles respectively.
Also, Check out how to make this Sunburst Mirror here
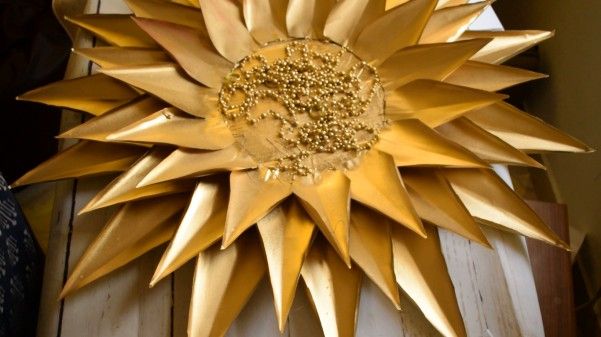
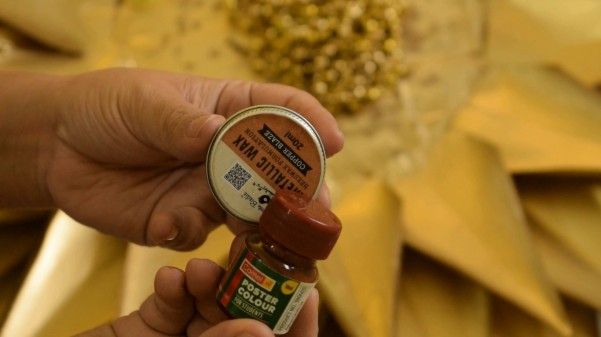
Once you are through with this, Spray paint the leaves with metallic gold, this one is by rust oleum. At last, we are ready to add the brass effect to this mirror. To create the brass effect, I have used metallic wax in bronze and brown acrylic paint. Take some brown acrylic paint and lightly brush the edges of the leaf. Top it up with a tiny amount of wax and rub to blend with the paint. Similarly, paint all the leaves.

Finally, glue the mirror with the help of a glue gun or e600 glue and add beads if you prefer. To hang this stick a command hook at the back and it’s good to go.
Voila!! Your Paper sunburst mirror is ready. I feel this looks a little bit like the one I wanted to create. Even though this is made out of paper no one can figure this out until you touch this. As for me, I think it’s not bad for what I was trying to achieve.
Let me know what do you think about this in the comment section below. I am sure you are going to do a better job than me here and if you do make it, please share here or tag me on Instagram @thediyhustle I would love to see yours. Just fill in your email id in the subscription box and I will notify you when another mirror tutorials are ready.
Thanks for stopping by!!
XOXO
Resources for this project:
See all materials


Comments
Join the conversation
-
It is so pretty. Great job.👍️♥️
-
Pix look ok but I don’t see in my home. Great inspiration for stage settings for school play productions or creating an environment for an event


Frequently asked questions
Have a question about this project?