


Mirror Makeover

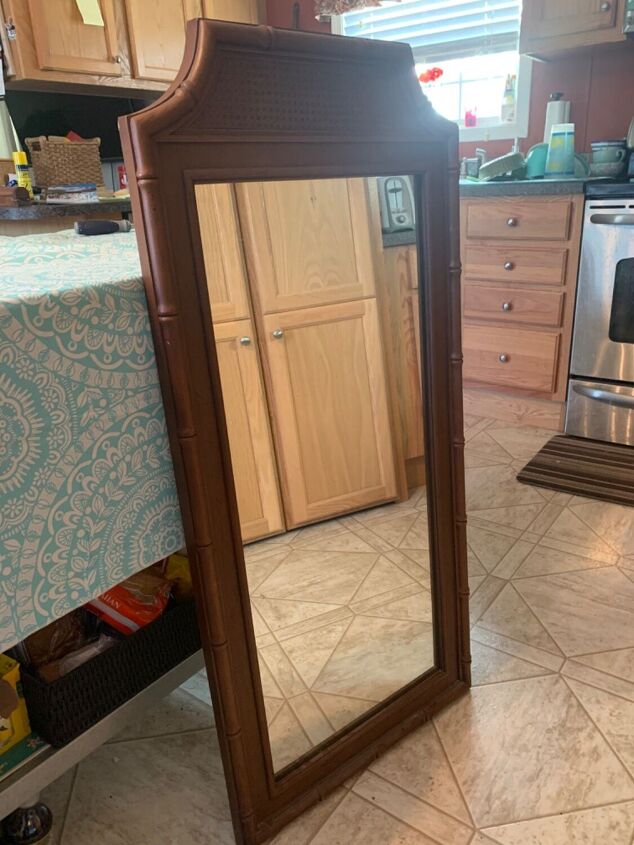
Todays challenge is to use paper to makeover a mirror. I have had this plastic mirror hanging around for years begging for some love.
Wait until you see what I came up with.
Let’s get started…
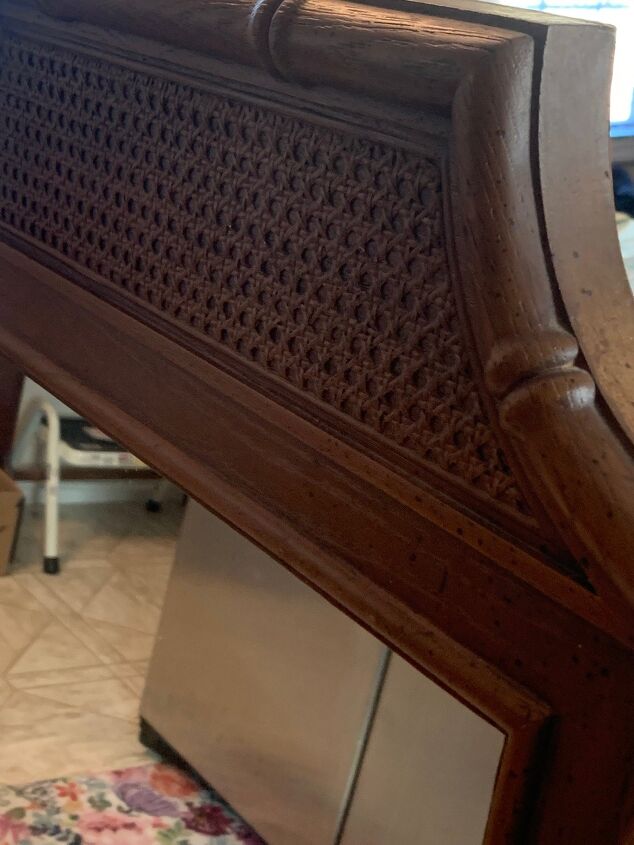
Just wanted to show you the details on this mirror. I’m planning something special for this top area.
This is a beast. The only reason it’s heavy is because of the glass mirror.

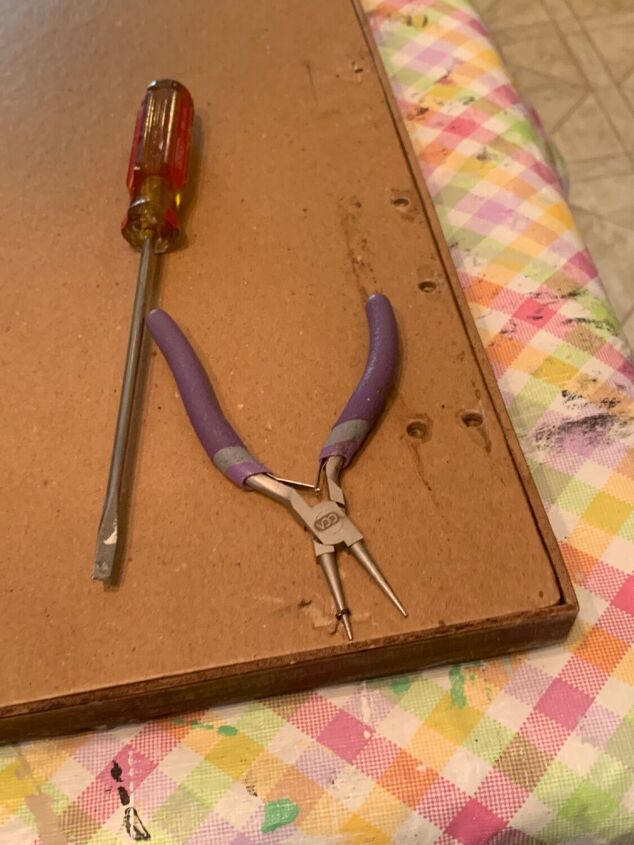
But the mirror needs to come off before I start painting the frame. This mirror has mountings so it can be attached to a dresser. But I’m going to give it a new life and purpose. I used a screwdriver to remove the mountings.
When in place the mirror itself will reflect the backside edge of the frame. I’m painting the frame white and don’t want the old brown to reflect.

So everything needs to come off before painting. I used a skinny flathead screwdriver and needle nose plyers to pry off the staples that holds everything together.
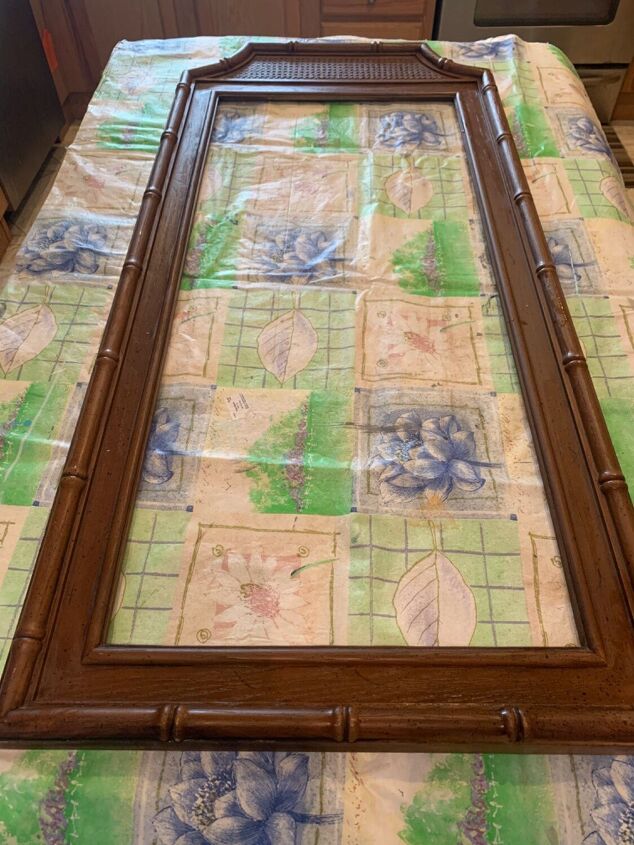
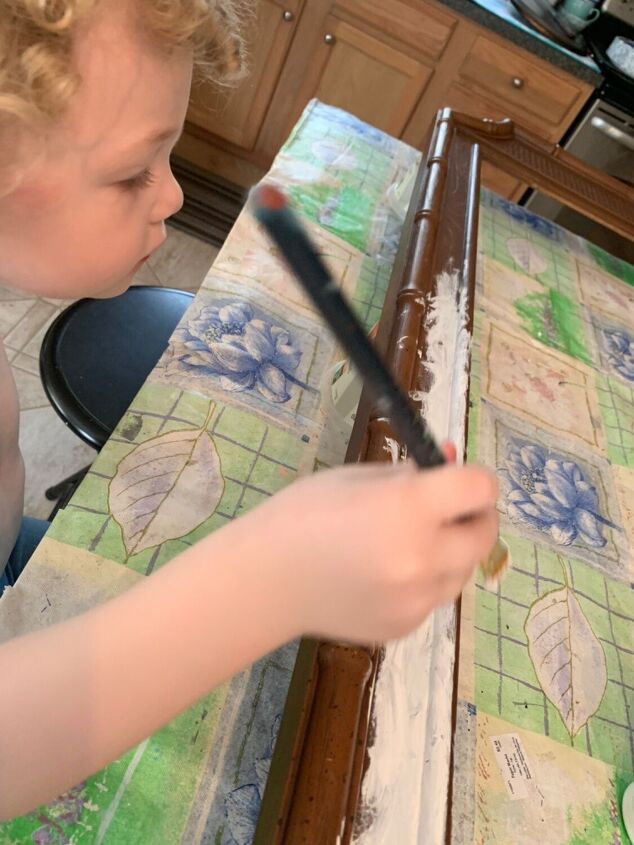
Once the backing and mirror are removed the frame is as light as can be. Now it’s ready to paint.
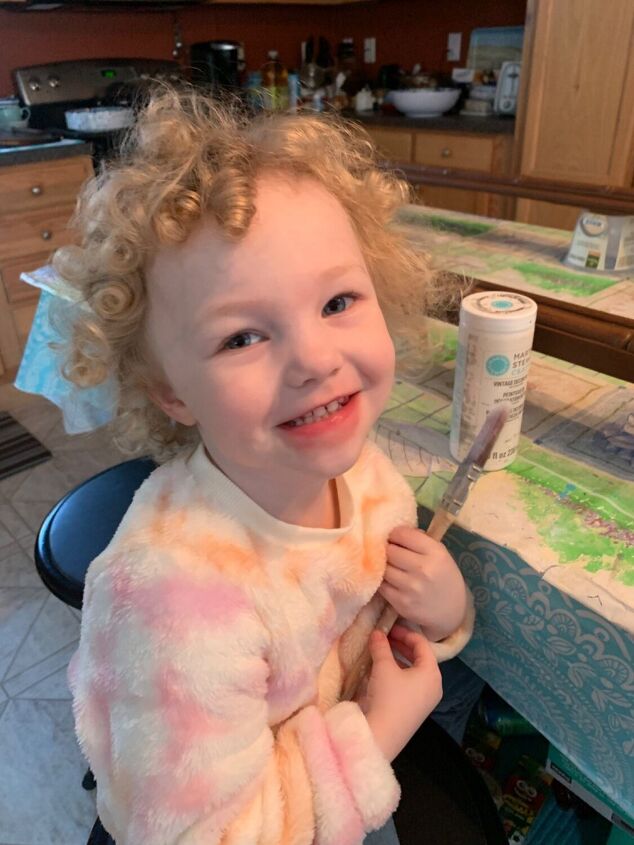
My granddaughter was my big helper that day. She is ready to help me paint the mirror white using chalk paint. I’m not sure how chalk paint does on plastic but we are about to find out. The original plan was to use spray paint that works nicely on plastic. But the outdoor temperature was not high enough to spray paint. It’s been really frigid outside so we had to go to plan B.
I’ll be mod podgeing paper napkins over the frame. So the painting part doesn’t need to be perfect. Me and Marki had a great time painting.
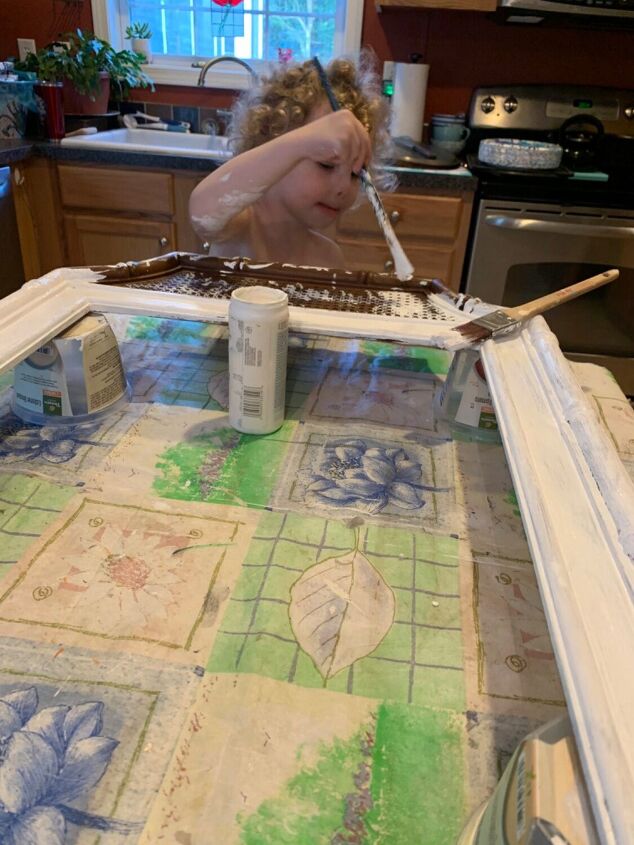
I assured Marki that we can wash the paint off her face and arms. She had so much fun helping.
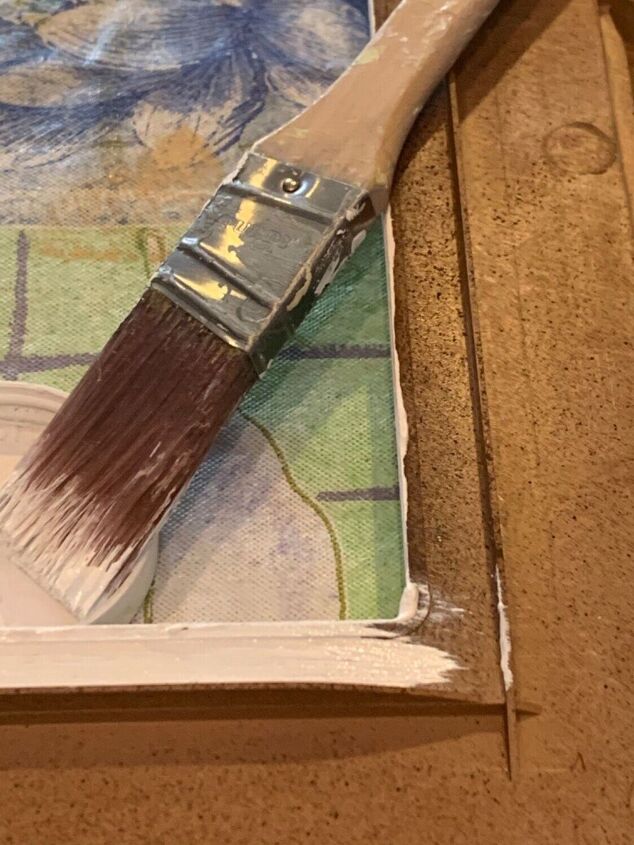
I also painted the edge on the back side. This is where the mirror will reflect the back edge color and I didn’t want it to show the brown color.
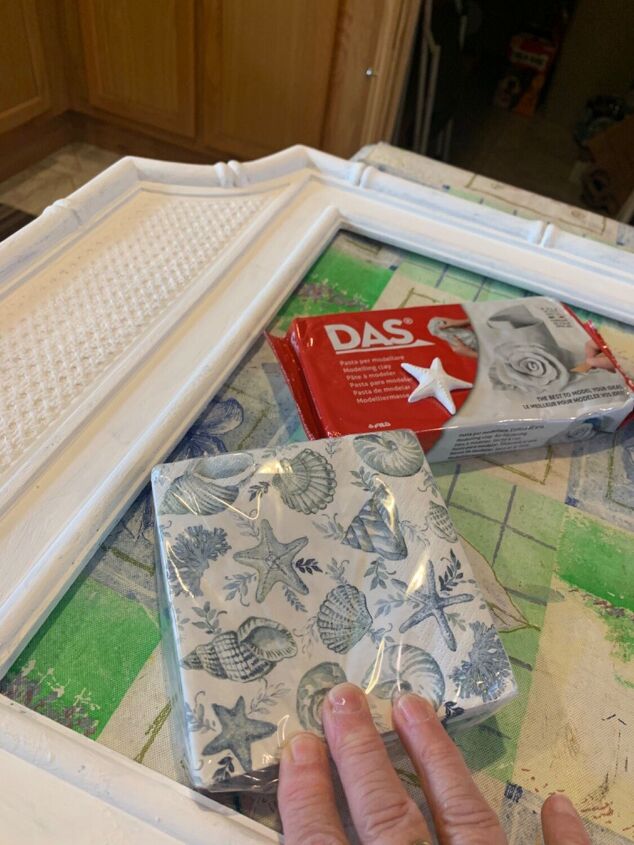
The project is now ready for the next step. I’m going to mod podge these blue and white sea shell paper napkins onto the mirror frame. And then later I’m going to add air dry clay sea shells.
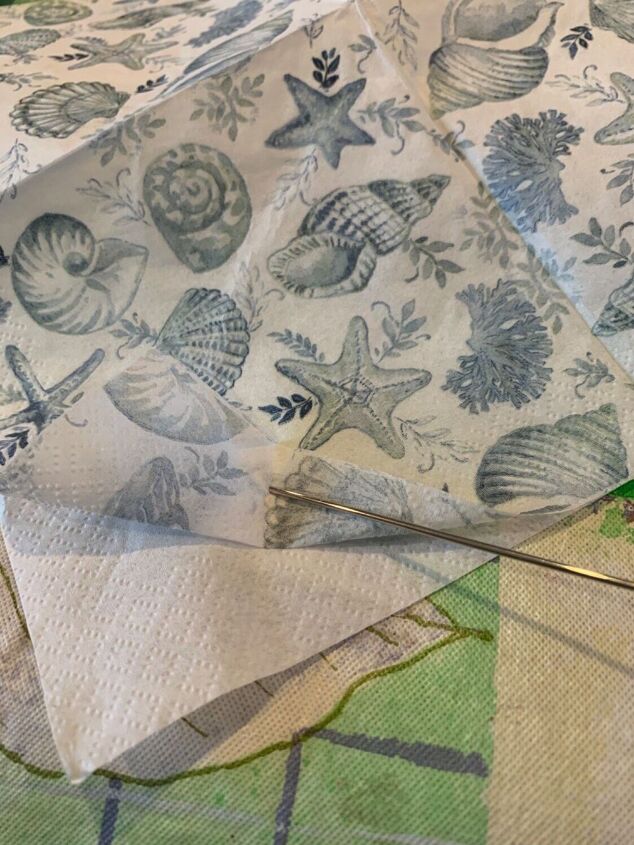
The napkin is 3 ply. I only need the top layer with the designs. I use a sewing needle to help me separate the layers.
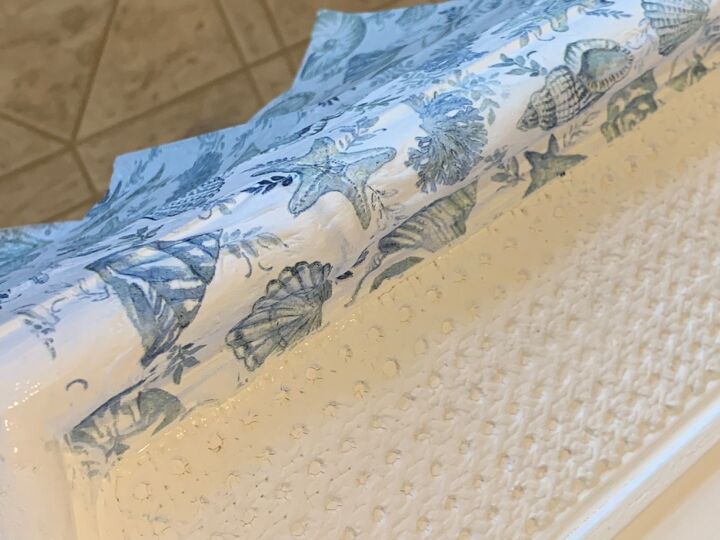
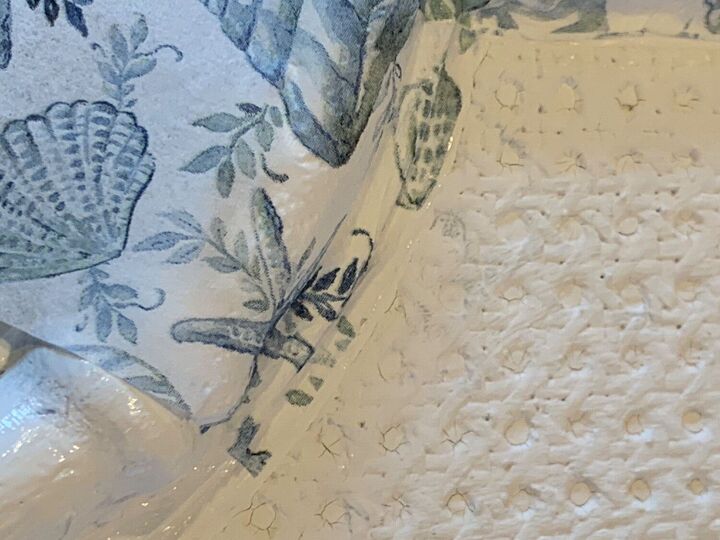
The top of the mirror has a basket weave look. I want to keep that area napkin free. That’s where I’m going to use the air dry clay to add some magic. First I brush on some mod podge and then I carefully place the napkin on leaving the basket weave area exposed. I’ll cut away the excess napkin.
And here I carefully go around the curved edge of the mirror frame.
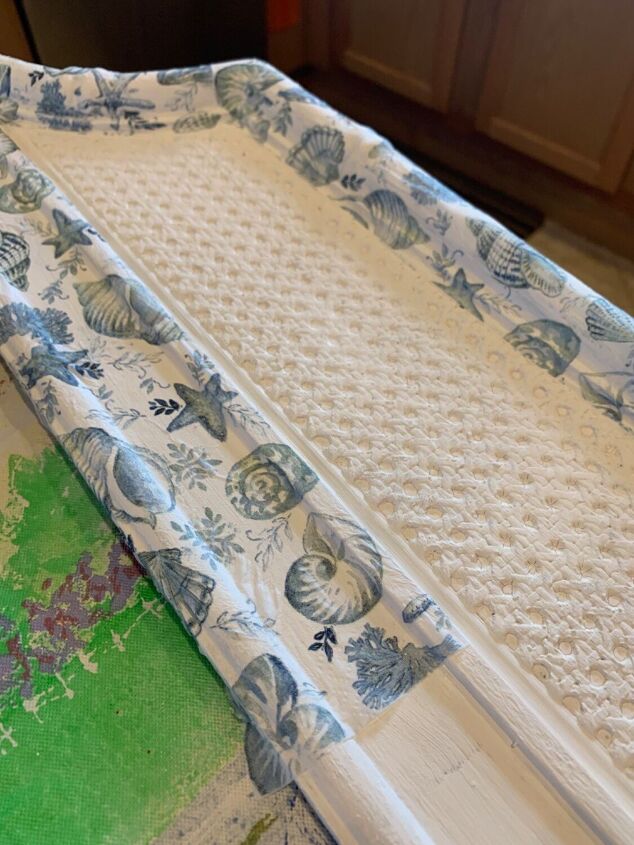
See how the top is coming along?

Marki helps to add the mod podge.
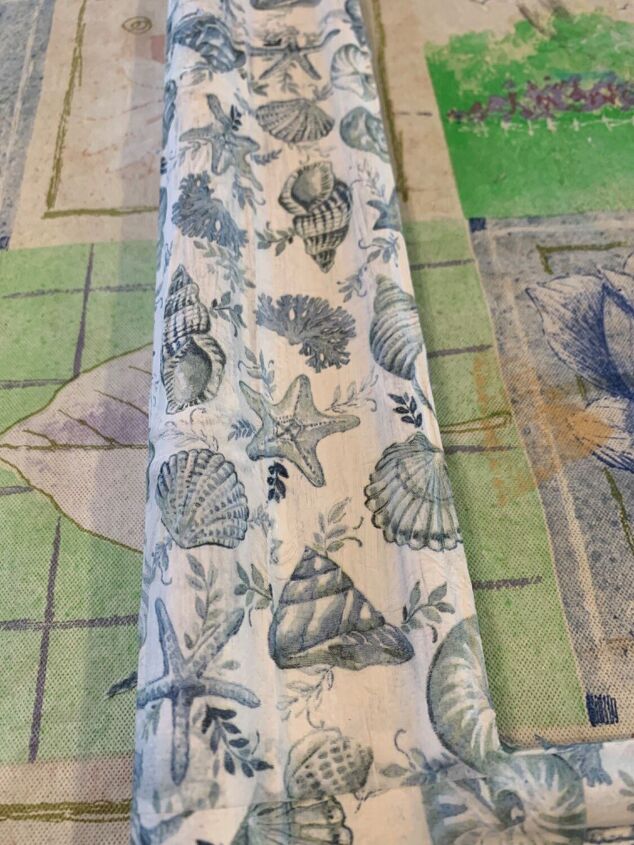
The rest of the frame was really easy. You can tear up the napkin when mod podging but I simply cut each napkin in half. I liked using the straight edges.
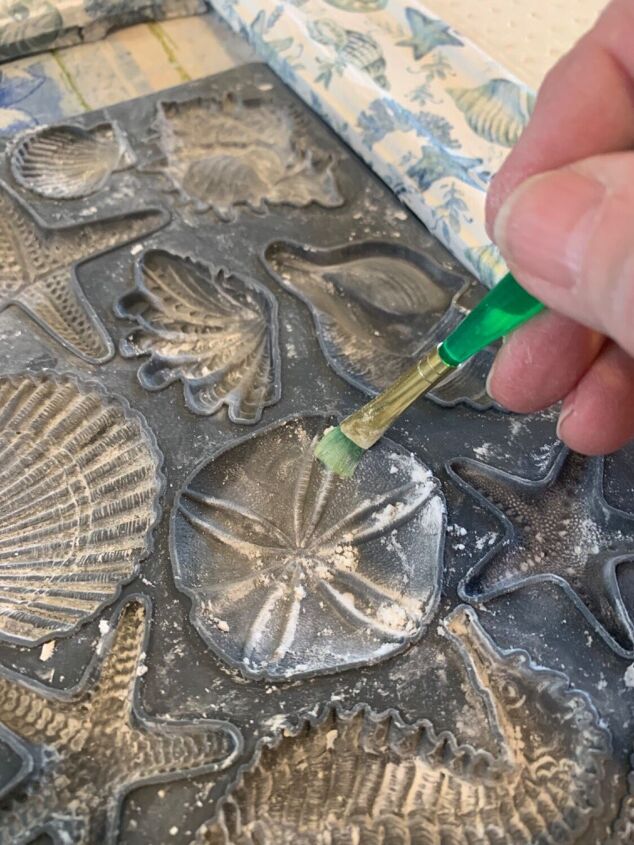
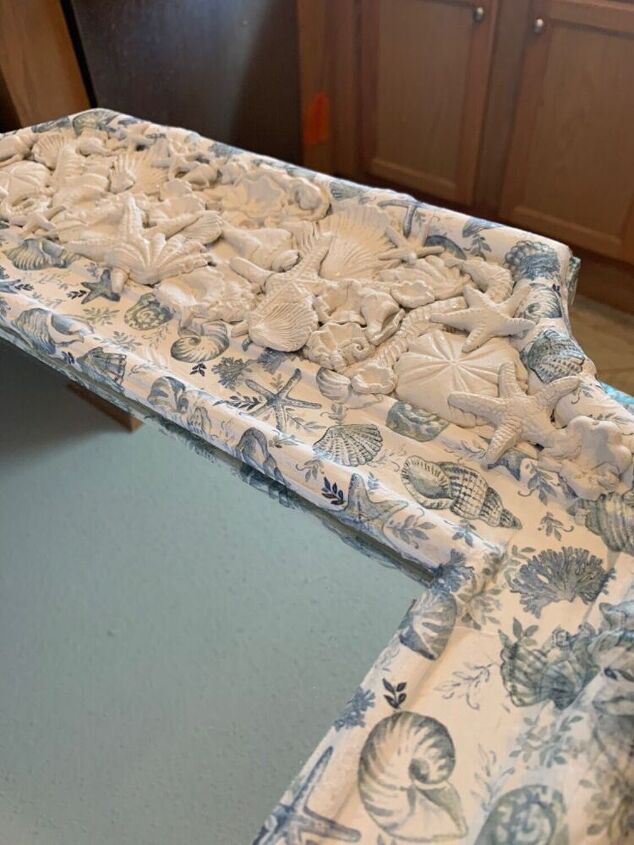
I used the sea shell IOD mould to make a variety of air dry clay sea shells. I’m brushing in a little bit of cornstarch to keep the clay from sticking.
I take the clay and press it into the mould.
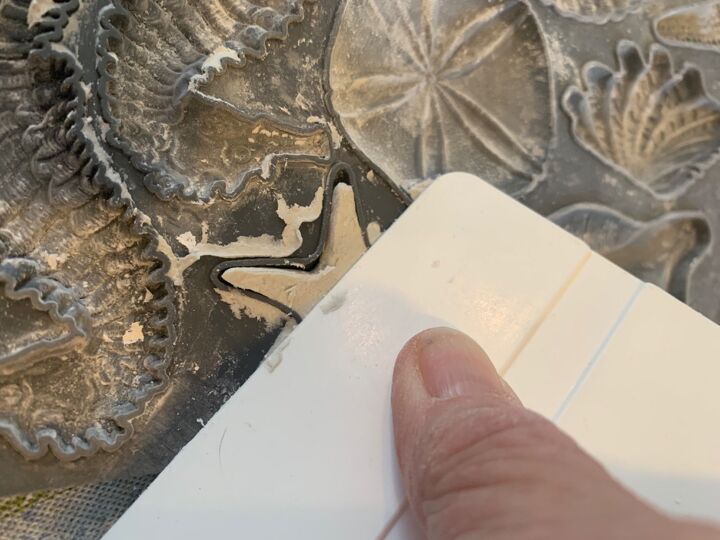
I use a straight edge plastic piece to scrape away the excessive. Then I used wood glue to attach each shell to the basket weave section on the top of the mirror. This mould has a variety of shells and sizes. There are even two seahorses.
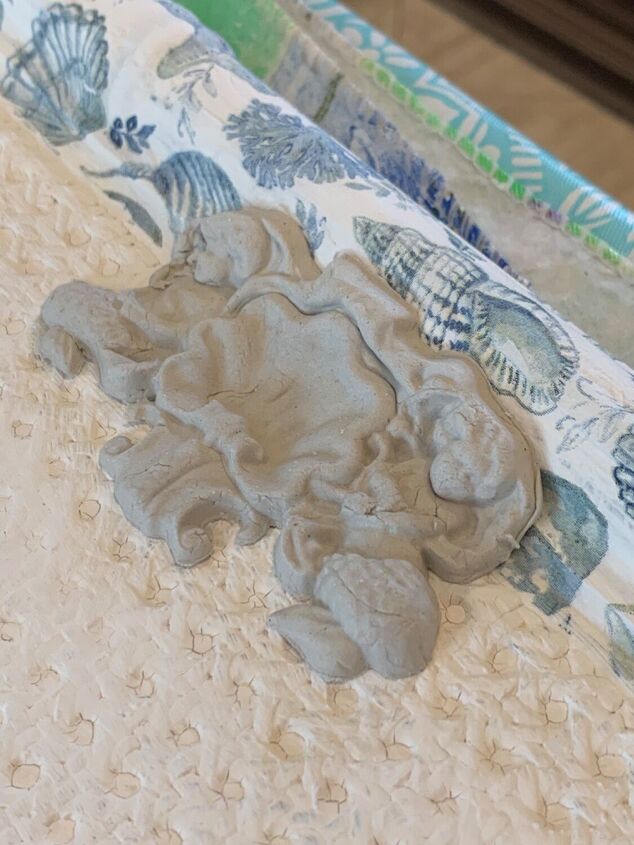
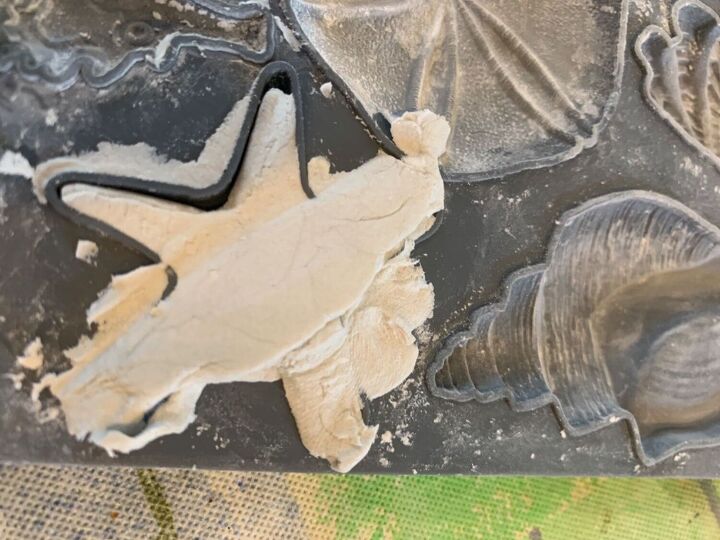
This first piece is from a different mould. I glued it on the center of the top to anchor all the other pieces. Adding the shells before the clay dries allows me to bend them into place.
I glued each shell on as I piled them into place. I did each side similar to the other side to add a little bit of symmetry. The clay is a grey color but will turn white when it dries. It takes a good 24 hours to dry.
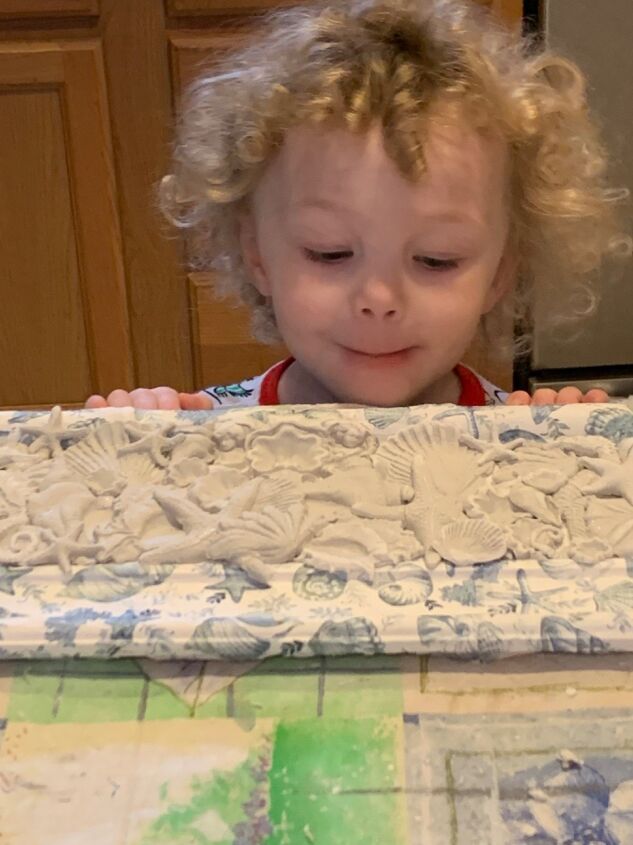
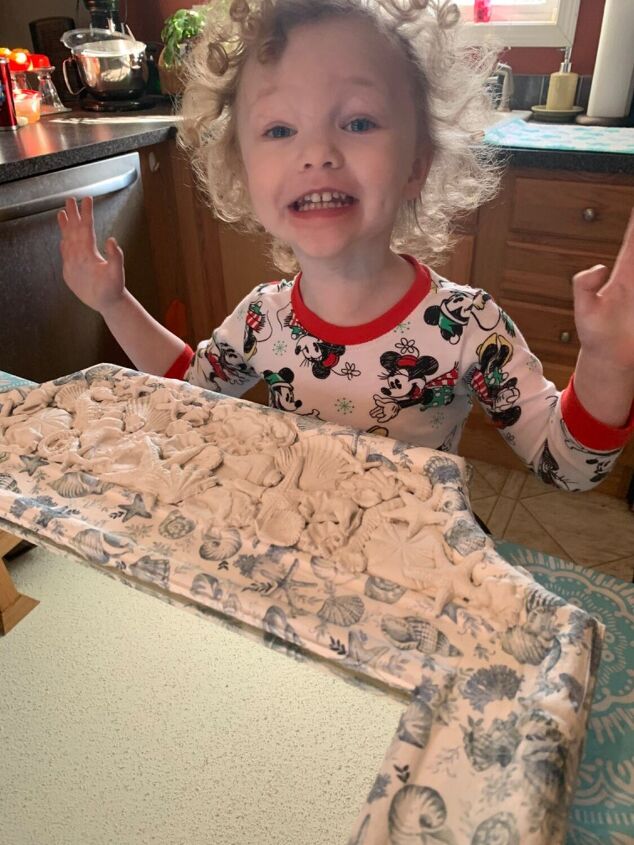
Marki approves!
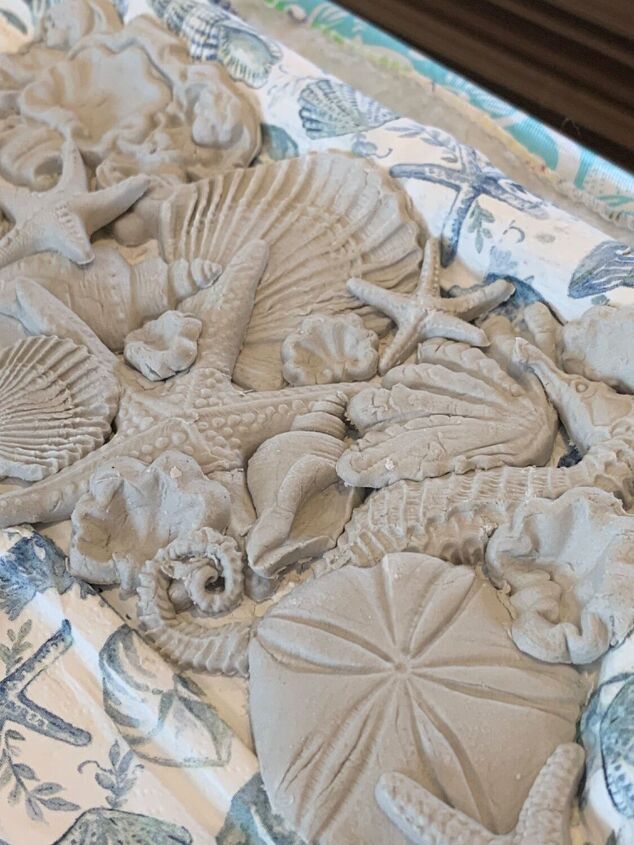
I replaced the mirror and tacked the backing back on. I’m leaving the clay shells white. If you want to paint them you need to make sure they are completely dry first.
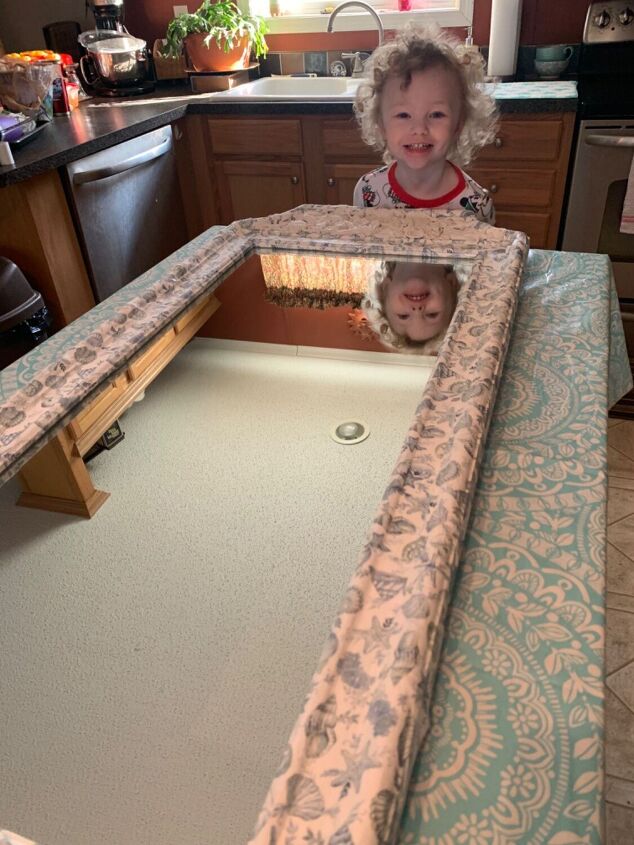
Look how pretty… both Marki and the mirror.
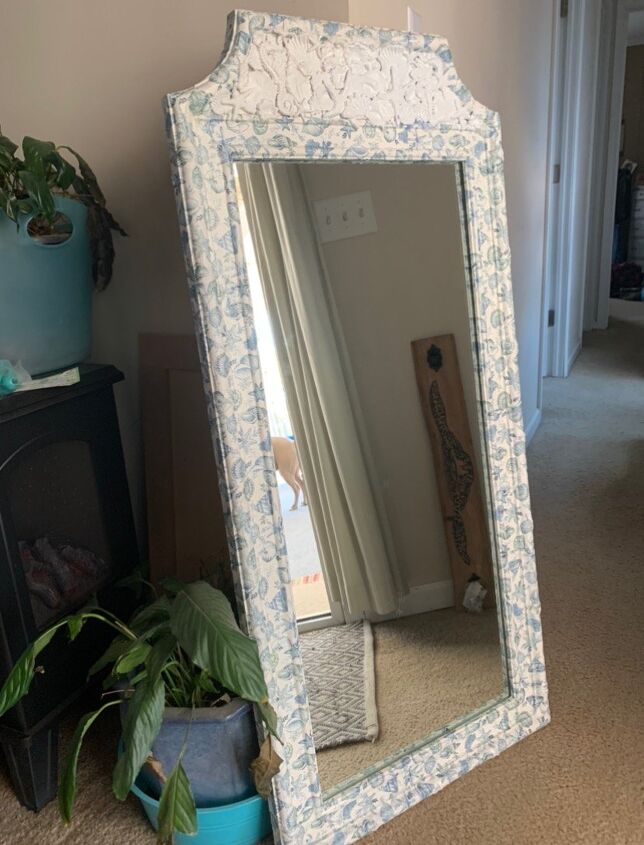
This mirror is all about the beach. Sea shells everywhere!!
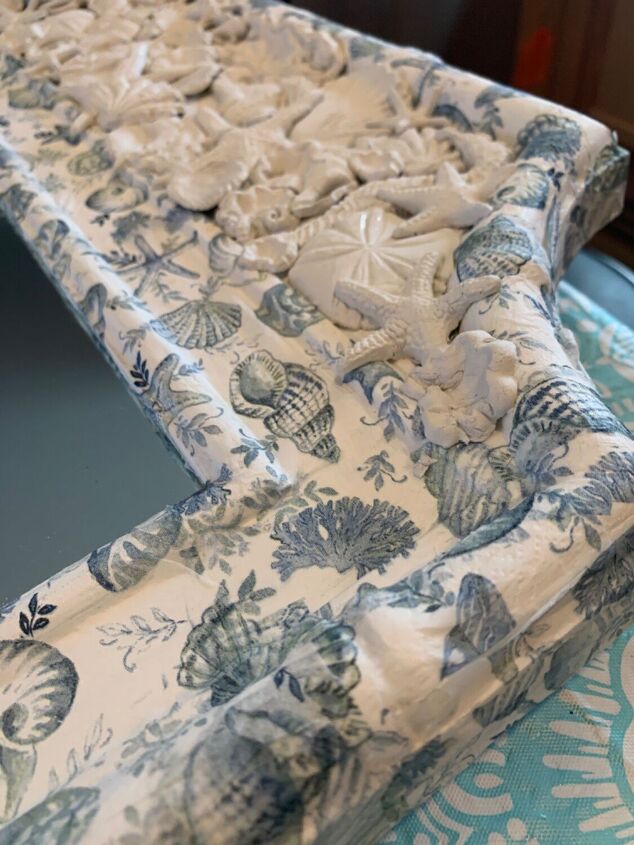
Close up.
Hope you liked this interesting way to upgrade a mirror.
Let me know if you have questions.
Have a great day.
Additional picture
Resources for this project:
See all materials


Comments
Join the conversation
-
Turned out really nice. Your helper did an excellent job too. Thanks for sharing
-
She’s such a good helper!


Frequently asked questions
Have a question about this project?
IOD mold .Where can u get them ? What type of clay?
Beautiful! The details of the shells seen in the close-up are so pretty. Is there any chance you could add a picture of the mirror from a little bit of a distance? I’d love to see the look of the whole mirror.
Lovely project, beautifully done!! Which exact shell mold did you use for the second lot of shells? I'm moving to a beach house on Sunday, and definitely want that mold!!