


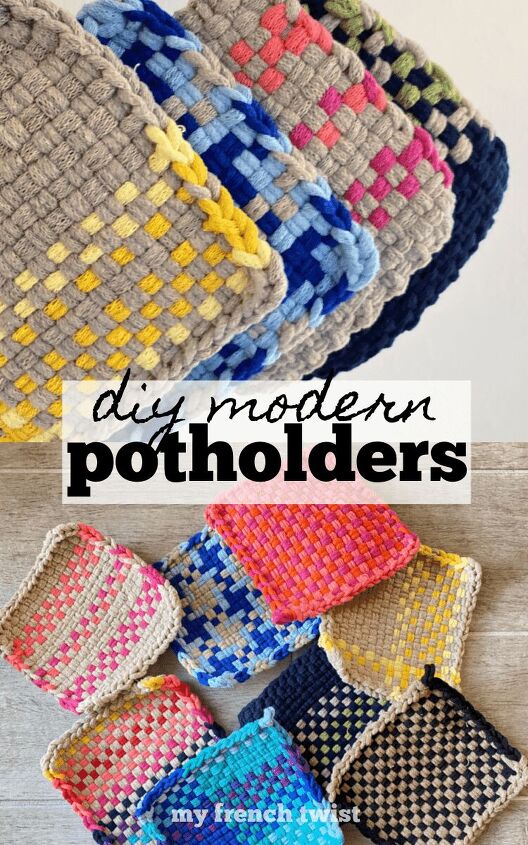
Modern Diy Potholders
Long before video games and internet, kids engaged is some pretty creative activities. And this will really blow your mind – even boys learned to craft. Oh, they’ll deny it if asked about it today. Only if they are steadfastly confident in their rugged masculinity will they openly admit that they have (at least once in their lives) made diy potholders.
These old school potholder looms are making a comeback! And when my new kit arrived just the other day, I noticed it caught my husband’s attention. He still hasn’t come clean but I’m almost certain he’s made a few potholders in his youth.
Here’s why these kits are so cool:
- The kit is all-inclusive – everything you need from loom to loops to crochet hook.
- These diy potholders are easy to make. The learning curve is fast. Like a whole huge batch during one Lifetime movie fast.
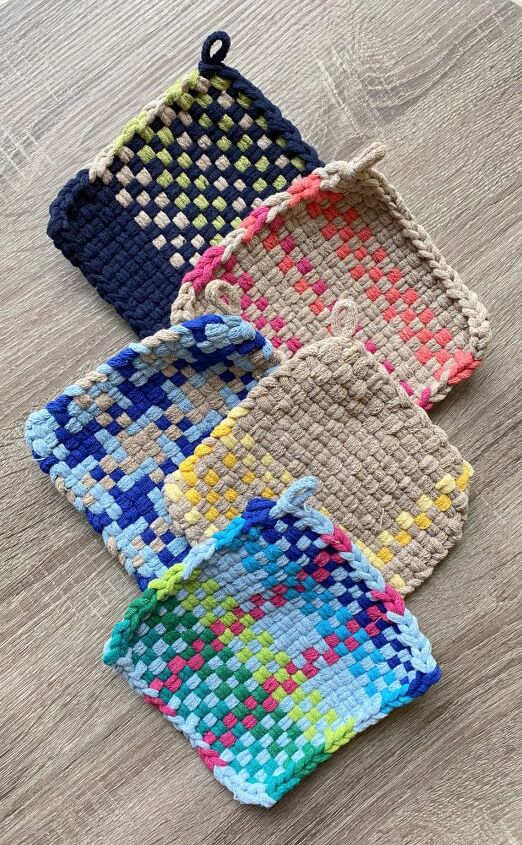
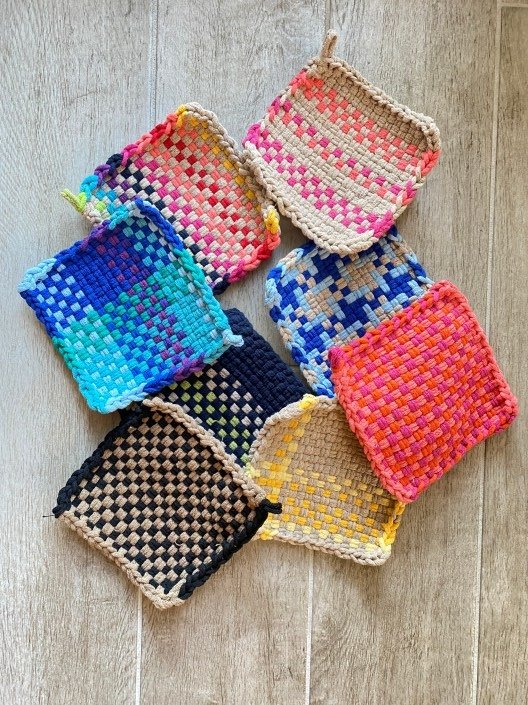
- They’re so honking cute. But practical cute, not useless creepy gnomes cute.
Ready to give them a try?
(This post may contain affiliate links; as an Amazon associate I earn from qualifying purchases. See disclosure here.)
supplies needed:
- potholder loom kit
- cotton loops
Before ordering my kit, I had already started designing intricate patterns in my head. But I confess, once I started weaving, my inner child took over. I had so much fun freely grabbing random colors and creating designs as I went along. But don’t worry, the kit does include instructions and sample patterns to get you started.
the process
Before following the steps illustrated below, watch this video to gain a clear understanding of the process.
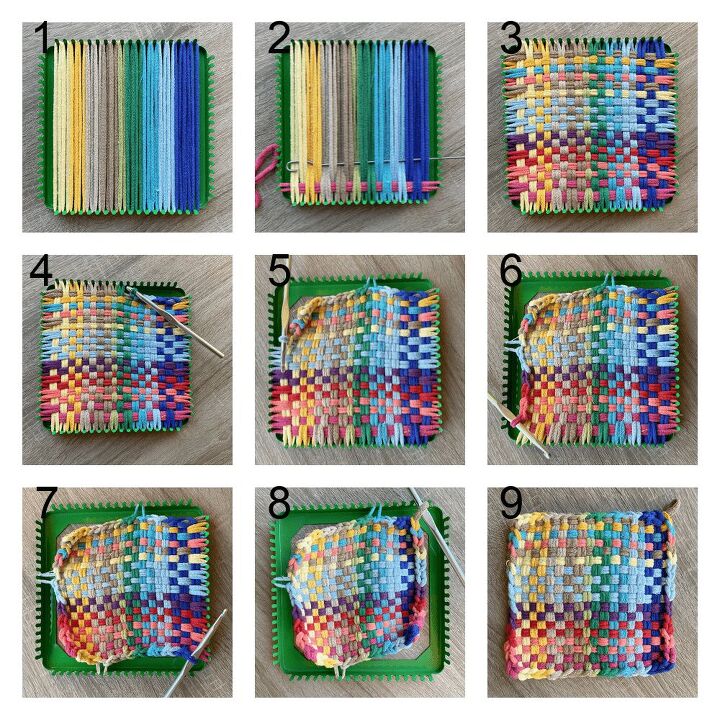
- warping – Stretch loops vertically to fit over each peg.
- weaving – Start from the bottom & push the metal weaving hook over & under loops, going from one side to the other. Attach a cotton loop to the hook & pull it back through. Secure the ends on the pegs. Weave the next row, going over & under opposite loops.
- Repeat this process until no pegs are left.
- finishing edges – Start in one corner; use the crochet hook to remove each loop, one at a time, to “finish” the edges.
- Once the first side is finished, keep potholder in place by attaching one loop to the loom (as shown in photo above). Begin crocheting the second side.
- Once the second side is finished, keep potholder in place by attaching one loop to the loom. Begin crocheting the third side.
- Once the third side is finished, keep potholder in place by attaching one loop to the loom. Begin crocheting the fourth side.
- Once the last side is finished, use the last loop for hanging the potholder.
- Remove potholder from loom and gently stretch & smooth out the sides.
The biggest compliment is a little share – pin the photo below!


Comments
Join the conversation
-
I am so glad to find your post because Ive been thinking of this project. I think I first made pot holder like this in girl scouts a hundred years ago. Im excited to pick up a kit and start weaving. 😎


Frequently asked questions
Have a question about this project?