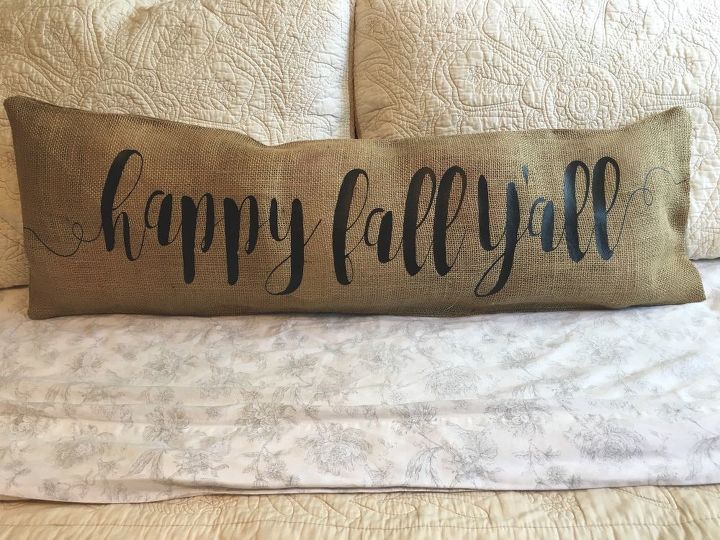
No Sew Burlap Pillow

7 Materials
1 Hour
Easy
I’m so excited that fall is just around the corner — it’s always been my favorite season! Don’t get me wrong, I love summertime and all that comes with it, but fall is just so cozy and gives me the butterflies-in-your-stomach kind of feeling. One of my favorite things about fall is the décor idea overload — it gives me a chance to let my rustic-loving vibes go crazy — with that in mind, I had to finally allow myself to make one of these super amazing NO SEW burlap pillows!
Supplies:


-burlap


-measuring tape


-fabric Scissors


-Stitch Witchery (aka: ‘SW’ going forward so I don’t have to keep spelling it out) ***NOTE: I ENDED UP USING HOT GLUE BECAUSE THE STITCH WITCHERY WASN'T A STRONG ENOUGH BOND FOR THE BURLAP***


-heat transfer vinyl (or stencil letters)


-heat press (or iron)


-plastic grocery bags (or some other type of filler)


-hot glue gun/sticks


***This project ended up costing me ZERO DOLLARS...yep, zip, zilch, nothing...because I had everything already on hand.
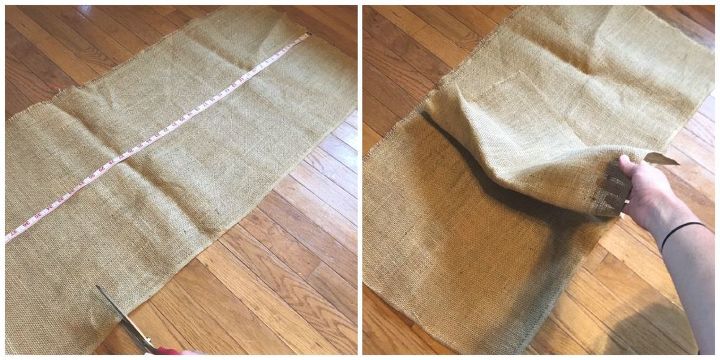
STEP 1: Measure and Cut Burlap


To start my pillow, I measured out how long I wanted it to be; I wanted mine to be long and thin to eventually put on a porch bench (for now it will go on my couch or bed) so I figured about 36” would be about right. Once my length was measured out, I cut TWO pieces of burlap — one piece for the front of my pillow and the other for the back. *Side note: after I cut my burlap, I realized I could have just doubled up my burlap and cut it altogether in one continuous piece. Feel free to do that!
STEP 2: Apply SW


If you’re a savvy sewer, you can skip this step and do your thing, but I am not good with a needle and thread (and I don’t have the patience for it…or the machine), so I chose to create my pillow with SW. [Little tip: you can also use hot glue instead but I use that for EVERYTHING, so I decided to use this method instead.] You’ll take a strip of SW and sandwich it on the edge of your two pieces of burlap, then iron the two edges together. I noticed as long as the burlap was hot, the SW was still able to be manipulated so I pressed down hard, gave a few spurts of steam and let it sit a second before ensuring the two pieces were instead adhered to each other. I did this step for the two longest sides (top and bottom) and one of the shorter sides.
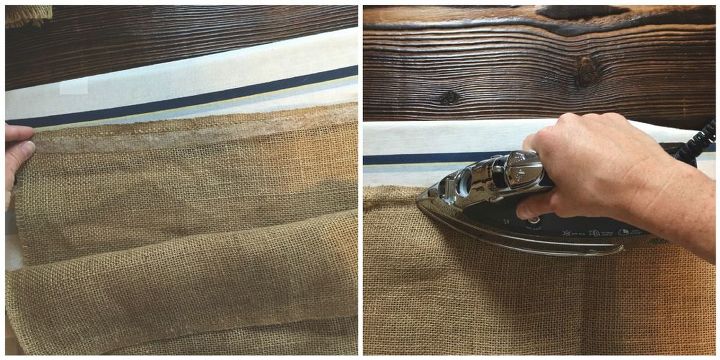
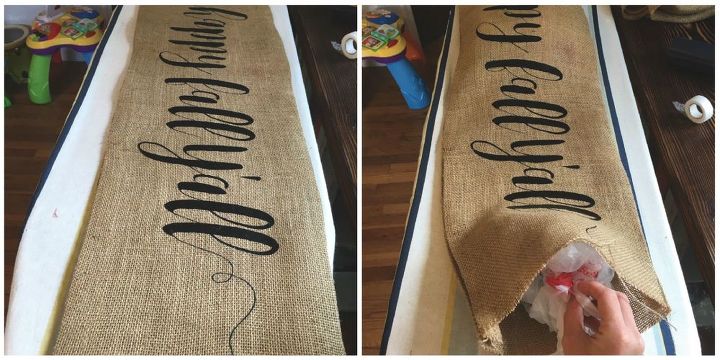
STEP 3: Flip burlap inside out and Iron


Once three of my four sides of burlap were adhered to each other, I flipped the burlap inside out. You don’t necessarily have to do this step but I wanted my pillow to have crisp, even edges (as even as I could get them), which is why I chose to do this method. After my burlap was inside out, I started at one end, pressed down the seam and ironed the edges — you’ll want to do this a little section at a time to ensure your seam is as straight as possible.
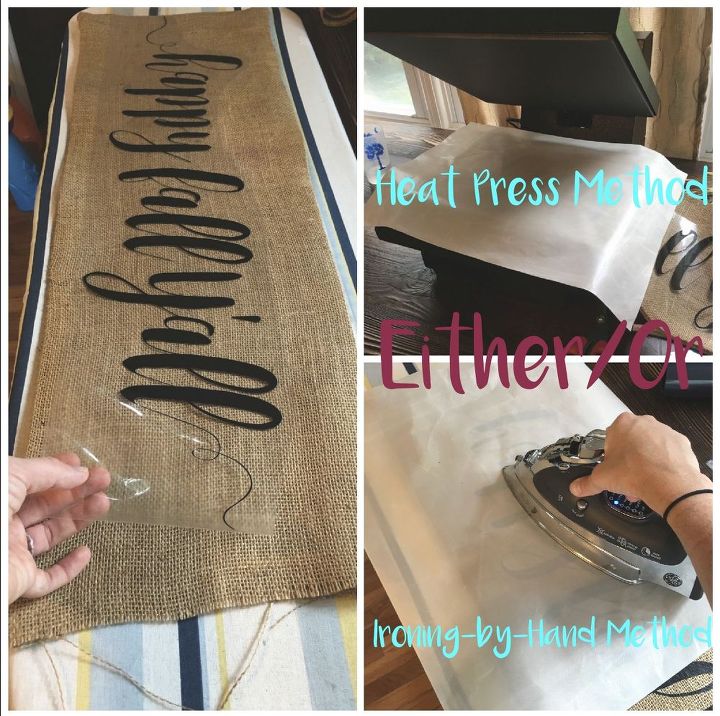
Step 4: Adding the quote


Ok so you can do this a number of ways. I personally have a Silhouette Cameo machine (shout out to all my Silhouette peeps!) and I use it for business but also to do fun, crafty things like this pillow. Of course, I know not everyone has a cutting machine and in that case, you still have a ton of options for creating your quote — you can go to just about any craft store or major chain store like Wal*Mart and buy a pack of stencils, you can create your own stencil with printer paper and a printer [with the stencil method, you would want to use fabric or exterior acrylic paint if it’s going outside], or you can even buy a roll of heat transfer vinyl (like what I use in this tutorial) from a craft store and create your own stencil/cut out words that way with an X-Acto knife.


In my case, I created the quote that I wanted my pillow to display (happy fall, y’all) in my Silhouette software, mirrored the image (You Silhouette peeps know what I’m talking about here! I always forgot to do this when I first started out.) and cut it out on heat transfer vinyl. Once your graphic is all cut and weeded out, stick it on your burlap and press it with a heat press or iron it. MAKE SURE YOU COVER YOUR GRAPHIC WITH A PIECE OF THIN FABRIC LIKE A PILLOW CASE OR WHATEVER PROTECTIVE SHEET CAME WITH YOUR HEAT PRESS!!! If you don’t, you’ll be sorry — the heat press/iron will melt that beautiful graphic of yours off.


*****If you’re using a stencil to create your quote, simply lay your stencil down on the burlap — I’d suggest inserting a piece of cardboard inside your opened pillow to ensure paint doesn’t bleed to the other side — and paint inside your stencil. I’d apply a coat of paint, let it dry, then apply a second coat just to be sure it’s all covered. Another tip would be to use a sponge tip brush to dab the paint on instead of painting it with a paint brush. Burlap can get a little annoying when you’re trying to paint because the fibers will start wanting to come off and get wrapped up in your brush which can lead to a mess and mistakes (i.e.: “coloring” outside the lines).*****
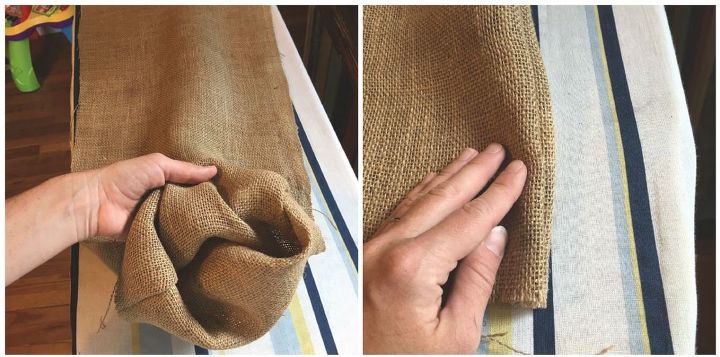
STEP 5: Fill the Pillow


After my graphic was applied (or if you used a stencil, after your paint dries), I filled my pillow to fluff it up. *Note: for your filler, you can use the cotton stuff you buy from the store or you can just use plastic grocery bags, those air bag things you receive when you order something, fabric you have laying around (though if you do a big pillow like me, I’m not sure if you’d have enough fabric laying around to stuff the pillow and make it fluffy enough) — pretty much anything that will allow your pillow to look filled out and enable it to sit up. I used plastic grocery bags and those little air bag packaging things I had in my basement. I stuffed my pillow enough where it looked formed but I didn’t want to add too much and it not sit up on it’s own.
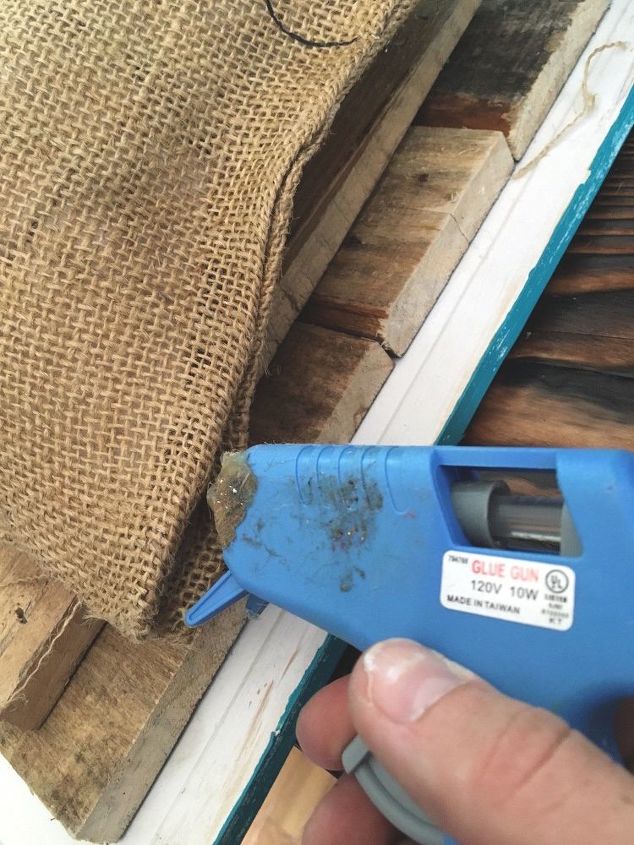
STEP 6: Close Pillow


Finally, I closed the fourth side (the other small side I had left open in the beginning in order to flip my burlap inside out). I folded both ends inward and carefully ironed them in order to make them stiff enough that I could let them go and they’d stay put. Then, I took a strip of SW, sandwiched in between the edges, and ironed them together. ......HOWEVER.....


As most of you DIYers know, you win some and you lose some, unfortunately. Once I was done with closing up my last seam, I looked back over my entire pillow and realized that the SW was just not holding the burlap together as well as I would've liked. Some places held together great while others were a bit sketchy, and I didn't want my pillow to literally fall apart at the seams, so even though I wanted to try a different adhesive medium, I ended up resorting back to my hot glue gun which did the trick. I'm assuming since the burlap is a heavier, more rustic material than regular plain Jane fabric, the SW just wasn't strong enough to hold it.
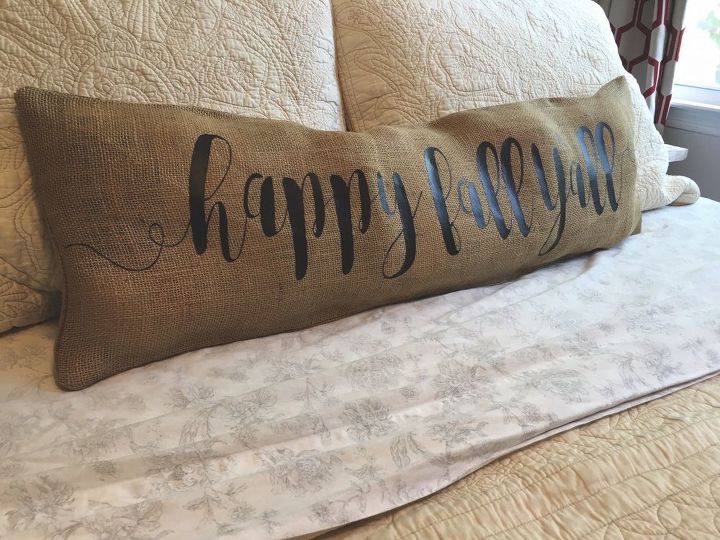
Despite my little hiccup, I absolutely LOVE how my pillow turned out. I’m all about rustic, however, burlap can get a bad wrap sometimes with maybe being TOO rustic and I think this project shows that it can still be classy if you use the right touches (in this case, the font).
Suggested materials:
  • Burlap   (on hand)
  • Hot glue gun/sticks   (on hand)
  • Heat press (or iron)   (on hand)
See all materials
Frequently asked questions
Have a question about this project?
  1 question
  • Anita Anita on Dec 28, 2018

    I see so many different Burlaps. Did you use a specific weight/type?

Comments
Join the conversation
3 of 8 comments
Next