


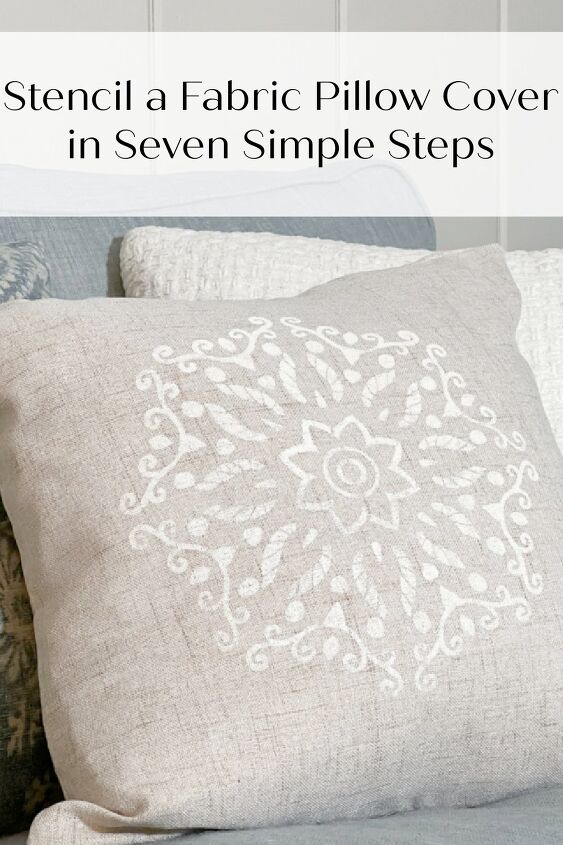
Stencil a Fabric Pillow Cover in Seven Simple Steps
You can never have enough pillow covers! Changing a pillow cover is a simple way to update your home’s decor. Follow this tutorial to learn how to stencil a customized fabric pillow cover using acrylic craft paint and a Makely stencil in seven simple steps.
This post contains affiliate links for your convenience. There is no additional cost to you. Please see my disclosure policy for more information.
Do you love pillows? I do. Pillows just make a space look so cozy and comfortable. I don’t know how many I own, but my husband would tell you that it’s probably too many.
So instead of buying more pillows, I just change out the pillow covers. It is a great way to update the look of your space without spending a fortune.
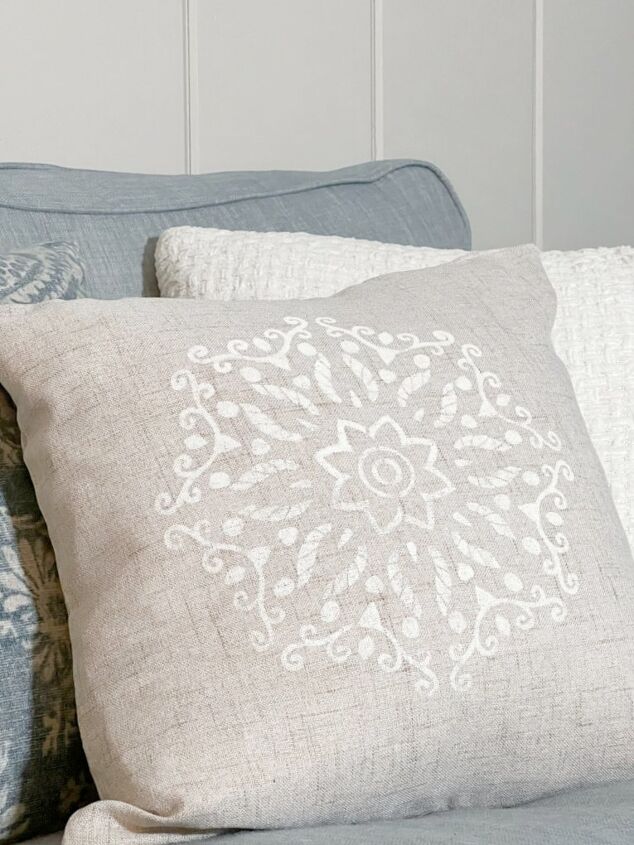
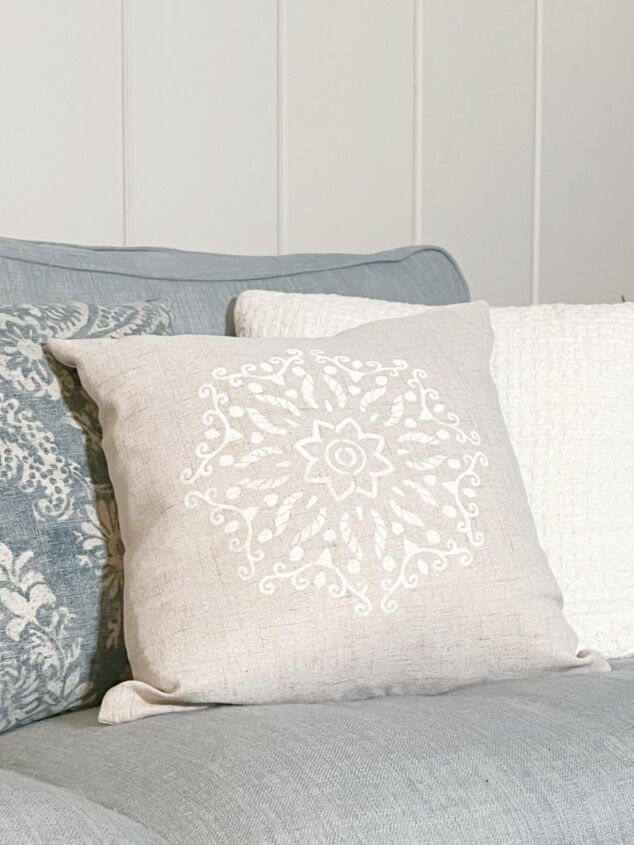
Pillow covers are also easy to personalize and customize for any decor style or occasion. Last spring, I made this sweet pillow cover for a special grandma and today I am sharing a beautiful stenciled pillow cover. I think this design looks a little like a delicate snowflake…perfect for winter decorating!
I love to craft and add personal touches to my home. I am always looking for craft supplies that are simple to use and are versatile. I am so happy I found Makely. This online shop is a family-owned DIY craft kit and supplies company, who offers high quality hand-picked craft supplies and carefully curated craft kits. These supplies make it easy to add a little creativity to your home.
I have a special offer for you from my friends at Makely!
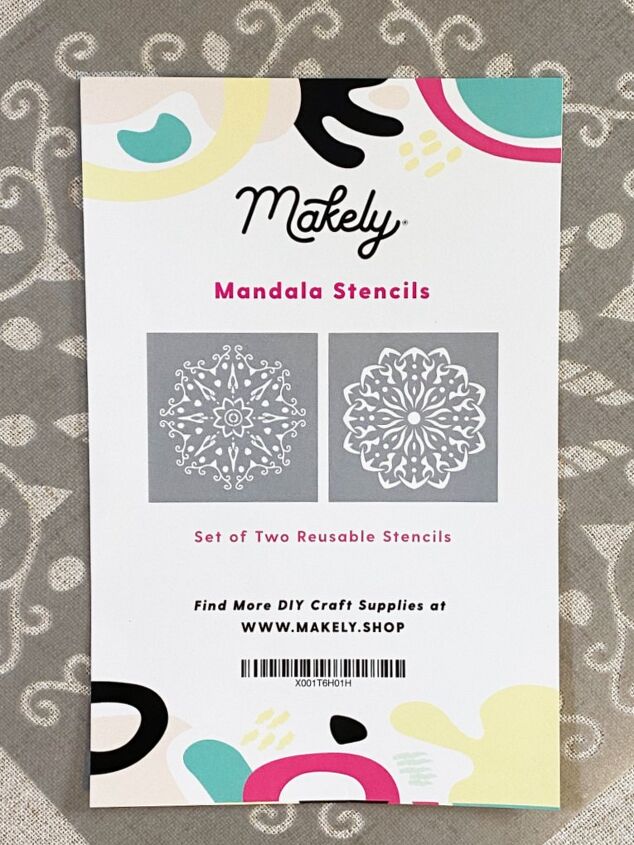
From now until Sunday Feb 13, you will receive a 25% discount for the Mandala stencils (these are the ones that I used for my stenciled pillow cover) by using the coupon code 25MYTHYME at checkout. You will also receive a 15% discount for all of our other stencil designs by using the coupon code 15MYTHYME at checkout.
- pillow cover (I used these faux linen pillow cover with an invisible zipper from Amazon.)
- Makely Mandala stencil
- acrylic craft paint (I used DecoArt acrylic craft paint in warm white.)
- fabric medium
- paper bowl or tray to mix paint with medium
- sponge stencil brush
- piece of cardboard
- First, wash your fabric pillow cover and iron it.
- Next, mix your fabric medium with paint. Follow the instructions on the label. For the textile medium I used, I mixed two parts medium to one part paint.
- Prepare your pillow cover for painting by inserting a piece of card board and waxed paper inside the pillow cover. This will ensure the paint will not bleed through.
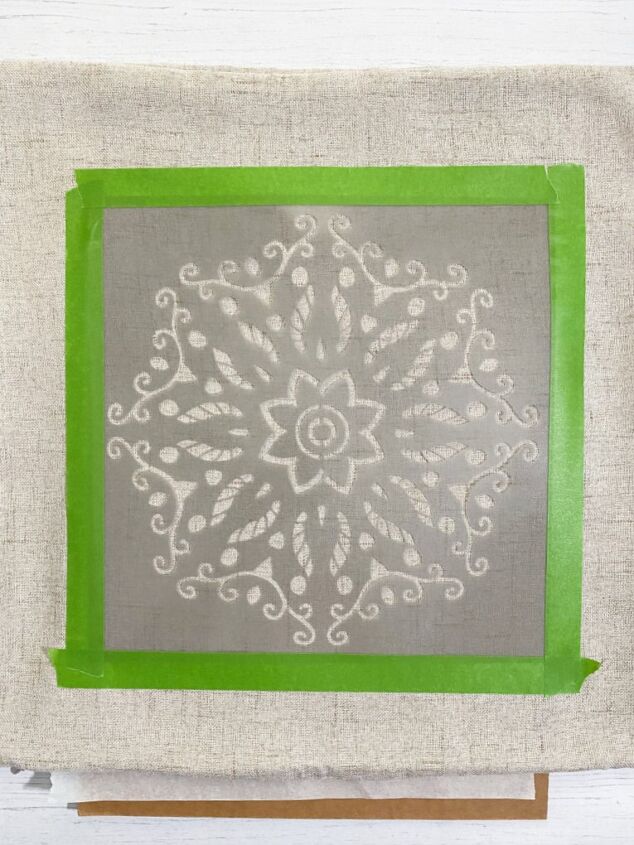
- Measure the pillow cover and place your stencil. Using painter’s tape, secure the stencil onto the pillow cover.
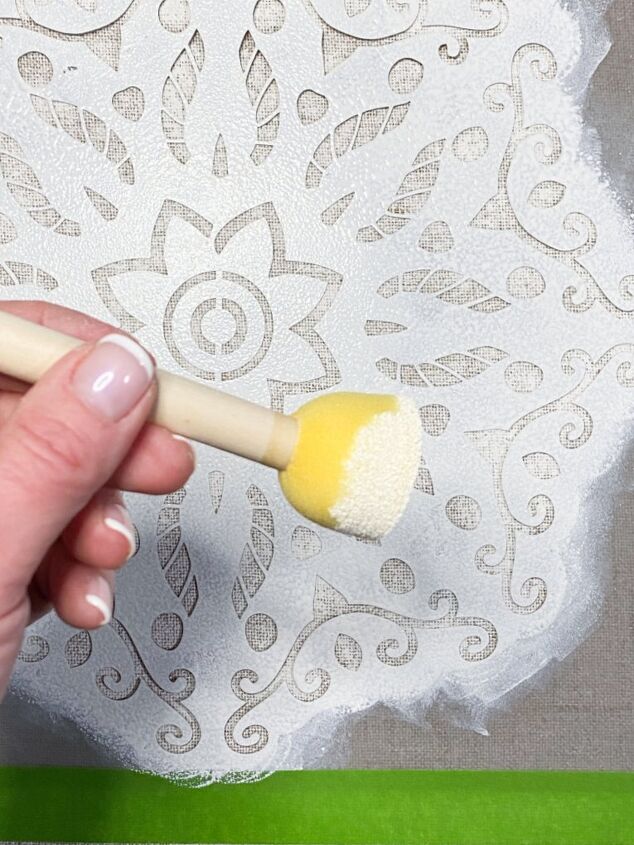
- Using a sponge stencil brush, with very little paint, lightly dab a thin layer of paint. Do not brush. Then, let the paint dry. You can also dry it with a hair dryer on low speed, using medium heat.
- Repeat and stencil another layer. For my pillow cover, I stenciled three light layers to achieve the look I wanted.
- When your stenciled design has completely air dried for at least 24 hours, seal your painted design with heat.
Acrylic paint can be used on fabric. To help ensure it will stay and wash well, you should wash and dry your fabric first. Then, you can use acrylic paint, but you will need to mix your paint with a fabric medium.
Fabric medium helps acrylic paint adhere to fabric. By mixing fabric medium into your acrylic paint, your paint becomes diluted and therefore, thinner. Now the paint can be absorbed easier by the fabric. The medium helps the paint to stick to the fabric better.
There are a couple different ways you can do this. Once your project is completely dry, you can seal acrylic paint with heat by putting your piece into your dryer (by itself to ensure the paint doesn’t bleed at all), or with an iron. If you choose to use an iron, set the iron on medium heat with no steam. Turn the pillow cover inside out. Place a press cloth inside, between the front and back of the cover and iron the reverse side of your stenciled design. Iron for about 3 minutes, moving the iron back and forth. Be careful as the fabric will be hot.
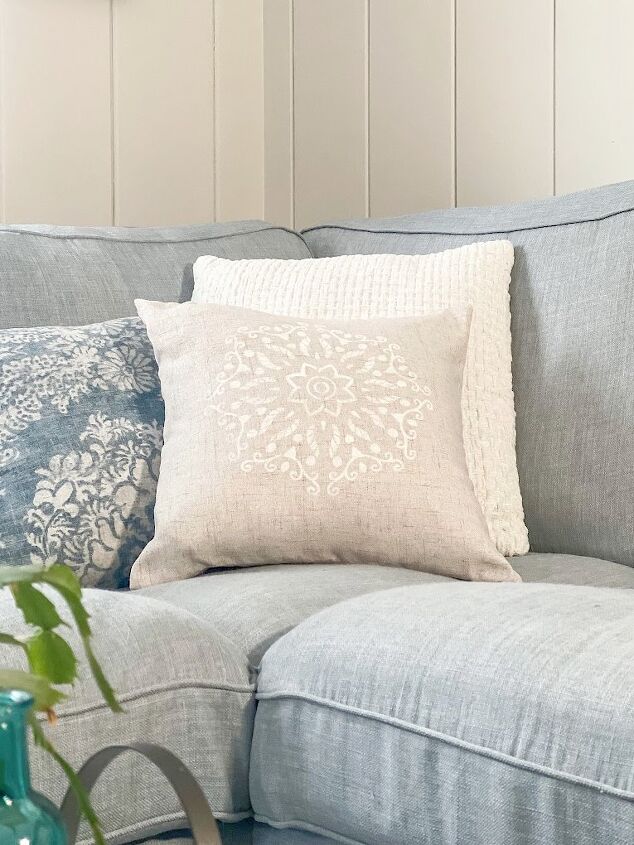
This pillow cover makes me smile. I love the white paint, but think I might want to make one with navy or gold paint too! What color would you choose?
If you have any questions about this project, please don’t hesitate to ask. Please let me know if you stencil a pillow cover. If you post it, please tag me. I would love to see and hear about your projects!
Thank you so much for visiting today! I would love to connect with you on Facebook, Instagram, Pinterest, or here on the blog!

Pin the image below to Pinterest by clicking the Pin button in the top left corner. I hope you’ll also follow me on Pinterest!
DIY Farmhouse-Style Sign
Easy Spring Floral Wreath
Easter Bunny Reverse Canvas
How to Make Decoupaged Easter Eggs
DIY Faux Mercury Glass Votive Holders

Comments
Join the conversation
-
Just finished and I made tassels to finish them off!
-
They look great! I love the idea of adding tassels. So pretty!


Frequently asked questions
Have a question about this project?