


Throw Pillows DIY // Cute + Affordable // ON A BUDGET
Hey guys! Today I wanna share with you how to decorate some pillow covers with supplies that you might have in your stash.
Throw pillows are a great budget-friendly way to spruce up a space like your living room, bedroom, guest room, or kid’s room. When I want to refresh a space, throw pillows are my go-to solution.
So, let’s begin!
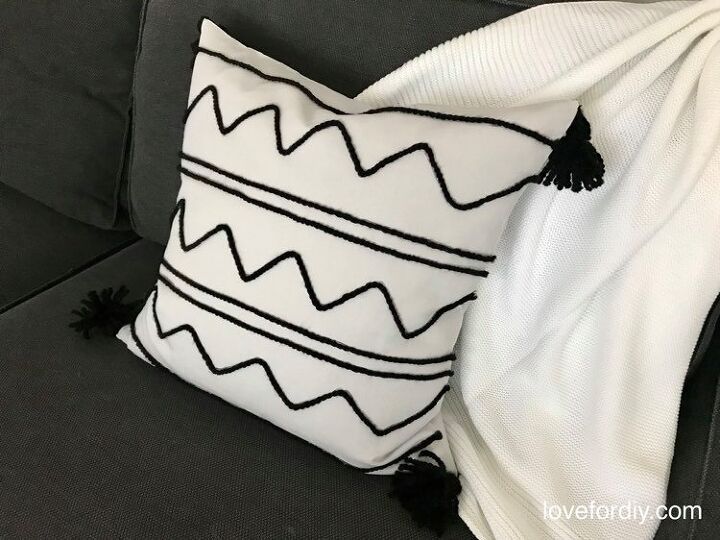
Throw Pillow 1
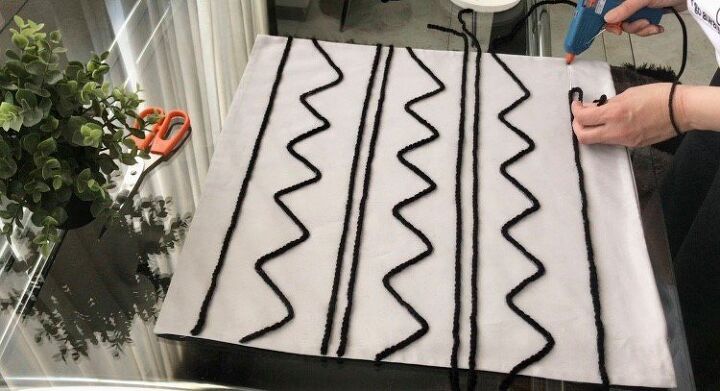
First, I hot glued the yarn in a straight line at the top of the pillow cover, and for the next row, I glued the yarn in a zig-zag pattern. I love how this pattern adds some dimension to my pillowcase, so I kept on gluing the yarn in this style, which I think is self-explanatory.
Then I cut off the excess yarn, and I went on and created my tassels!
How to make the tassels
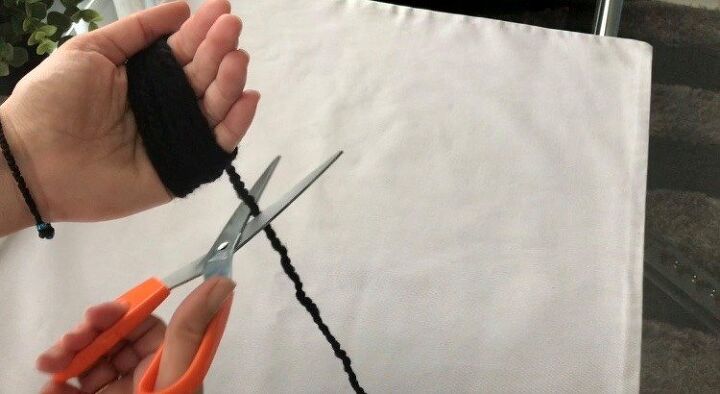
I created four tassels for each corner of the pillowcase, and I started by wrapping the yarn fifteen times around my hand and then cut off the excess with a pair of scissors.
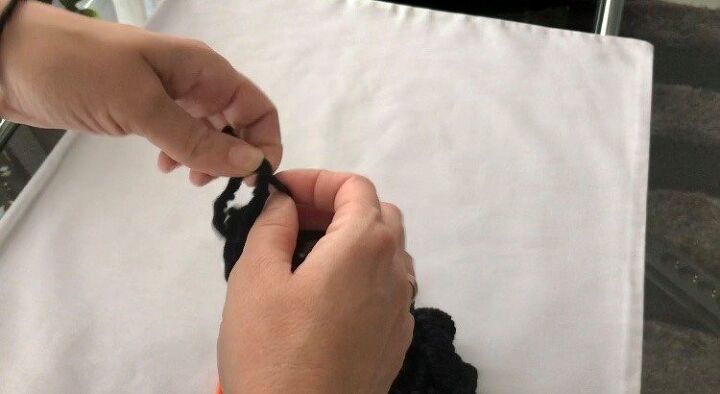
Next, I cut off a piece of yarn and passed it through the loop, and I made a double knot.
After that, I snipped off another piece of yarn and tied a double knot about an inch of the top of the tassel.

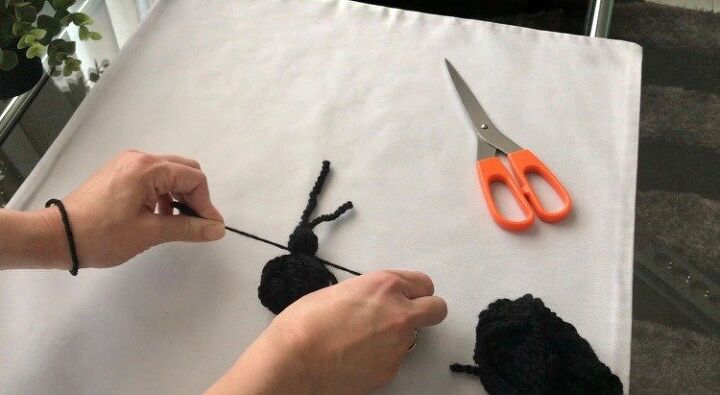
Then I took my scissors and cut all the loops.
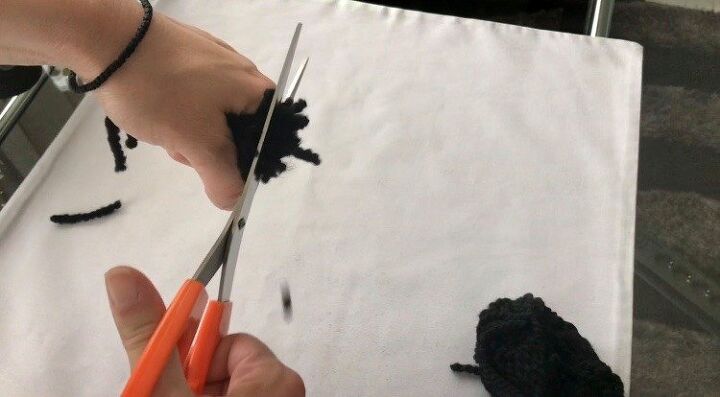
Finally, I trimmed off my tassel to make it look nice and even.
Add the tassels to your pillow cover
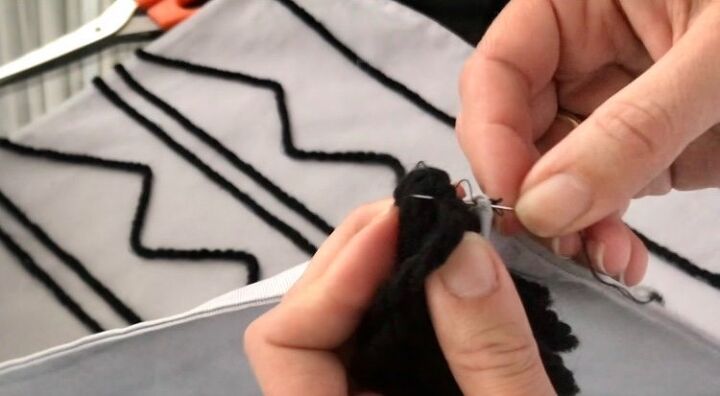
Next, I took a needle and a thread, and I hand stitched the tassel to the corner of the pillow, and once it was nice and secure, I trimmed off the excess yarn…and this is how it turned out!
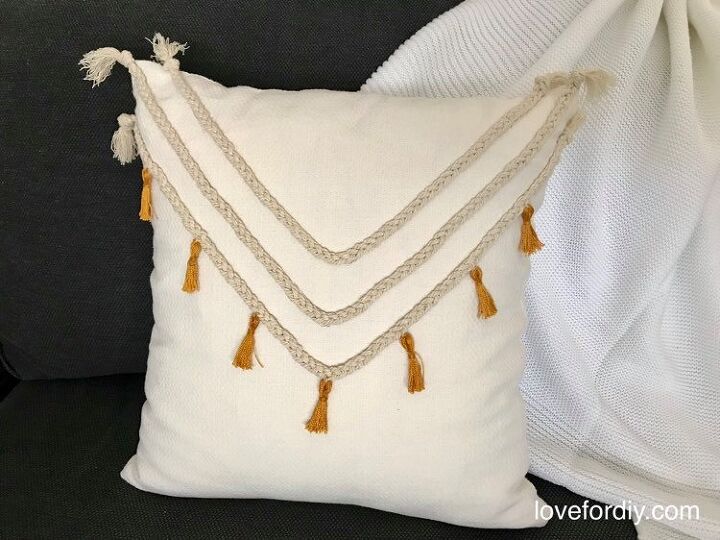
Throw pillow 2
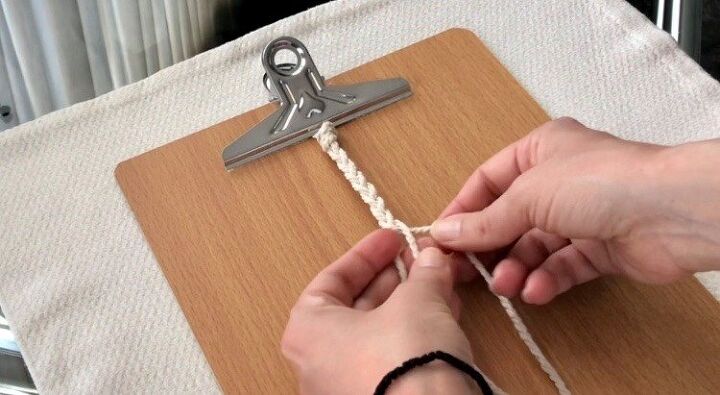
I started by cutting off three equal-length pieces of cotton rope to make a braid. Then I made a knot about 2″ from the top, and I attached the end tails to a clipboard to stabilize it and work on my braid more easily. When you finish with the braiding, tie a knot making sure to leave 2" from the end.
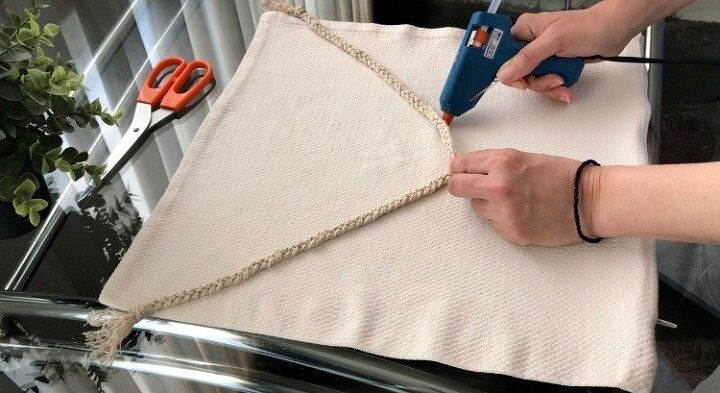
Then I placed my braid on my pillowcase in a V shape, and I hot glued it in place. As you can see, the ends of the braid sit about an inch down from the top corners of the pillow.
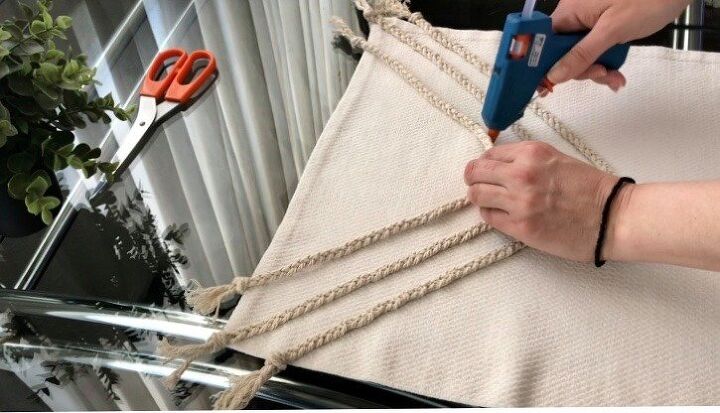
Next, I lay down my second braid on top of the first one in the same form, but this time the ends of this braid sit right on the corners of the pillow. And then, I glued the last row that sits about 2″ in from the corners.
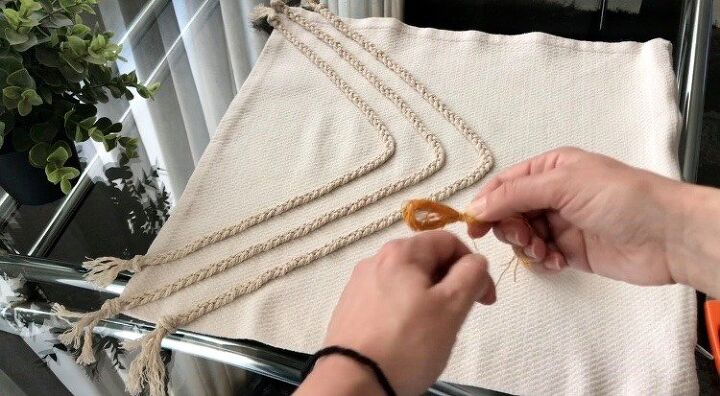
Now it’s time to make the tassels as we did with the first throw pillow, only this time, I wrapped the embroidery thread thirty times around my three fingers.
And the other difference is that I wrapped the thread around the tassel many times and then made a tight knot to secure the tassel in place.
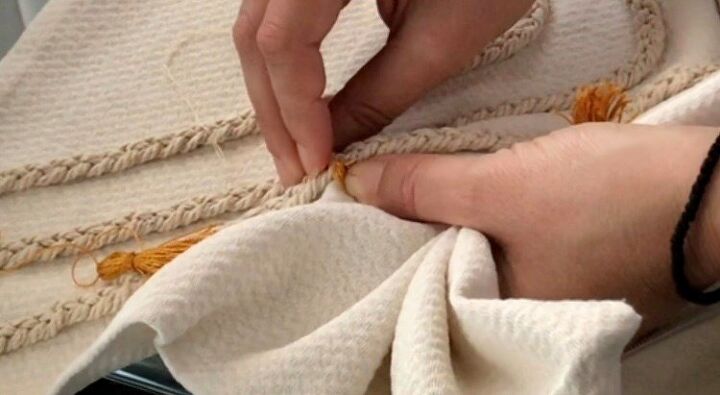
I made seven tassels in total, and I hand-stitched each one at the bottom braid.
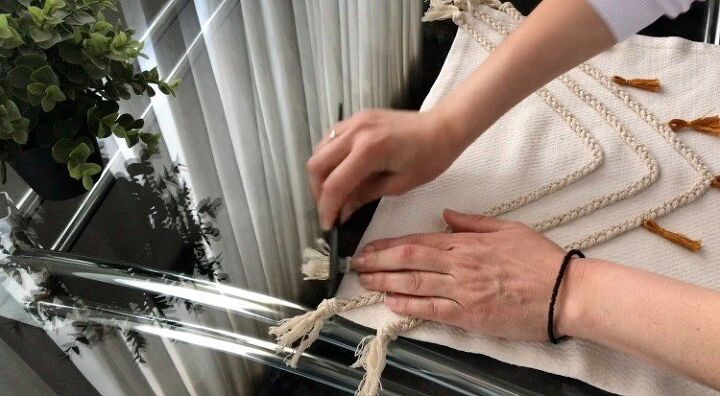
Then I went on and unraveled the end tails of the braids, brushed them with a comb, and finally cut them, leaving a space about 2″ from the knot, and… here is how the second throw pillow turned out!
If you want more details on these projects, check out my video tutorial!
Thanks for stopping by!
Lot’s of love
Evi
Resources for this project:
See all materials


Comments
Join the conversation
-
Very inspiring! Possibilities - endless....
-
Your choices are very pretty and classic. I don’t think I’d wash unless sewn on (hand or machine). But I’m inspired. Thanks for sharing


Frequently asked questions
Have a question about this project?
What glue did you use???
What kind of paint can I use to redo my bathroom cabinets