


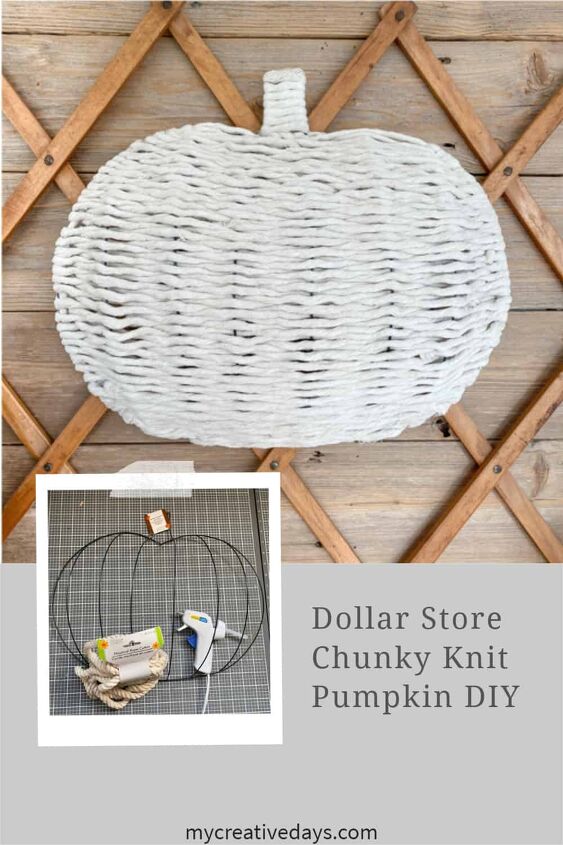
Chunky Knit Pumpkin DIY – Dollar Store Craft
This dollar store chunky knit pumpkin DIY ended up so much better than I imagined.
I was not planning on making these at all. I found two wire pumpkin forms at my local thrift store. They are sold at Dollar Trees as well. I have never seen them at my Dollar Tree, but when I was doing a live video showing how I put these together, people were telling me they sell out very fast in the store. You can order them online but you have to buy a case of 24. That’s alright. You can make a few for your home and make more for gifts! 🙂 I also found them on Amazon HERE.
When I saw them in the thrift store, I picked them up because I knew I could do something with them. I just wasn’t sure what that was right away. Fast forward a couple of weeks and I picked up one of the nautical ropes while I was in Dollar Tree. I was planning on using the rope for my mini pumpkin wreaths, but that didn’t work.
Fast forward a few days and the pumpkin wire forms and the rope were sitting on my work table. I thought, let’s see what happens when I take the rope apart. Taking it apart left me with three different strands. Then I thought, let’s see what will happen if I put the strands of the rope on the wire pumpkin. After playing around with it for a bit, I came away with one of my favorite fall projects to date!!!
{Affiliate links are used in this post. Click on any of the underlined links to find the products I am talking about. You can read my disclosure HERE.}
The final result looks like a chunky knit pumpkin and it only cost $4!!!! I was so excited about the outcome that I got on Instagram and Facebook that day and had to share the project live.
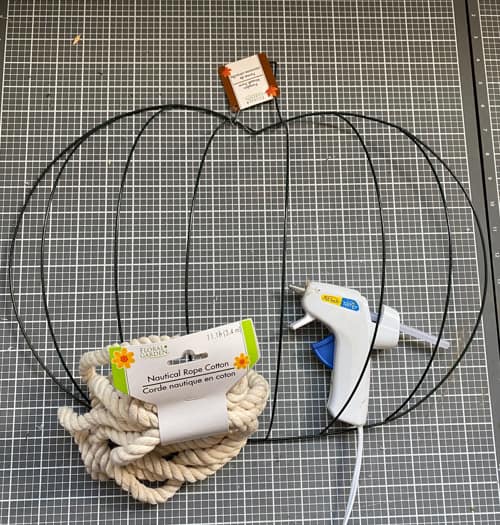
Rope – Dollar Tree (you need 3 ropes per pumpkin)
Scissors
I tried doing this project a few different ways. I am sharing the steps that gave me the best result here.
The first thing you have to do is take apart the ropes. You need three ropes per pumpkin you make. The ropes are made up of three strands “braided” together and taped on each end. You just have to pull the strands apart on one end so the tape is pulled off and not holding them together. Once that is off, start “unbraiding” them to get them apart until you end up with three separate strands.
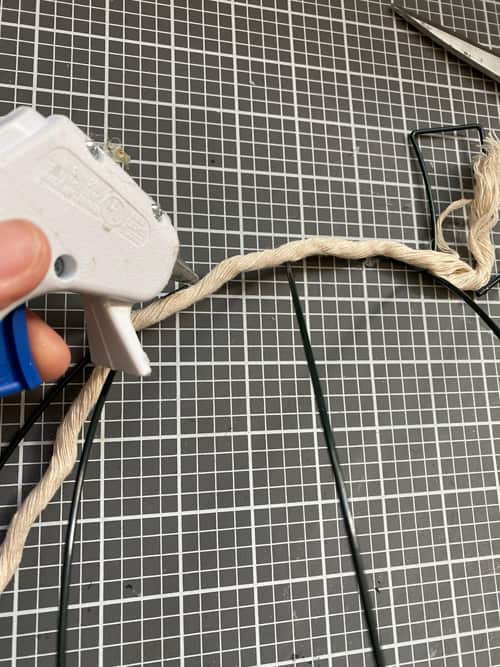
Next, you are going to hot glue one of the strands around the outer wire of the pumpkin. You will start with one end of the strand and leave about 3″ “excess” that isn’t hot glued. Start hot gluing at the top by the stem. You will only hot glue this strand on the outer shell of the pumpkin form. You don’t need to do the wires that run vertically on the pumpkin and you don’t need to do the stem. The strand you hot glue around the pumpkin will be longer than you need. Once we get around the pumpkin and end up at the top on the other side of the stem, hot glue it in place. Now, I would leave about 3″ excess here and cut it off and tie the “excess end” I started with and the “excess end” I ended with together. (You will get a better understanding of what I mean in my video below). That is just the way I did it, but you wouldn’t have to cut that off when you reached the top and you could just start weaving the strand.
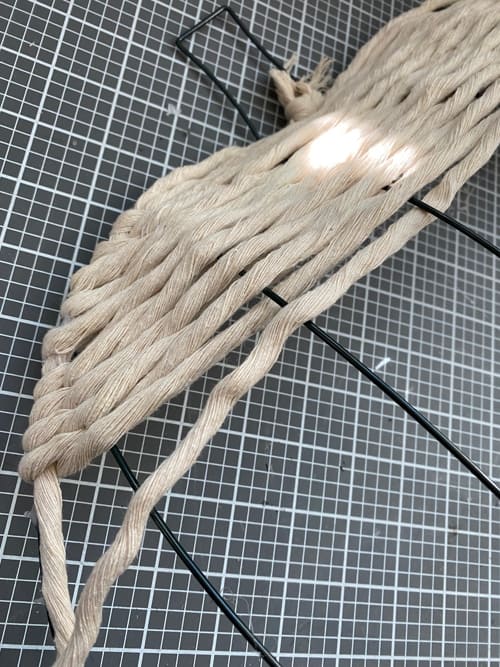
Once you have the outer part hot glued down (this helps keep the strands in place as you are weaving), it is time to start weaving. You will basically, weave the strands until you fill the entire pumpkin. I just started at the top near the stem and went to the right. You want to do the regular over/under weave through each vertical wire on the pumpkin.
Once you get the side of the pumpkin, you just take the strand around it and start weaving the other way (again, you will see how I did this in the video below). You can use some hot glue on the sides of the pumpkin to help keep the strands in place – especially around the curves of the pumpkin. Once you are weaving in the middle of the pumpkin, it goes really fast because the strand you hot glued around the outer part will help keep the strands on the sides as you are weaving. The middle part of the pumpkin is straight as you weave so it will stay in place.
You will come to a point when you run out of your rope strand. At this point, just tie the end of the strand to a new strand and keep weaving. I would hold the knot towards the back (see video below) and that helped so you can’t really notice them at all. As you continue weaving, it fills in so well that the knots almost get lost in it all.
Once you get to the end of the pumpkin, keep weaving until you don’t have any more vertical wire on the pumpkin to weave through. I used some hot glue on the last row of weaving to keep it in place. You will have some excess at this point. I cut that off and it was enough to do the stem.
With the stem, I hot glued the end of the strand I just cut off on the bottom and started wrapped the stem with the strand. When I got the entire thing covered, I hot glued the top to put it together and close the gap. Cut the excess strand off or you could use it to hang the pumpkin if you wanted to.
It is kind of hard to describe this process in writing, so I am including the live video I did putting these together. I am a visual learner so it’s always easier for me to see things being done. The sound cuts out during the video because my internet was acting up. Sorry about that. The video will come back on and you will be able to see and hear the entire project.
You could die the rope to make these in different colors. I LOVE the chunky knit look this rope gives, but you would also do this with yarn, fabric, ribbon and many other things. I think it would be fun to do them with some plaid flannel shirts or blankets from the thrift store. I love plaid for fall.
Is this Dollar Store Chunky Knit Pumpkin DIY a project you would try?
If you do, I would love to see it! Share a photo and tag me @mycreativedays on Instagram.
PIN THIS POST!
Upcycled Pumpkin Craft Project
DIY Pumpkin Lantern Made From A Yard Sale Find


Frequently asked questions
Have a question about this project?