


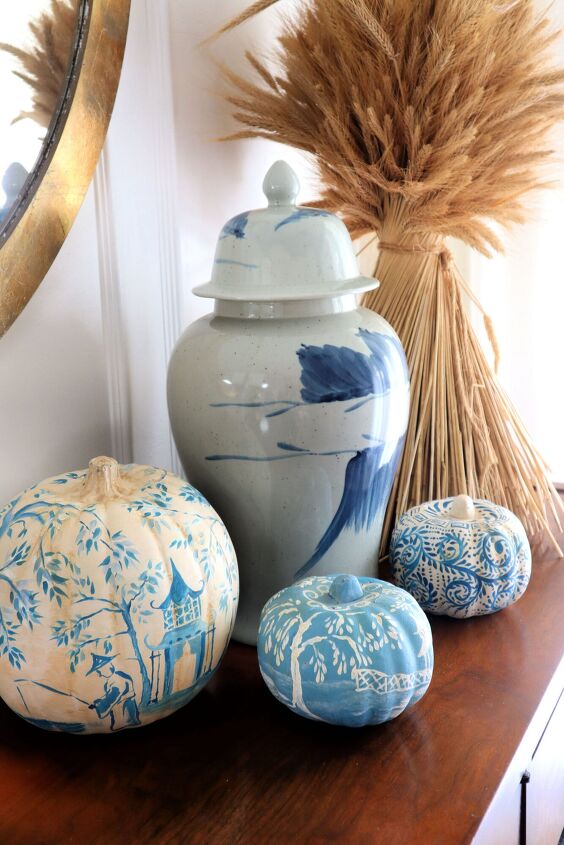
DIY Hand-painted Chinoiserie Pumpkins From the Dollar Tree
DIY Chinoiserie Pumpkins from the dollar tree…might contain affiliate links…disclosure here.
These hand-painted pumpkins were a fun departure from my usual sewing related/ DIY/ home maintenance content. Sometimes you just need to do something out of the ordinary and just for the fun of it.
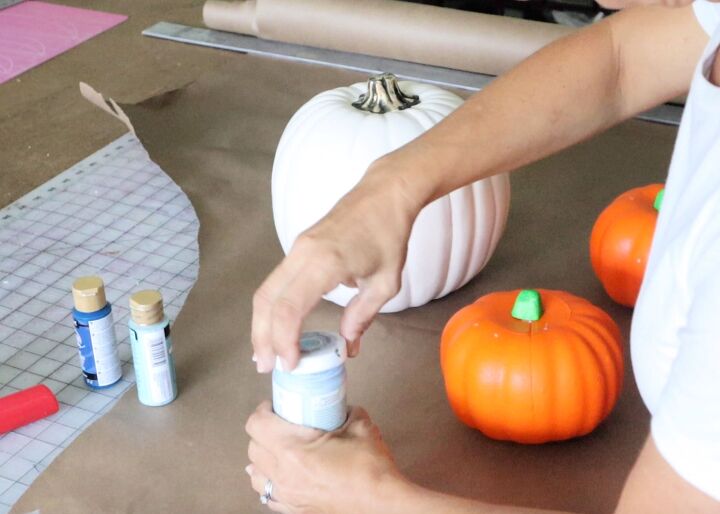
I bought the two orange pumpkins at the Dollar Tree and the large pumpkin I bought at Micheals Crafts. I painted all three pumpkins with a couple coats of craft paint base coat. Even though the large pumpkin was already a very similar color to the base coat, I painted it anyway so it would have the same matte sheen and texture.
I used regular craft paint, even for the base coat.
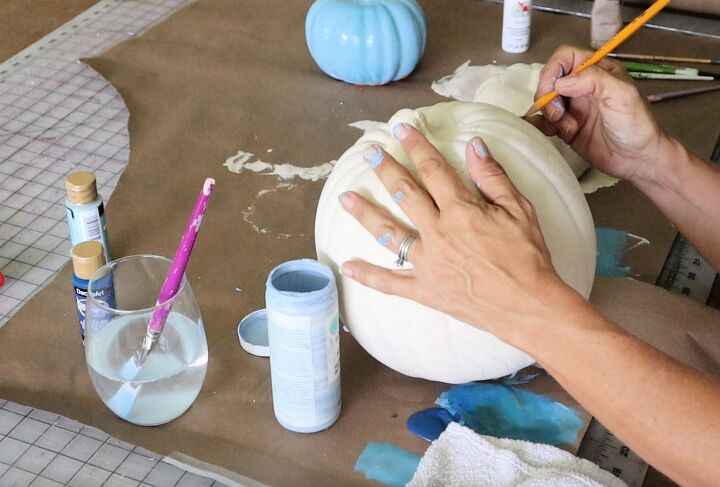
Once my base coats were dry, I propped my computer on my work table with Pinterest onboard, and sketched the Chinoiserie design on the large pumpkin with a pencil. I used a variety of images from wallpapers to fabrics and blended all my favorite elements of Chinoiserie style. My love of Weeping Willow trees inspired most of the design. Obvs. …
However, if you don’t feel confident in just sketching the design you could print out your favorite elements, make your print into transfer paper, and then transfer the designs to the pumpkins. I have a tutorial on DIY transfer paper
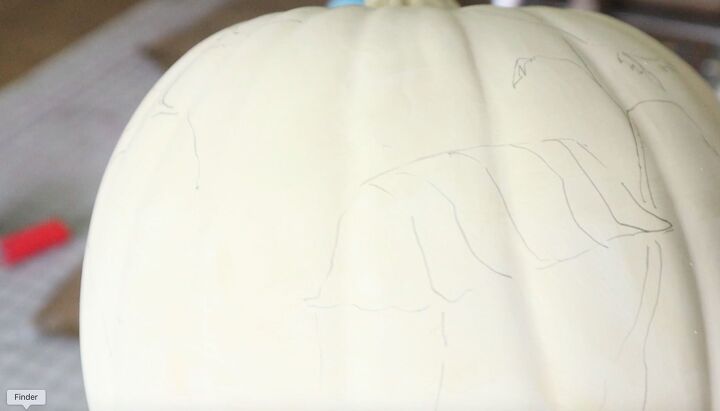
Close up of my loose sketching on the large pumpkin.
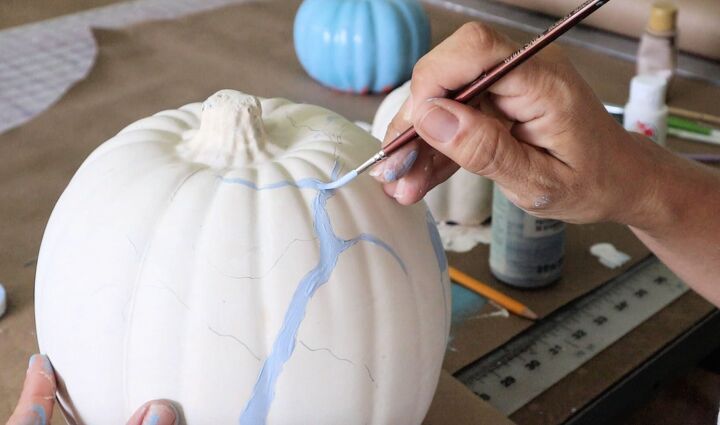
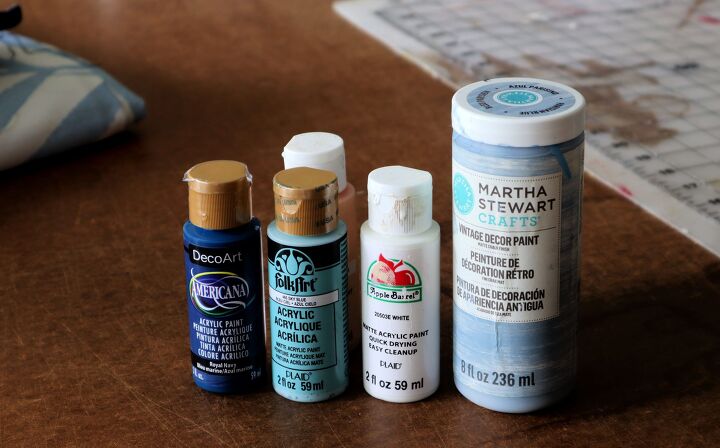
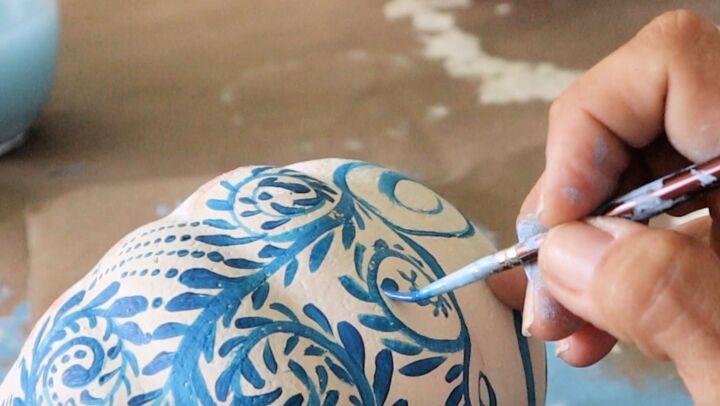
I painted all the backgrounds with the light blue Martha Stewart Paint first.
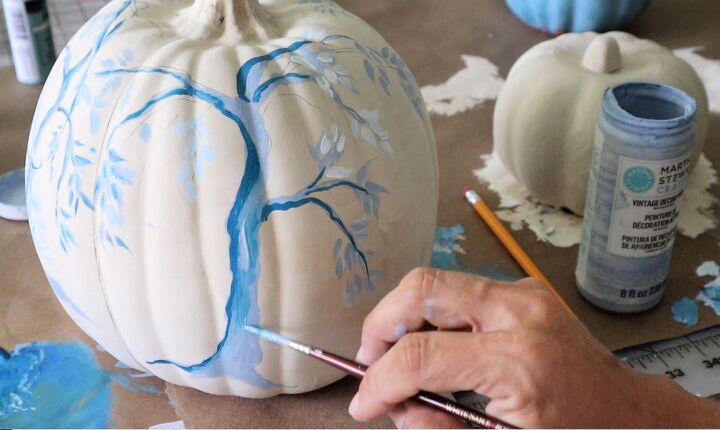
After all the basic shapes were established with the light blue paint, I started to add some dimension with the dark blue paint. The light blue paint was still wet at this point, so I was able to easily blend the colors to get a nice soft look.
Sidenote: At this point the pumpkin looks undesirable, and I wanted to quit and throw the pumpkins in the trash. However, I know this is usually the case mid project, so I just pressed on. And as usua,l it came together and I really like how they turned out. So, just finish the project and see how you like it in the end. Trust the process. 😉
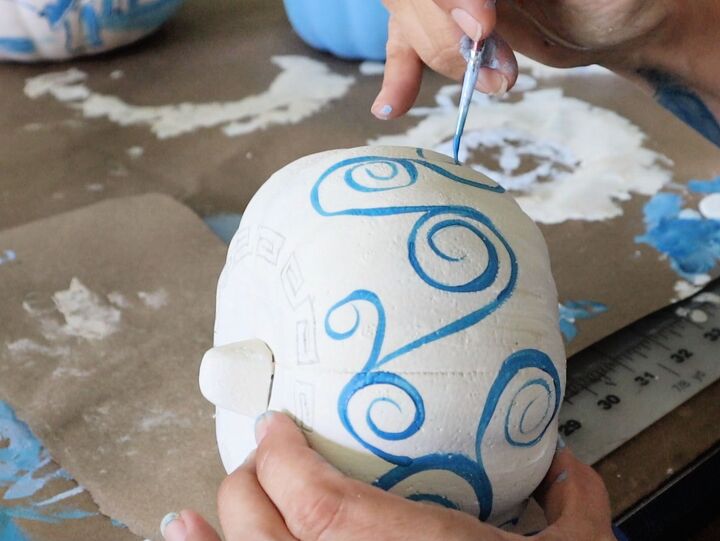
This next pumpkin I just free-handed the design with my paint brush. This swirl design goes all the way back to my Levi’s in high school, so I didn’t need to pencil sketch first. 🙂
After adding all the swirls, I painted all the leaf shapes then the dots. The key to this design is a good quality filbert brush. It needs to have a firm bristle and a nice point. Watch the video below to see the technique in action.
The third pumpkin I made very similar to the first large pumpkin in terms of design, just inverted. I painted the background blue and made the design white.
There you have it…a super fun afternoon project to do for fall. A departure from the usual fall decor.
Summary
Article NameDIY hand-painted Chinoiserie PumpkinsDescriptionHow to handpaint Dollar Tree pumpkins in the Chinoiserie Style.Author

Comments
Join the conversation
-
Beautiful. You win first place!!! ❤️❤️❤️
-
Very pretty!
But for people who can't paint (like me), this is pretty and easier! I chalk painted, added bling then dollar tree feathers and flowers.


Frequently asked questions
Have a question about this project?