


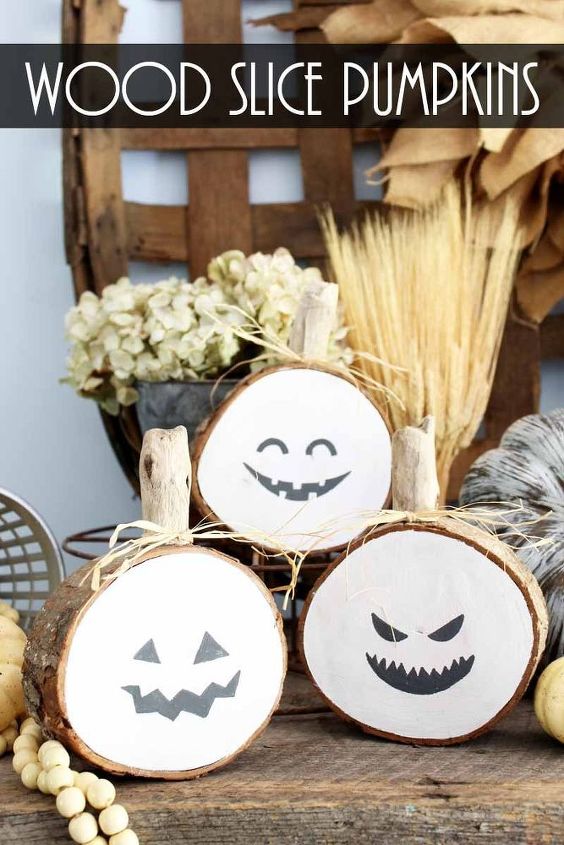
DIY Pumpkins From Sliced Logs
2 Materials
$00
0 Minutes
Easy
These log slices make the perfect rustic pumpkins for your stylish farmhouse decor. Halloween decorations can be festive and gorgeous! Read on to see how...
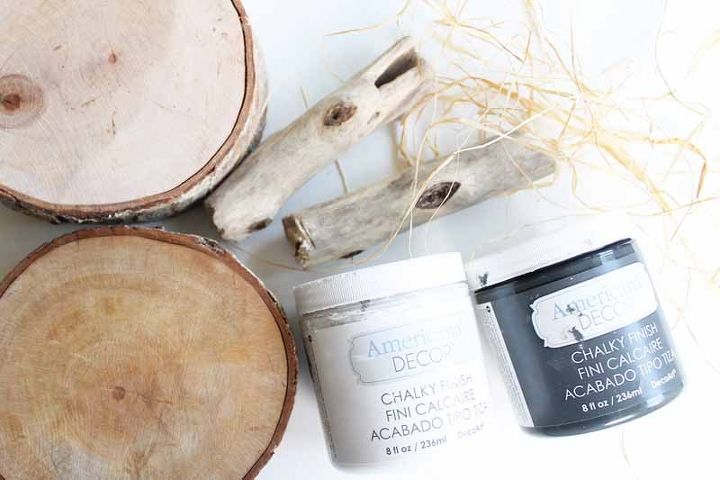
Supplies needed to make these wooden pumpkins:
- Americana Decor Chalky Finish Paint in Relic and Everlasting
- Wood slices (thicker slices will stand better)
- Paint brush
- Driftwood pieces
- Raffia
- Hot glue and glue gun
- Pumpkin pattern ( click here to download)
Instructions:
Paint one side of your rustic wood slices with the white paint. Leave the bark around the edges unpainted. For a rustic look, only use one light coat of paint. Allow to dry completely before continuing.
Then download your pumpkin pattern from above and print.
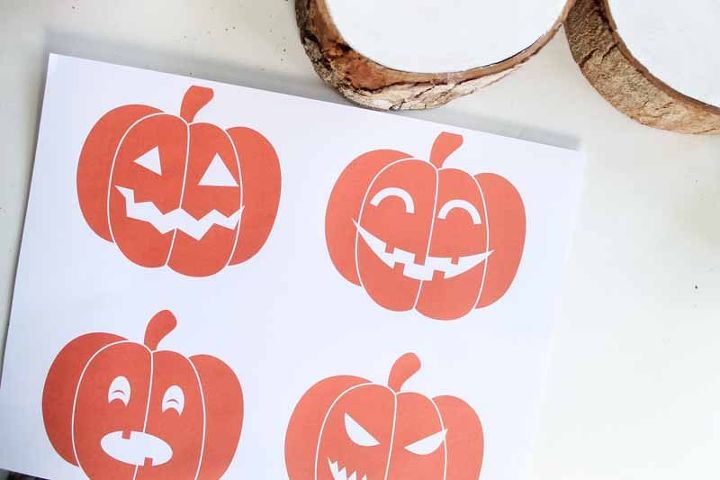
Place the pumpkin pattern on the white painted side of your wood slice. Tape or hold in place and use a pen to trace around all of the details pressing down well. Trace only the facial features.
After tracing, lift up your paper and you will see a slight indent in your wood slice everywhere you traced the pattern. These make the perfect guides for painting.
Add a dark paint (in this case a dark grey) in the outline areas. Again, I only added one coat because I wanted rustic wooden pumpkins.

For tips on adding driftwood stems, using raffia, and the final reveal, visit me at The Country Chic Cottage.

Want more details about this and other DIY projects? Check out my blog post!
Comments
Join the conversation
1 comment
-
Great idea for my grandkids!! Thank you!


Frequently asked questions
Have a question about this project?