


How to Easily Paint an Abstract Pumpkin
Hmm…how to paint an abstract pumpkin?
No, how to EASILY paint an abstract pumpkin!
I’VE GOT YOU!
Allow me to reminisce for a moment.
My childhood memory of fall pumpkins consists of carving my Halloween pumpkins: two triangles for eyes, one triangle for a nose, and a mouth with one straggly tooth. (Two straggly teeth if I was feeling particularly creative!)
Creativity with pumpkins decorating has exploded and I couldn’t be happier!
Pumpkin love begins in September and continues through Thanksgiving. There are so many amazing and creative ways to decorate a pumpkin to go with your home decor and holiday decorating.
I think I need to “up” my childhood version of decorated pumpkin and offer something a little more in line with my home and love of color.
My Contribution
Nail polish.
Yup! That is my creative contribution!
Think about….there are zillion colors to choose from and you can pick up a bottle inexpensively at any grocery or drug store.
Not making a connection between a pumpkin and nail polish?
Let’s romanticize it a bit…how about painting an ABSTRACT pumpkin using nail polish!
How?
Well, let me show you!
Supplies
This is a pretty straightforward list…
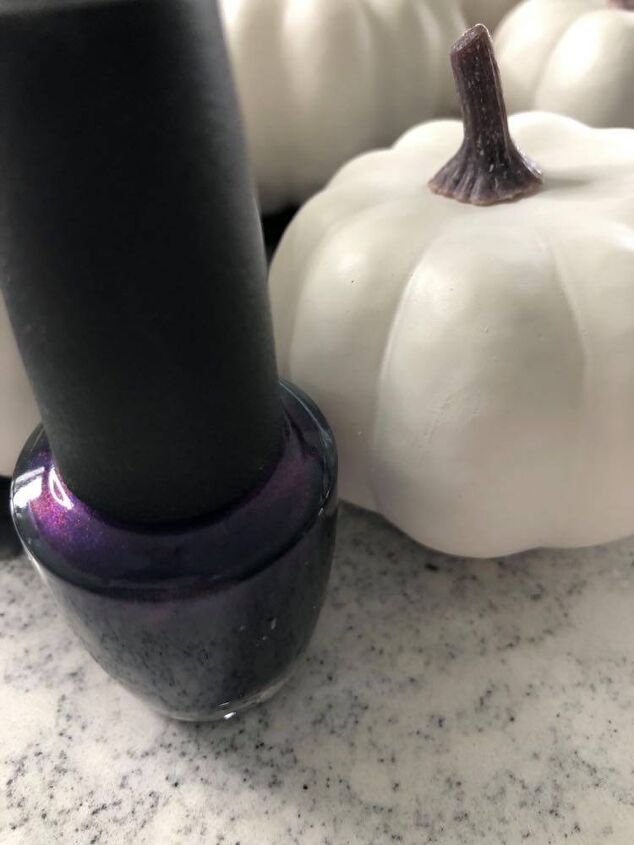
- Nail polish – Go with whatever color you like! I opted for OPI nail polish in “Russian Navy”. ( you can see it here) Choose your favorite color!
- Plastic container
- Wood stir stick (I ended up not using it but it might work for you.)
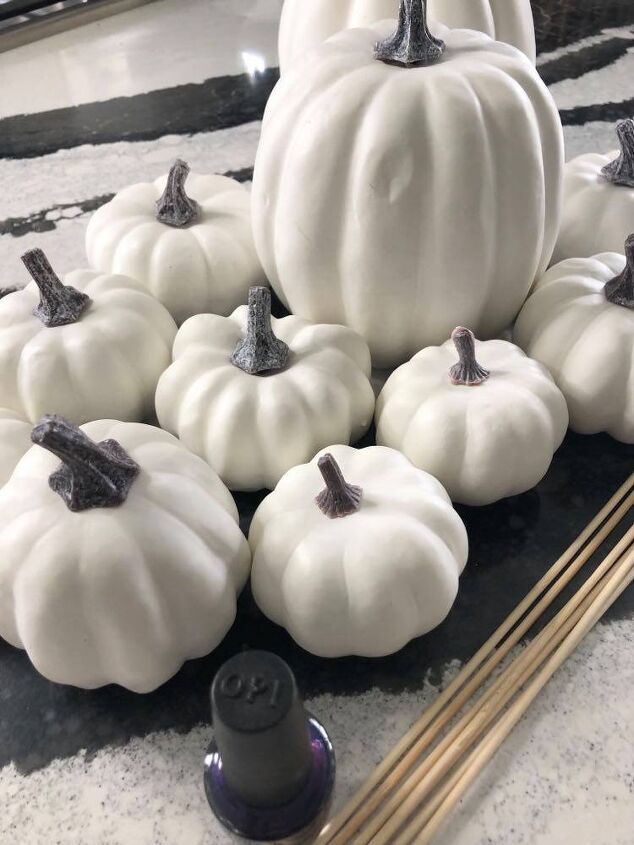
- Pumpkins (These can be real or faux. I found some at the dollar store but their overall color was too yellowish for me. The ones I ended up using are from Amazon and I loved how crisp white they are. I even love their curly stems! You can see them here.)
- Wax paper
You can use any shade of nail polish that you want!
How to Paint an Abstract Pumpkin…Easily!
First, fill a plastic container with lukewarm water. Once 3/4 full, add 5-6 drops of nail polish.
Believe it or not, this is probably the trickiest part of the entire project. If the water is too cold, the nail polish will ball up and drop to the bottom of the container. Too hot and the polish will not disperse enough.
It’s a little like Goldilocks and the Three Bears…you want the water “just right!”
Take a little time to play with this by adding a drop of polish. You will know right away that you’ve got it right when you see the drops disperse on top of the water.

Next, shake the bowl a bit and the drops will start to disperse even more. You can use a wood stir stick to move the polish around. However, I found that, in my case, the polish just stuck to the stick and did not disperse.
Now for the fun part! Grab your pumpkin by the stem and dunk!
Swirl the pumpkin around quickly and watch the polish grab hold.
(Gloves can be a good thing here. I walked around with blue fingers for three days!)
Remove from the water and let dry on some wax paper for about 15-20 minutes on each side.
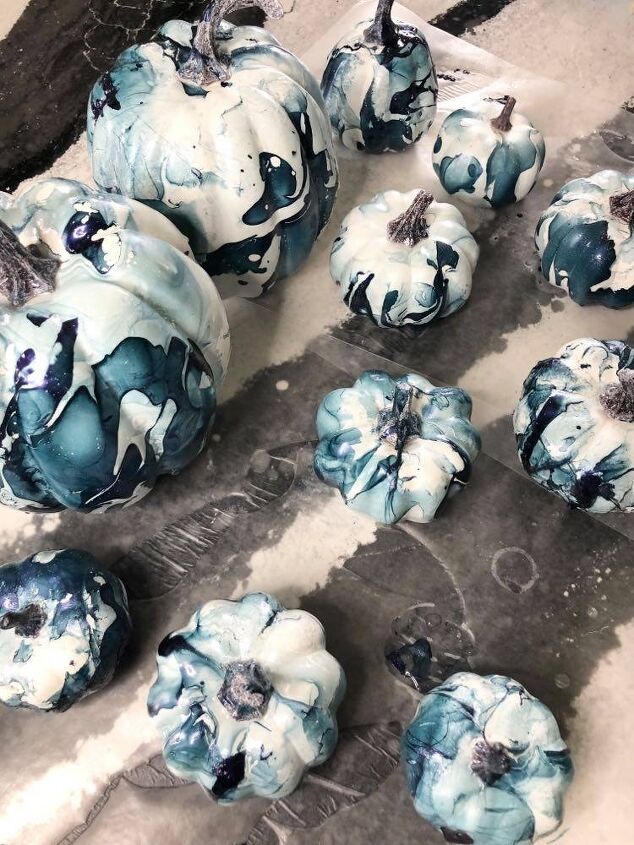
As a person who usually likes to control every paint stroke or infinite detail in a project, this was amazingly satisfying to just dunk and remove with such careless abandon!
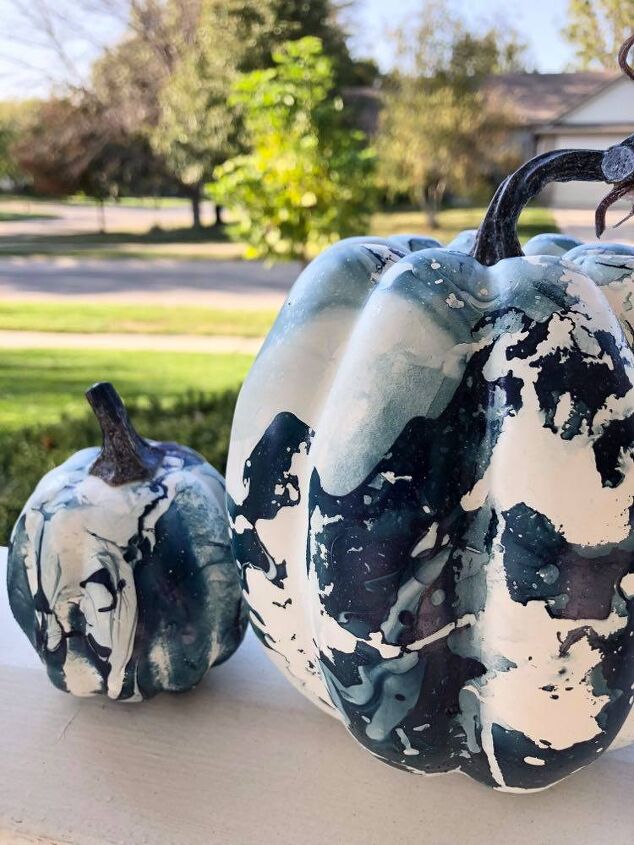
The pumpkins emerge with a really cool random and abstract pattern!

So, for the cost of some faux pumpkins and a bottle of nail polish (about $20 altogether), you can create a stunning set of abstract pumpkins.
- Place in a basket on your kitchen island.
- Display on a tiered cake stand.
- Line up on your porch railing.
- Include with your Halloween decor
- Use as place cards or in a centerpiece on your Thanksgiving table.
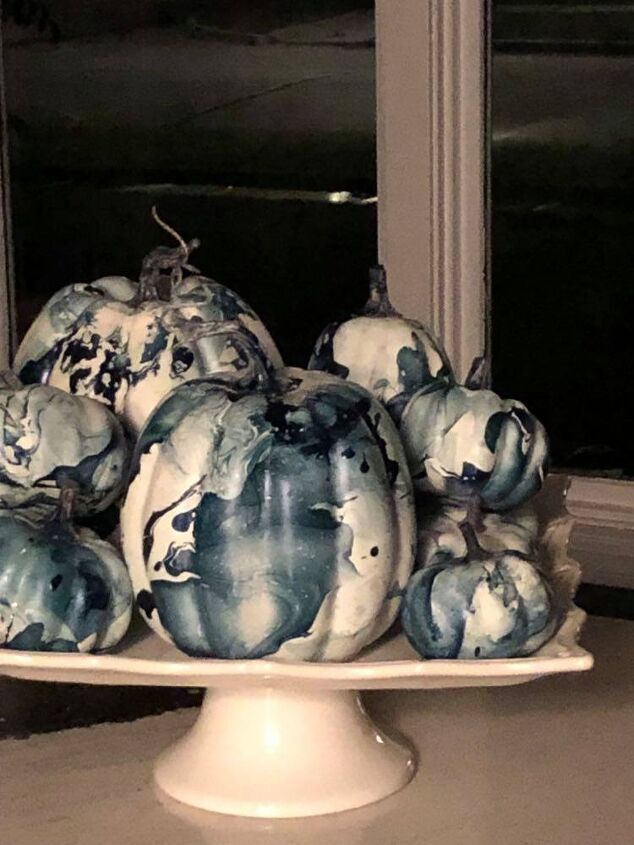
In this photo, the pumpkins take on a rather macabre vibe with dark background lighting. Great for Halloween!
On the brighter side, the pumpkins offer a cheery “Hello” from the front porch!
Happy dunking and swirling!
Cheers!
Speaking of Holidays
YOU ARE INVITED to join me for “Missy’s Merry and Bright Christmas Workshop!”
For 4 Saturdays in November, we will craft together LIVE and decorate our homes for Christmas…TOGETHER! For more information and to register with EARLY BIRD PRICING… Go here for Missy’s Merry and Bright Christmas Workshop!
Recent Projects
Easy and Run Spray Paint Projects
A Dramatic Bookcase Makeover Using Wallpaper
A Leather Fall Wreath in 3 Easy Steps
An Unexpected Way to Decorate Your Front Door for Fall
A Wood File Cabinet Makeover Using House Numbers

Comments
Join the conversation
-
Beautiful
-
Cute, but if you just use spray paint you don't have to have the water "just right". There's my contribution, spray paint.


Frequently asked questions
Have a question about this project?
Do you add more polish after every pumpkin dunk or will the 5-6 drops color the bunch
Love the ideal thanks for sharing. I’m going to try. But could you please answer the question on using several different colors. I’m curious too. Have you tried it?
Absolutely love this thank you!