


How to Make a Dollar Tree Napkin Pumpkin Craft
Let’s make a napkin pumpkin craft! Of course, another pumpkin craft, it is Fall after all! In addition to that, Hobby Lobby even has an entire pumpkin wall! But, enough of that, let’s get into how to make this napkin pumpkin craft.
Before that, if you’d rather watch a video, you can watch the replay below
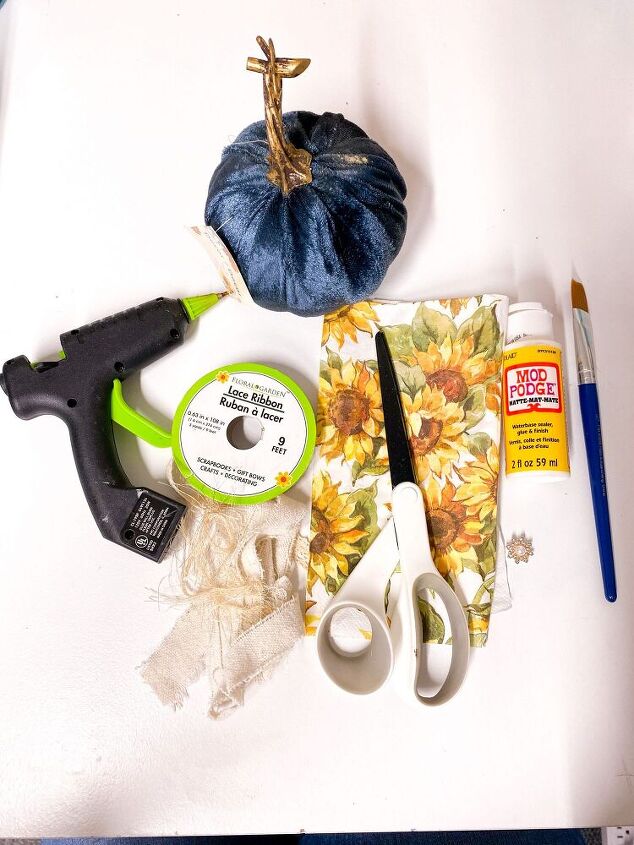
Also, here is what you’ll need:
- Pumpkin from Dollar Tree (mine is velvet)
- Mod Podge
- Hot glue gun
- Moss
- Embellishments
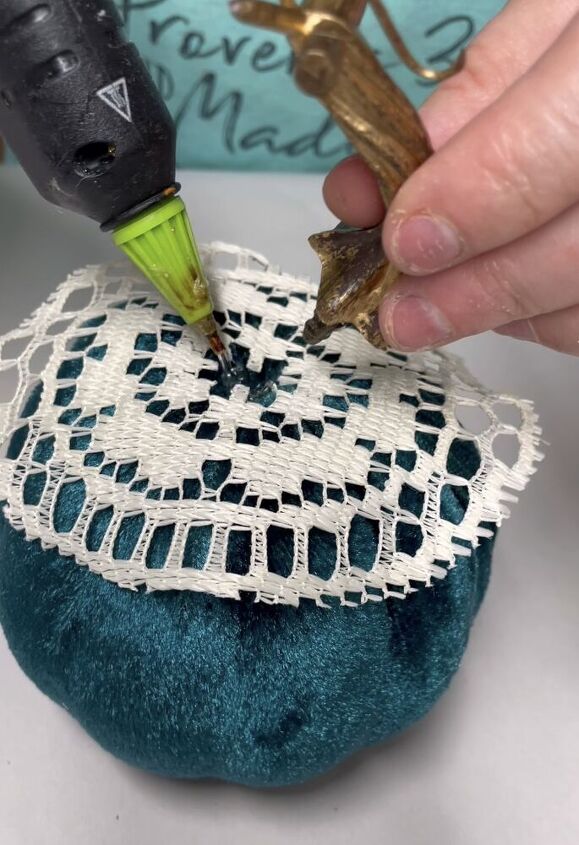
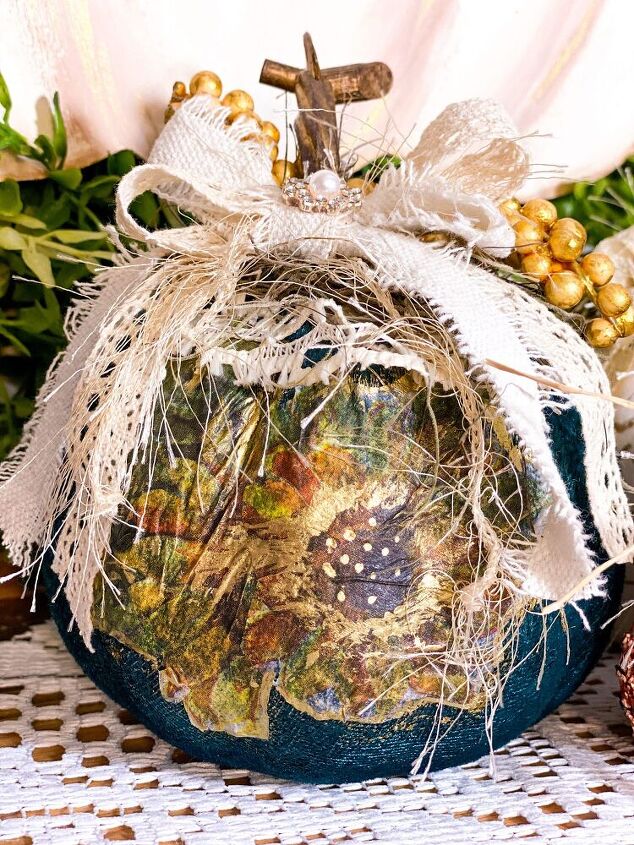
Firstly, trim a piece of lace fabric, you’ll also pop off the step of the original pumpkin. Once you have done that, you will lay the fabric down a top of the pumpkin and then replace the stem. You can easily replace the stem by hot gluing back where you removed it.
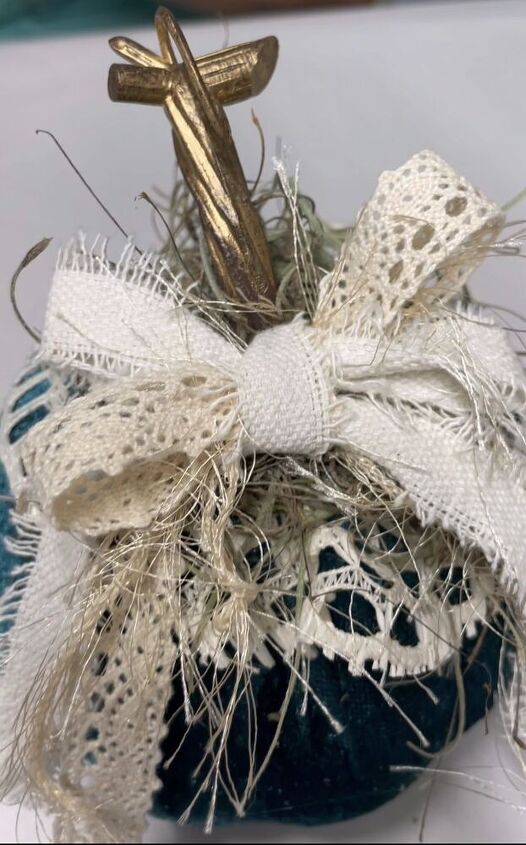
Secondly, create a shabby chic bow. I used spare fabric I already had that appeared shabby chic, also I tied it very simply, similarly to how you tie a shoelace.
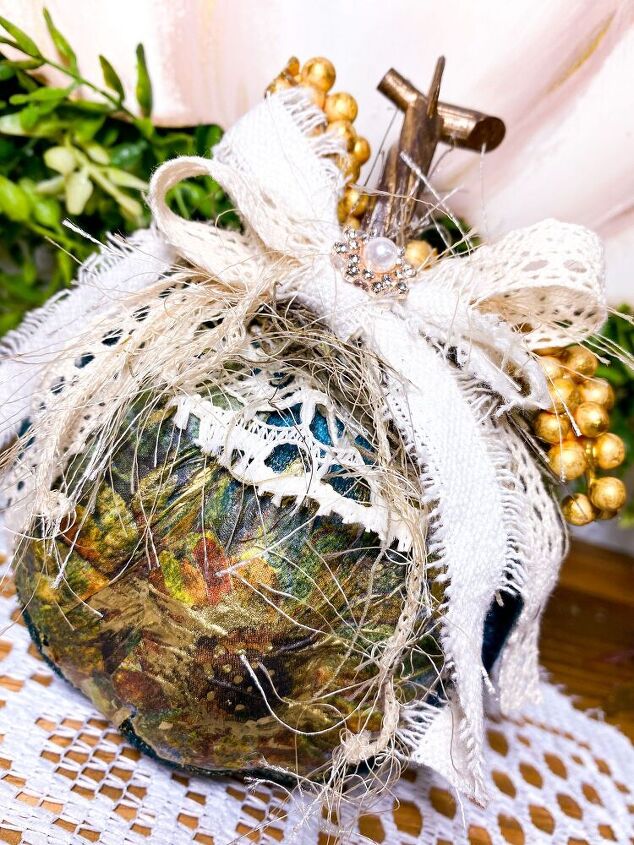
Thirdly, you’ll add your napkin! Of course, by the picture, you can tell I deco-podged the napkin onto the pumpkin. To do this, peel your napkin back so that it’s a thin layer. Then, pour mod podge onto the pumpkin and use a paintbrush to dab the napkin on. I then used a heater to speed up the drying process. Lastly, I embellished the bow by adding a small jewel. I also painted some fall berries gold and hot glued those behind the bow.
Finally, You have your beautiful Dollar Tree Napkin Pumpkin Craft completed!
After I had finished, I went back and added some detailing with a gold pen to help the napkin stand out. That is optional though. If you loved this craft, then check out our blog for more like it! We’re also on social media, follow us on Facebook, Instagram, Youtube, and Pinterest.
Sign up for my email list, you’ll get a FREE printable when you do!

Comments
Join the conversation
-
How do I join your email list? I love this crafty pumpkin!!


Frequently asked questions
Have a question about this project?