


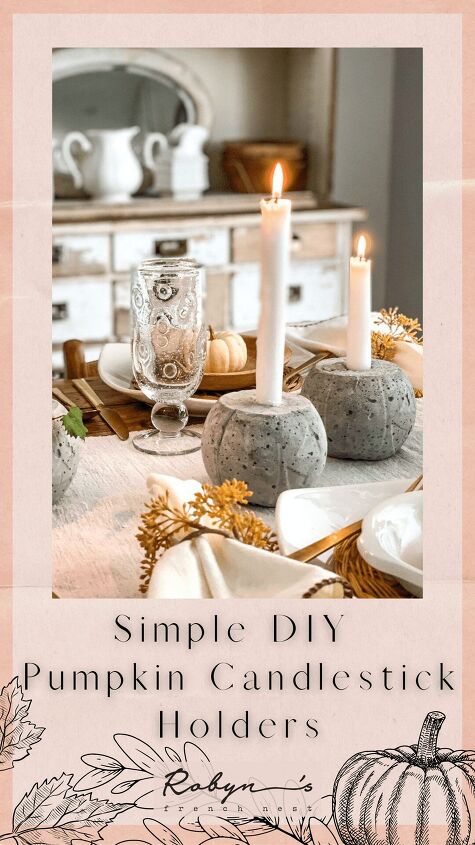
How to Make Easy DIY Pumpkin Candle Holders

Looking for a fun DIY project this fall? Check out my easy DIY pumpkin candle holders, perfect for styling your table for the fall season!
Fall decor is just so fun! And something about the fall season makes me want to try some DIY projects! If you’re hopping over from my friend, Kimberly, at From Farmhouse to Florida, welcome! I’m so glad you’re here! Her fall DIY is on my list to try now too!
KariAnne from Thistlewood Farms is hosting an epic Fall DIY blog hop and you’re going to get enough ideas today to last you for the whole season! KariAnne shares fabulous home decor styling tips, DIY, shopping guides, and everything in between. I love subscribing to her blog…and I’m always entertained too!
Maybe it is just that we are home more in the fall and the weekends aren’t quite as crammed with activities, but I always get in the mood to try some DIY projects when fall rolls around.
Concrete is such a fun trend in home decor right now. We have had concrete countertops and polished concrete floors in parts of our home for years and I love them. When the design trend started for cement accessories, I was all in!
My friend Toni from @toni_marianna shared a really fun concrete pumpkin last year! She made a large one that she used as a planter. I loved it so much and went looking for my own pumpkin form so we could give it a try.
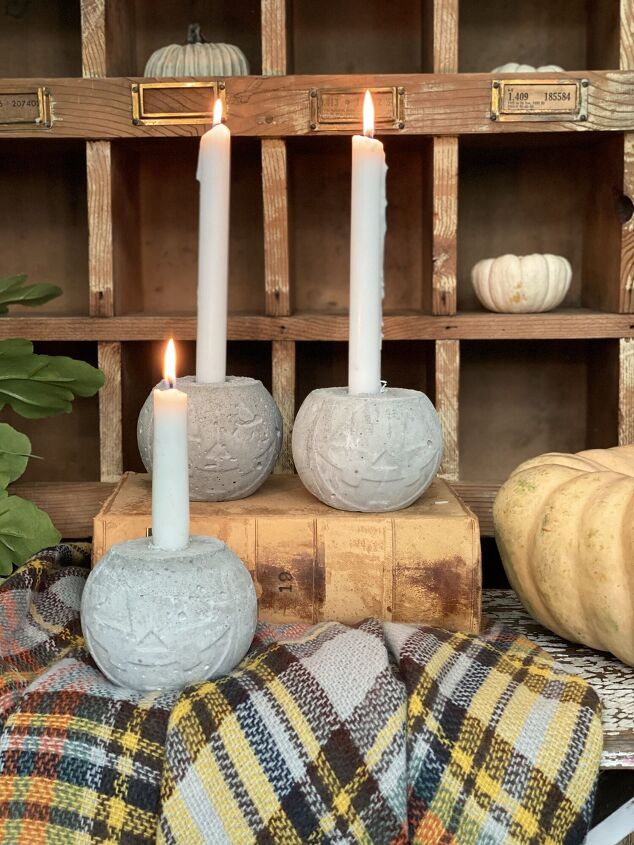
I came across these $1 jack-o-lantern buckets and thought they would be so cute! I don’t really decorate for Halloween, but what’s not to love about a friendly, concrete jack-o-lantern face?!
We made some planters with the large trick-or-treat buckets and I enjoyed them all fall! Face showing around Halloween and just turned them around to a regular pumpkin for the rest of the fall season!
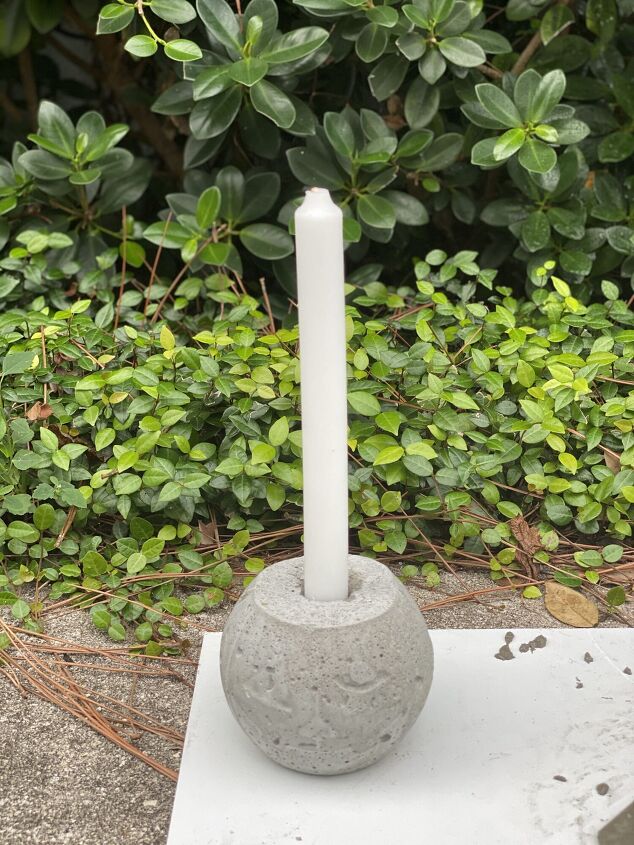
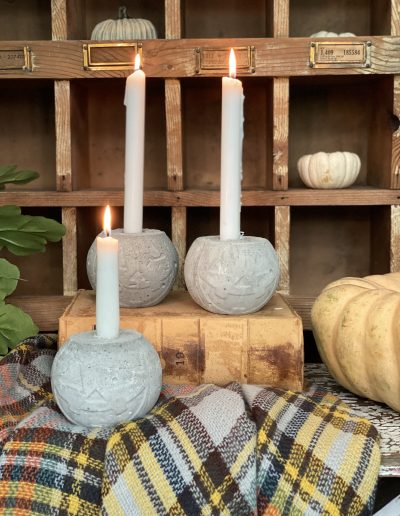
I was in the store one day and saw the miniature jack-o-lantern buckets. So super cute! I immediately knew they would be the cutest pumpkin candle holders. I absolutely love them. Again, I love that I can use the face side or if I want a plain pumpkin, just turn them around!
Robb made several for me in an afternoon and I had fun styling them. This is an inexpensive, easy fall afternoon DIY project!
Here’s how to do it:
DIY Pumpkin Candle Holders
Simple, budget-friendly, and oh-so-cute!
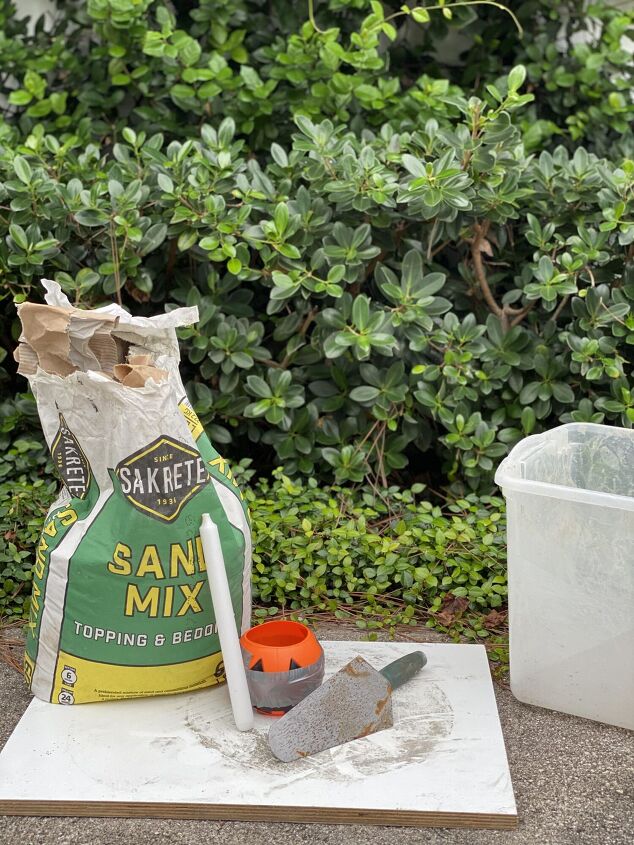
For this DIY, the material list is pretty short:
- Small plastic pumpkin
- Concrete mix
- Cement trowel (or something to stir & scoop the concrete)
- Utility knife
- Duct tape
- Taper candle
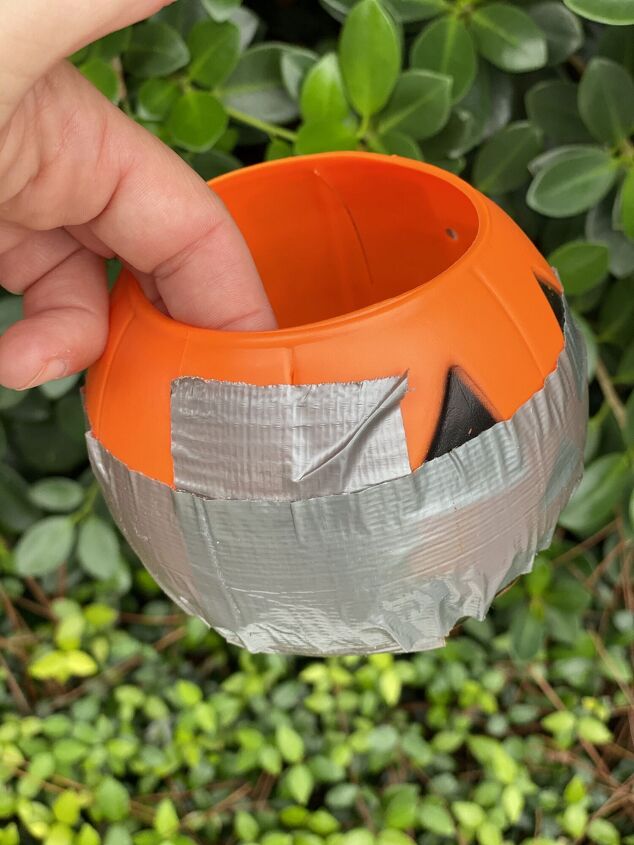
We found that cutting the pumpkin before we started worked best. Start just below the rim and cut in a straight line to the bottom. Do this a second time on the opposite side of the rim. This will make taking the plastic off the hardened concrete a breeze.
Once you have made your two cuts, wrap masking tape around the pumpkin to hold it firm:
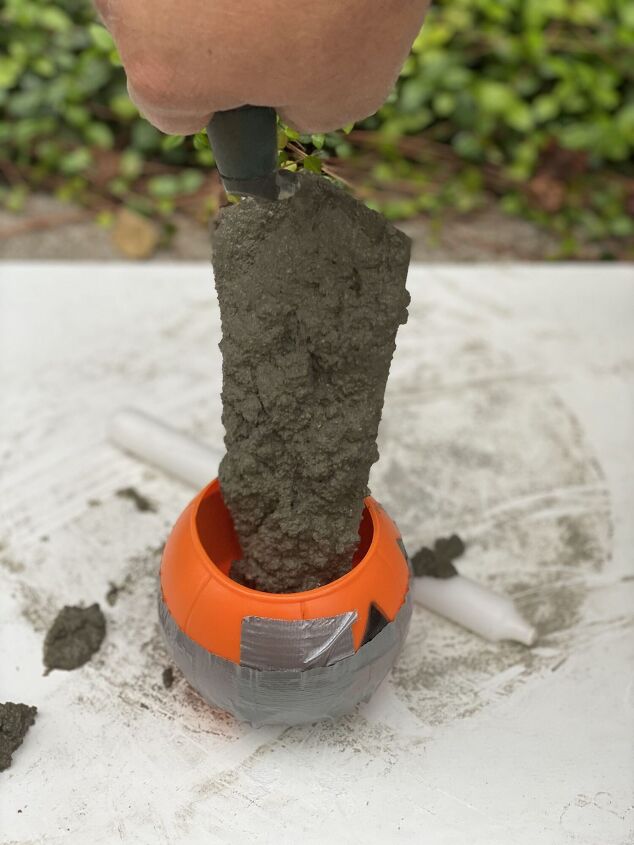
Once you mix up a small batch of concrete, just scoop it into the pumpkin form. We found a rounded edge trowel worked really well.
While the concrete is still wet, set your candle. Make sure it’s straight and in deep enough. In a couple hours or so, the concrete will be firm enough to remove the candle. We found it helpful to twist the candle slightly as we removed it from the concrete.

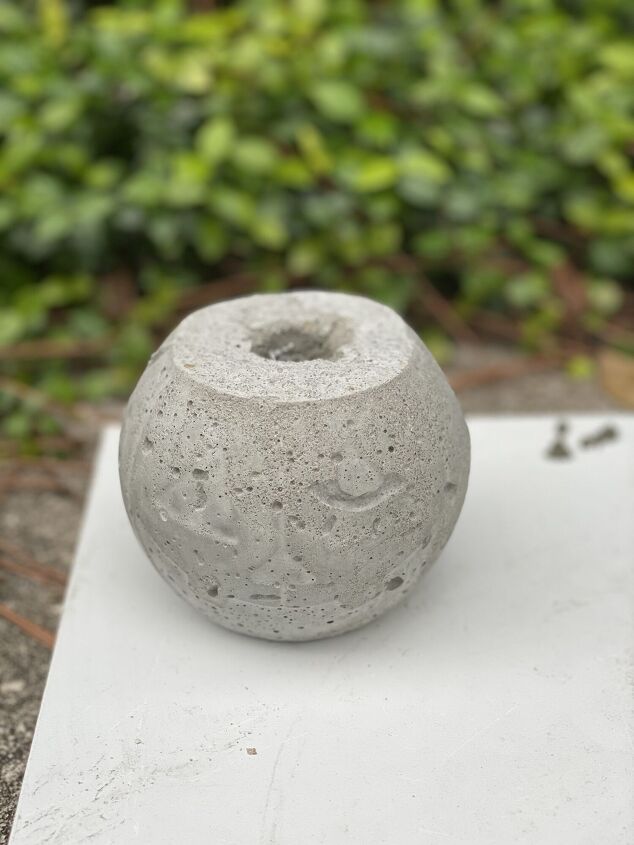
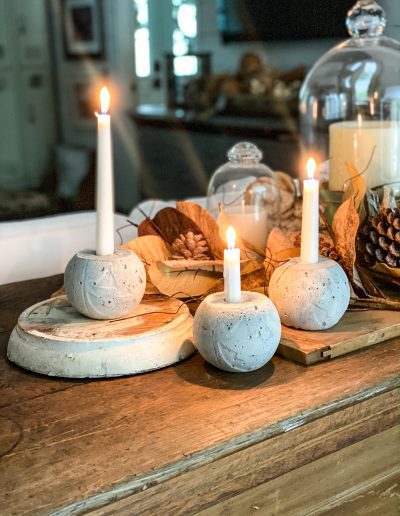
Once the concrete sets hard (we waited overnight), your new candle holder is ready for the big reveal! Just take off the tape and gently remove the orange plastic form & enjoy!
How to Style Your DIY Pumpkin Candle Holder
So many possibilities!
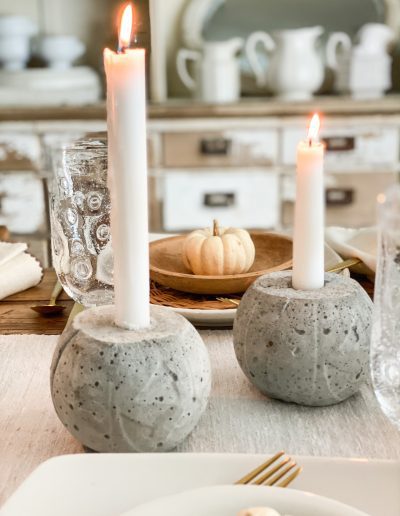
I love using candles throughout our home and even more so in the fall and winter months! These DIY pumpkins add a nice touch of fall in a neutral way and I love how they even add some unexpected texture to fall decor.
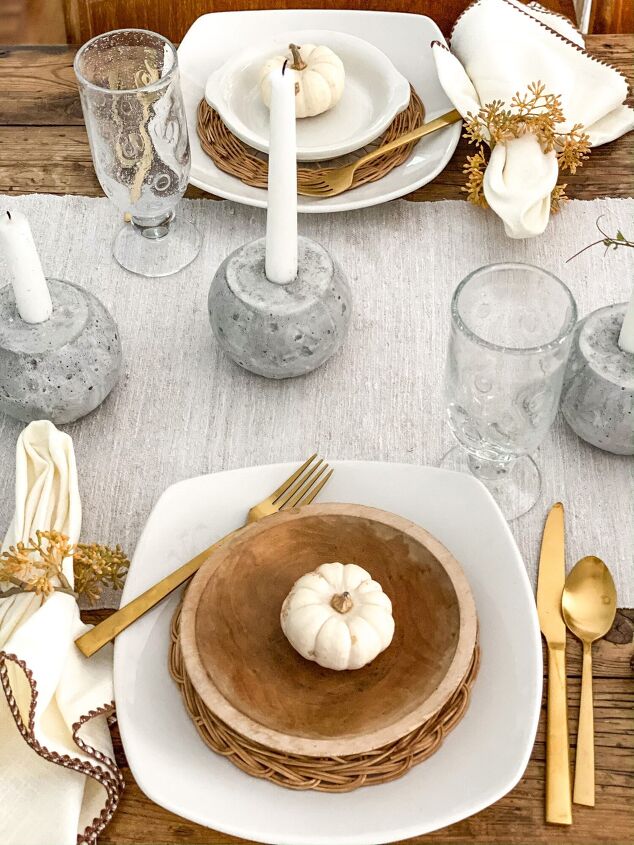
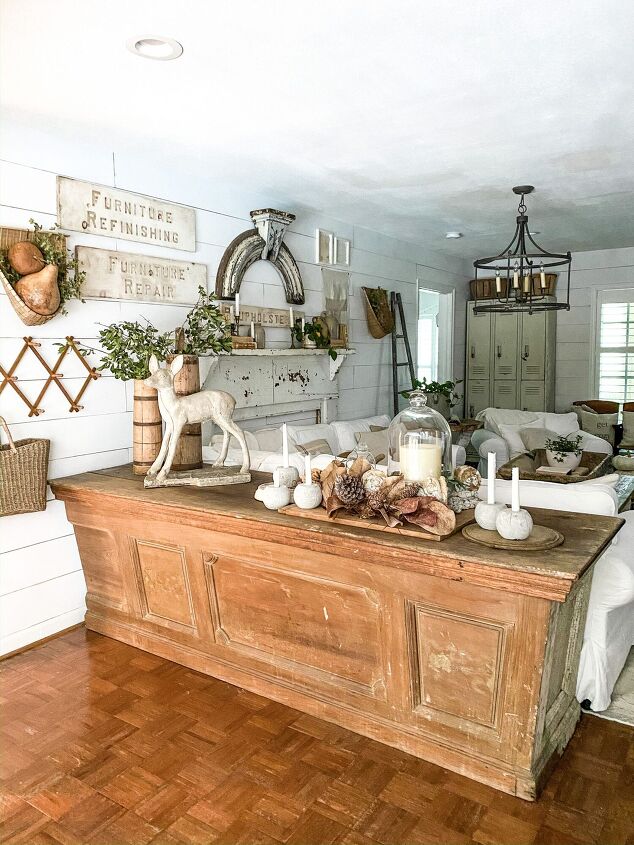
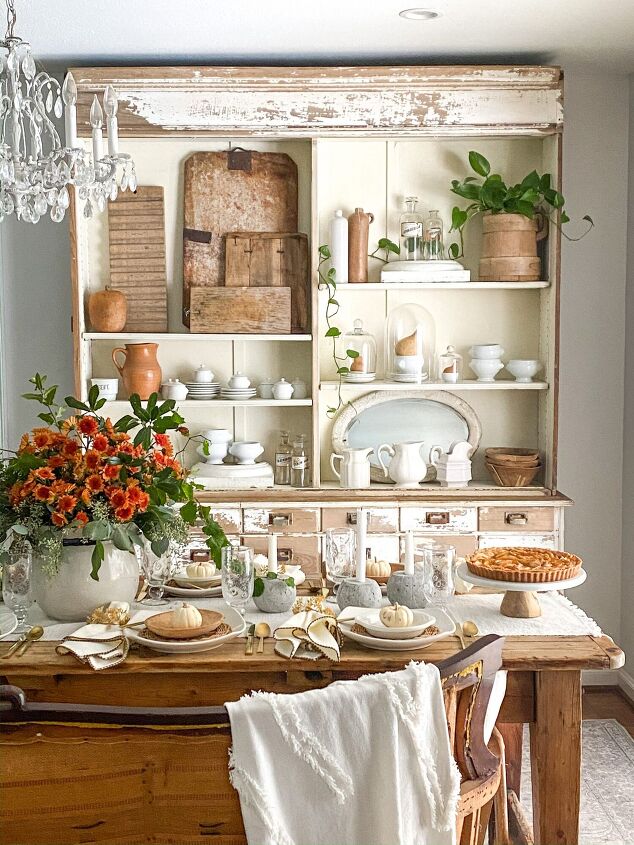
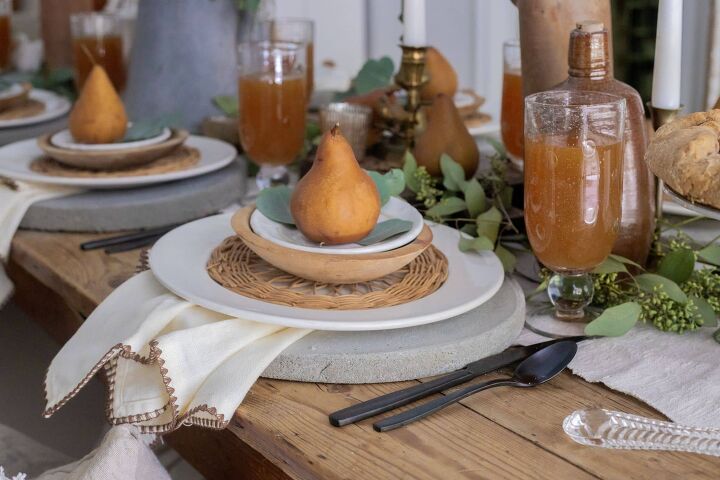
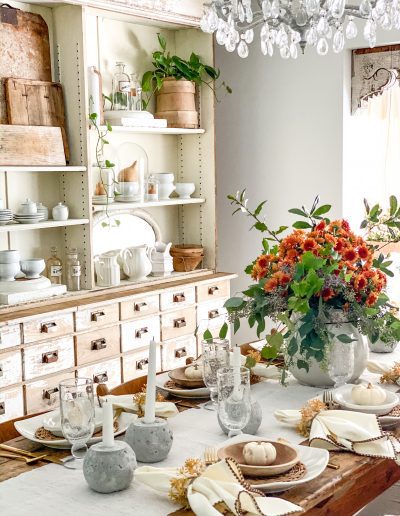
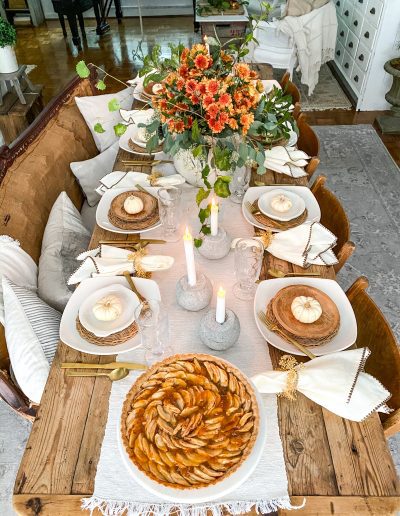
I had fun styling my concrete pumpkin candle holders on a couple of fun fall tablescapes!
They would also be so cute sitting on cubbies or shelves. You could tweak the DIY a bit by adding a real stem in the hole where the candle goes.
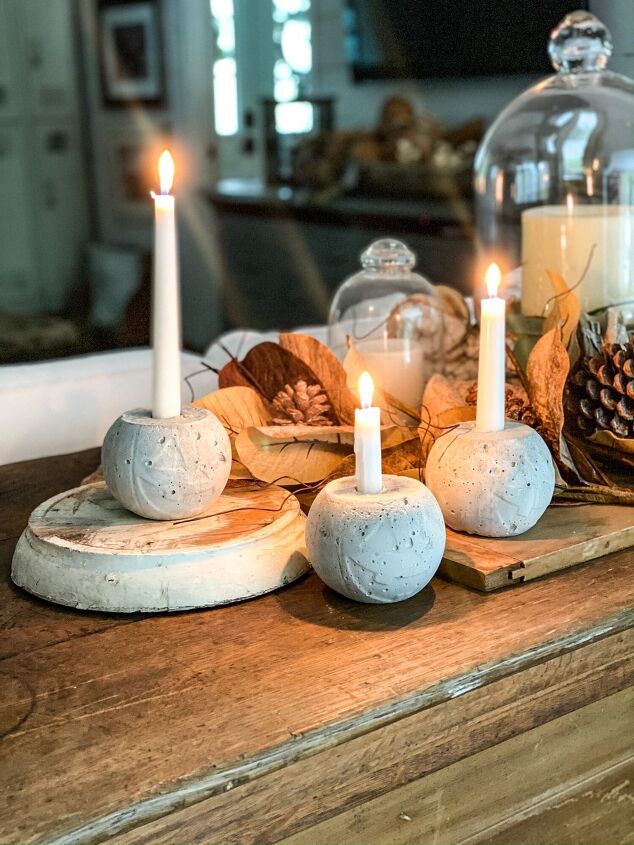
I love using vintage books to create a variety of height when I’m styling items that are the same, such as a grouping of these DIY pumpkin candle holders! Vintage books are one thing I always thrift for and one of my “must-have” thrifted fall decor items!
You could also style these DIY pumpkin candle holders on a mantel! It would be a perfect place to use some battery-operated taper candles. You can find one of my favorites HERE. It would also be a fun way to add some not-so-scary Halloween decor in a more simple and neutral way!
You can find some of my favorite fall mantel styling ideas over on this post and then go ahead and add this fun DIY to my list of mantel favorites too!

My favorite way to use these DIY pumpkins is to dress up my table! I love that they add a fun factor, while still being cute and classy!
Tip: Keep a collection of taper candles that have burned to varying heights. When styling candle holders that are the same height, you can add more interest and a curated look by having different heights of candles. You can find my favorite smokeless, dripless taper candles HERE.
When I’m finished using them on my table, I carefully place them in a drawer and use over and over. I love having the look of the ones that have already burned part of the way!

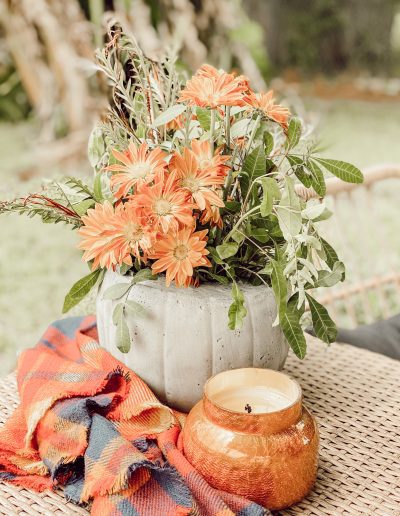
How to Adapt This DIY for Pumpkin Planters
The candle holders are cute, but what about those planters?
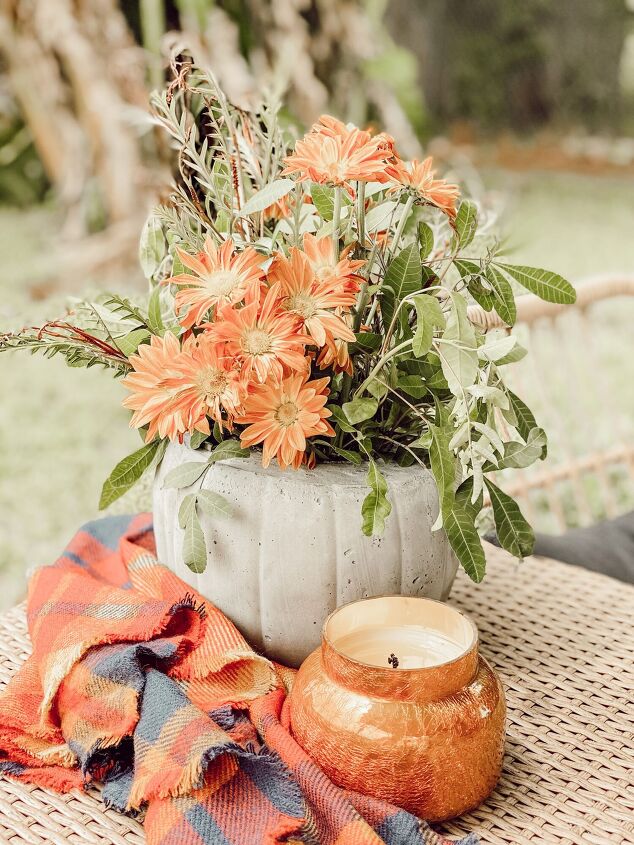
To create DIY pumpkin planters, you need to tweak just two materials. Instead of the miniature jack-o-lantern buckets, you’ll want to purchase the large trick-or-treat size. You can usually find these in the seasonal aisles at Walmart, or conveniently order one here.
You also want to pick up a large, plastic cup from the Dollar Tree. Mine came in packs of two, which was great since I was making multiple planters. The large cup becomes your vase inside the concrete pumpkin. It is easy to add fresh flowers or add dirt and plant a small plant.
Process for Creating DIY Pumpkin Planter
Making a planter is very similar to the candle holder with two changes: Just plan on more concrete & a plastic cup for a vase.
- Cut the pumpkin just below the rim to the bottom on two sides.
- Tape the pumpkin with a duct tape “belt”. A couple times around works fine.
- Fill the pumpkin about 2/3rds full of cement
- Take your plastic cup “flower vase” and gently twist it into the concrete until the concrete & cup lid are even with the pumpkin rim.
- It’s helpful at this point to add a heavy weight to the cup, since the concrete tends to move your vase as it dries.
- Let the concrete harden over night
- Remove the tape & orange plastic, and your new planter is ready for action!
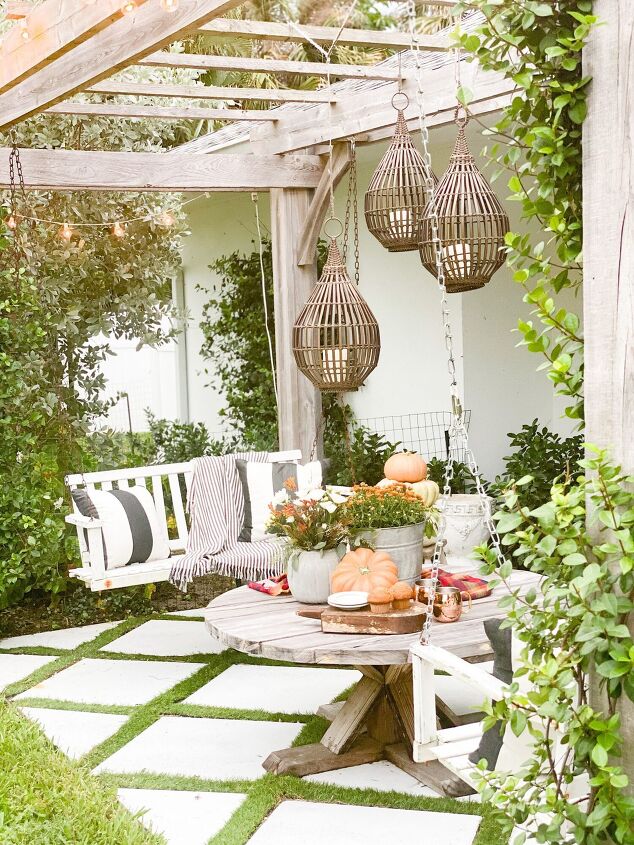
You can use this planter indoors or outdoors. I enjoy them both places! They make a really cute table centerpiece, filled with fresh flowers. Or create a grouping of them with potted mums for your porch steps!
Concrete is a really fun material to work with. I love the neutral color and the great texture that it adds to decor. If you’re looking for more fun DIY projects, check out these DIY chargers that we made! They were super inexpensive, but definitely took a little bit to figure out the best process. You can cut out all the guess work and make them with these simple, step-by-step instructions!
I featured these DIY chargers in my fall tablescape ebook. For $4.95, you get 5 Fall Tablescape ideas complete with guides for everything you need. I included some fun planning pages to help you get and stay organized for your fall gatherings too! You can purchase the ebook HERE.
I hope you’ll share with me if you make a version of this DIY! It was fun to share the process with you.
For more DIY inspiration, head over to Laura from Decor to Adore. It’s such a fun season and I love seeing everyone’s DIY projects!

I’d love for you to follow me on social media! You can find my home decor inspiration on Instagram, Pinterest, and Facebook!
Blessings,


Gallery


Resources for this project:
See all materials


Comments
Join the conversation
-
I don't see instructions for mixing the concrete or what concrete you used etc.
-
Cute idea but when giving directions please give them correctly. You state cutting the pumpkins before made removal easier and that you used MASKING tape but the picture shows DUCT tape. I am quite sure masking tape would not hold the plastic together under the weight of the concrete.


Frequently asked questions
Have a question about this project?