


How to Make a Cute Tide Pod Container Pumpkin Centerpiece
The next time you finish your Tide Pods be sure to save the container for this beautiful DIY pumpkin centerpiece. In this tutorial, I'll show you how to build a fall floral arrangement using autumn leaves, sunflowers, mums, berries, and more.
Keep reading to discover how to make a Tide Pod container pumpkin for your fall tablescape.
This post was transcribed by a member of the Hometalk editorial team from the original HometalkTV episode.
Tools and materials
- Tide Pods container
- String
- Scissors
- Glue
- Paint
- Floral foam
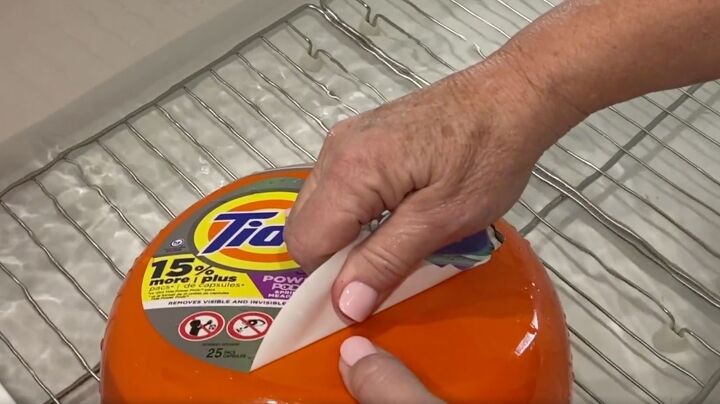
1. Remove the Tide Pods label
The best way to start getting the label off the Tide Pods container is to soak it in some hot water.
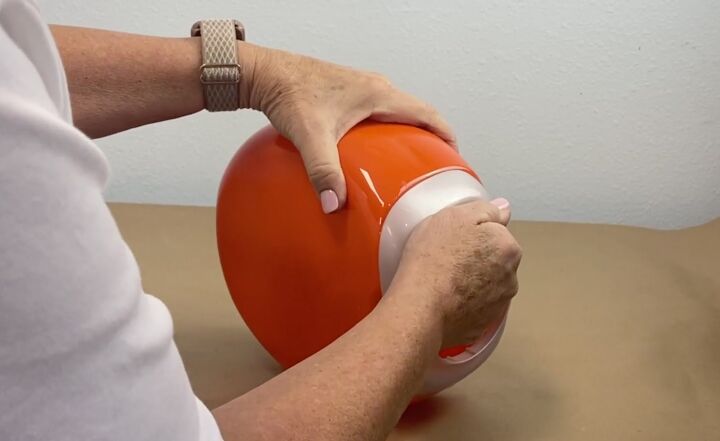
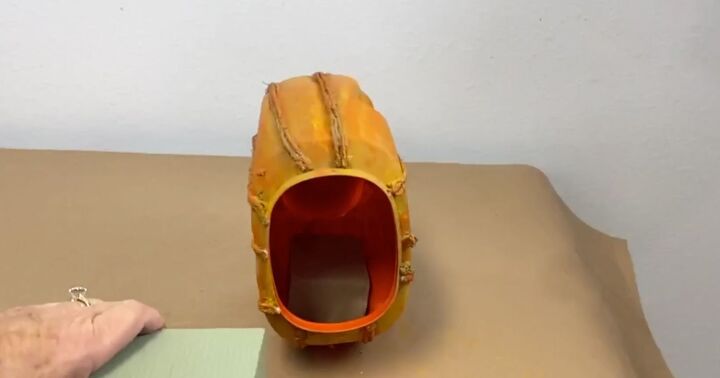
2. Remove the top piece
The next step is to remove the top piece. That just gives just takes a little bit of twisting.
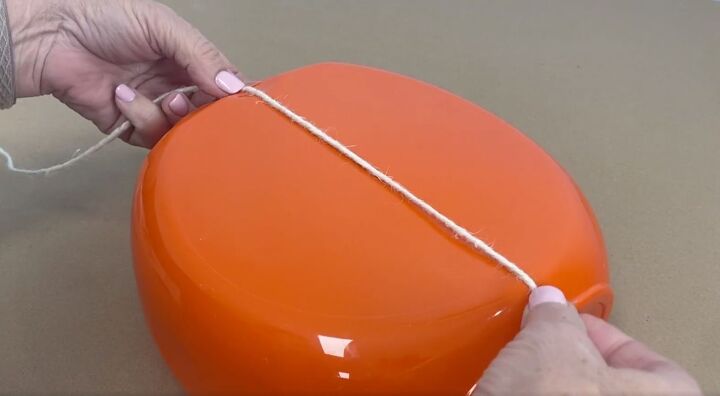
3. Add string
Now, I'm going to cut string to the length of the container. Then, glue them to the Tide Pod container to give the pumpkin some depth.
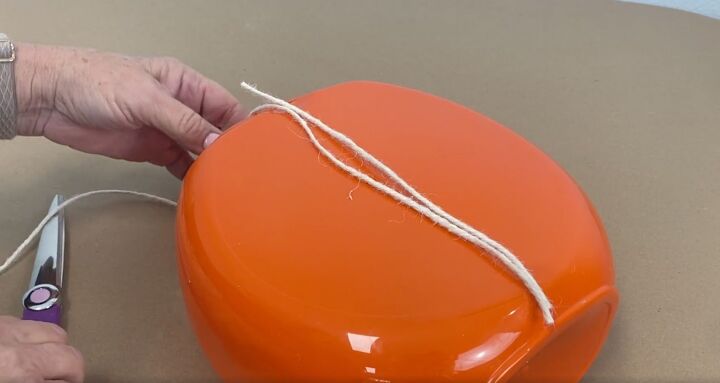
I might even use two together so I’m just going to cut several of these. I can always trim the ends off later. I'd rather make them a little extra long than too short.
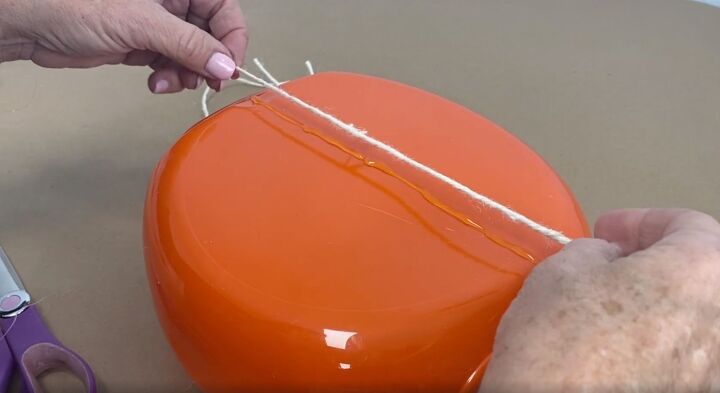
Next, I'm going to hot glue those to the Tide Pod container. Pumpkins are a natural thing. They are not perfect, so you do not have to worry about being perfect.
I want them to be a little extra thick so I am going to double them up. You could use a thicker rope if you wanted to on these.
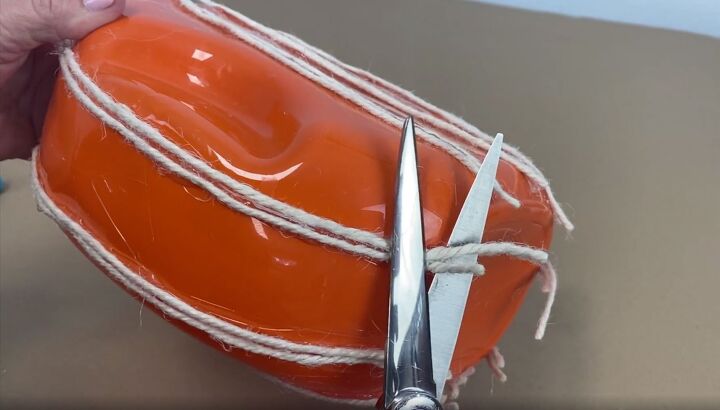
Once I have all of my strings in place and the glue is dry, I'm going to trim off the bottom of these because I want the pumpkin to sit flat. I don't want it to be wobbling on any of these strings.
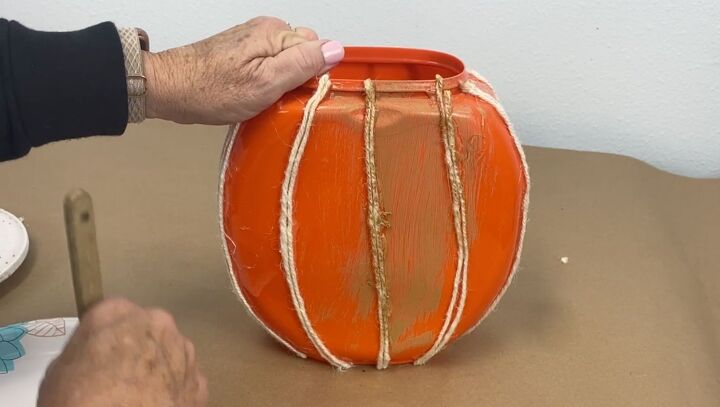
4. Paint the pumpkin
The next thing I'm going to start doing is to paint the container since this is so bright, almost like a safety vest. To start, I’m going to give it a cursory coat of bronze.
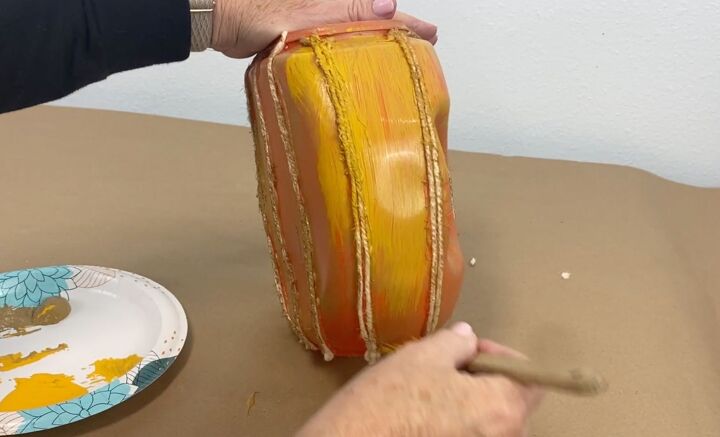
After letting that sit for a few minutes we're going to start with some other colors. I’m going to add a tangerine yellow color next. Make sure to really cover the strings.
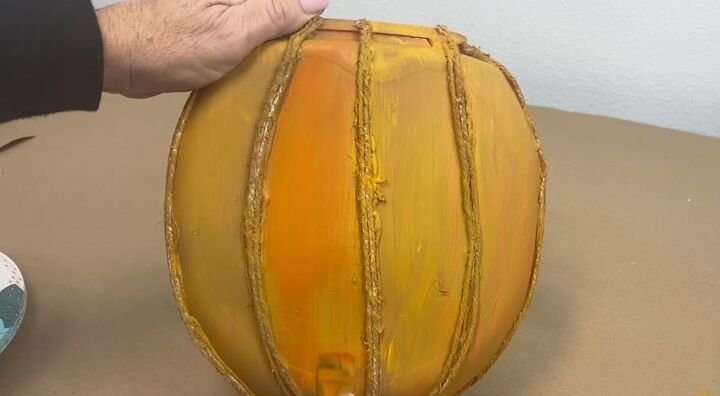
Once the tangerine orange is dry, I am going to add a little bit of orange. I'm just going to add a little. Just be sure to leave some of the other colors showing.

5. Add floral foam
Now that the paint has dried on our pumpkin, I want to put some floral foam inside.
I don't want it rocking around so I'm going to cut some of it and put it over on the sides.
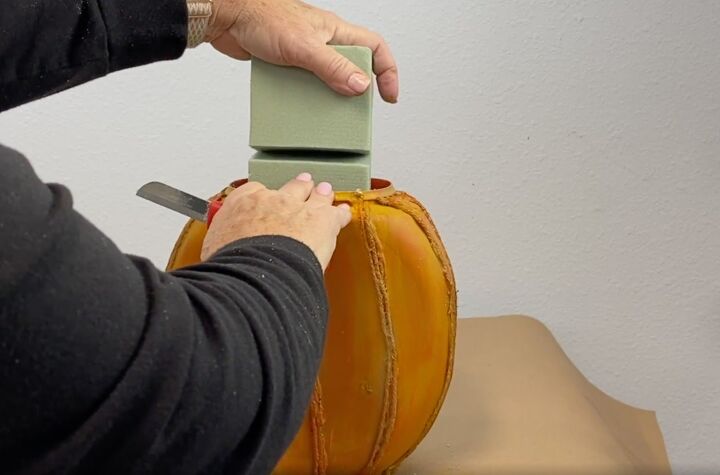
We have our last piece of floral foam in here, and I'm going to cut it just a little bit high so I can arrange flowers up here.
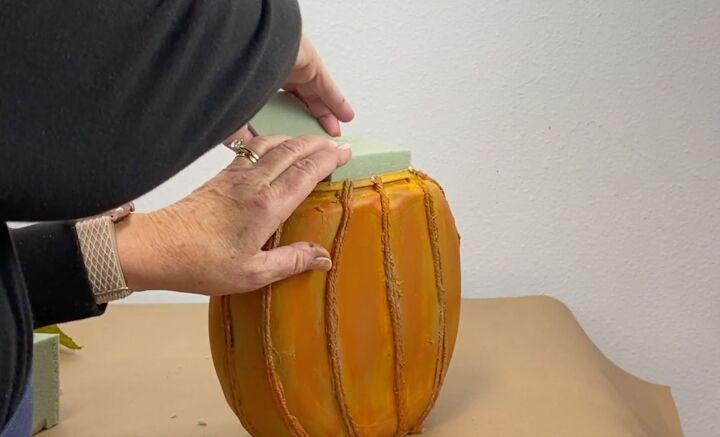
Again I don't want it wobbling back and forth so I'm going to cut one more thin piece and wedge it in so that it doesn't wobble.
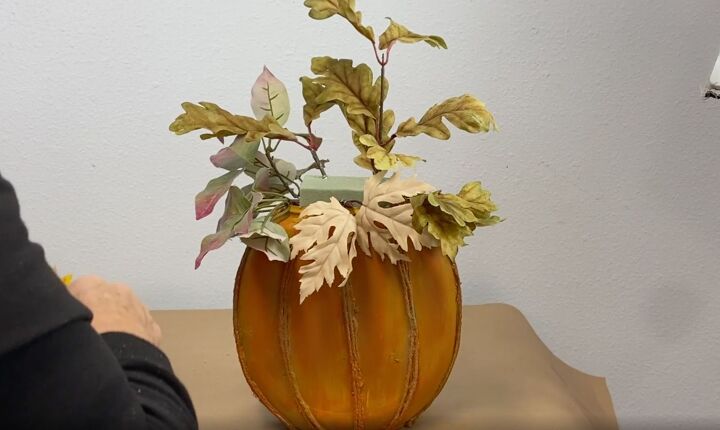
6. Add flowers and foliage
Now we're going to make this into a beautiful fall arrangement. One of the first things I want to do down here around the bottom is to add some pretty fall leaves. I'm going to add oak leaves and these leaves that have a pretty little bit of pinkish red to them.

We're just going to keep building up our fall floral arrangement so next, I’ll add some beautiful fall sunflowers to it.
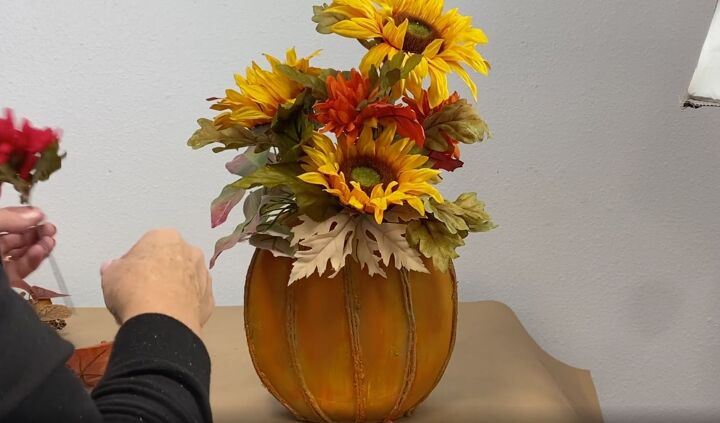
I’ll add a couple of those at different heights as well add some fall mums.
In this piece, I'm going to add some little berries there for height. I think I have another piece of oak leaves that are a little taller, so we'll give that some height and some nice fall color as well.
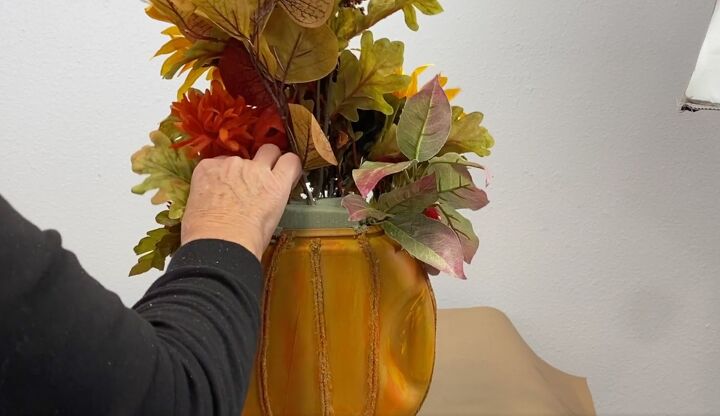
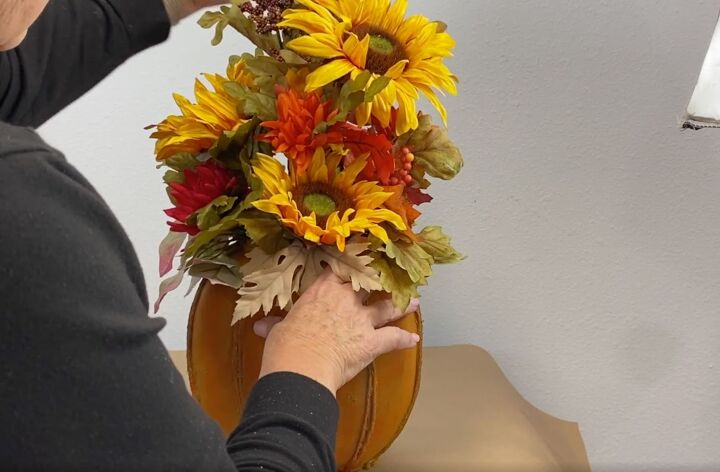
Don't forget to turn your arrangement around. Even though I'm going to showcase this from the front, I want you to make sure that you have covered the back.
You don't know when somebody's going to peek around the back, so make sure you do finish it off so that your floral foam is covered in the back too.
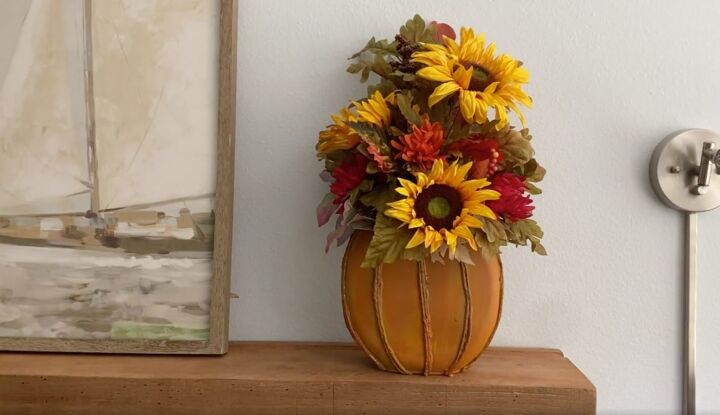
Tide Pod container pumpkin
Here we have a beautiful Tide Pod container pumpkin fall arrangement, which also works as a DIY pumpkin centerpiece for the fall holidays.
The next time you have an empty container lying around, think about turning it into something completely different!
Can you believe this started out as a Tide Pods container? Let me know your thoughts and feedback in the comments below.
DIY fall ideas


Comments
Join the conversation
-
The new tide container lables are impossible to remove. Cannot be pulled away as shown. I tried everything. Hot water soak, goo gone, acetone, nothing works. help
-
That was so beautiful when all finish.


Frequently asked questions
Have a question about this project?
This project is so absolutely darling! I will definitely be doing this one! Thanks for sharing such a clever idea.
Anyone have any containers they are willing to share? I cannot use Tide, but would love some of the containers...Blessings!