


We Show You How To Make Pink Velvet Pumpkins, It’s An Easy Afternoon
Pink velvet pumpkins are everywhere this fall.
And come to find out, velvet pumpkins are easy to make!
The sophistication they add to almost any fall decor has catapulted blush pink velvet pumpkins into one of the season’s hottest trends for the past several years.
It’s easy to see why … they are luxurious, plush and elegant.
Trouble is, these adorable treasures are also so popular, pink velvet pumpkins are practically sold out everywhere.
And when you do find velvet pumpkins in shades of blush, burgundy or cream, they can be ridiculously expensive.
But come to find out, they also have one more great quality …
It’s easy to DIY velvet pumpkins!
Here’s everything you need to know about the process, as well as a few shots of how I’m planning to incorporate velvet pumpkins into our fall tablescapes:
HERE’S HOW TO MAKE VELVET PUMPKINS AND THE SUPPLIES YOU NEED:
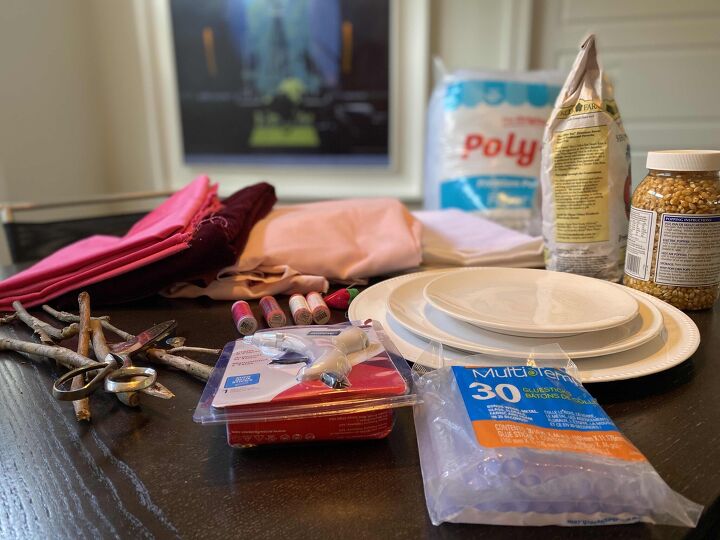
- Velvet fabric in shades of pink, blush and burgundy (one yard will make about six pumpkins, depending on their size)
- Sewing needle and matching thread (I also used a needle threader, which I highly suggest)
- Hot glue gun and glue sticks
- Polyester fiberfill
- Scissors
- Sticks for “stems”
- Round plates or platters for the “pattern”
- Pencil or fabric marker
- Dried beans, rice or popcorn to weight the bottom of the pumpkins
- Funnel
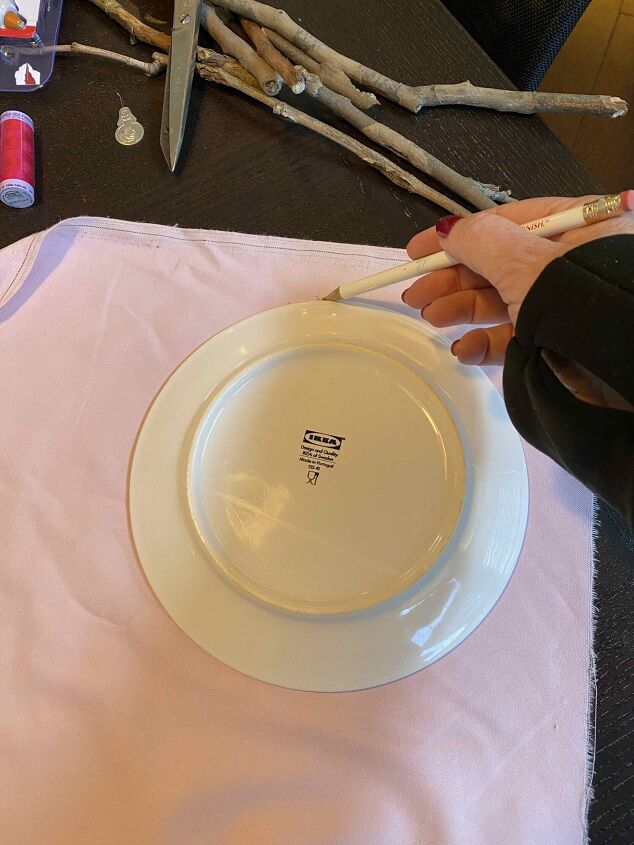
Begin by choosing your “pattern” to trace around.
This is a nine-inch dinner plate.
While you could spend the time making a more traditional paper pattern, it truly is not worth the effort.
I used a pencil to trace the plate.
You”ll want to make your tracing on the back of the fabric, so any marks will eventually be on the inside and will not show.

GATHER TOGETHER …
To gather the fabric and create the pumpkin shape, you need to do a running stitch all of the way around the perimeter of the pink velvet circle.
Be sure to to double or quadruple the thread, since you’ll be pulling to gather the fabric and do not want it to break.
If it breaks, you’ll have to start over.
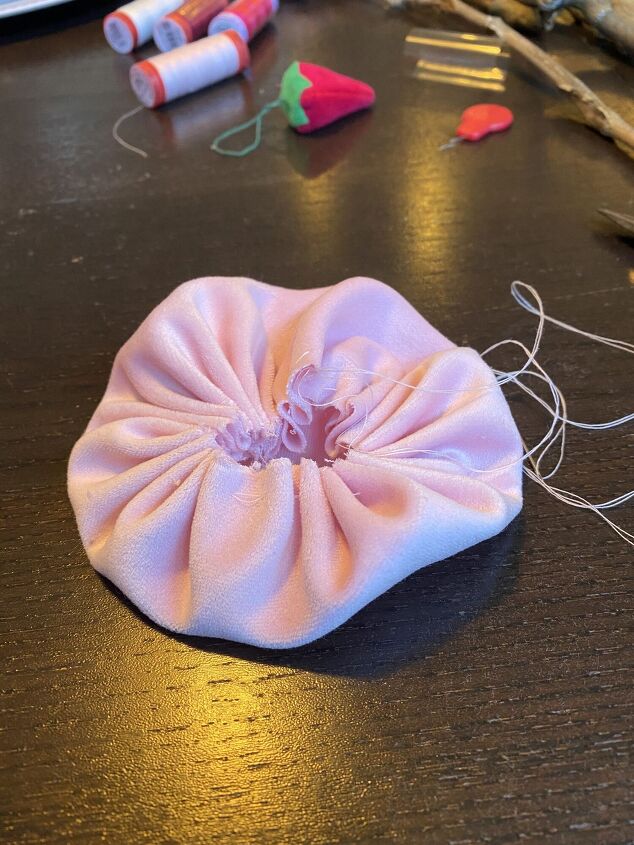
Pulling the threads to gather the fabric is what creates the pumpkin shape.
Again, you want to make sure the thread doesn’t break and you lose the ability to gather, which is key to making this work!
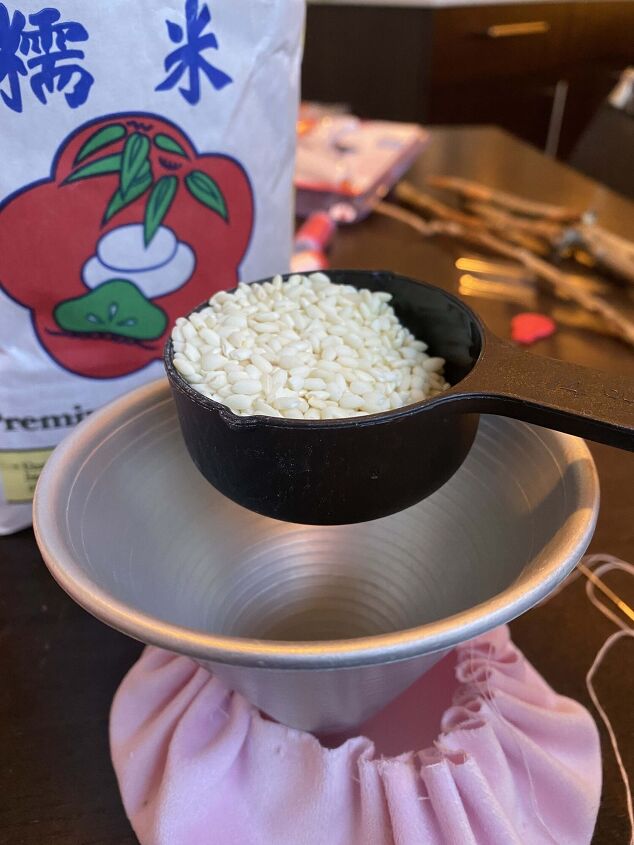
A FUNNEL IS A GREAT TOOL TO HELP YOU FILL THE PINK VELVET PUMPKIN …
The next step is to fill the base of the velvet pumpkin with something to weight it.
I used dried rice but beans or popcorn could also work well.
For this sized velvet pumpkin, about one quarter cup was perfect.
Obviously you need to play with the amount, depending on the size of the pumpkin.
The funnel was a great tool … it really helped me avoid accidentally spilling rice all over the table!
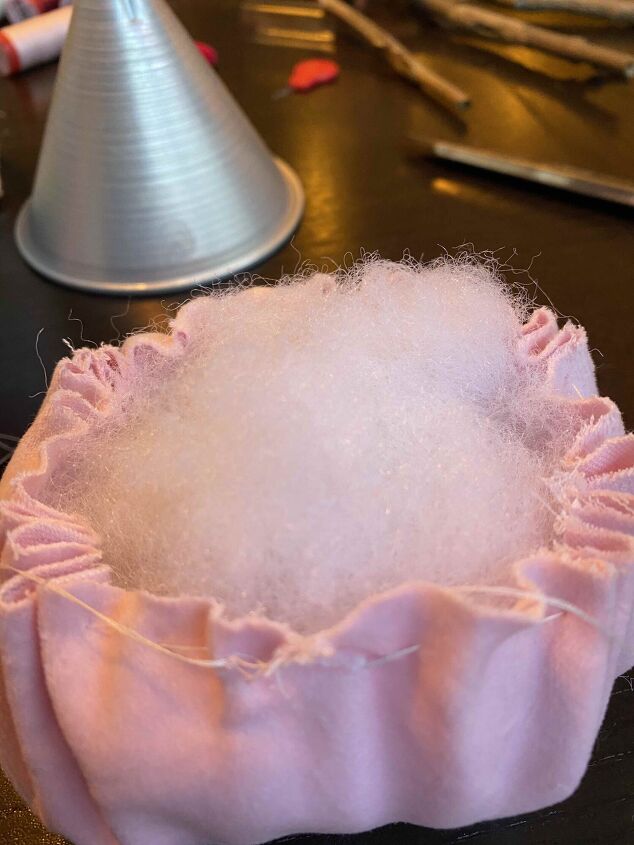
Filling the pink velvet pumpkin with fiberfill is only slightly tricky.
The biggest challenge is just making sure you keep the top fabric gathered and don’t break the gathering thread.
After the pumpkin is “plumped” to your desired shape, you need to begin to close the hole at the top.
Tightly pulling the gathering thread achieves this.
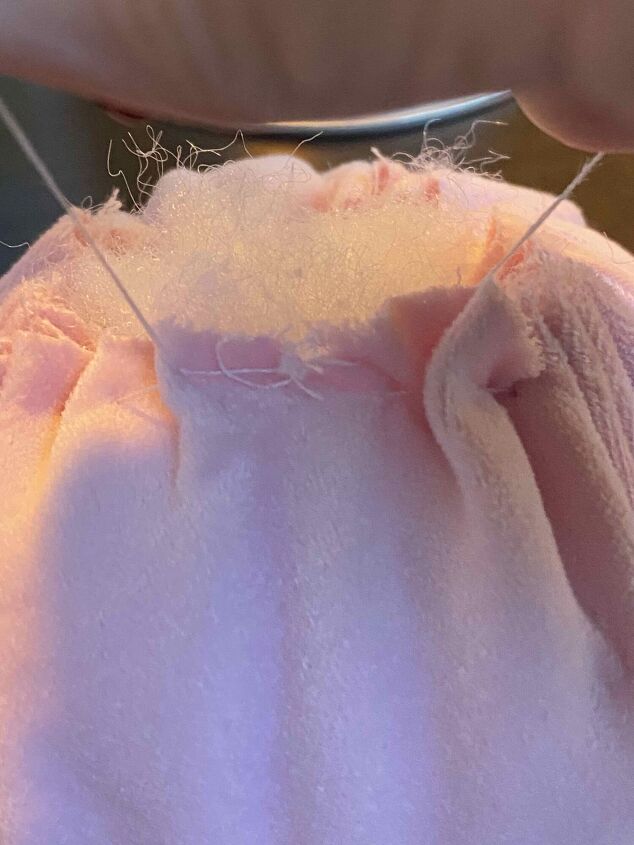
After the hole is stitched closed, you need to send the needle to the bottom of the velvet pumpkin and pull a stitch through to the top.
Here’s a great video that explains exactly how to do this:
The final step is to attach a pumpkin stem with hot glue.
You can trim the stem to your desired length.
It’s okay if a bit of the hot glue remains … it actually makes it look more like a real pumpkin, in my opinion.
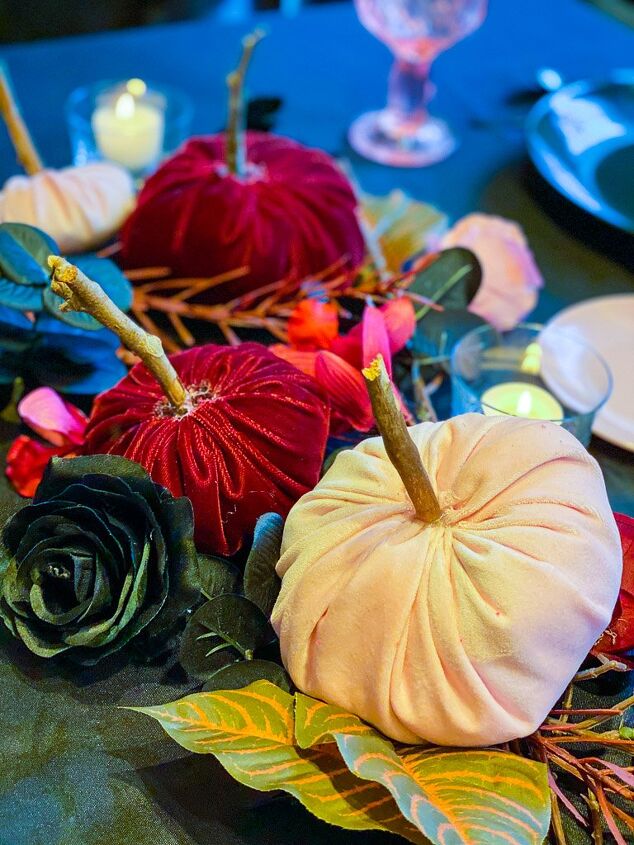
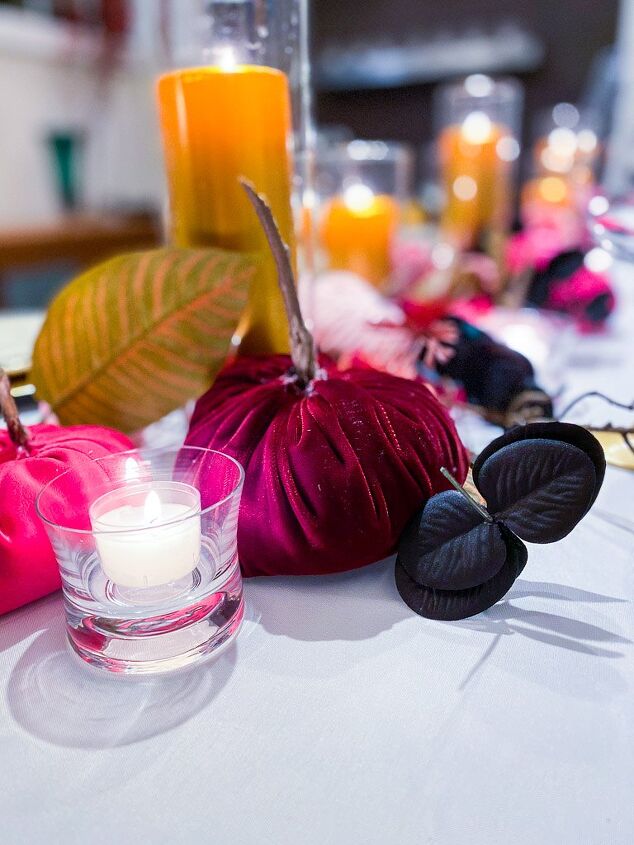
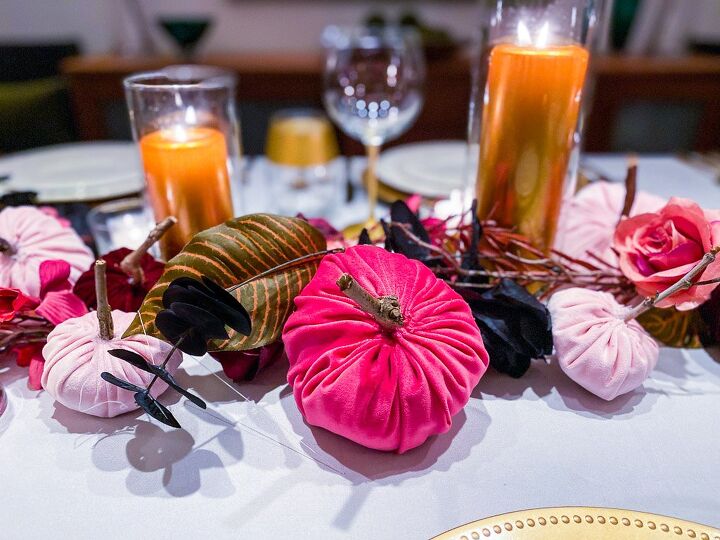
A PREVIEW OF OUR FALL TABLESCAPES …
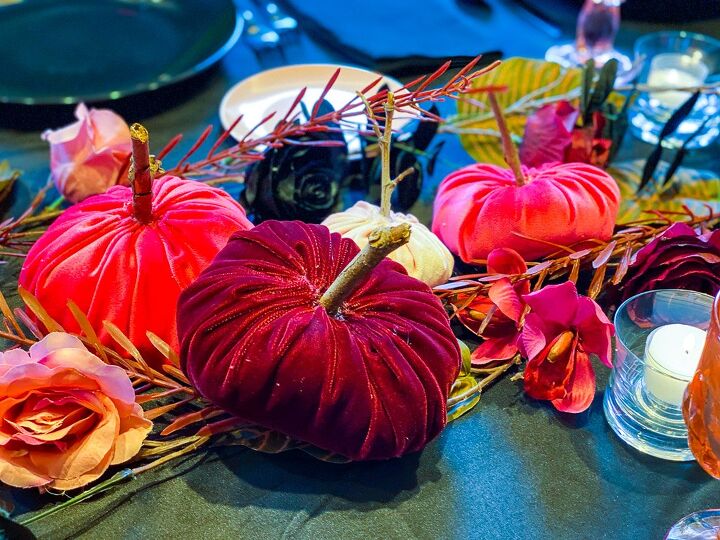
I couldn’t have been more thrilled with how darling these turned out.
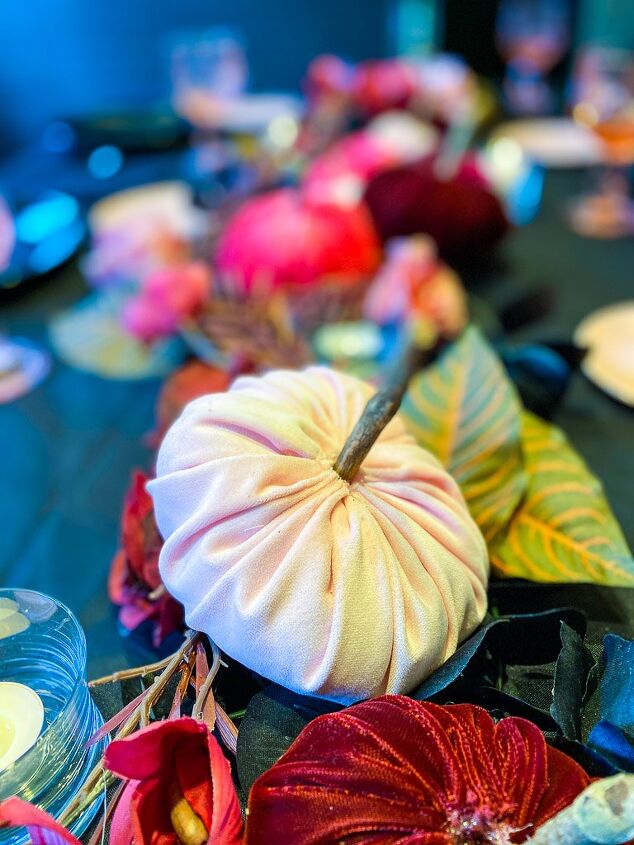
These little gems are going to be fantastic to place around my house and on my fall table settings!
For more fall decor ideas, explore these blogs:
One Table, Three Ways: Thanksgiving Table Ideas
One Table, Three Ways: So Many Halloween Ideas
Did you try this idea? Share it on Instagram with the hashtag and tag @makeeverydayanevent.
If you have any questions or suggestions, contact us or leave a comment!
Follow us on social media! You can find us on Instagram, Pinterest, and Facebook.


Comments
Join the conversation
-
Thrift stores can be a good source of inexpensive small pieces of 'fancier' fabrics such as velvets. Look through the childens' racks for holiday clothing, which is often in like-new condition.
-
If you use glass craft “stones” to weight them, they won’t attract bugs or decompose during storage.


Frequently asked questions
Have a question about this project?
How many pumpkins did you complete for the listed cost of $100 for the project?
Would it be easier to sew together using dental floss instead of thread? Dental floss does not break easily. Just a thought!